


When we saw a peek into Jasmine's notebook over on Instagram we had to find out more! In this blog post, Jasmine takes us on a little tour of her jeweller notebook, sharing her favourite pages and top tips along the way.
Do you have a similar notebook? Tag us in yours over on Instagram for a chance to feature!
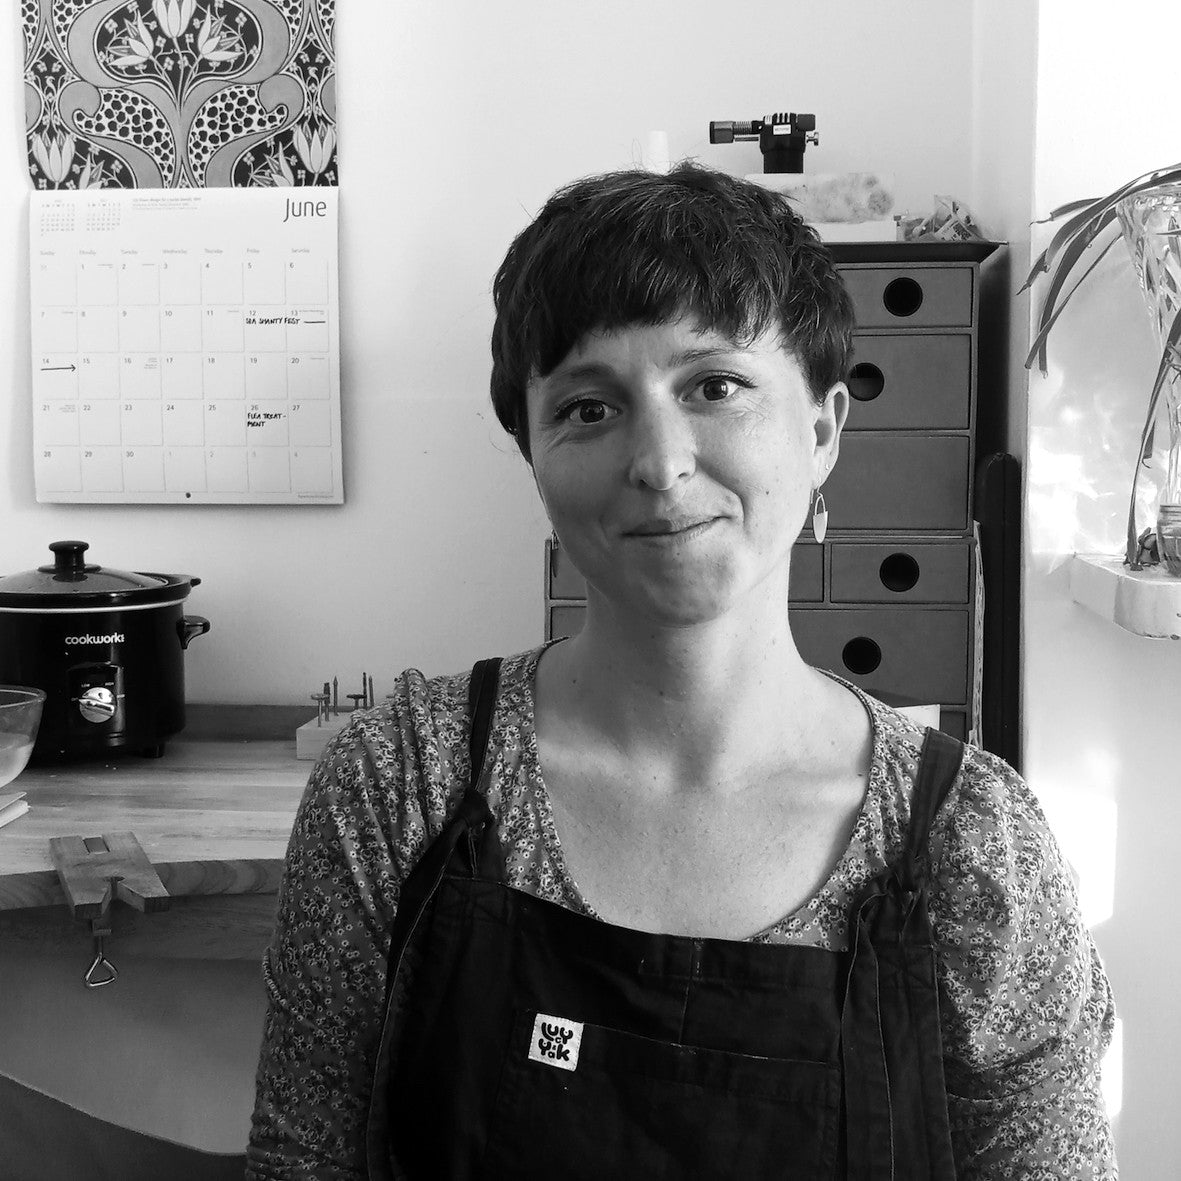
Meet The Jeweller, Jasmine
Finding a secondary school with a good art department was my mum's only criteria when I moved into year 7 and since then I've been on a long journey to find my place in the creative industry. I graduated from Falmouth university with a degree in Graphic Design and five years later I trained to be a secondary art teacher in a Bristol school.
During my stint as a teacher I could feel time for my own creative practice slipping away so I enrolled myself on a silversmithing course one evening a week for 10 weeks to encourage myself to start making again and I was hooked. Two years later and I've moved to Brighton and set up my own little studio which I work from part time. My jewellery is usually simple and minimalist but I have recently been experimenting with reticulation to add texture. I work predominantly with silver and am inspired by geometric shapes, angles and the balance of a piece.

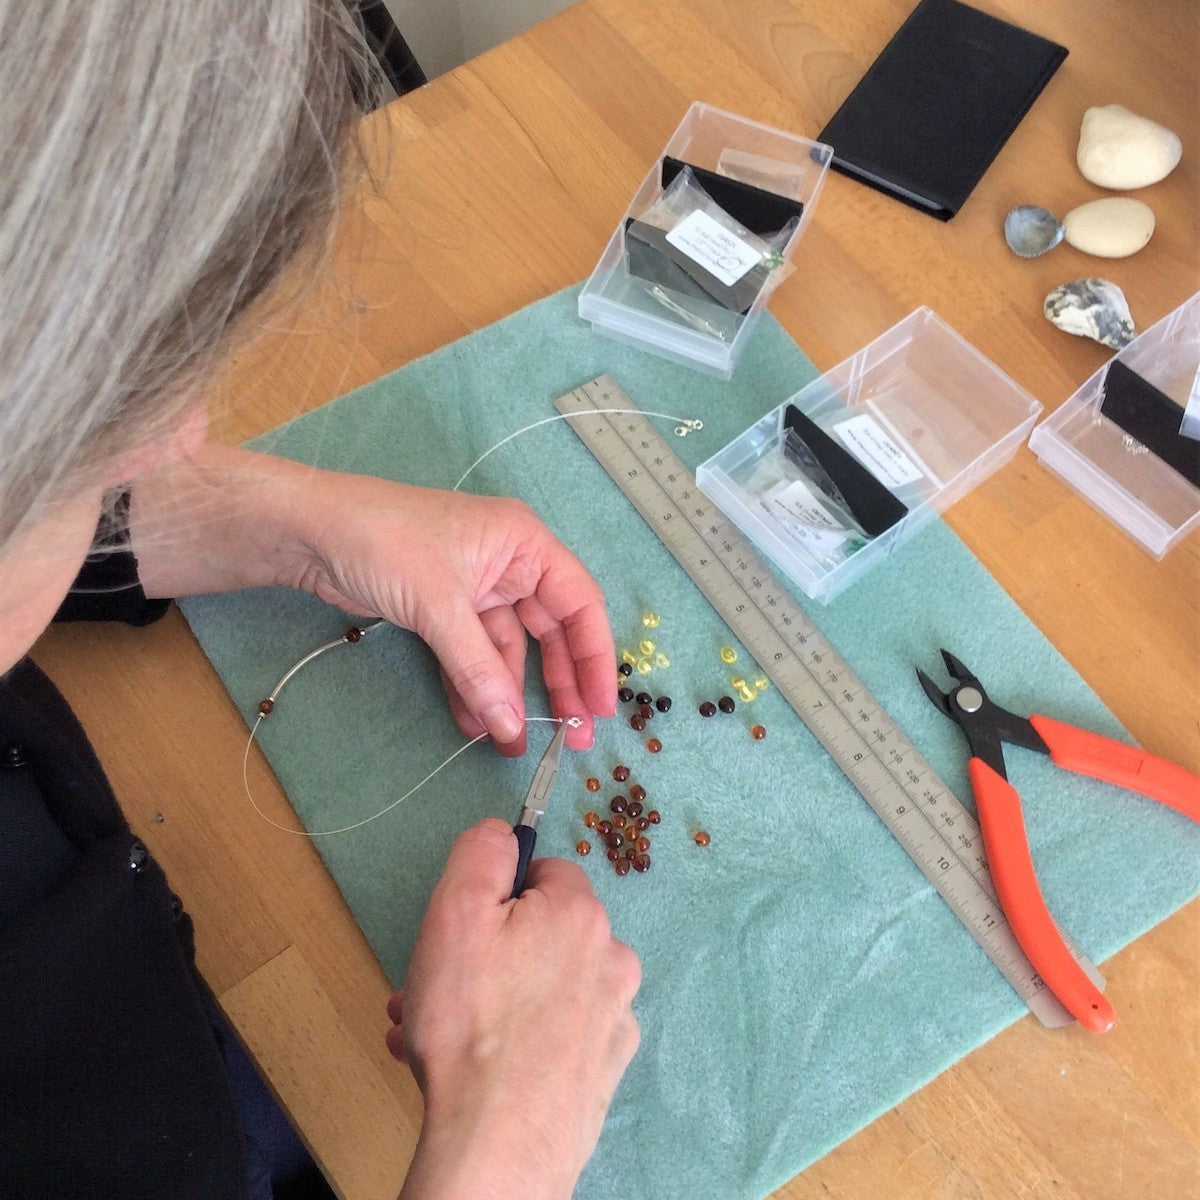
The Notebooks
I like to keep two notebooks; one for making notes and sketching designs when I'm in the studio, and a mini one which stays in my bag for when I have moments of creativity when I'm out and about.
When I was learning how to silversmith I wrote down EVERYTHING in this notebook so that I could refer back to it when I was practicing on my own. There's something about the whole process of writing instructions down that makes it sink in for me.
Two years later and I'm still adding to it each time I learn something new. I've even got a stash of fresh notebooks exactly the same as these ones ready for when they get full. I'd be lost without them.

Band rings
A textured band ring was one of the first things I made. Call me strange but I love the fact that there is an equation to work out the band length you need. Don't forget to make your band ring two ring sizes smaller if you're hammering in texture, it always amazes me how much a bit of hammering can stretch the metal.
Follow Kernowcraft's tutorial on how to make a textured ring band

Filing and polishing
Filing and polishing seemed pretty obvious when I first started silversmithing, but I quickly learnt a number of useful tips which really made the difference. Make sure you alternate the direction of your sanding between each grade of abrasive and keep sanding until the marks of the grade before have vanished. And I can't stress enough how much better it is to file in long smooth strokes, any vibrations when filing your piece mean you need to change your technique, long and smooth is the way.

Piercing out
I like to draw little diagrams next to my instructions as a quick reminder. Your blade must ping when you flick it, if not take it out and fit it again. Leaving it will mean a broken blade and inaccurate piercing out. You should also never force the saw on the up, the blade does all of the work on the down stroke. I rarely break a blade now, I think I broke 2 the first time I ever pierced out.

Signet ring
This is a technique I learnt quite recently and it's something that really relies on how you draw out your template at the beginning. I love shapes, angles and a bit of maths so this really suited me. The main thing to remember is the bigger you make the circle on the top of your template the bigger the actual signet will be. It's also better to make the height of your signet a bit bigger, you can always file it down but you can't add it on once it's cut.

Wish list
As most of you will know, silversmithing is something that can be practiced using a handful of basic tools. But once you get hooked, be ready to spend a good chunk of money on expanding your collection. There are endless exciting tools to be had. When I first started learning I wrote a list of basic tools to buy to set up my own studio, I add to this list each time I discover a tool I want. I keep crossing items off but the list gets longer and longer.

Design ideas
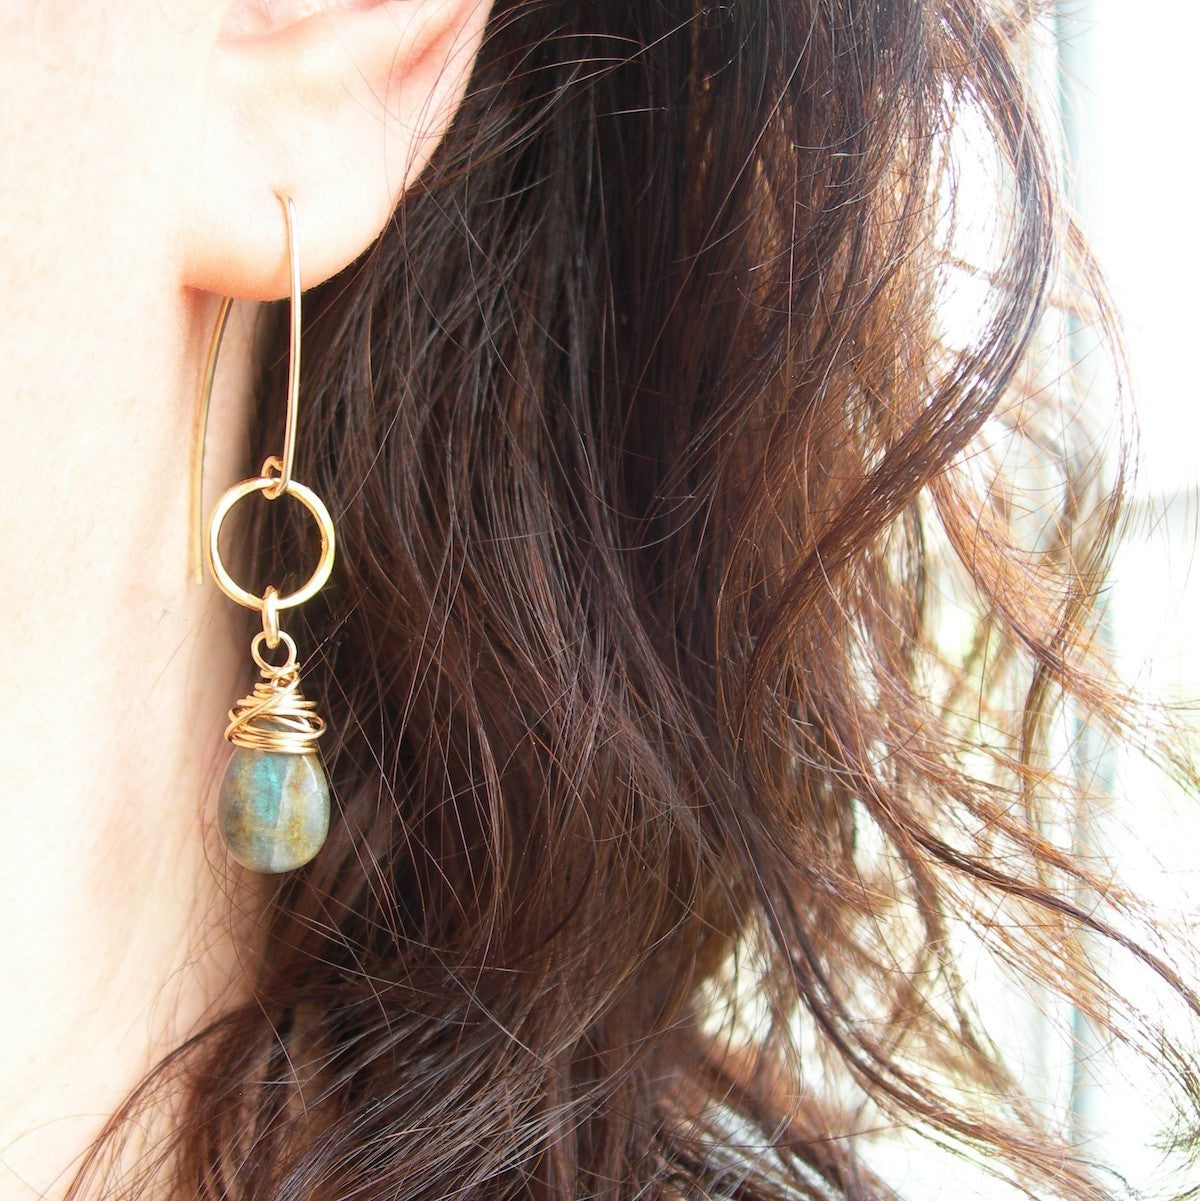
Most of the pages in my notebook are filled with designs and rough sketches. Any idea I have gets jotted down whether I think it has the potential to become something or not. Even if I don't use it it might spark off another idea. A lot of my ideas come from playing around with shapes found in nature, I especially like the humble circle.
Read More...

Follow Jewellery Making Tutorials
We have a range of free jewellery making tutorials available, whether you're a complete beginner or expert silversmith! We cover the basics of jewellery making, beading, wire wrapping, metalsmithing to metal clay - so you can explore the techniques that interest you.

Meet The Jeweller Interviews
We chat to some of our customers who share their beautiful handmade jewellery! We also hear about how they got started in jewellery making, hear all about their top tips as well as how to succeed in running a business.
Also in this section:
- Chatting To Silver Clay Tutor Emma Roy From Silver Clay Academy
- Chatting To Truro College Exhibition Winner, Caitlin Haughton
- Mixed metals, textures and being inspired by outdoors with Lucy Spink Jewellery
- Magical Metal Clay, Love of Nature and Gems With Beaded Magpie
- Talking Wax Carving, Texturing & Otherwordly Jewellery With Zoë From Brother Banquo And Queen
- Talking Gold And Sand Casting With Billie Ellen Designs
- Meet The Jeweller: Talking Opal Obsession with Jenny from Sea Surf Rocks
- Chatting To Truro College Exhibition Silversmith Winner, Olivia English
- Day In The Life Of Cornish Eco Jeweller Sarah Drew Jewellery
- Wax Carving, Metal Clay & Coastal Designs With Rockpool Jewellery
- Colourful Jewels, Cornish Inspiration & Ring Love With Marsha Drew
- Chatting Unique Nature Inspired Designs & Intricate Sawing With HISO
- Anxiety Jewellery & Favourite Gems With Rozen Jewellery
- Day In The Life Of A Jeweller With Gretel's Metals
- Sea Glass, Healing Gemstones & Cornish Coastal Inspiration With Ula Jewellery
- ‘A Heart of Gold’ Jewellery Collaboration, Raising Awareness of Heart Disease in Women
- Stone Setting, Diamonds & Jewellery Design With Goldsmith Sonia Cheadle
- Magical Metal Clay, Nature & Gems With Susan Studd
- Chatting To Truro College Exhibition Silversmith Winner, Esther Moore
- Handmade Jewellery Inspired By Japanese Heritage & Philosophy With Kumiko
- Creating Unique Jewellery Collections With Gem Lark Jewellery
- Crystal Jewellery With Jessica From 'Roses & Whiskey'
- Statement Crystal Jewellery With FIRENZA
- Electroplating & Crystals With Studio Roan
- Chatting Beading & Wirework With Author & Tutor Sara Withers
- A Day In The Life With Soul Purpose Jewellery
- Meet Jeweller, Tutor & Author Anastasia Young
- A Day In The Life Of A Jeweller With Basia From Stardust Mine Jewellery
- Meet The Jeweller, Author & Tutor Jinks McGrath
- Meet The Maker Transforming Coins & Scrap Metal Into Fun Characters
- Behind the Scenes At The Jewellers Retreat - An Interview With Jessica Rose
- Combining Skills Of Illustration & Metalsmithing With The Sylvan Smith
- Magical & Whimsical Jewellery With Manom Jewellery
- How To Work With Gemstones As A Jeweller With Gemmologist Sally Spencer
- Sea Glass, Personalisation & Christian Jewellery With Jordan Lily
- Chatting Beads, Etsy & Social Media With Emma From Evren Blue
- Garden Studio Tour, Jewellery Making & Packaging With Little Black Cat Jewellery
- Jewellery Inspired By Cornwall, Magic & Myth With Gemheaven Jewellery
- Sand Casting Silver Cockle Shells & Nature Inspired Jewellery With Anna Davenport
- Day In The Life Of Running A Sea Glass Jewellery Business With Created By Niki
- Leo + Elk On Running A Family Business During A Pandemic
- A Day In The Life Of A Jeweller: Finding Normality Again With Kim Thomson
- Gemstone, Body Positivity & Black Lives Matter Designs With 'Jewellery By Eilatan'
- Meet The 'All That Glitters' Contestants Of Series 1
- Briolette Jewellery, Etsy & Learning With Ocean & Earth Jewellery
- What's Inside A Travelling Jeweller's Briefcase?
- Combining Sea Glass & Diamonds With Glasswing Jewellery
- Bohemian Luxe Handmade Jewellery With 'Feathers And Wings'
- Diamonds & Granulation With Milly Maunder
- Then & Now, Jewellery Through The Ages With Sam Stirrat
- Contemporary Engagement Rings With William White
- Designing An Engagement Ring With Guest Writer Sea Surf Rocks
- Meet The Jeweller & Author Of 'Soldering For Jewellers' Rebecca Skeels
- Jewellery Making Notebook Tour With Jasmine Butler
- Running A Handmade Jewellery Business During A Pandemic With 'Louy Magroos'
- Home Jewellery Studio Tour & Top Tips With Jodie Fern
- Let's Talk Business With Jeweller & Tutor, Karen Young
- Nature & Mental Health Jewellery With Lost Kove
- Meet The Jeweller Behind Hazey Designs
- Jewellery Making Storage Tour With Scruffy Dog Silver
- Meet The Beader Behind Dainty Rocks
- Jewellery Workshop Tour With Little Silver Star
- Mindful Gemstone Jewellery With The Sea Tree Company
- Let's Talk Sea Glass Jewellery With Sadie Jewellery
- Chatting Beads & Growing A Jewellery Business With Liz Lloyd
- Beading With Carolyn Anne Jewellery
- Jewellers Of Colour: Connecting BAME Jewellers In The Jewellery Industry
- Meet The Self-Taught Jeweller Behind Corzana
- Meet The Jeweller Behind The Messy Creative
- Handmade Button Jewellery With Crafty Little Koala
- Beautiful Gemstones For Beautiful Skin With Inlight Beauty
- Meet The Boho Jeweller Behind Moonsalt Jewellery
- Etsy Success & Personalisation With Little Homebird Jewellery
- How Jewellery Making Has Helped My Chronic Illness & Mental Health
- Jewellery Making With Nature's Treasures
- Meet Illustrator & Polymer Clay Jeweller, Nyassa Hinde
- Jewellery Trade Secrets With Metalsmith Society
- Sea Glass Jewellery & Launching A Business With Love Kernow
- Meet The Jeweller Behind London Jewellery School & Jewellers Academy
- Meet Stephen Goldsmith, Author Of Polishing & Finishing For Jewellers
- Resin, Flower & Gemstone Jewellery With Ellanor Aquitaine
- Meet The Jeweller Behind Trinkets By Moonlight
- Meet The Self-Taught Jeweller Behind Olivia Street Silver
- Personalised Handmade Jewellery With Ruby & Wonder
- Meet The Cosmic Jeweller, Vikki Hall
- Meet The Eco-Friendly Jeweller, Jemima Hurlock
- Meet The Cornish Jeweller, Thomas Matthews
- Beachcombing & Jewellery Making With Cornish Agates
- Festival & Boho Jewellery With Tegen
- Mokume Gane & Vessel Pendants With Nicola Bottono
- Meet The Jeweller Behind View Of The Sea
- Artists Residency With Jeweller, Jonathan Videgrain
- Meet The Jeweller & Gemstone Addict Behind Made By Oonagh
- Pre-Loved, Vintage Jewellery With Ella Masters
- Baker's Dozen Exhibition With Sarah Shelton-Palmer
- Meet The Jeweller, Tansy Wilson
- Celestial, Boho & Witchy Jewellery With Amber Wheatley Designs
- Let's Talk Metal Clay With Lisa Cain
- Meet The Jeweller Behind When Caitie Met Soda
- Make It Challenge: Recycling The Same Piece Of Silver For 100 Days
- Bespoke Engagement Rings With Blackacre
- Meet The Jeweller Behind Claire Howard Jewellery
- Meet The Jeweller Behind Award Winner Andrew Berry
- Meet The Nature Inspired Jeweller Behind Lima-Lima
- Creating An Opal Ring & Pendant With Little Joy Jewellery
- Jewellery Inspired By Your Home With Claire Halligan
- Award Winner Monique On Techniques & Cornish Inspiration
- Meet The Jeweller Jonathan Videgrain
- Meet The Jeweller Louella Jewellery
- Meet The Jeweller Behind Bijoux De Chagall
- Alternative Wedding Jewellery With Bloody Mary Metal
- Jeweller Chloe Michell Talks Working With Metal Clay, Tools and Inspiration
- Setting Up Your Work Bench With Jeweller Victoria Walker
- An Interview With NAJ Shortlisted Designer of the Year Sheila Kerr