


Briolettes are one of our most popular beads! They are so pretty and are perfect for adding to earrings and necklaces.
Take a look below at the many ways you can transform briolettes into beautiful pieces of jewellery and get all the jewellery making supplies you need right here with Kernowcraft.
What Is A Briolette Bead?
A briolette bead is a pear-shaped bead with facets that makes them sparkle beautifully in the light! Briolettes are usually fully drilled so you can easily add them into your designs by wire wrapping, adding to thread or attaching to an appropriate setting.

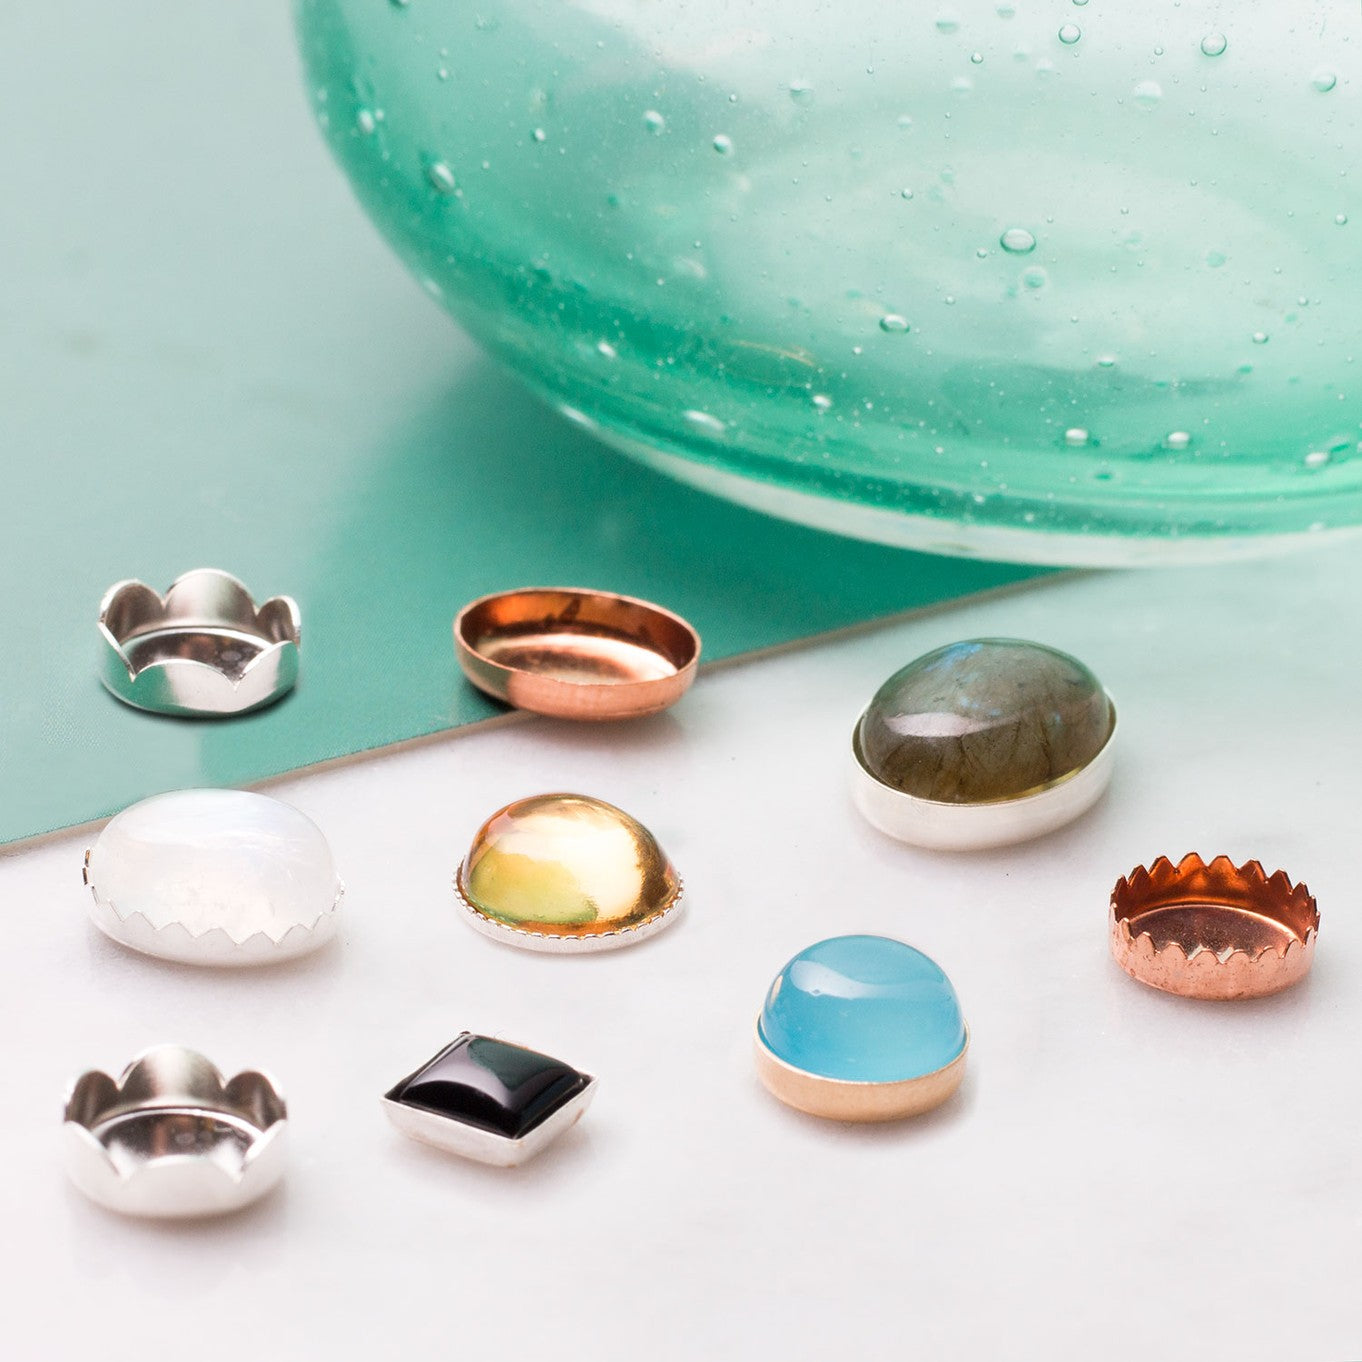
1. Use Bell Caps
Bell caps are used to attach gemstones or unusually shaped stones which can then be easily added to earrings, necklaces or bracelets as a simple yet beautiful embellishment. Creating handmade jewellery using bell caps requires very little tools and supplies - meaning these magical caps are perfect for jewellery making beginners. All you need is some glue to set your chosen stone in place, we recommend using Devcon 5 Minute Epoxy Glue.
Keep in mind that you will need to have a suitably sized stone to attach to your choice of bell cap.
Labradorite Briolette Necklace
Create a simple necklace by gluing the bell cap to the briolette and hanging it from a ready made chain with the help of a jump ring.

Amethyst Briolette Earrings
How pretty are these amethyst drop earrings! We've used our small petal edge bell caps to create a pretty, everyday design.

Explore Bell Caps
Bell caps are not only great for using with briolettes, you can use them with suitably sized rough gemstones, sea glass and tumbled stones too. At Kernowcraft, we have a range of bell caps to choose from in a range of styles including filigree, twist, plain and petal edge caps.

We Recommend Using Devcon 5 Minute Epoxy Glue
Devcon 5 Minute Epoxy glue is Kernowcraft's most recommended and reliable glue for jewellery making and is perfect for attaching gemstones to bell caps!
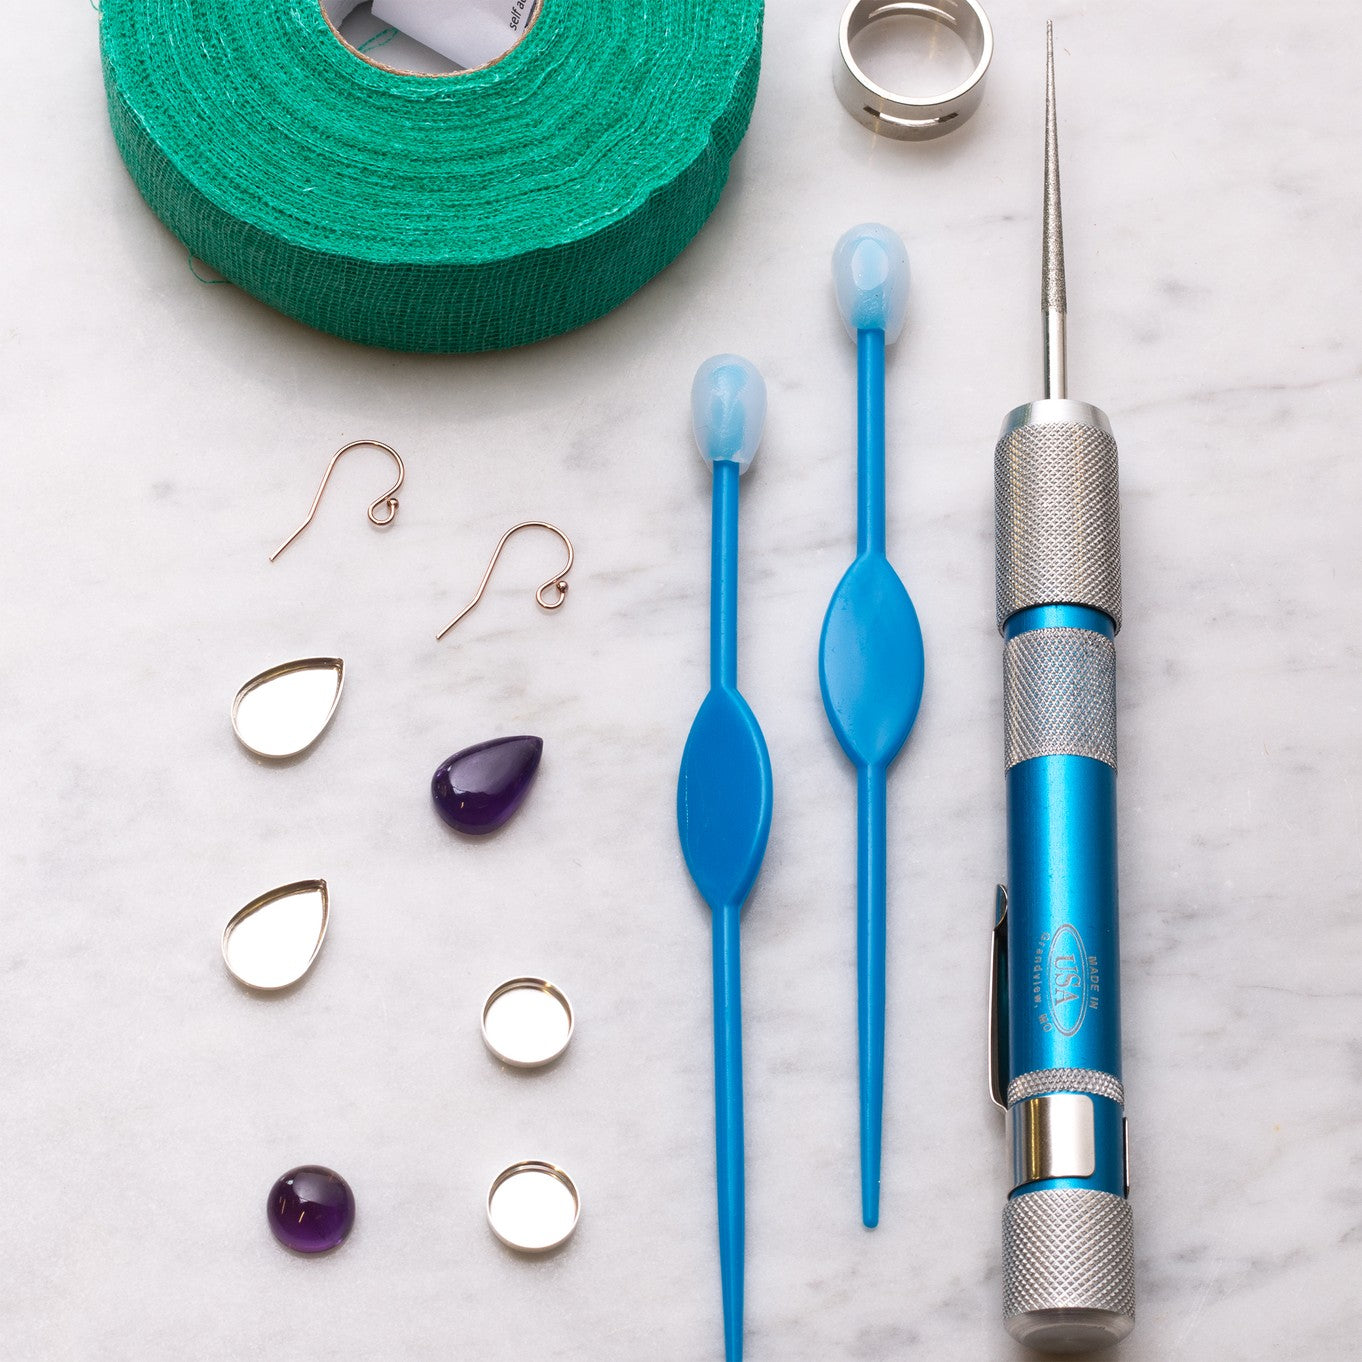
2. Wire Wrap
Once you've mastered the skill of wire-wrapping, you won't be able to stop making! It is such a popular jewellery making technique that allows you to get creative with so many designs. Below we feature three slightly different briolette designs using wire wrapping techniques - we hope they inspire you!

How To Wire Wrap A Briolette Bead
Follow our step by step tutorial on how to wire wrap a briolette bead, with photos and recommended shopping list so you can have a go for yourself!

Gold & Peridot Earrings
We love this combination of green and gold! Peridot is such a vibrant stone and these tiny briolettes look lovely wire wrapped in chunky gold wire and hung from earwires.

Spinel Briolette Necklace
Wire wrap a briolette bead with a loop and simply thread onto your favourite thread, chain or jewellery wire for a minimal design.

Tanzanite Briolette Bar Necklace
Another great way to feature a briolette bead is to create two loops on either end of the bead and attaching to chain to create an elegant necklace.

Shop Jewellery Wire
Jewellery wire is available in various metals including copper, brass, plated, sterling silver and gold.
For wire wrapping a briolette bead, we recommend using 0.3mm - 0.5mm wire depending on your chosen bead and design.

Shop Jewellery Making Pliers
Shop all the jewellery making pliers you need with Kernowcraft! Our handy pack of pliers includes all the essentials including snipe nose pliers, round nose pliers, flat nose pliers and side cutters.
Read Our Advice Pages: Essential Jewellery Making Pliers & Their Uses
3. Create A Minimal Necklace
Sometimes you just can't beat a minimal design and briolette beads are perfect for this! Simply add your bead to your chosen thread for a simple yet pretty design. A great gift idea for any gemstone lovers in your life.
Watch our video below showing you how easy it is to make your own, featuring Flex-rite jewellery wire and crimps with loops.

Flex-Rite Wire
Flex-rite jewellery wire is available in a range of metals and diameters to suit your designs. This lightweight and strong thread is great for floating necklaces and hanging pendants.

Fasten With Crimps
To create a secure fastening on your Flex-rite wire, you will need crimps, a clasp and a jump ring depending on the design.
Check out our crimps with loops (featured top right of the picture), which provide a neat way to finish your designs without the need for separate crimps and jump rings.
How to use crimps with flex-rite jewellery wire
1. Move the beads to the middle of the wire and then thread on one crimp a few cm down the wire.
2. Loop the wire to thread the end through the crimp. Do not worry if the loop starts off too large, you can adjust this once the end of the wire is through the crimp by pulling it up. Ensure the loop has enough room to allow your clasp to connect.
3. Once you have adjusted the loop to the correct size use snipe nose pliers or magical crimping pliers to pinch the crimp together. Then cut any excess wire using side cutters
4. On the other end of the wire, add the other crimp and then add one clasp - repeat the last process in creating a loop by threading the end of the wire through the crimp.
5. Adjust the size of the loop accordingly and push the crimp shut with snipe nose pliers or magical crimping pliers - cut off the remaining wire.


Silkon Thread
Silkon thread is a bonded synthetic fibre that does not fray or stretch and can be used without a needle. It's available in a range of beautiful colours and doesn't fray or stretch.
It's good strength and is suitable to use with a wide range of beads including briolettes!

Fastening Silkon Thread & Using Wire Guardians
Use crimps as featured above to secure your design, we also recommend adding wire guardians (also known as thread protectors) to prevent your thread from wearing against your findings.
How to use wire guardians: Thread a crimp on after your last bead and simply feed your thread through the protector. Slip your clasp, necklet-end or jump ring over the protector and the thread together, pass the thread back down through your crimp and fasten as you would normally.
The products used in these projects are suggestions to inspire you. Products used were compatible at the time of making but do be aware that stocks can vary, so do use your own judgement as to the compatibility of each item when making.
Also in this section:
- Macrame Bead Bracelet Tutorial
- Your Guide To Bead Stringing Materials For Jewellery Making
- The Essential Tools For Beading
- Beading: How To Start Jewellery Making With Lyndsey
- Answering Commonly Asked Beading Questions
- Types Of Beads For Jewellery Making
- The Difference Between Half Drilled, Top Drilled And Head Drilled Beads
- How To Use Top Drilled Beads
- Jewellery Making With Half Drilled Beads
- What Are Briolette Beads & How To Use Them
- Stringing Beads With Small Holes
- How To Make Your Bead Holes Bigger With A Bead Reamer
- Types Of Clasps For Jewellery Making
- 8 Reasons You Need A Bead Board
- How To Make A Sliding Knot
- Advice On Knotting Elastic Stretch Magic Thread
- How To Use Flex-Rite Jewellery Wire
- How To Use Crimps
- How To Make A Silkon Thread Briolette Necklace
- How To Use Beading Chain
- 4 Ways To Use Gemstone Donuts
- 4 Gemstone Chip Bead Project Ideas
- How To Use End Caps For Jewellery Making
- How To Make Earwires With Gemstone Beads
- How To Make A Memory Wire Bracelet
- How To Make Gemstone Bead Earrings
- How To Make A Bead Bar Necklace
- How To Make Beaded Bracelet With Flex-Rite Wire & Wire Guardians
- DIY Gemstone Friendship Bracelets
- How To Make A Beaded Bracelet With Knot Covers
- How To Make Polymer Clay Earrings
- How To Make Felt Jewellery
- DIY Mini Tassels & Jewellery Projects
Have A Question?
If you have any questions, feel free to get in touch with our friendly team who will be more than happy to give you advice over email or on the phone.
You can learn more and find inspiration by visiting our Jewellery Making Tutorials, Jewellery Making Kits and YouTube Channel. Don't forget to follow us on social media and tag us in your designs on Instagram & Facebook, we would love to see!