


Creating beaded jewellery is a fun and creative way to expand your design repertoire. There are so many different options when it comes to beading and a whole variety of tools to help you create whatever your imagination thinks of!
On this page, we have compiled a list of the essential tools for beading projects. These tools will help you save time as well as contribute to creating professional pieces of jewellery.
Shop Beading Tool Kit With Kernowcraft
At Kernowcraft, we've popped our favourite and highly recommended beading tools into a kit to make it easy for you to get started in your jewellery making journey.
Find out more about the tools below and discover why you will need them for your beaded designs.
Shop our full range of beading tools here
Products & Supplies Mentioned in this Guide
- Beginners Beading Tool Kit
- Pack of Pliers and Side Cutters
- Thread Snips
- Bead Mat
- Bead Stringing Needles
- Bead Board With Clear Lid
- Micro Crimping Pliers
- Deluxe Bead Reamer Set

Pack Of Pliers And Side Cutters
What is it?
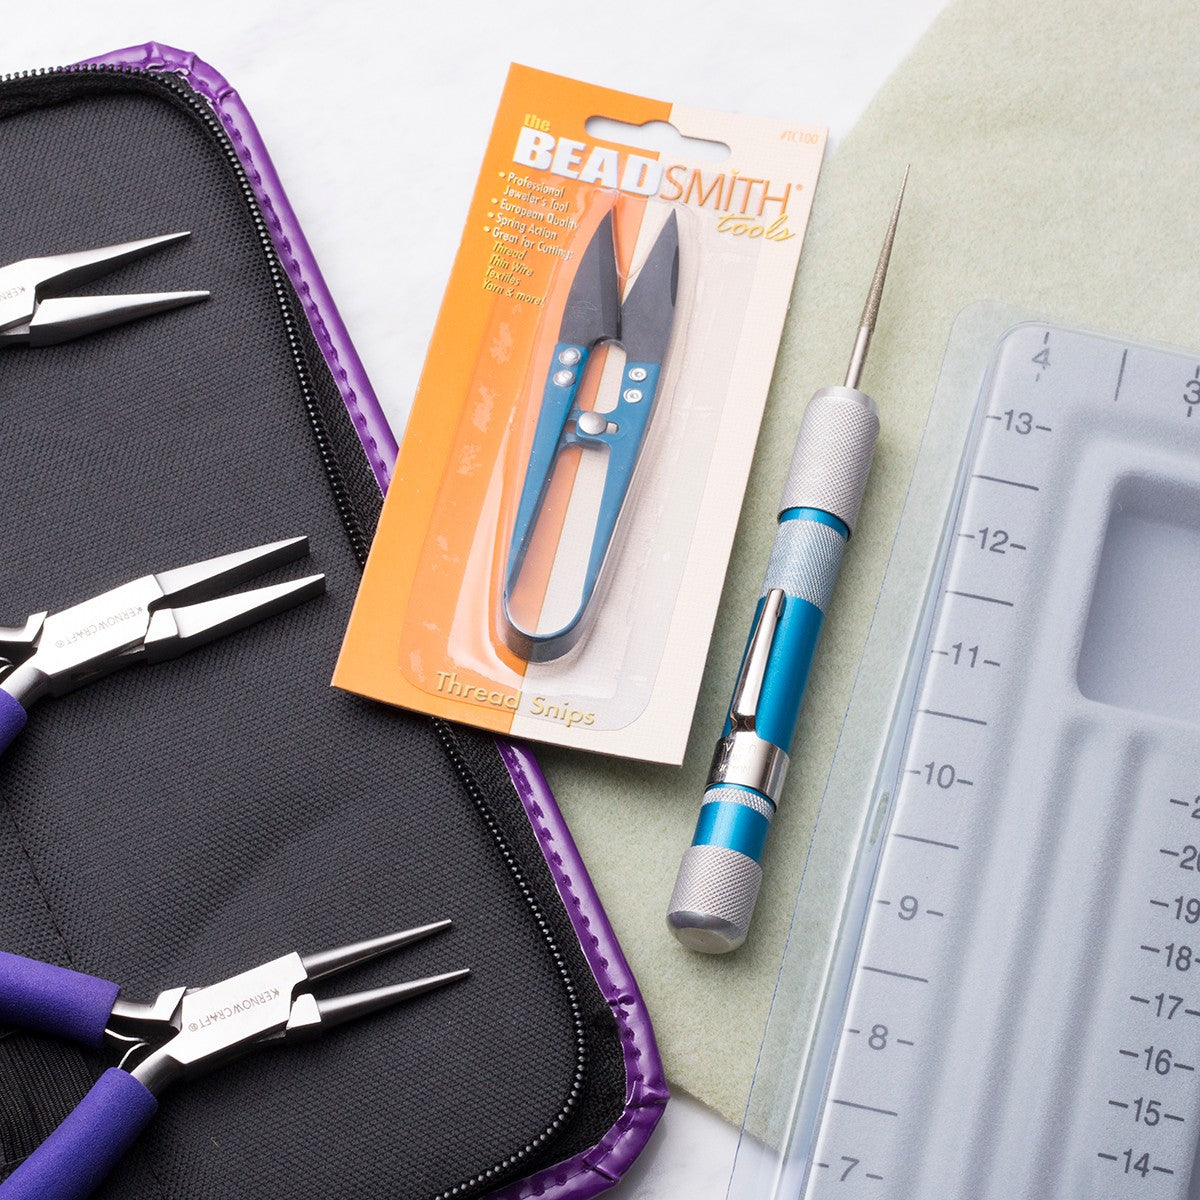
This is a handy pack of useful pliers with comfortable handles in a zip-up case. The pack contains all the pliers that you are likely to need for jewellery making and bead stringing. It includes snipe nose (also known as chain nose), flat nose, round nose and bent nose pliers as well as a pair of side cutters, making it an excellent buy for jewellers and beading enthusiasts alike.
Why do I need it?
Pliers are one of the most useful tools you will need when making any type of jewellery, the different nose options available in this pack will come in really handy for different projects, there's nothing worse than getting halfway through a project and not having the right tools to complete it.
Buying this pack is much cheaper than buying the pliers individually and you get a handy case to keep them all in.
How to use
You will find that the different pliers will have different uses, the snipe nose are great for opening and closing jump rings, the round nose for making connections and wire wrapping and the cutters you can use to cut wires threads nice and close to keep your work looking nice and tidy. Read our advice page on pliers and their uses.

Thread Snips
What is it?
Thread snips are ideal for cutting beading thread, thin wires, textiles, yarn, gimp or french wire and much more.
Why do I need it?
Thread snips are sprung so they can be used with ease, even in hard to reach places. The strong blades are sharp enough to leave a nice neat end after cutting.
At approximately 11cm long they are small enough to be held in the hand while your fingers manage fiddly jobs such as knotting.
Unlike scissors, they can easily be manipulated and operated with only one hand which can prove invaluable when you cannot let your thread go for risk of losing all your beads!
How to use
Use as you would scissors.

Bead Mat
What is it?
This handy bead mat is made from a special fleecy fabric with fibres which prevent your beads from rolling away.
At 35cm x 28cm, our bead mat is plenty big enough for most beading projects and can be easily rolled up or folded for easy storage.
Why do I need it?
Small things have a tendency to roll away and disappear. This mat will stop this from happening, if you drop a small bead on to the mat it will just stay put - saving you lots of time and hassle crawling around looking for that bead that got away!
How to use
Simply put the mat down wherever your hands are going to be working, for example on your workbench, your kitchen table or lap tray so you can make whilst watching the TV.

Bead Stringing Needles
What is it?
These bead stringing needles are fine, flexible twisted wire needles with a collapsible eye for stringing beads with small holes.
Available in fine and medium in packs of 5 needles with Kernowcraft.
Why do I need it?
These make threading multiple beads with a small hole on a fine thread a whole lot easier! They are a real time saver.
How to use
Simply thread your fine beading thread through the small loop hole at the end of the needle and then place the beads down the needle and push over the loop onto the thread.

Bead Board With Clear Lid
What is it?
The bead board is a must have for beaders and is developed for the beader on the go. Use it to lay out your jewellery designs and make any changes easily before you string them.
Why do I need It?
The bead board will come in handy on so many occasions, from getting colour combinations right, using the measurement guides for accuracy, creating multiple thread designs, to keeping organised.
How to use it
Simply place your chosen beads onto the board and select the findings you need to plan your design carefully. It also has a removable lid, so you can take it on the go, keeping all your beads findings and design in place so you can come back to it easily.

Micro Crimping Pliers
What is it?
These micro crimping pliers by Beadsmith are used to create perfect crimps every time.
Why do I need it?
You can simply flatten crimps using snipe nose pliers or flat nose pliers but this can sometimes cause the edges to be sharp and untidy. These pliers have cleverly shaped jaws so they have a 2 step process which creates small, neat crimps every time for a professional finish.
How to use
Squeeze the pliers over the crimp so it forms into a neat, smooth crimp.
Meant for use with crimps with a diameter of up to 2mm and forms a finished crimp with a diameter less than 1.2mm, meaning it can be hidden within a clam shell style bead tip or even slipped inside a large hole bead.
Bead Reamer
What is it?
This deluxe diamond bead reamer set by Beadsmith is a must-have for all beading enthusiasts. Due to the way semi-precious gemstone beads are drilled, the holes can sometimes be very tiny in the middle and it can be so frustrating when just a few of your beautiful beads don’t quite fit onto the thread or wire you have chosen.
Why do I need it?
This handy gadget eliminates the need to rethink your choice of thread or change your design by enabling you to gently enlarge the holes in stone, glass, ceramic beads as well as pearls. you can adjust any of your beads to fit a wider range of beading threads and cords.
How to use
Simply secure your bead in to position, insert the reamer in to the drill hole and twist, we recommend that you twist until you reach the centre point and then turn the bead and work it from the other side to create an even hole throughout the bead. Used with water to lubricate and just a couple of gentle 'twists' is all it usually takes.
Also In This Section:
- Macrame Bead Bracelet Tutorial
- Your Guide To Bead Stringing Materials For Jewellery Making
- The Essential Tools For Beading
- Beading: How To Start Jewellery Making With Lyndsey
- Answering Commonly Asked Beading Questions
- Types Of Beads For Jewellery Making
- The Difference Between Half Drilled, Top Drilled And Head Drilled Beads
- How To Use Top Drilled Beads
- Jewellery Making With Half Drilled Beads
- What Are Briolette Beads & How To Use Them
- Stringing Beads With Small Holes
- How To Make Your Bead Holes Bigger With A Bead Reamer
- Types Of Clasps For Jewellery Making
- 8 Reasons You Need A Bead Board
- How To Make A Sliding Knot
- Advice On Knotting Elastic Stretch Magic Thread
- How To Use Flex-Rite Jewellery Wire
- How To Use Crimps
- How To Make A Silkon Thread Briolette Necklace
- How To Use Beading Chain
- 4 Ways To Use Gemstone Donuts
- 4 Gemstone Chip Bead Project Ideas
- How To Use End Caps For Jewellery Making
- How To Make Earwires With Gemstone Beads
- How To Make A Memory Wire Bracelet
- How To Make Gemstone Bead Earrings
- How To Make A Bead Bar Necklace
- How To Make Beaded Bracelet With Flex-Rite Wire & Wire Guardians
- DIY Gemstone Friendship Bracelets
- How To Make A Beaded Bracelet With Knot Covers
- How To Make Polymer Clay Earrings
- How To Make Felt Jewellery
- DIY Mini Tassels & Jewellery Projects
Have A Question?
If you have any questions, feel free to get in touch with our friendly team who will be more than happy to give you advice over email or on the phone.
You can learn more and find inspiration by visiting our Jewellery Making Tutorials, Jewellery Making Kits and YouTube Channel. Don't forget to follow us on social media and tag us in your designs on Instagram & Facebook, we would love to see!
