


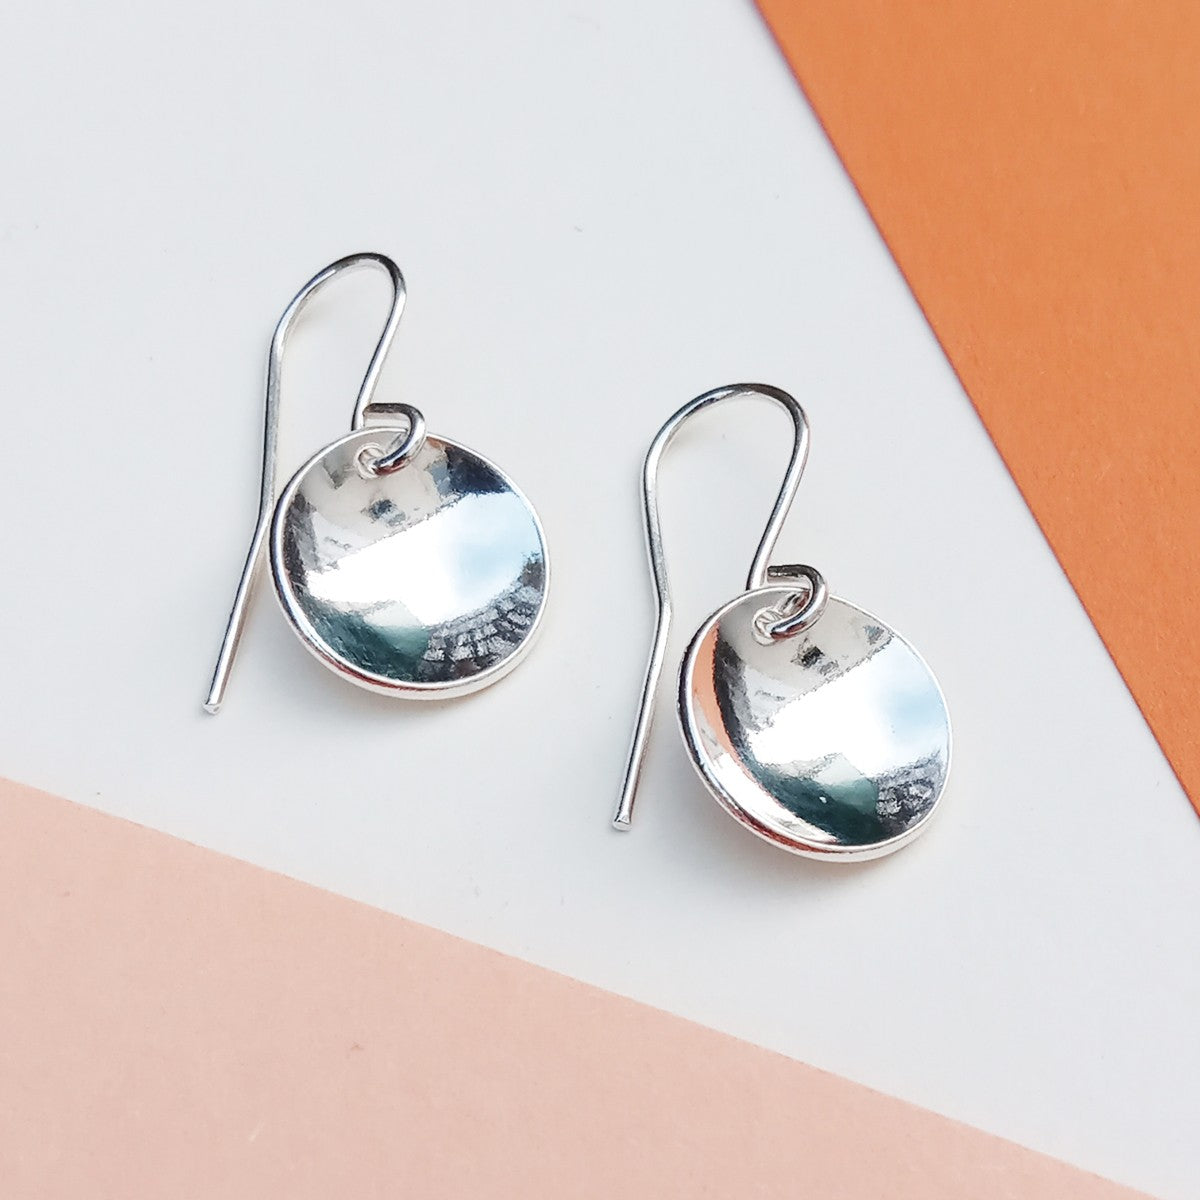
In this tutorial, Jasmine from JAS Jewellery shares with you a great metalsmithing project on creating domed earrings. This includes a range of techniques including cutting, doming, drilling and polishing metal.
Why Jasmine loves using a doming block
I found myself buying a doming block quite quickly when I started silversmithing. A lot of my pieces explore the use of circular shapes and being able to dome them took my designs to the next level.
Using a doming block is something that can be explored even as a newbie to the world of silversmithing. It's a great tool to create simple domed earrings and can be used to create components for more complex pieces. This tutorial shows you how to form and polish your domed discs, these can then be turned into earrings by adding earring hooks or a necklace by attaching a jump ring and necklet chain.
The possibilities are endless...
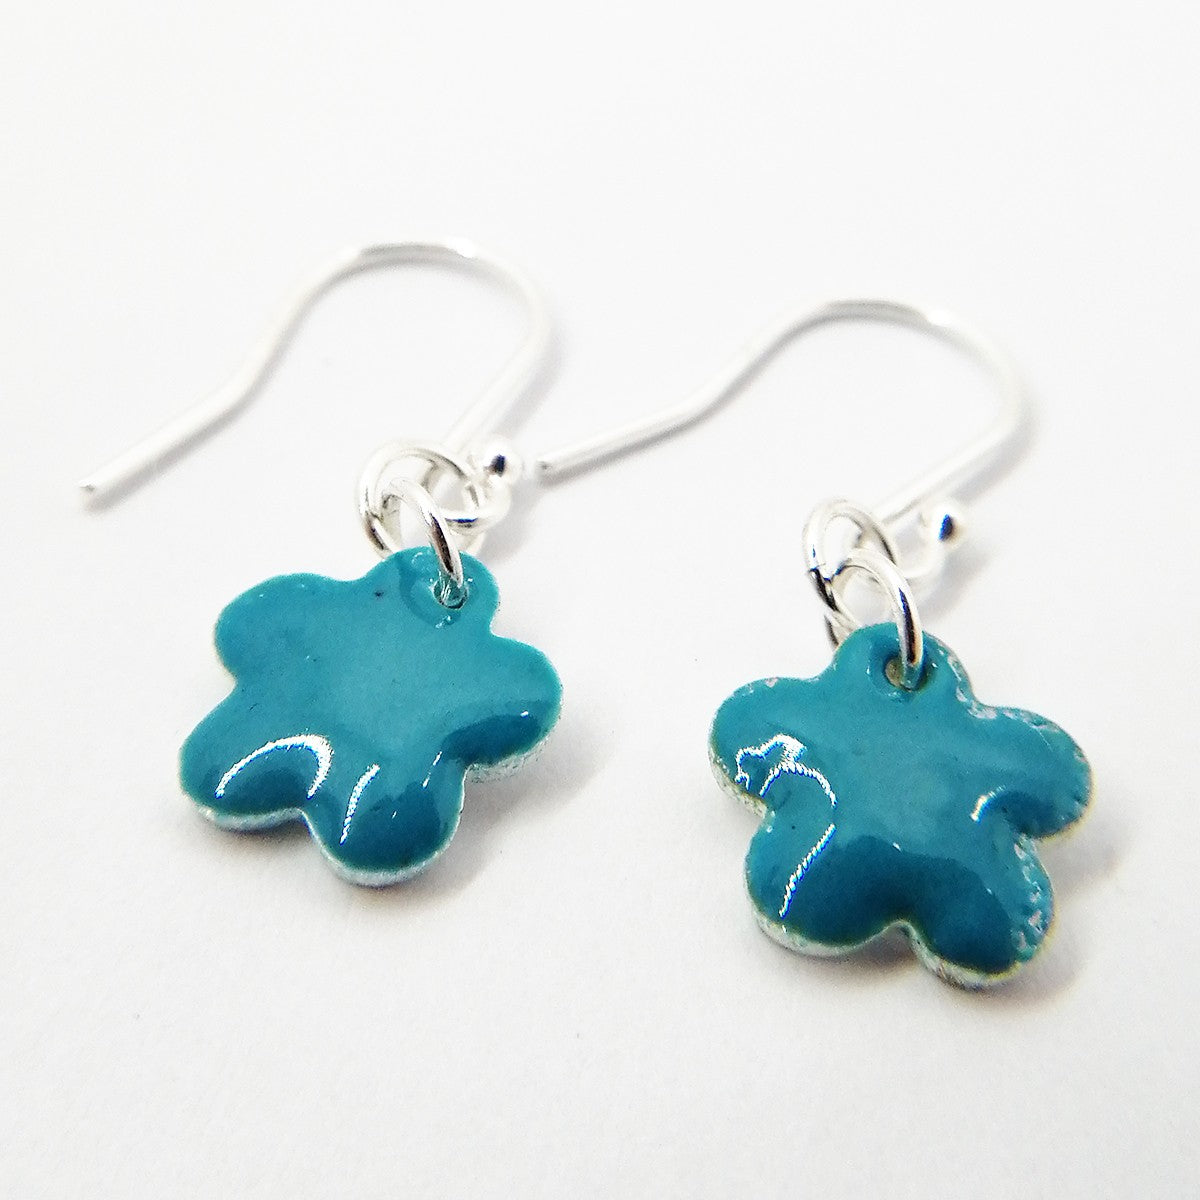
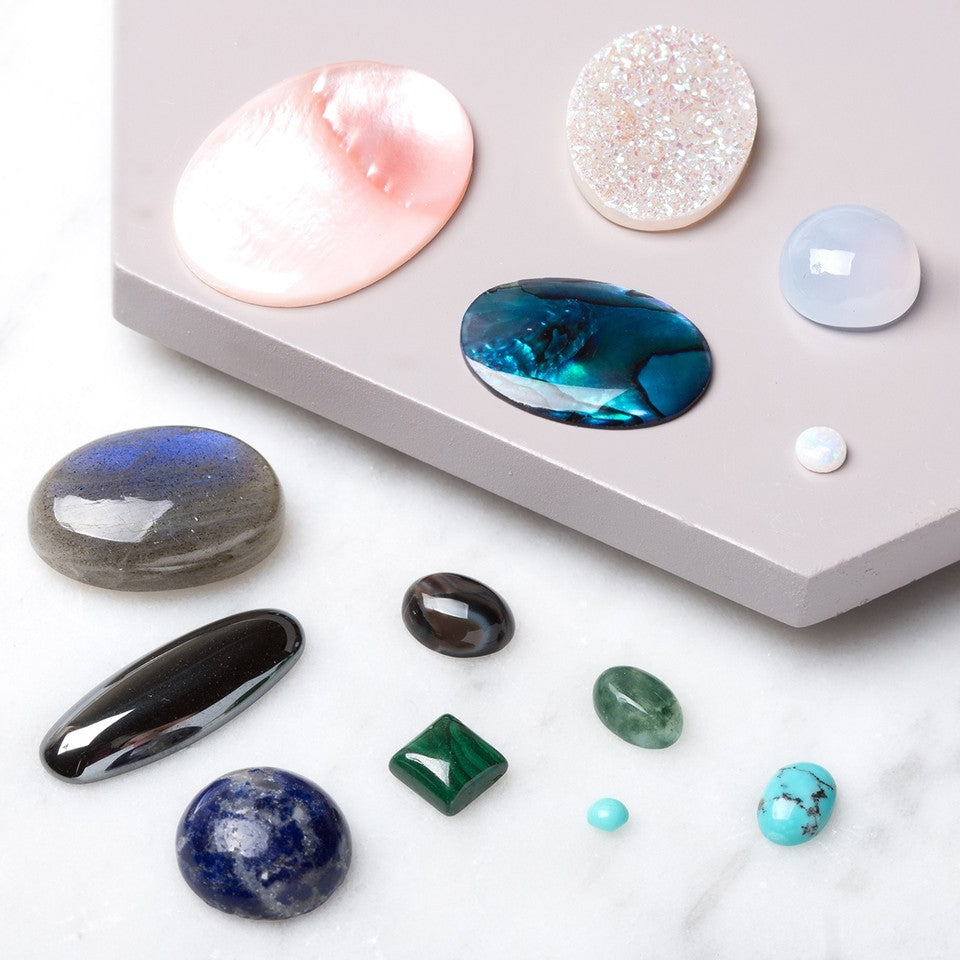
The discs in the tutorial have a smooth surface for a minimal look but there are so many creative possibilities! You could easily texturise your piece with a ball pein or cross pein hammer as well as add a patina using liver of sulphur to make those textures stand out. Or use a rolling mill before cutting your discs out to achieve a more textured look. Other alternatives include sawing a star or flower shape from your disc before doming or even go a step further and set gemstones inside the dome or add some granulated spheres.
If you try this tutorial, please share your designs with us on social media and don't forget to tag @kernowcraft & @jas_jewellery_ for a chance to feature.
Recommended Tools & Supplies
- Silver sheet (0.7mm or 0.8mm) or your choice of metal
- Sharpie
- Circle stencils or dividers
- For cutting out discs: scriber, saw frame with blade, bench peg & anvil OR disc cutter & ball pein hammer
- Cut Lube/Beeswax
- Half round needle file
- Wet and dry sanding sheets
- Gas torch
- Soldering block
- Metal tweezers
- Plastic tweezers
- Safety pickle
- Quench bowl and water
- Doming block and punches
- Rawhide hammer
- Polishing papers
- Optional for mirror shine/satin finish: Dremel Multi Tool - Luxi white or rouge & polishing mop for mirror finish or blue radial disc for satin finish
- For drilling metal: steel block, centre punch, twist drill bit with Dremel Multi Tool or hand drillstock
- Earwires (follow tutorial to make your own from wire here)

Step 1: Draw Circles
Firstly, use a set of circle stencils to decide how large you'd like your discs to be, bear in mind that when you dome the discs they will appear smaller. Use a sharpie or a metal scriber to draw the circle onto your metal sheet.

Step 2: Cut Out The Discs With Jewellers Saw
Use your bench peg to hold your sheet steady and use your jewellers saw to pierce out your discs following the line you've drawn. Make sure your saw is upright and that you don't grip your handle too tightly when you saw, let gravity do a lot of the work.

Alternative To Step 2: Use A Disc Cutter
Choose the right size punch from your disc cutter, bear in mind that when you dome the discs they will appear smaller. Slide your sheet into the cutter and place the punch in, hold the punch steady and using a ball pein hammer strike the top of the punch until the disc drops to the bottom.

Step 3: File & Sand Discs
Using your needle file (I like to use the flat side of a half round file) file any marks from the edge of your disc, make sure you file in the direction of the curve to keep the rounded shape. Then use 400 grit wet and dry sanding sheets to sand your discs on the faces and the edges.
TIP: Place your sanding sheet flat on your anvil and move your discs across the top in a figure of eight motion. This will ensure your disc is completely flat and even on both sides.

Step 4: Anneal Discs
You'll probably find that you need to anneal your discs after filing and sanding to soften them up for doming. Do this by heating up your discs with your gas torch on a soldering block, once the silver starts to turn a dull reddish colour take the heat off, quench in water, then put in the safety pickle to clean. Another tip is to draw a line with a sharpie on your silver once your silver reaches annealing temperature the sharpie mark will disappear. Remove your discs from the pickle with plastic tweezers and rinse and dry before doming.

Step 5: Choose The Right Dome
Find the right sized dome and punch for your desired look. The larger the dome and punch the shallower your dome will be, make sure that you use a punch that doesn't fit too tightly in the dome, you want about 0.8mm between the edge of your dome and the punch to allow for your silver to sit comfortably.

Step 6: Create Domed Discs
Place your annealed discs into the correct sized dome of your doming block, make sure it's central then place the punch on top. Strike the punch with a rawhide mallet hitting at different angles and moving the punch around so that you reach every part of the disc's surface. You don't need to hit too hard, gentle taps to start with then a little harder if you need to. Keep checking to make sure the disc has curved fully and evenly.

Step 7: Sand & Polish
Next you'll need to sand your domed discs using wet and dry sanding sheets starting with 400 then 600 and ending on 1200. This will make sure you've got rid of any marks from using the doming block and punch and then you're ready for polishing. I like to use the polishing papers and do it by hand working from green up to white.
You can end the polishing process here or do the following steps for a mirror shine or satin finish.

Step 8: Add mirror shine or satin finish
You can stop the polishing process with your polishing papers from the previous step or have a go at gaining a mirror shine polish or satin finish.
For a mirror shine polish: Attach a polishing mop to the Dremel Multi Tool, apply rouge (Jas uses Luxi for the same effect) to the polishing mop and use this to achieve a mirror polish.
For a satin matte finish: Attach our 400 grit blue radial bristle disc to the Dremel Multi Tool and use on the discs to achieve a satin finish.

Step 9 (Or Before Step 7 if you're a beginner): Drill Holes
Now it's time to drill a hole in your discs so you can easily turn them into jewellery. Place your disc on a steel block, and use a centre punch to dent where you want the hole, this will prevent the drill bit from skidding across the surface of your disc and help you start drilling the hole.
Start with the smallest drill bit and work up to a drill bit that is slightly bigger than the thickness of your ear wire or jump ring. I start with a 0.5mm drill bit then finish with a 0.9mm bit, the wire I use is 0.8mm. You can use a round ball burr to neaten the drill hole or a round file to tidy any sharp edges. Using cutting lube or beeswax helps to lubricate your drill bit and drills much easier.
If you are a beginner we would recommend drilling before polishing. If you have limited experience, you could easily slip off the centre punch mark which will create a scratch, meaning you will have to sand and polish your piece again!

Step 10: Turn Into Jewellery!
Now it's your turn to get creative with your shiny drilled discs and turn them into pieces of jewellery.
You can add earwires to create instant earrings - check out Kernowcraft's earwire tutorial here. You can also add a jump ring and chain to create a lovely necklace, or experiment with adding wire wrapped beads or gemstones to the mix. The choice is yours.

Meet Guest Jeweller Jasmine
I'm Jasmine, the face behind JAS Jewellery. I've been silversmithing for just over two years and I create all of my pieces from my home studio in Brighton.
I like to play around with geometric shapes in my pieces and take a lot of inspiration from minimalist art and architecture. I also like to use a combination of copper and silver in my work for a pop of colour.
Shop Doming Block & Punches With Kernowcraft


Watch Kim's tutorial on how to use a doming block, part of the 12 Months Of Metal series on our blog
Learn How To Make Earwires Or Shop Ready-Made

Follow Earwire Tutorial
Watch our video or follow the step by step photos on how to make your own earwires from wire. Including a handy list of recommended tools and supplies.

Shop Ready Made Earwires
Choose from our wide range of earwires and earring findings, including shepherds crook earwires as featured in a range of metals, as well as lots of settings to use with gemstones too.
Also in this section:
- Guide To Sanding & Polishing For Jewellery Making
- Hand Polishing Your Jewellery With Polishing Papers
- A Guide To Texturing Metals For Jewellery Making
- Top Tools For Making Textures On Metal
- Beginner's Guide To Chasing & Repoussé
- How To Make Easy Textured Earrings
- How To Make A Hammered Copper & Silver Heart Pendant
- How To Make A Textured Cuff Bracelet
- How To Make A Metal Leaf Decoration
- How To Use Doming Block & Punches For Jewellery Making
- How To Make Domed Metal Earrings With A Doming Block
- How To Engrave Your Drawings On Art Clay Copper
- Textured Washer Bracelet Tutorial With Guest Jeweller Laura Grey
- Barrelling Machine For Polishing Metal - Everything You Need To Know
- Tumbling Machine For Polishing Stones and Glass- Everything You Need To Know
- Polishing Jewellery Q&A With Stephen M Goldsmith
- Town Talk Products For Cleaning & Caring For Jewellery
- Creating A Resin Bird Pendant With Designer Sarah Hoare
- VIDEO: How To Create Patina With Liver Of Sulphur
- 2 Ways To Apply Liver Of Sulphur
- VIDEO: How To Use Silver Plating Solution
- How To Clean & Prevent Tarnished Jewellery
- Why You Need Anti Tarnish Paper Strips
- How To Use Midas Finish Seal Lacquer
- How To Use Renaissance Wax To Prevent Tarnished Jewellery
- VIDEO: Working With Crinkle Metal Sheet
- A Guide To Using Mokume Gane Metal For Jewellery Making
HAVE A QUESTION?
If you have any questions, feel free to get in touch with our friendly team who will be more than happy to give you advice over email or on the phone.
You can learn more and find inspiration by visiting our Jewellery Making Tutorials, Jewellery Making Kits and YouTube Channel. Don't forget to follow us on social media and tag us in your designs on Instagram & Facebook, we would love to see!