


Learn all about casting & granulation
It's the final month of Kim's 12 Month's Of Metal series and we're kind of sad about it! What an amazing year of incredible tutorials, we've loved hearing your feedback and continue to see more of your designs inspired by Kim's projects.
Throughout December, Kim has been sharing casting tutorials, with top tips and tricks to help introduce you to the technique - check them out below and get the tools and supplies you need to give it a go with Kernowcraft.
Kim covers the following topics:
- Introduction to casting and granulation
- How to use a potato instead of a charcoal block
- Organic silver casting with pasta, rock salt, lentils & water
- Overview of casting crucibles
- Health and safety
- Sand casting tutorial
- Cuttlefish casting
If you try any of the techniques featured in the series, please tag us in your designs - we would love to see and share! Find Kernowcraft & 'Make It With Kim' on Instagram and use the hashtags #12monthsofmetal & #Kernowcraft
Introduction To Casting & Granulation
Kim gives you a basic introduction into casting, showing you an easy technique on how to cast shapes using a charcoal block. Kim also shows you how to create silver spheres, known as granulation.

Charcoal Block
A charcoal block is a great surface for soldering on as it reflects the heat back onto the metal and consumes the oxygen around the piece being soldered, which reduces fire stain. As Kim shows, it can also be used for casting by drilling or carving shapes into the surface to use as a crucible.

Casting Gemstones
Kim shows you a fun little trick of setting a stone in molten metal! It's important to remember that not all gemstones will withstand the heat, therefore it's important to do your own research and experiment with different stones yourself. Kim uses a small cubic zirconia stone in the video above and we absolutely love the results! Click below to explore our cubic zirconia gems.
Using A Potato Instead Of A Charcoal Block?
Kim shows you how you can replace a charcoal block with a potato! Showing you how to make silver balls and a sweet cast heart.
Organic Silver Casting Tutorials With Pasta, Rock Salt, Lentils & Water...
Kim shows you a tutorial on organic silver casting! Including small scale silver casting into rock salt - plus spaghetti and water casting.
Casting Crucibles Plus Important Health & Safety Information
Find out more about the crucibles you can use for casting plus important health and safety information for casting metal in the video above.
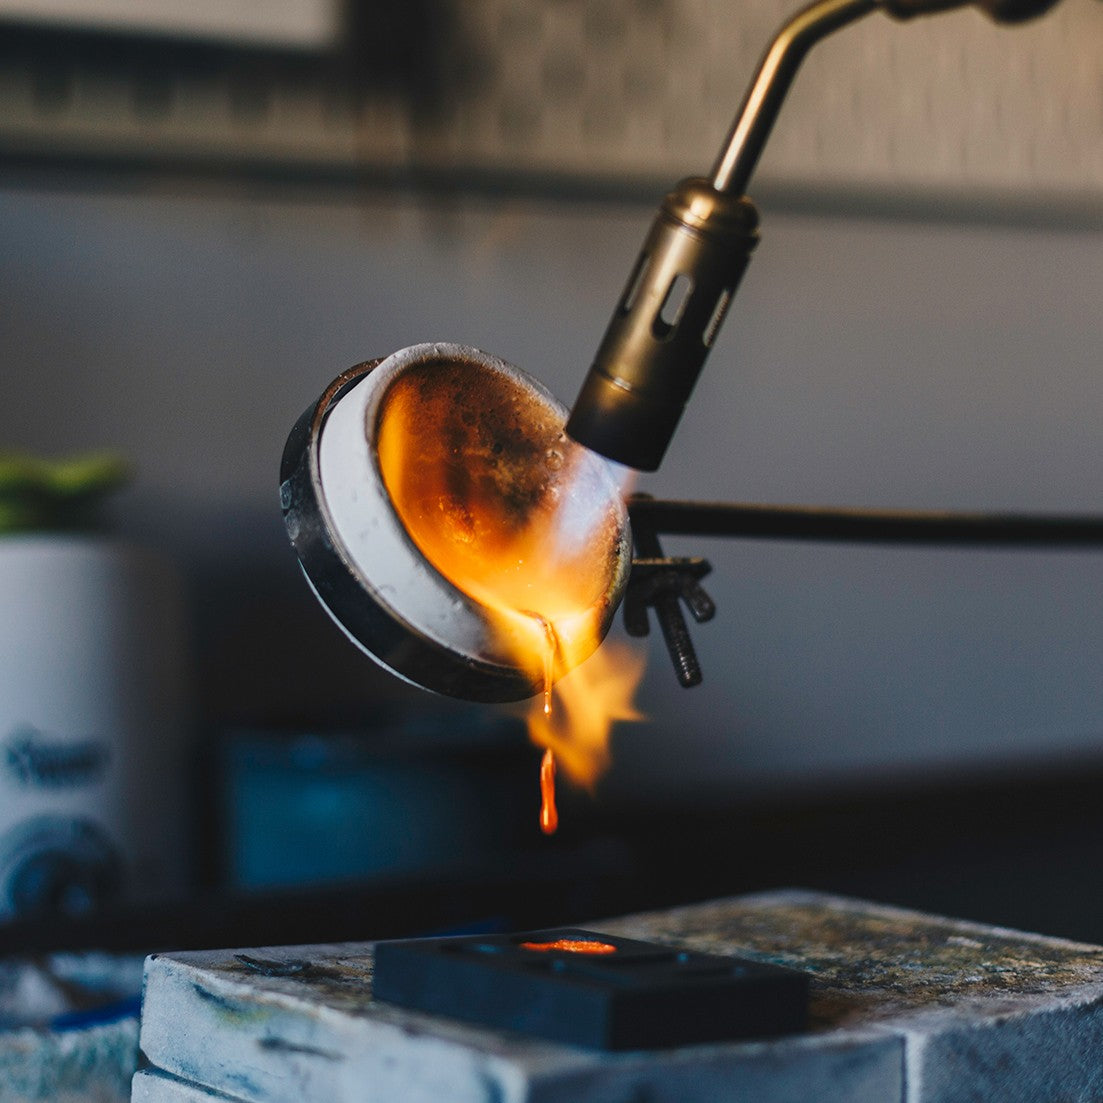
Kim - "Crucibles! They are containers to hold metal while melting it and transporters for then pouring that molten metal into a mold. They come in many shapes and sizes and all the ones I'm going to show you are for melting fairly small amounts of metal.
Larger amounts of metal are melted in large vase shaped crucibles in a super hot furnace rather than with a blowtorch. I prefer a crucible with a fairly flat surface as the heat can get to the metal easier. If you don't have a crucible and are only melting very small amounts of metal with a small torch, you could do that by carving a small crucible shape out of a magnesia soldering block or by making a little channel in a charcoal block and propping one end of the block up so the molten metal rolls into your mold. Always ensure you're working in a safe area so if you drop any molten metal, it is not going to fall on a flammable surface or you!
Molten metal is hot. VERY HOT. If it falls onto a surface that isn't fireproof, you could easily cause a fire. If it falls on you, you will burn yourself, badly. Before we start, you need to plan how you can minimise these risks and deal with them if they ever do happen. Creating a fireproof safe work area is a must. You will need multiple fire bricks, kiln shelves or similar so you have a safe area in case you miss while pouring the metal and remember you'll need a safe, heatproof surface to put your crucible down once you've finished.
The exact personal protection measures will depend on exactly what you want to do and were. There's a big difference between melting a tiny amount of silver into little balls compared to heating large crucibles in a furnace and lots of variables in between. It depends on how much you're doing, how often, in what environment and your overall health. Some things to look into and consider are, fire safety, clothing (synthetic clothing can melt onto your skin or catch fire from a tiny spark), eye protection, fume extraction, respirator masks, metal fume fever and the fumes different metals give off when molten. Do some research and decided what you're happy to do and how in your specific workspace."
Sand Casting Tutorial
The results with Kim & Kerry
Kim and Kerry discuss how they got on with casting, reveal the finished pieces and the difficulties they faced along the way...
Cuttlefish Casting Tutorial
Kim - "Next up for Make It Month 12 is casting into a mold. You can make 2 part molds from a variety of things which you then pour molten metal into. One popular choice is cuttlefish casting. You use a bone from a cuttlefish and carve or press your design into it. This bone was found on a beach but you can also find them in pet stores as budgies like to eat them.
You prepare your mold by cutting the cuttlefish bone in half using a jewellers saw. They are usually soft inside so you can smooth the inner surfaces by rubbing them together. You won't want to breathe in the dust so make sure you wear a mask and maybe go outside or work on a newspaper or a tray to collect the offcuts and dust.
You can either carve a design into them or push something into the soft bone. If you push, make sure you do it carefully so you don't snap it as I did! But as you can see, you can normally still use a different part of the cuttlefish. You'll need to carve a channel into the bone for your metal to be poured into and bind the two pieces of bone securely so the metal doesn't pour out the sides.
We didn't manage to film the pour... it was one of those days! You will find my sand casting video which shows how to make a channel and pour metal into it."
Kim - "Sand casting with delft clay with Kerry Day. Sand casting is usually done with a super fine sand which is impregnated with special oil to help it form around what you wish to cast and pick up all the little details. Here we are using a sand called delft clay. You pack it into a 2 part mold. Most sand casting molds are round rings and you have to be careful to match up both sides of your mold accurately.
My mold is rectangular and clips into itself which makes it very easy to align it but I haven't had much luck using it standing on end through the built-in channel recess. The molten metal often wouldn't fill the mold and you need to make air escape holes which in my mold, would also allow the metal to escape which is unsafe. We decided to use it the way the round ones work. So instead of standing it on end, we laid it flat and carved the channel and air holes on the top.
Make sure you are working in a safe area and are prepared in case of any spills. You can see my previous health and safety videos from Make It Month 12. You need more metal than your actual mold shape would require as you need enough metal weight to force it down into the mold before it cools. This means you normally need to use a powerful torch like my mapp gas, go system torch. The metal needs to be fully melted and combined so you can see me checking it with a soldering poker. Metal often looks molten but there are still hard unmolten parts inside. If you are doing this on your own, you can gently swirl your pan.."
Cuttlefish Casting Part 2 & Monthly Round Up
Finally, Kim shares a video on pouring molten silver into a cuttlefish mold - watch how well the cuttlefish holds up with multiple castings!
Meet the jewellers who love granulation...

Meet The Jeweller, Sophie Cunliffe
We chat to Sophie all about her handmade granulation jewellery, creating bespoke pieces in her home of Herefordshire. We find out more about how she discovered the world of metalsmithing, while also sharing her top tips for aspiring jewellers - plus you'll get to see more of her incredible designs.

Meet The Jeweller, Milly Maunder
Milly joins us over on the blog to chat to us about combining her two favourite things, diamonds and granulation! We find out more about Milly's admiration of diamonds, top tips for creating your own granulation designs as well as sharing her goals for the future.
Watch More From The 12 Months Of Metal Series
- 12 Months Of Metal: Basic Cutting & Texturing Metal For Jewellery Making
- 12 Months Of Metal: Sawing Metal For Jewellery Making
- 12 Months Of Metal: Forming Metal
- 12 Months Of Metal: Soldering For Jewellery Making
- 12 Months Of Metal: Cabochon Setting Tutorials
- 12 Months Of Metal: How To Use A Rolling Mill
- 12 Months Of Metal: Riveting & Cold Connections For Jewellery Making
- 12 Months Of Metal: Metal Etching
- 12 Months Of Metal: Claw Setting Tutorials
- 12 Months Of Metal: Reticulation
- 12 Months Of Metal: Hollow Jewellery Tutorials
- 12 Months Of Metal: Casting & Granulation For Jewellery Making
- Larkman's Legacy & Kim's Trip To Geevor Tin Mine, Cornwall
