


Guest Tutor, Eleni shows you how to make your very own wishbone ring!
The Meaning Of A Wishbone Ring
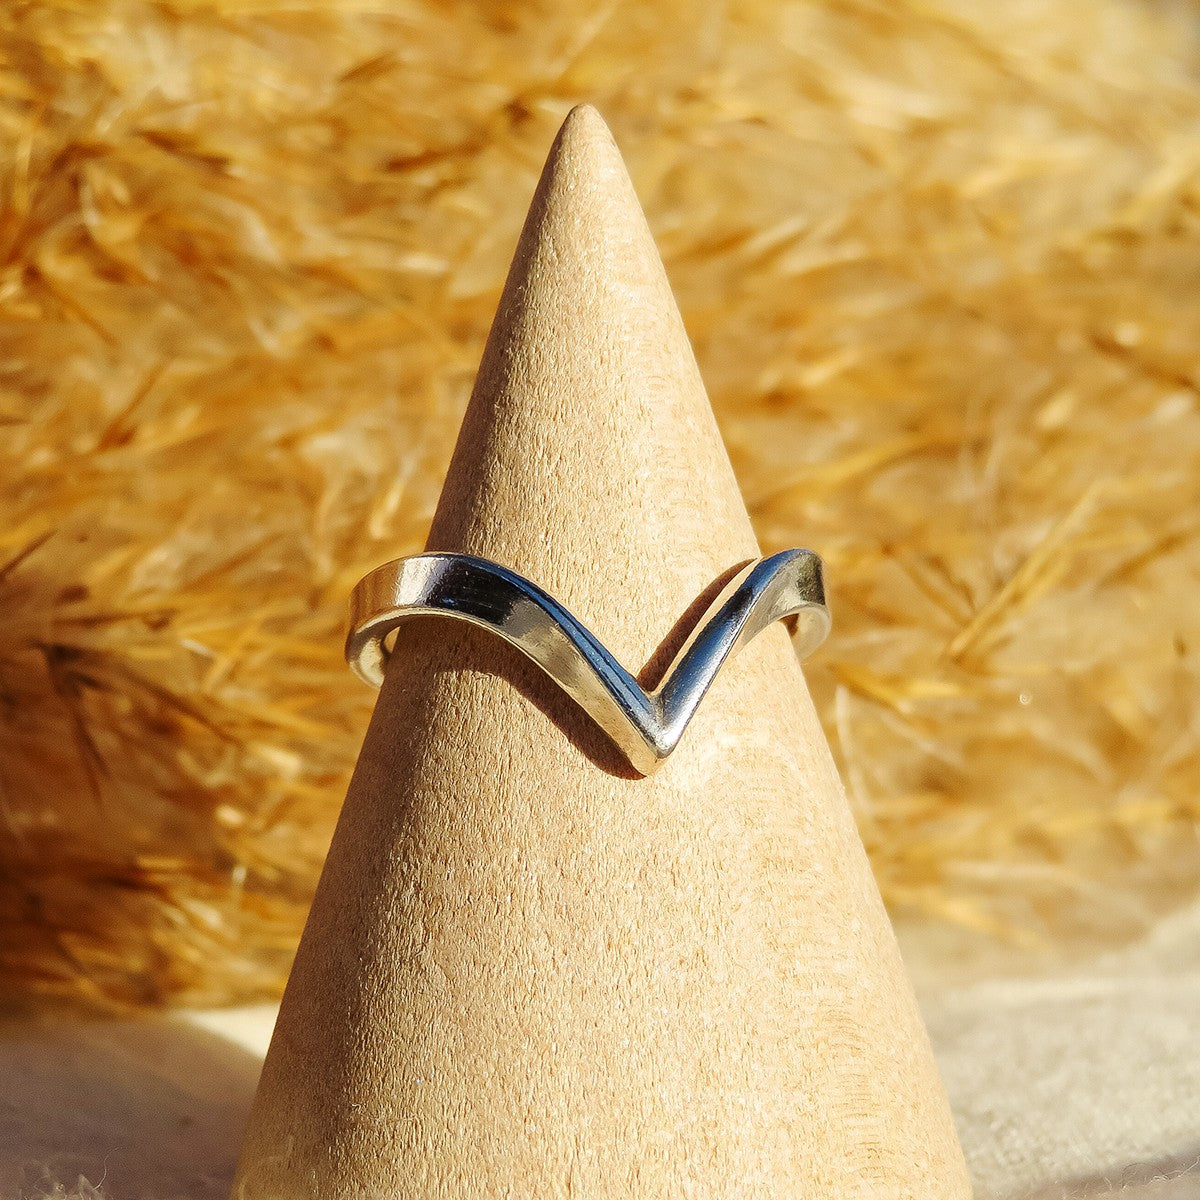
This v-shaped ring symbolises eternal love, prosperity and hope, often used in eternity and wedding rings to bring long-lasting luck - but it also looks fabulous for casual, everyday wear too. It gets its name because the shape is similar to a wishbone in a chicken or turkey - in tradition, two people go head to head to break the wishbone and the person with the biggest piece of bone gets good luck or a wish granted!
Wishbone jewellery became popular with the Victorians and the wishbone soon evolved to become a symbol of love; it was thought by gifting a wishbone ring it would bring two people closer together. Today many wishbone ring designs feature sparkling diamonds, thought to bring the wearer long-lasting luck and happiness - perfect for special occasions such as an anniversary.
Hi there, my name is Eleni and I am a silversmith here in London, UK. I run my own online jewellery business called Asími, where I hand craft sterling silver jewellery such as rings, earrings and necklaces.
You’re probably reading this because you’re wondering how you can make a wishbone ring. I’ve written out a step by step guide, with all the tools and materials needed to make your very own wishbone ring.
Recommended tools & supplies
Watch Eleni's Video Tutorial On How To Make A Wishbone Ring
Follow Step By Step Instructions With Photos On How To Make A Wishbone Ring

Measure the ring blank
Begin by measuring the ring blank to your desired size. A quick reminder that to do this, you need to take the inner diameter + metal thickness and times it by 3.14 (pi).
When it comes to creating the ‘V’ shape in the ring, it depends on if you want the ‘V’ to be deep or shallow. To do this, you would add 8-9mm onto your ring blank if you want a deep ‘V’ and for a shallow ‘V’, you would add 7mm.
- Inner diameter + metal thickness x 3.14
- Deep V = 8 - 9mm
- Shallow V = 7mm
I would like to add that making a wishbone ring isn’t an exact science and does require some practice until you get the hang of how you like your ‘V’.

Saw & file D-shape wire
Once you have your measured ring blank, measure it with a ruler and mark the required length with a pencil and use a jewellers saw to cut.
TIP: Don’t forget to lubricate your saw blade to help it glide through the metal and prevent it from sticking.
Once you have sawed out your ring length it's time to file the edges straight, place the wire up against your bench peg and use a file to file both edges down, making sure they’re flat on each side.


Form the wishbone ring
Place the wire on the bench peg, with the D-shaped side facing you so that you can file the D side. You want to file at an angle to create a little slope and do this on both sides, making sure it’s even and smooth. Refer to the video above for visual guidance.
Next, take the wire and wrap it around the mandrel to get the two ends that were filed down to meet. Once you remove it from the mandrel, you want to make sure the edges are flush up against each other ready for soldering.
TIP: Something I like to do, to make sure the ends are flush, is to take my saw blade, put it inside the ring and saw through where the points meet so that I can make sure they’re sitting flush against each other.

Solder
Flux the join that you will be soldering where the two points meet. Place hard solder on the join and slowly start to heat the piece using your torch. Once the solder flows, turn the ring round and use your torch again to make sure the solder has flowed completely. Place your ring in pickle solution until it’s nice and clean, then rinse in water.

File
Using a needle file and emery sticks, file down the point so that it's rounded nice and smooth.

Shape the Wishbone ring
Place your ring on the mandrel and hammer it to size, avoiding the point.
Next, grab a pencil and mark the point where the ring would close if it were an ordinary ring. Once you’ve marked it with your pencil, remove the ring and reach for your nylon pliers. This bit is tricky and might take some time, or even a few goes! Place your pliers where you marked your ring and bend the ring down. You should have a v shape now!
Place it on your mandrel again and hammer your ring, making sure you rotate the ring so it’s even on both sides.

Time to polish
There are many options to polish, but one of my favourite ways is to use tripoli and red rouge. I use tripoli first with my Dremel, making sure I remove any tripoli residue before using moving onto red rouge. Once you have used the red rouge, you can use warm, soapy water to remove the residue from the red rouge.
Alternative ways to polish include using polishing papers, 3M radical discs or putting it in the tumbler - but remember, the tumbler doesn’t get rid of scratches, it only polishes!

The finished wishbone ring
I hope you’ve enjoyed this step-by-step guide and hope you have fun making these beautiful, meaningful rings.
If you liked what you saw, come and say hi to me over on my Instagram page @asimistudio.

How to wear your wishbone ring
Due to the wishbones V shape, this makes it ideal for pairing with other rings and this is why it's often a popular choice with engagement and wedding rings.
You can choose to wear your wishbone ring facing down or upwards, it's completely up to you and whether you want to pair it with another ring.
Meet Guest Tutor Eleni
Eleni founded Asími in 2020, the jewellery business evolved from a hobby of working with clay - Eleni firstly worked with polymer clay and her skills and passions then developed into silversmithing.
Creating from her London studio, Eleni works with sterling silver and various gemstones to create unique pieces that can be cherished forever.
Follow Asími


Adding diamonds to your wishbone ring is thought to bring the wearer long-lasting luck and happiness. That's why you'll often find eternity and wishbone wedding rings encrusted with sparkling diamonds!
Diamond is also April's birthstone, so a diamond wishbone ring could be the perfect handmade gift for a loved one.

Jewellery Wire
Explore our wide range of wire for jewellery making, including sterling silver, eco-friendly, 9ct gold, copper, brass and more. There are various shapes to choose from including D-shape, square, rectangular, beaded, twisted and gallery wire.

Build A Tool Kit
If you're unsure of what tools you need to get started in jewellery making, head to our Build A Tool Kit section. You'll find an array of tool kits for various areas of jewellery making including beading, metal clay and metalsmithing.
Also in this section:
- Metalsmithing and Soldering General Advice
- How To Make Granulated Hoop Earrings
- Wax Carving & Granulation Process With Rockpool Jewellery
- Common Soldering Problems & Solutions For Jewellers
- The Essential Jewellery Tools & Supplies For Soldering
- Types Of Tweezers For Jewellery Making & Their Uses
- 10 Jewellery Tools For Supporting Your Work
- Using A Third Hand For Jewellery Making
- Using A Charcoal Block For Jewellery Making
- How To Use A Jewellers Piercing Saw
- How To Use Needle Files For Jewellery Making
- Soldering Flux For Jewellery Making Explained
- How To Use Safety Pickle & The Importance Of Using Plastic Tweezers
- How To Prevent & Remove Fire Scale & Fire Stain
- What Is Thermo-Gel Heat Barrier?
- What Is A Multi Chuck & Essential Accessories For Your Dremel Multi Tool
- How To Use Your Scrap Silver For Jewellery Making
- How To Make Scrap Silver Earstuds
- What Is A Ring Mandrel & How To Use It
- How To Adjust Ring Sizes
- How To Make A Ring Band
- How To Make A Wishbone Ring
- How To Make A Spinner Ring
- How To Make A Spaghetti Ring With Kim Thomson
- How To Make A Textured Ear Cuff With Searose Jewellery (No Soldering!)
- How To Use A Bangle Forming Die Tool
- How To Make Bezel Set Heart Cabochon Earrings
- 10 Reasons You Need A Headband Magnifier For Jewellery Making
- What Is Alligator Tape & How To Use It For Jewellery Making
HAVE A QUESTION?
If you have any questions, feel free to get in touch with our friendly team who will be more than happy to give you advice over email or on the phone.
You can learn more and find inspiration by visiting our Jewellery Making Tutorials, Jewellery Making Kits and YouTube Channel. Don't forget to follow us on social media and tag us in your designs on Instagram & Facebook, we would love to see!

