


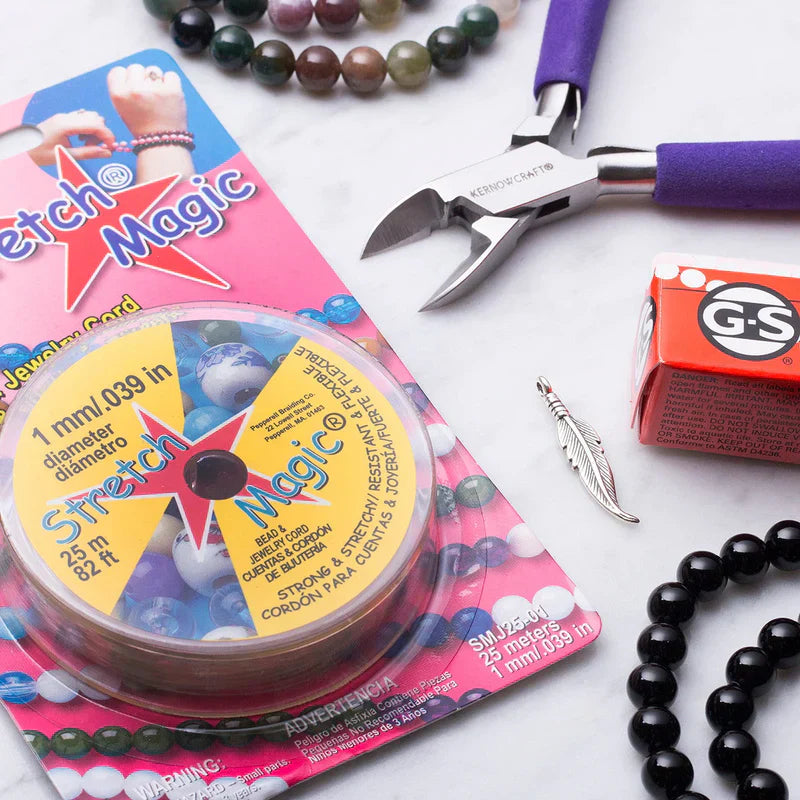
Stretch magic is a fantastic, clear, strong and stretchy elastic thread.
It won't crack or harden over time and is ideal for beaded bracelets and necklets without the need for a clasp.
It is important to knot this thread well to avoid the risk of slipping or the knot coming undone and ruining all of your hard beading work! Here we provide pictured step-by-step instructions for a simple overhand knot (or a double overhand knot) recommended by the manufacturers to ensure your design is secure.
What you'll need to make an elastic bracelet
- Clear stretch magic
- Your choice of beads (ensure the hole size will fit the elastic) - we've used our green aventurine round beads
- G S Hypo cement glue
- Side cutters or scissors
Watch Our Tutorial Below to Make an Elastic Bracelet
Follow Step By Step Photos On How To Knot Elastic Thread

Step 1
Pre-stretch your Stretch Magic to help loosen it up. Thread your beads on to suit your design.

Step 2
Cross the strands over.

Step 3
Fold one end of the Stretch Magic under the other to create a simple, loose overhand knot – do not pull tight yet.

Step 4
Cross the strands again.

Step 5
Repeat step three and folding one end of the Stretch Magic under the other to double up your overhand knot. At this point you can do as many overhand knots as you like - if your design is heavy it might be worth doing a few more – however be aware of how big the knot is going to look once your design is finished.
 Step 6
Pull the knots tight together.

Really tight! Try changing the direction of your pull to ensure it is extra secure.

Your knot should have no gaps between the strands.

Step 7

Step 8
Use side cutters or scissors to trim off any excess Stretch Magic thread.

Finished
Your knot is now finished and secure, you can now wear your new beautiful handmade bracelet.
Read to get started? Get your essential supplies for making elastic jewellery

Featuring our pretty aventurine beads but you can choose any beads you like
This knot should be secure and not slip. Alternatively you could crimp the stretch magic, but if you are doing this, be careful not to squeeze the crimps too tight or it could damage or cut into the Stretch Magic – we would recommend sticking with a trusty knot!


In need of some inspiration? Check out our jewellery making kits


The products used in this project are suggestions to inspire you. Products used were compatible at the time of making but do be aware that stocks can vary, so do use your own judgement as to the compatibility of each item when making.
Elastic Thread Troubleshooting
When making elastic jewellery for the first time, you may find that your designs are not holding or perhaps the elastic snaps. Follow our troubleshooting tips below to make sure you have secure jewellery designs every time!
Use good quality elastic cord made for jewellery making
There are many elastic cords available for many crafts, Stretch Magic is a popular choice among jewellers and one which offers high strength and durability for your designs.
Stretch the cord before using
Always pre-stretch your elastic cord to prepare and loosen the cord before you start stringing your beads, this means your design will stay the same size and won't stretch and distort.
You're probably not pulling tight enough!
If you're finding that your jewellery designs are coming apart and the knots are not holding, you're probably not pulling your knots tight enough and in all directions! Keep practising your knots and pull as tight as possible to secure your knots.
Use G S Hypo Cement Glue on your knots and don't use Super Glue
Cement glue is our recommended glue for jewellery making for precision application. It has a fine nozzle, making it easy to apply for intricate work and for using small amounts of glue to be applied such as on your elastic knots to add strength. Avoid using super glue as this goes brittle over time and is thought to corrode the elastic over time.
Store your elastic thread in a cool, dry place
Storing your elastic cord where it is exposed to sunlight and warmth can damage the strength of your cord and cause it to go soft and likely snap when tieing your knot. Try to always keep your jewellery making tools and supplies in a cool dry place.
If using crimps, avoid crimping too hard
The beauty of elastic cord is that there really is no need for using crimps and other findings which could potentially cut and damage the elastic! A simple knot does the job but if you choose to use crimps do not crimp too hard.
Take care when wearing your elastic bracelets
Always roll the bracelet onto your wrist rather than stretching and remember to keep your bracelets away from chemicals, oils, perfumes and sunlight as this can deteriorate the elastic over time.
Also in this section:
- Macrame Bead Bracelet Tutorial
- Your Guide To Bead Stringing Materials For Jewellery Making
- The Essential Tools For Beading
- Beading: How To Start Jewellery Making With Lyndsey
- Answering Commonly Asked Beading Questions
- Types Of Beads For Jewellery Making
- The Difference Between Half Drilled, Top Drilled And Head Drilled Beads
- How To Use Top Drilled Beads
- Jewellery Making With Half Drilled Beads
- What Are Briolette Beads & How To Use Them
- Stringing Beads With Small Holes
- How To Make Your Bead Holes Bigger With A Bead Reamer
- Types Of Clasps For Jewellery Making
- 8 Reasons You Need A Bead Board
- How To Make A Sliding Knot
- Advice On Knotting Elastic Stretch Magic Thread
- How To Use Flex-Rite Jewellery Wire
- How To Use Crimps
- How To Make A Silkon Thread Briolette Necklace
- How To Use Beading Chain
- 4 Ways To Use Gemstone Donuts
- 4 Gemstone Chip Bead Project Ideas
- How To Use End Caps For Jewellery Making
- How To Make Earwires With Gemstone Beads
- How To Make A Memory Wire Bracelet
- How To Make Gemstone Bead Earrings
- How To Make A Bead Bar Necklace
- How To Make Beaded Bracelet With Flex-Rite Wire & Wire Guardians
- DIY Gemstone Friendship Bracelets
- How To Make A Beaded Bracelet With Knot Covers
- How To Make Polymer Clay Earrings
- How To Make Felt Jewellery
-
DIY Mini Tassels & Jewellery Projects
Have a questions?
If you have any questions, feel free to get in touch with our friendly team who will be more than happy to give you advice over email or on the phone.
You can learn more and find inspiration by visiting our Jewellery Making Tutorials, Jewellery Making Kits and YouTube Channel. Don't forget to follow us on social media and tag us in your designs on Instagram & Facebook, we would love to see!
