How To Make A Wire Wrapped Cabochon Pendant
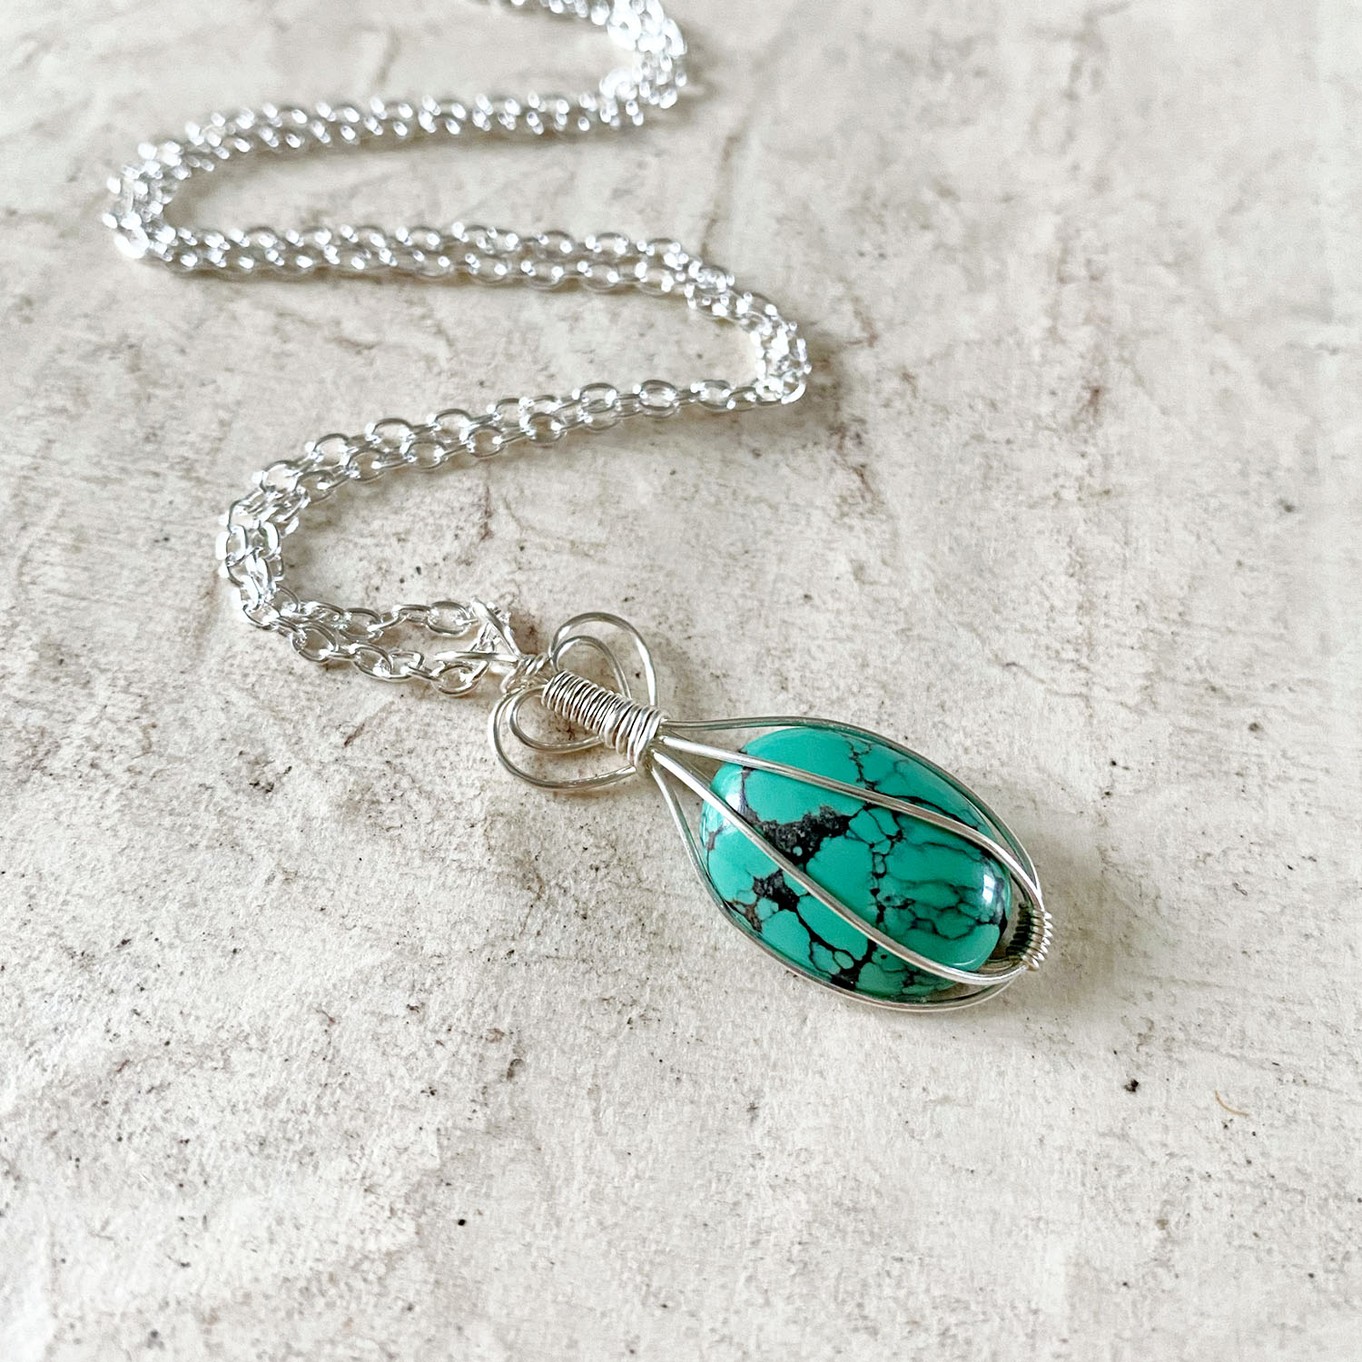
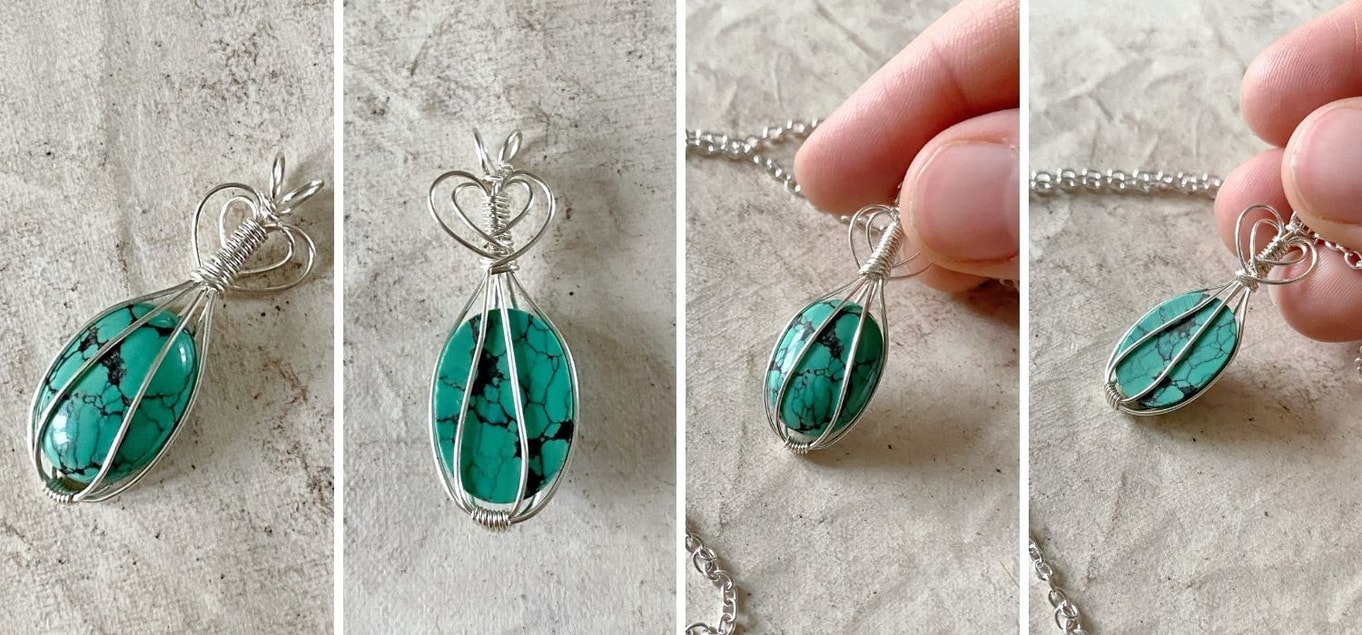
Ellie from 'Ellie's Handmade Art' shares with you a tutorial on how to wire wrap a gemstone cabochon to create a beautiful pendant. This project uses one of our stunning spiderweb turquoise cabochons but you can use this technique with any of your favourite gemstones and choice of metal wire.
Follow along with Ellie's steps below and buy all the jewellery making tools and supplies you need online to get making. Share and tag us in your wire wrapped designs over on Instagram and Facebook for a chance to feature!
About Our Guest Tutor, Ellie
Ellie has been making jewellery since 2014, creating intricate wire wrapped designs. Taking inspiration from nature, Ellie creates one of a kind pieces using ethically sourced gemstones and runs a successful Etsy shop, selling her creations.
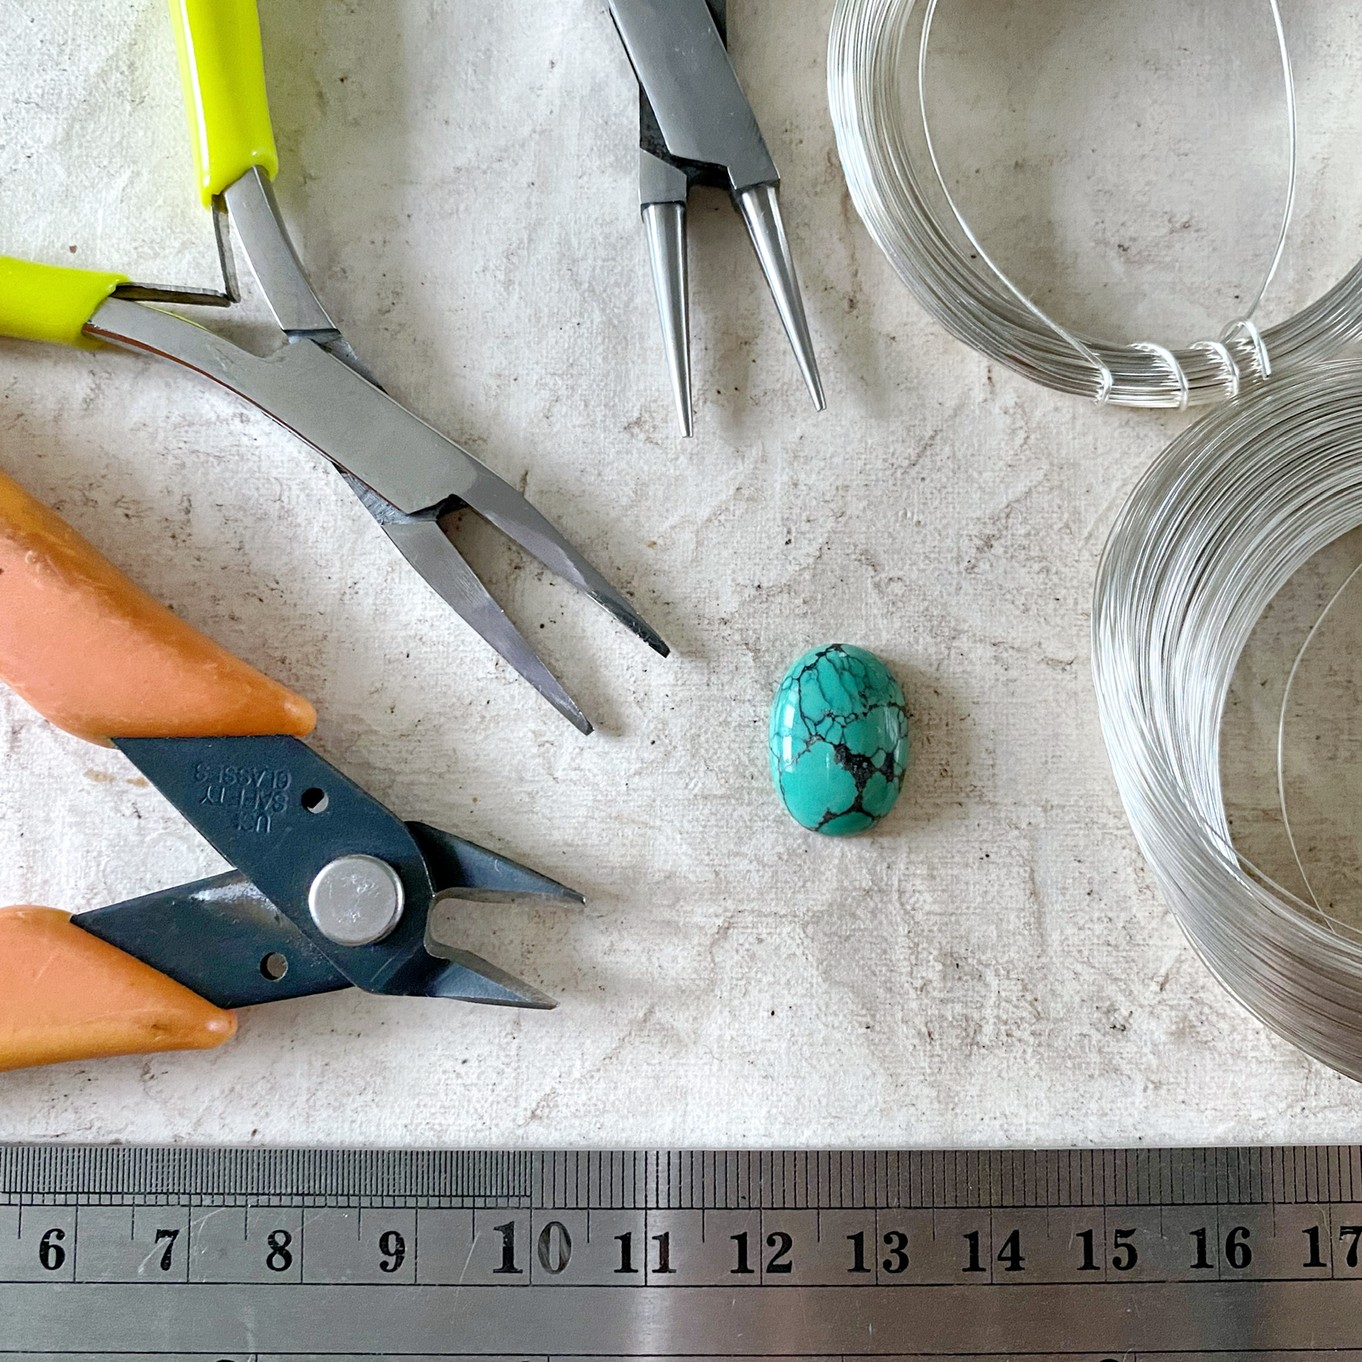
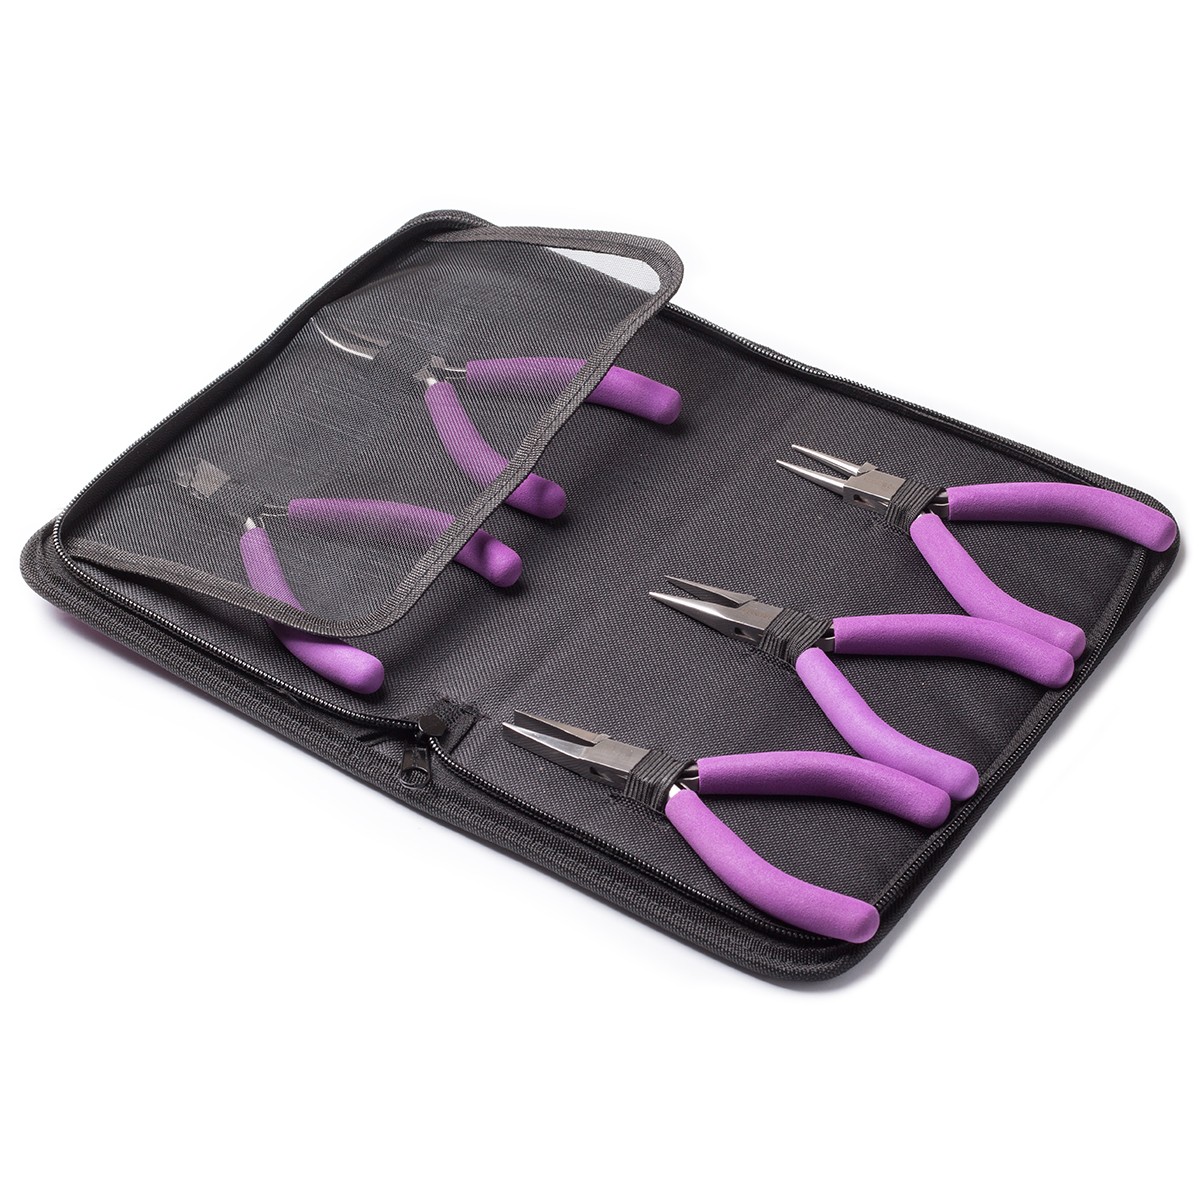
Recommended Tools & Supplies
- Flat nose pliers
- Round nose pliers
- Wire cutters
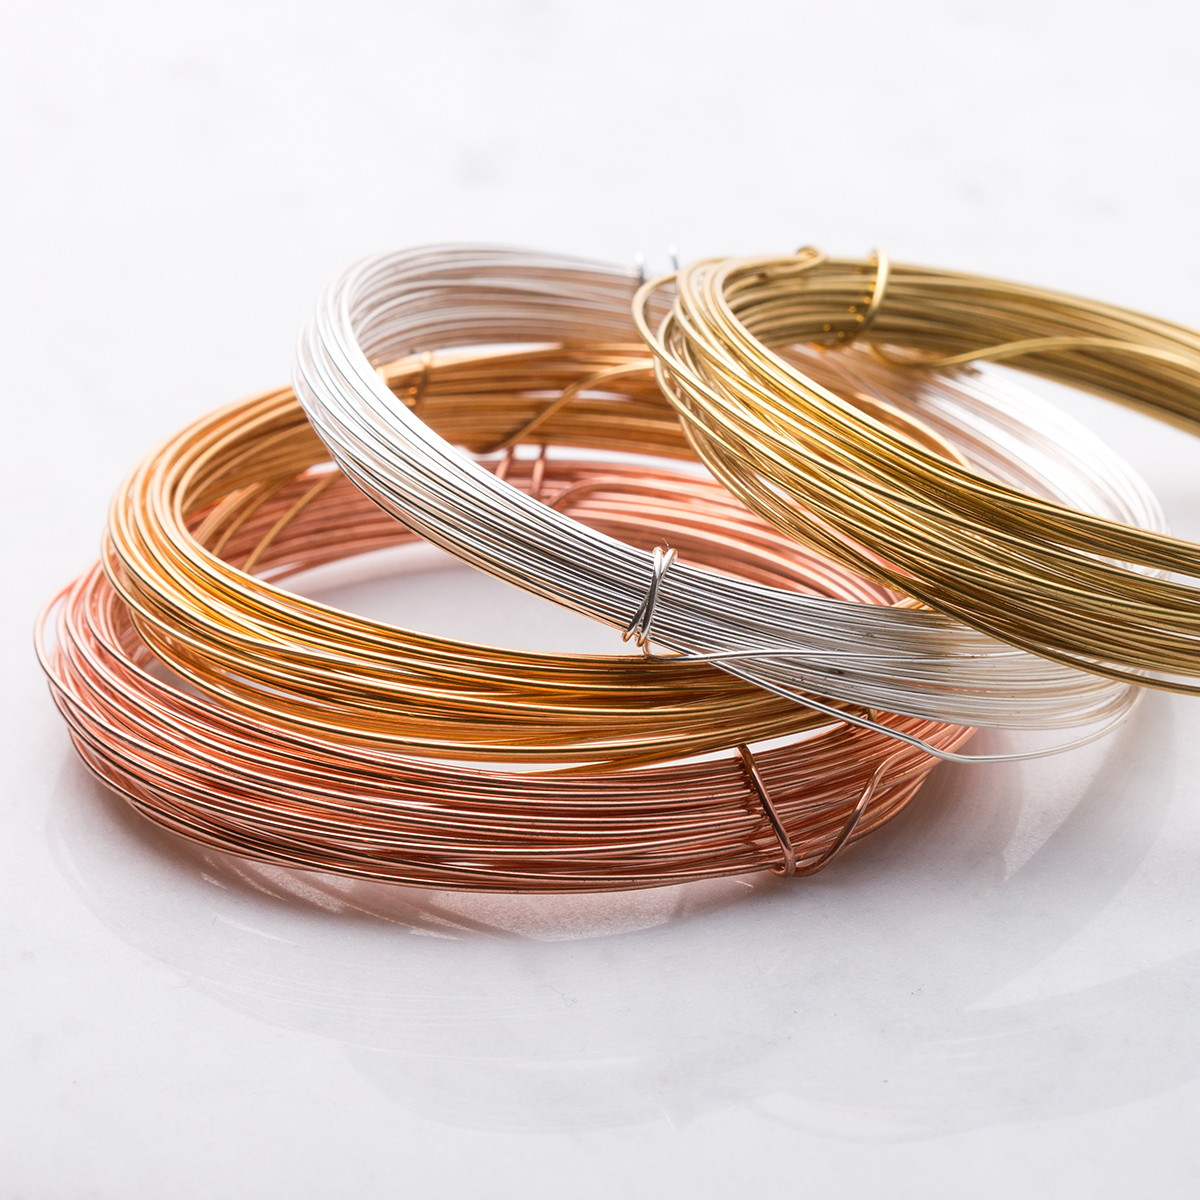
- 3x 20cm of 0.6mm wire (sterling silver wire in this project)
- 2x 15-20 cm of 0.3mm wire (sterling silver wire in this project)
- Approx 18x13mm cabochon or another suitable size (featured: spiderweb turquoise cabochon)
- Tape measure/ruler
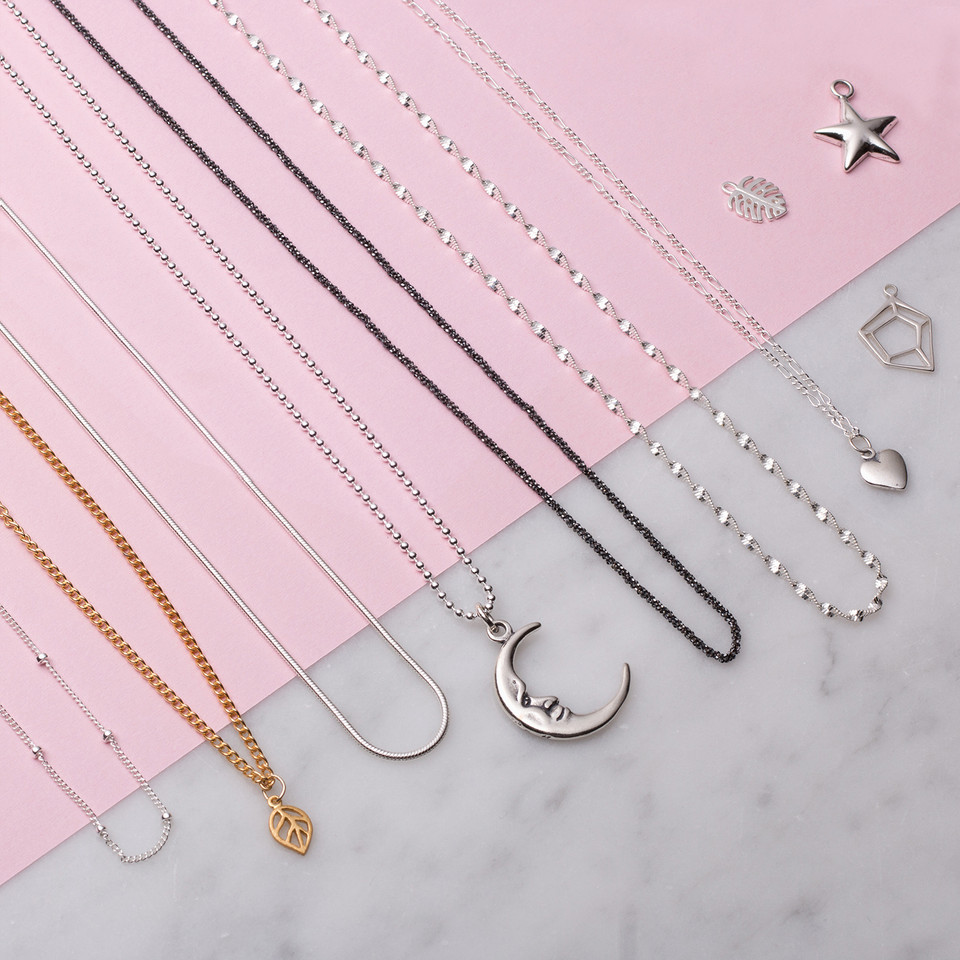
- Necklet chain
- Optional: clamp
Follow Ellie's Step By Step Tutorial On Creating A Wire Wrapped Pendant Below
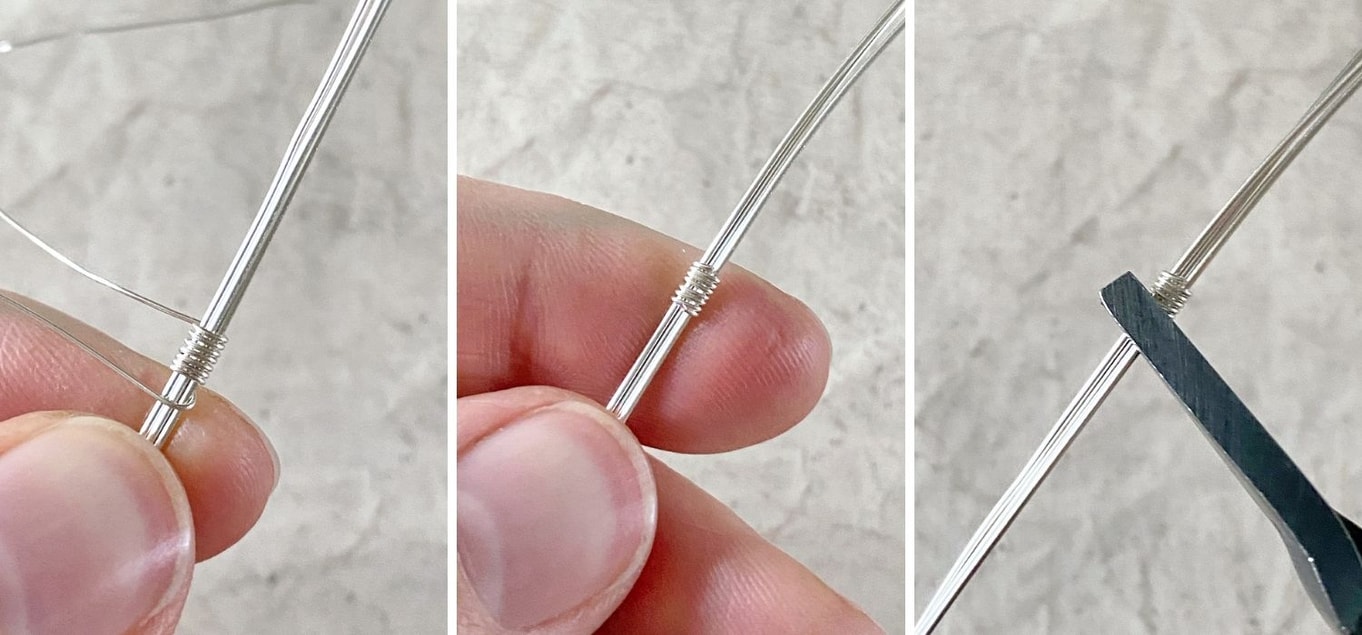
Take your 3 pieces of 0.6mm 20cm base wires in one hand, (if you find it easier you can use a clamp to keep them straight), take 1 piece of the 0.3mm wire and in the middle of the wires, wrap around the 3 base wires whilst holding them flat approximately 7 times.
Cut the 0.3mm wire close to the base wires with side cutters and use your flat nose pliers to gently squeeze together to secure.
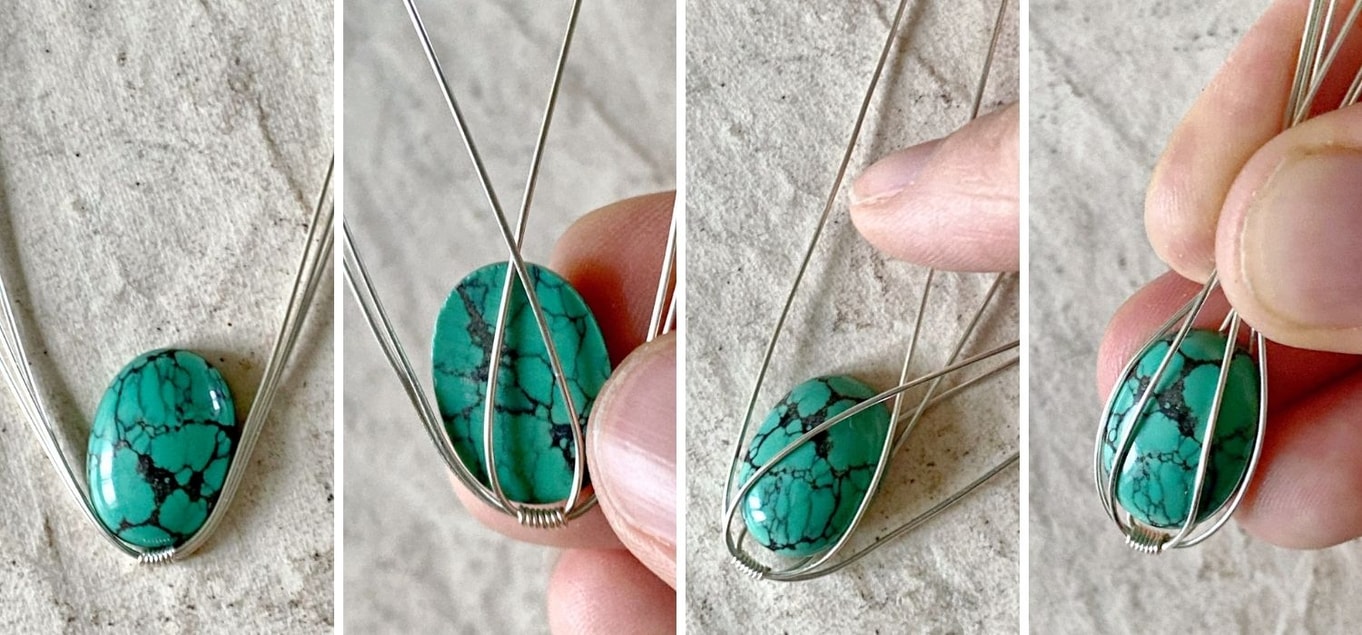
Place your cabochon down and with the joined wires at the bottom, gently bend the wires around the edges.
Turn your cabochon over in your hands and gently pull the two back wires and cross them over at the back, then turn the cabochon over and do the same over the front of the stone.
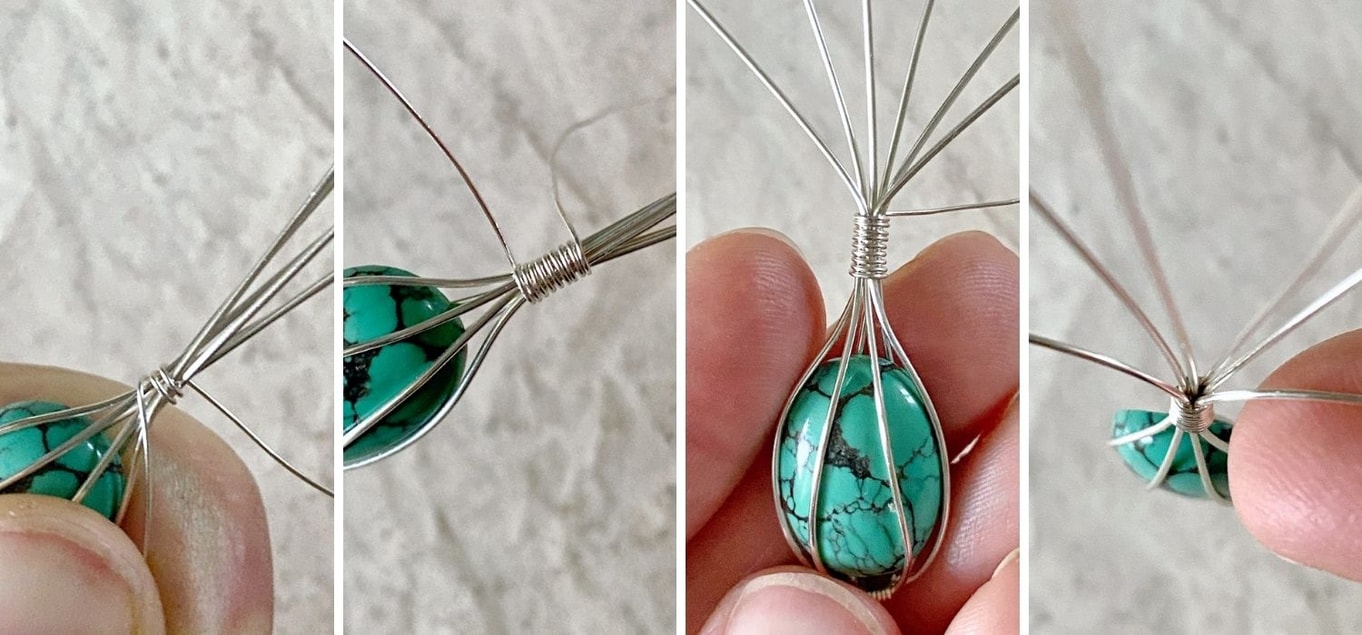
Bring all the wires around to the top of the cabochon and pull together.
Take your second piece of 0.3mm wire and wrap the wires together tightly, I did this about 10 times around, keeping the tension nice and taught to keep the cabochon in place and secure.
Trim off the wire with your side cutters and using your flat nose pliers, gently squeeze the end close to the base wires.
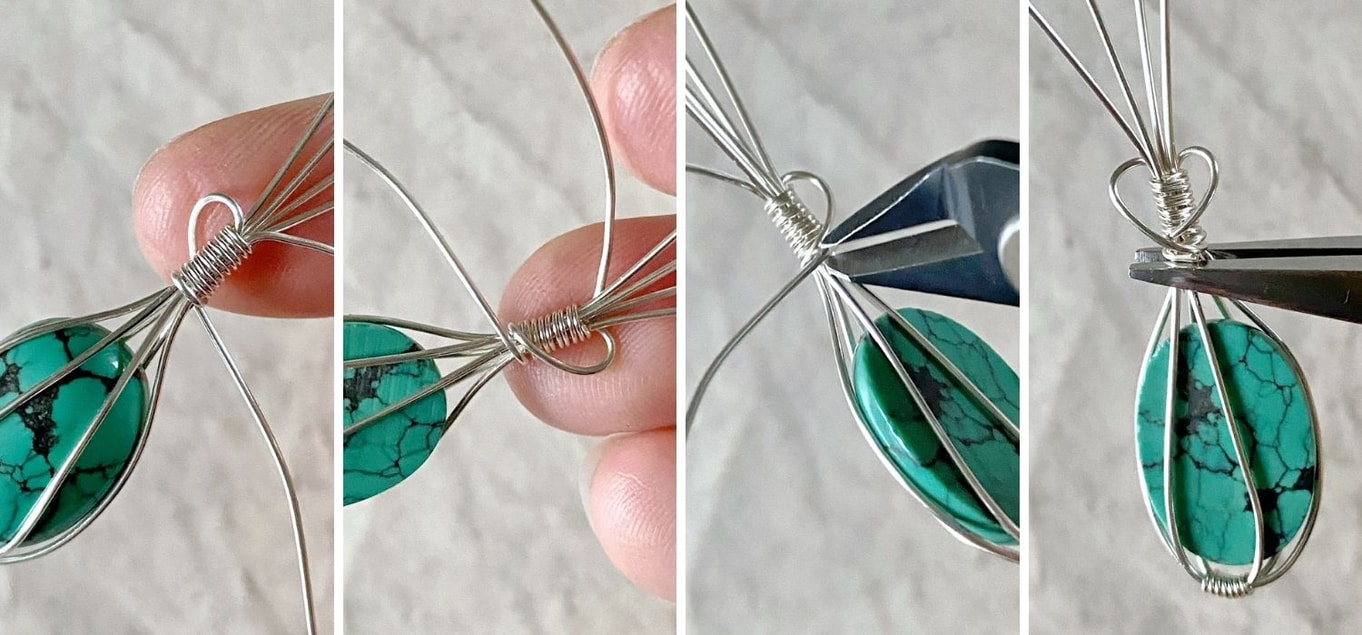
Splay put your wires so two are facing forward and two to either side.
Gently bend one wire to the side and around the back of the wrapped wires.
Wrap around once keeping the wire taught.
Using your side cutters trim the wire, repeat this on the opposite side.
Once you have trimmed both sides use your flat nose pliers to secure the ends against the base wires.
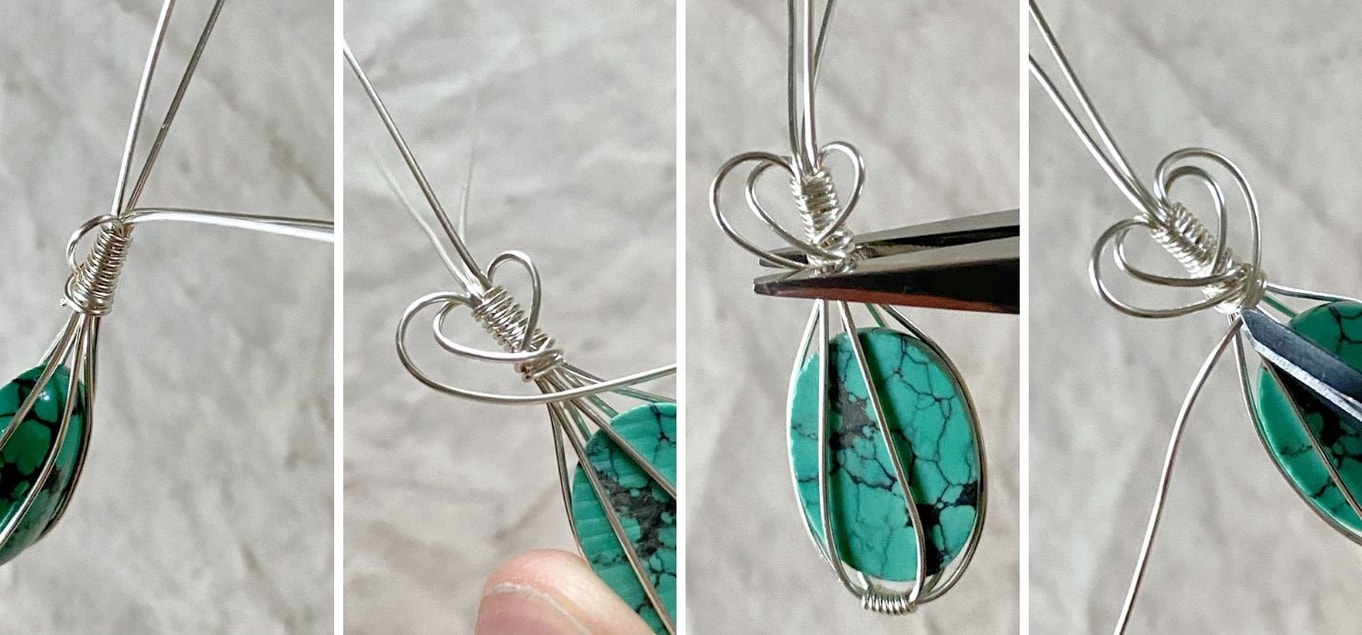
Take the second wire at the side of the first heart loop and wrap around below the wires you have already secured.
Trim the wire with your side cutters and use flat nose pliers to gently squeeze the wire to the base.
Repeat these steps on the other side.
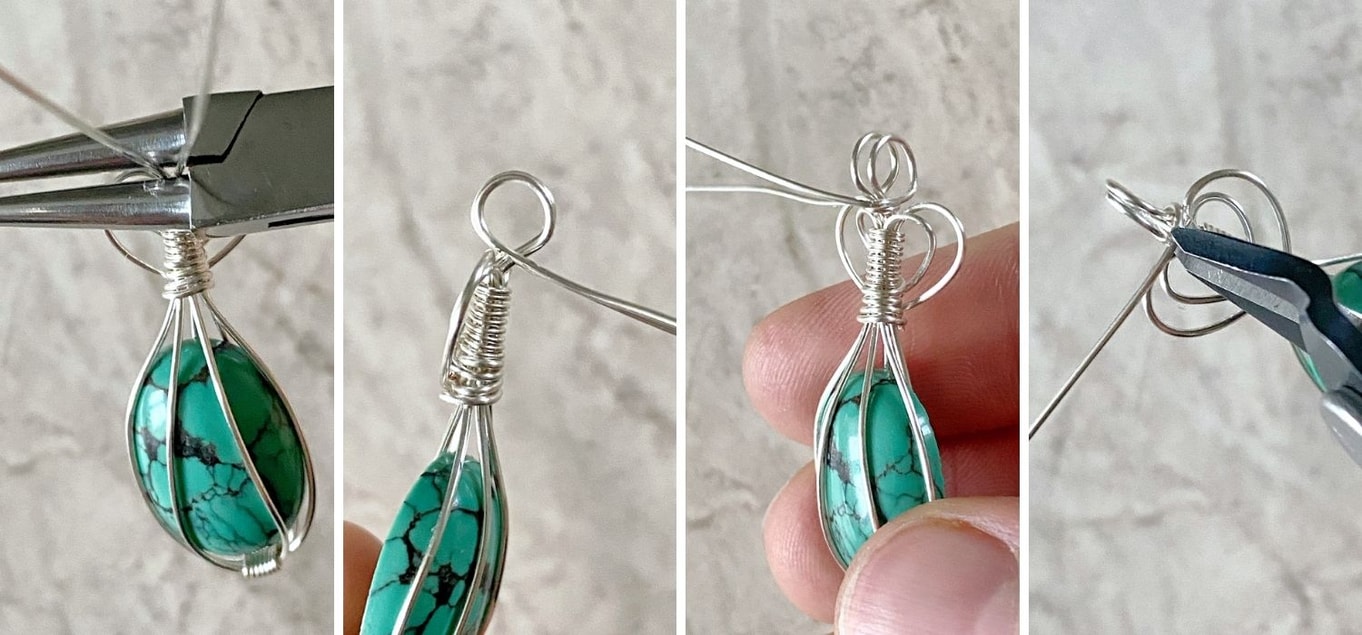
Take the final two wires and bend them forwards to the front of the pendant.
Using your round nose pliers, hold the wires as close to the base as possible and bend them around both wires on each side.
Take out the pliers and gently bend around the front and to the back to secure the loops.
The products used in this project are suggestions to inspire you. Products used were compatible at the time of making but do be aware that stocks can vary, so do use your own judgement as to the compatibility of each item when making.
Explore Supplies & Get Making!
Also in this section:
- How To Make A Wire Wrapped Nest Necklace
- How To Make Your Own Teardrop Bead Earrings
- Tools For Making Jewellery Using Wire
- Your Guide On Choosing Wire For Jewellery Making
- Compare Jewellery Designs Using Different Sized Wire
- Wire Gauge Coversions
- How To Work Harden Jewellery Making Wire
- How To Use Nylon Jaw Pliers For Jewellery Making
- How To Use A Thing-A-Ma Jig For Jewellery Making
- How to Wire Wrap a Bead With a Headpin
- How To Wire Wrap A Bead
- How To Make A Wire Wrapped Bead Chain
- How To Wire Wrap A Briolette
- Wire Wrapped Cluster Briolette Earring Tutorial
- How To Make Wire Wrapped Bead Necklace With Handmade Clasp
- How To Wire Wrap A Rough Crystal
- How To Make Valentine's Day Earrings: Wonky Wire Hearts
- How To Make A Wire Wrapped Crystal Necklace
- 6 Wire Wrapped Ring Projects & Essential Tools
- How To Make A Wire Wrapped Bead Ring
- How To Make An Anxiety Ring
- How To Make A Wire Wrapped Gemstone Ring
- How To Make A Wire Wrapped Cabochon Pendant
- How To Make A Tree Of Life Pendant
- How To Wire Wrap A Gemstone Donut
- How To Make Christmas Tree Earrings
- Simple Sterling Silver Wire Scroll Earrings
- Soldered Circle Hoop Earrings With Beads Tutorial
- How To Make Wire Hoop Earrings & Customise Them
- Metal Charm Hoop Earring Tutorial
- How To Make A Wire Word Necklace
- 4 Wire Wrapped Gemstone Tube Bead Projects
- Festival Inspired Crystal Necklace Tutorial
HAVE A QUESTION?
If you have any questions, feel free to get in touch with our friendly team who will be more than happy to give you advice over email or on the phone.
You can learn more and find inspiration by visiting our Jewellery Making Tutorials, Jewellery Making Kits and YouTube Channel. Don't forget to follow us on social media and tag us in your designs on Instagram & Facebook, we would love to see!

