A Guide To Texturing Metals For Jewellery Making
It's Time To Get Creative With Metals!
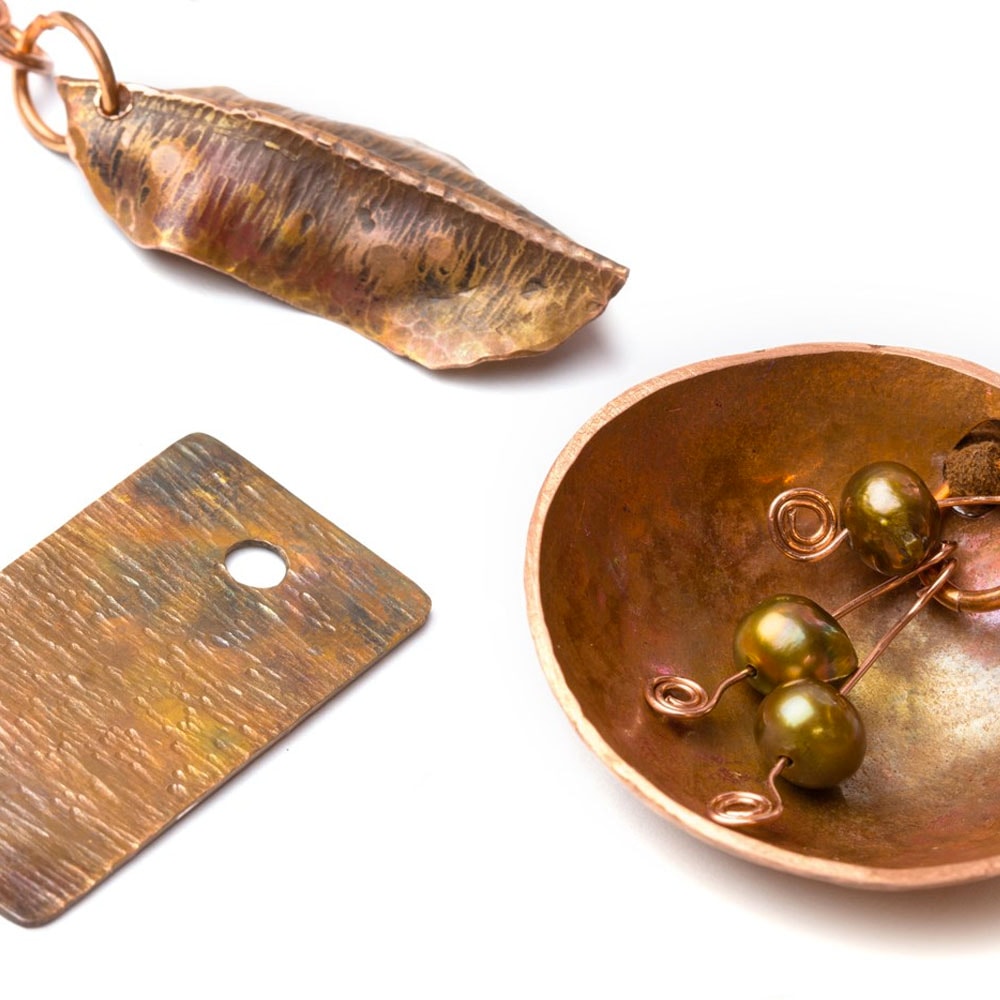
There are so many different effects that can be achieved with metals, whether that's adding a patina, texturing or shaping... the sky is the limit!
All textures and finishes can be created easily on a budget, so you don't have to spend a lot of money for amazing results!
There are so many metals and tools to work with and results to try, which often makes it daunting when starting out, so we've put together a few ideas in this post to help get you started and learn to navigate all the different colours, thicknesses, materials, and pre-textured metals like mokume gane and crinkle metal.
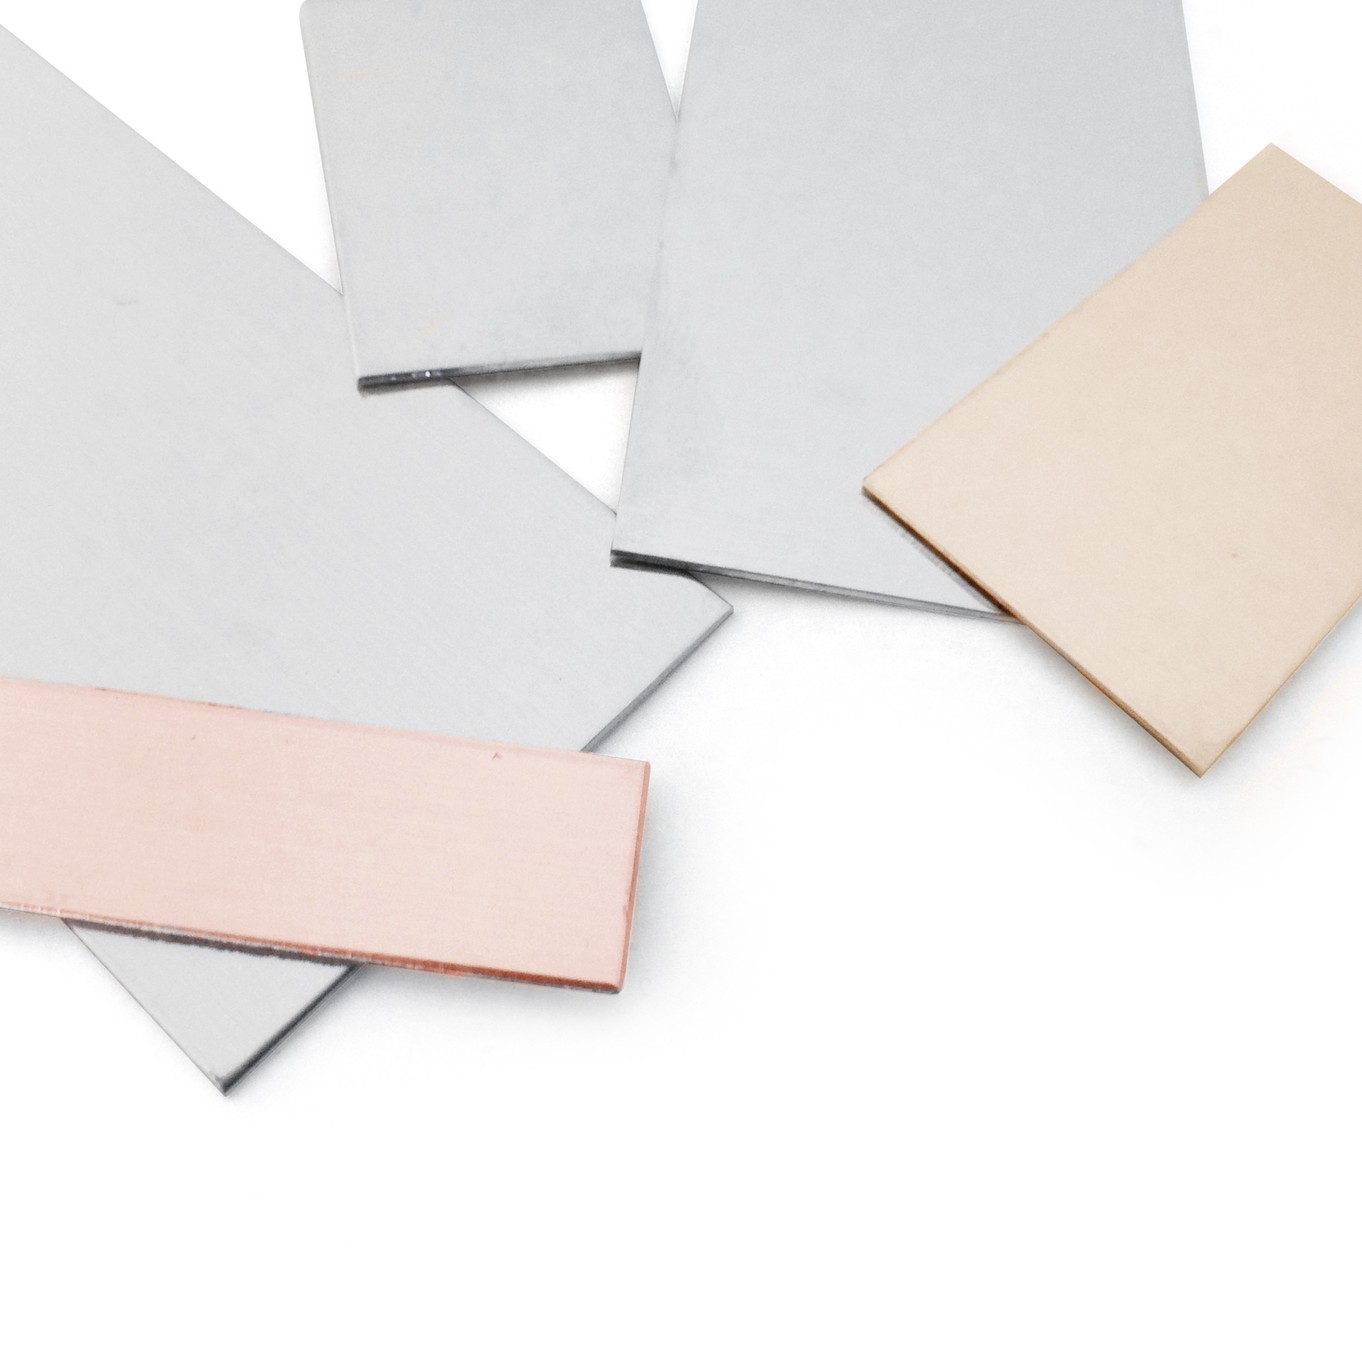
What metal should I use for jewellery texturing?
When starting out, we would recommend you use a metal such as copper. Being cheaper, copper can allow you to practice and gain experience with a relatively small budget. Once you have gained confidence and experience with copper, you can move on to more valuable metals such as bronze and silver.
All of our metals are available in various thicknesses, but we do recommend starting out with something thinner, as a thinner sheet metal is more flexible and easier to manipulate. Once you master your technique with a thinner sheet, you can then move onto thicker and more difficult materials. This will allow you to improve your skills before moving on to something challenging with confidence.
Every metal has unique properties and will react in different ways. This means that depending on the material you use, you can apply the same technique, and produce completely different finishes. For example, if you were to apply a heat treatment to copper, you'll produce completely different results than if you were to do the exact same thing with a sheet of brass.
Once you've experimented with different textures, tools, thicknesses, and materials, you're sure to find a finish you love that you'll want to use over and over again!
Why has my metal become too hard to work with?
Bending, shaping, texturing and cutting metal will cause it to harden as you work. This is completely normal, so don't worry if your material becomes too difficult to control, you just need to employ a process known as annealing.
Annealing is the process of softening the metal, allowing it to be worked easily. To anneal your metal, you need to apply heat to the surface using a gas torch, until the whole thing glows a soft red. You must then quench the surface in cold water. You'll then find that the metal is once again soft, and easier to manipulate. You'll soon learn when you need to anneal your metal!
How should I cut and shape metal for jewellery?
There are various ways to cut and shape your metal. You can start with just the basic tools and add to your toolkit as your interest and skills progress. We have some great ideas for expansion in our 'Build A Toolkit' section of our website.
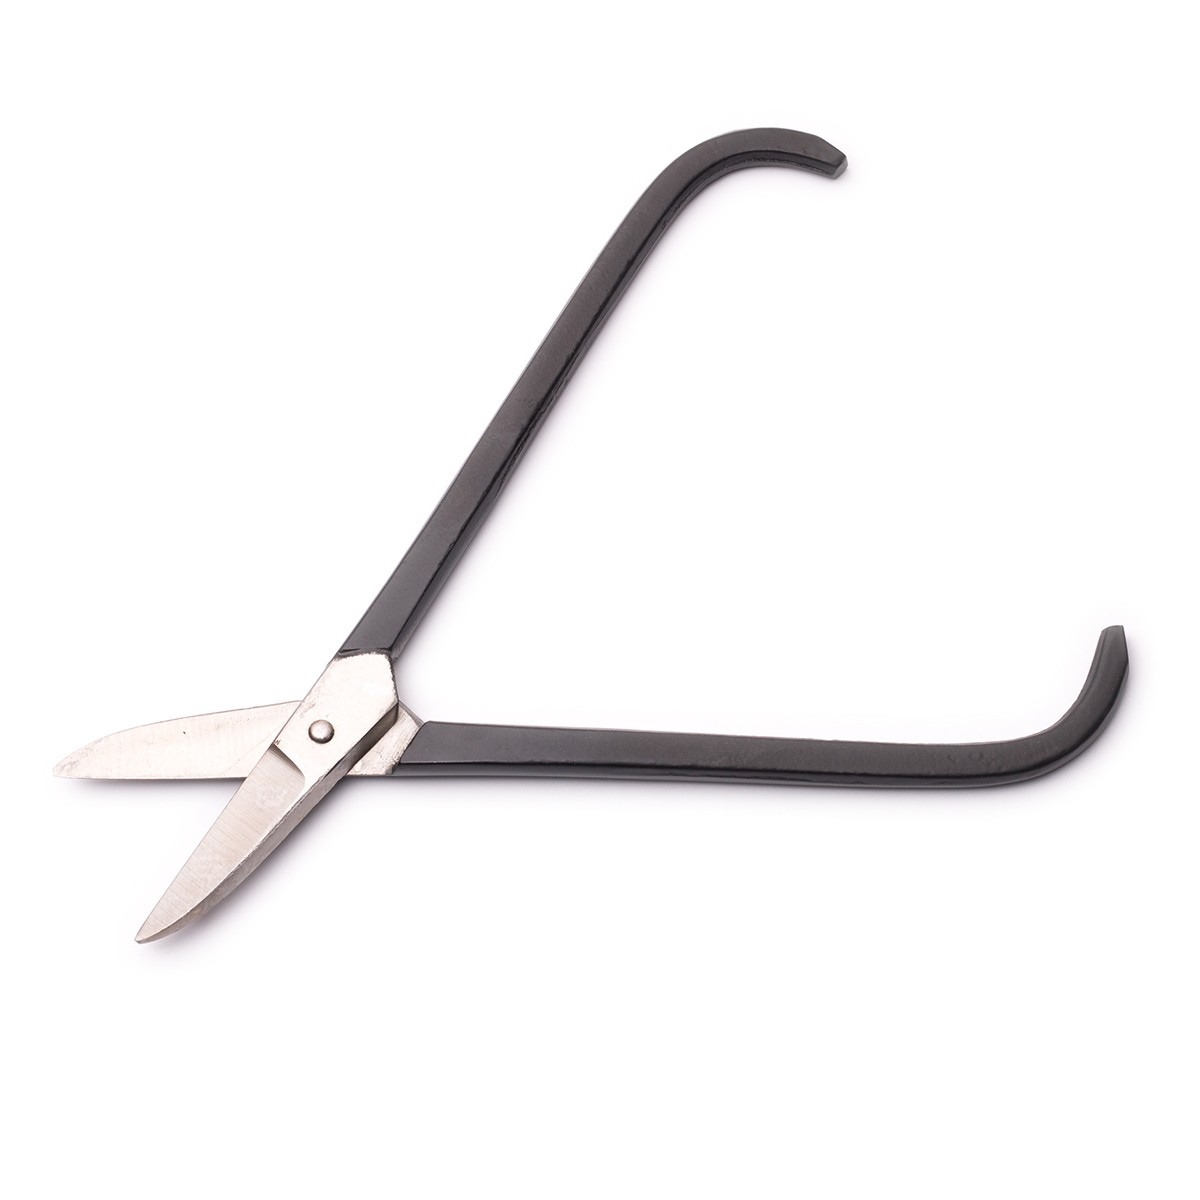
Metal Sheet & Wire Cutters
To start, you could employ a set of metal sheet & wire cutters. These are brilliant for cutting through anything up to 0.6mm thick, which is perfect for anyone starting out as you'll need to start thinner to practice.
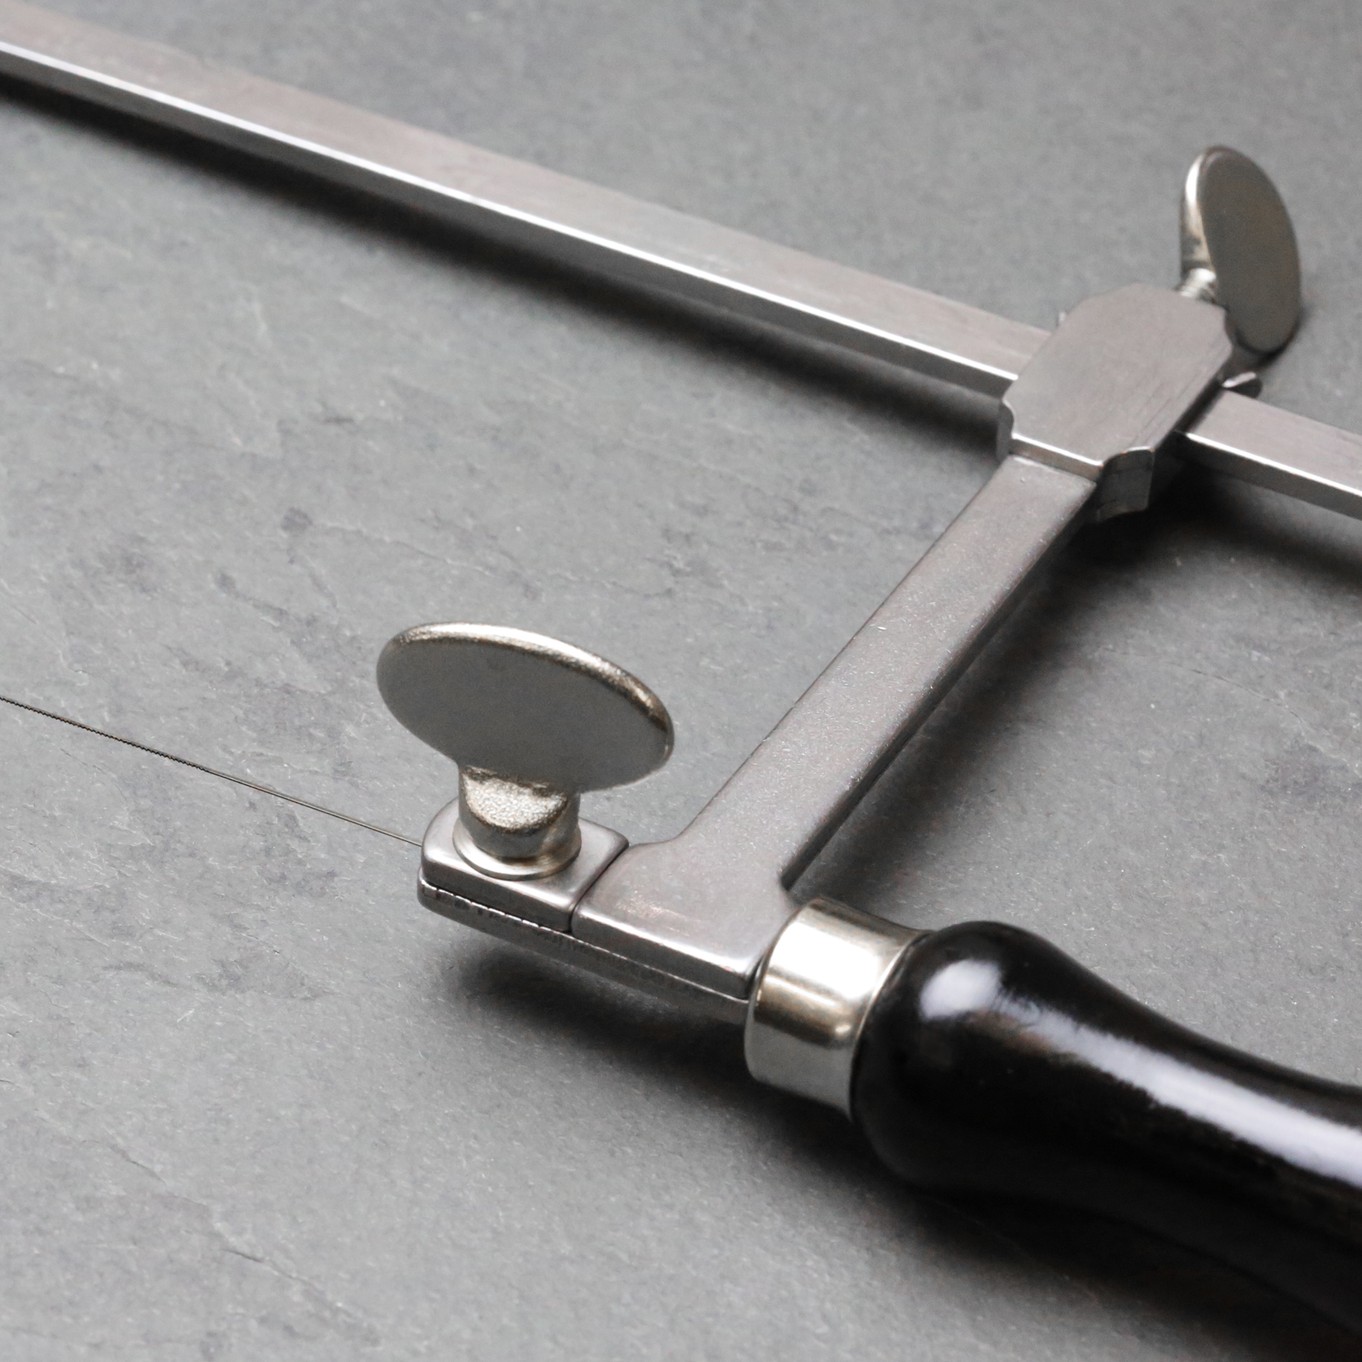
Saw Frame & Saw Blades
As you progress to thicker metals, you'll want to use a piercing saw (and blades) which can create some really intricate designs, as it's extremely thin and easily manoeuvred.

Dremel Multi Tool
If manually sawing your metal doesn't sound like fun, there's also the automatic option! A Dremel Multi Tool, fitted with its cutting blades, can saw through any metal with ease.
Disc Cutter Tool
To create perfectly sized discs of metal for your designs, you'll need the disc cutter tool. Simply insert your metal sheet under one of the punches, and tap with a hammer. It will punch out a perfect circular disc, at your chosen size.
What tools can I use to texture jewellery?
Adding a texture to your metal can give simple shapes a dramatic finish, and the texture applied will depend on the tools used. Take a look at some of our top tools below.
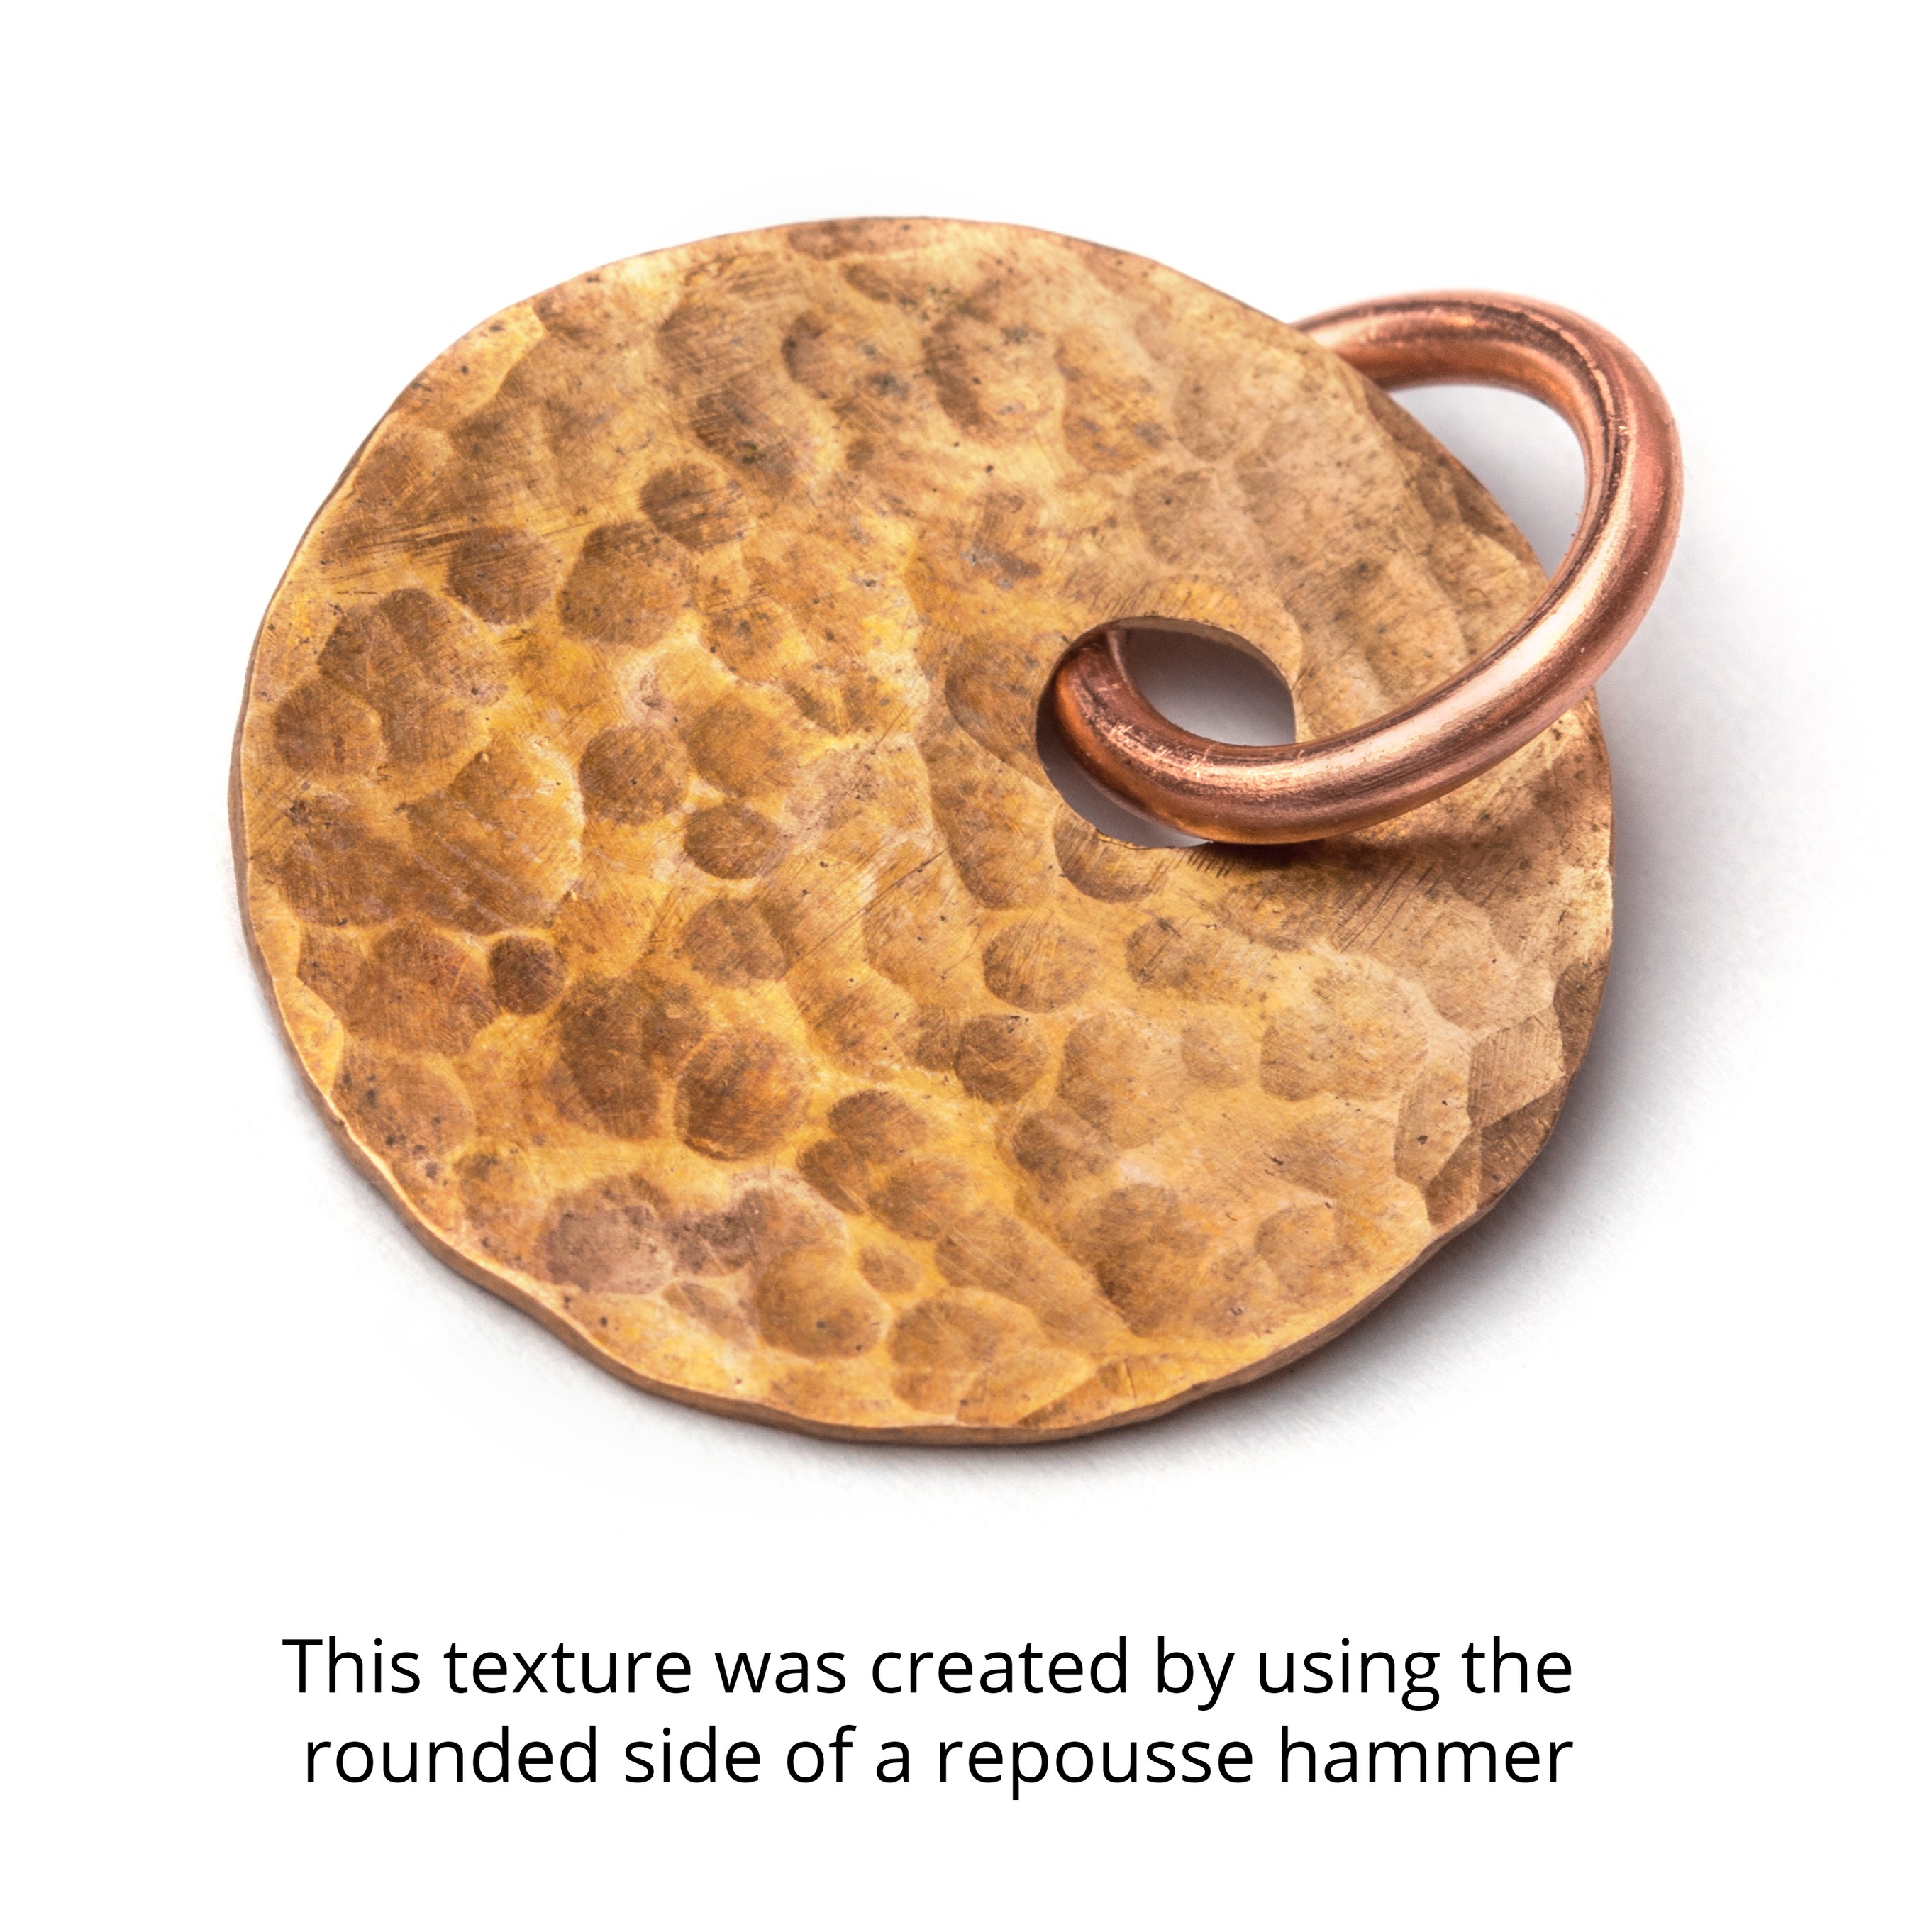
Repousse Hammer
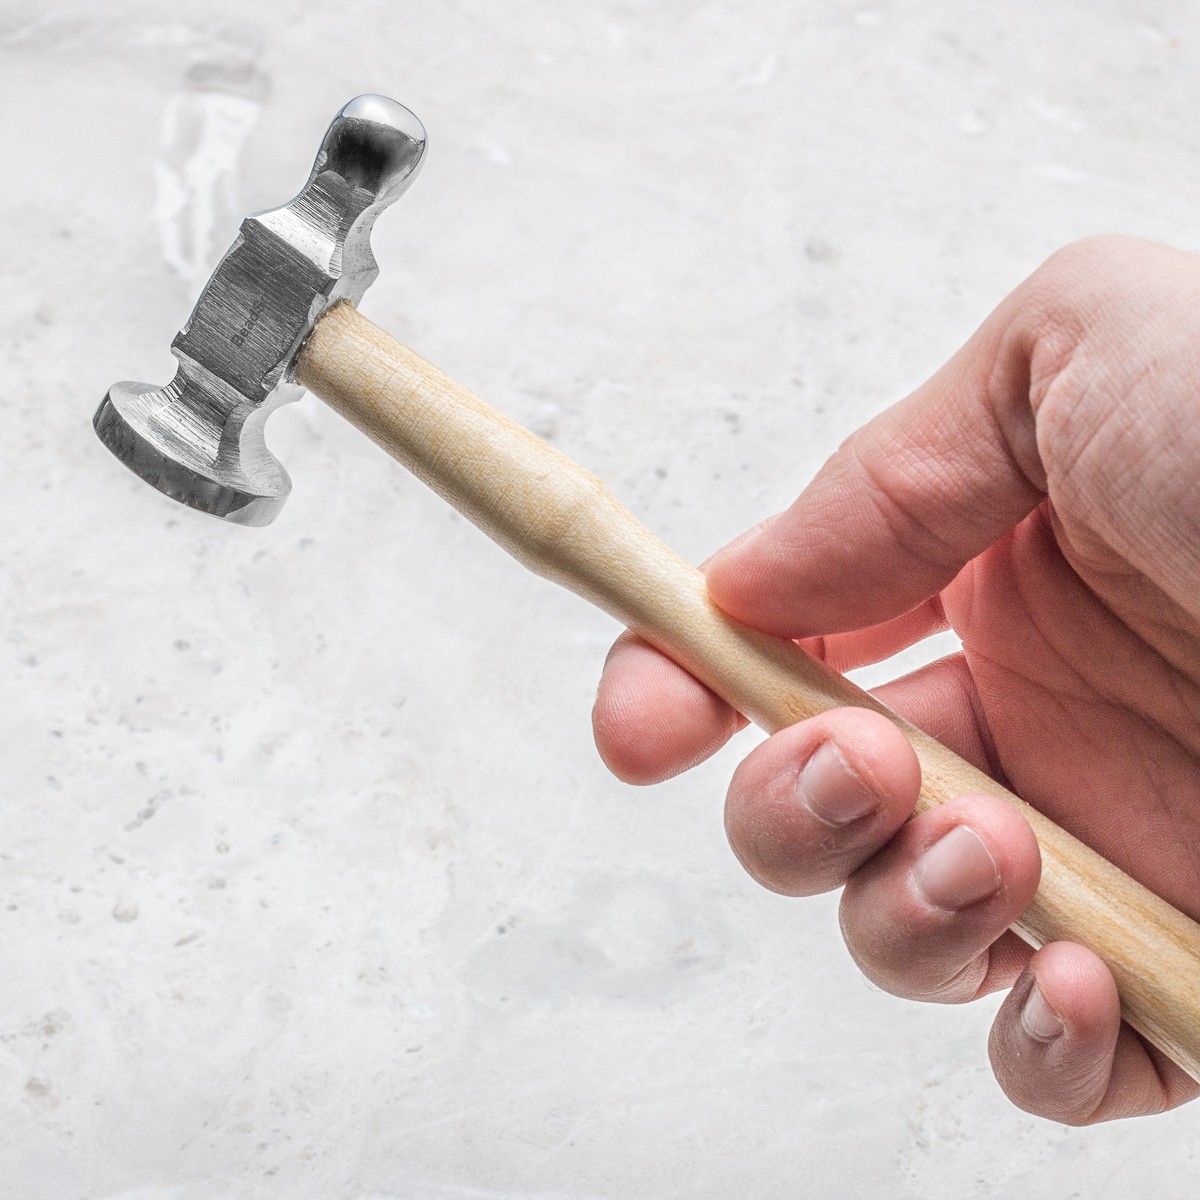
A repousse hammer (also known as a chasing hammer) has a flat side and a domed side - using the domed side of the hammer will produce an extremely popular dramatic hammered metal effect.
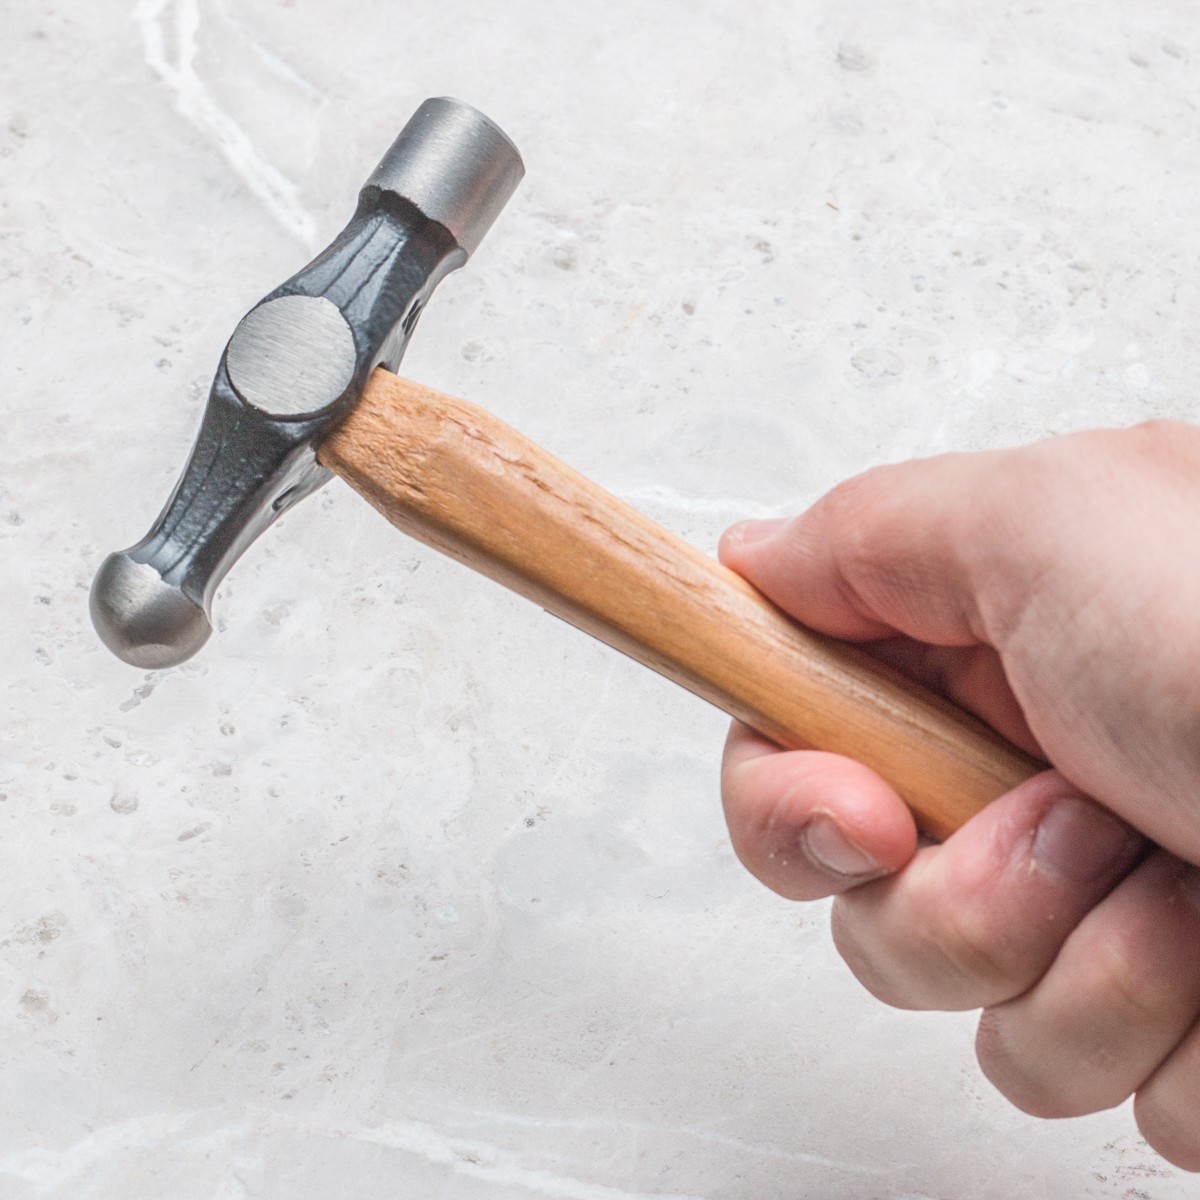
Ball Pein Hammer
The ball pein hammer is also a great tool for achieving a traditional hammered effect. It's also suitable for using with doming punches and the doming block to create curves and domes in metal. For a sturdy working environment, that won't be dented or damaged by your hammering, we recommend using a steel bench block as the perfect surface to place your metals when hammering.
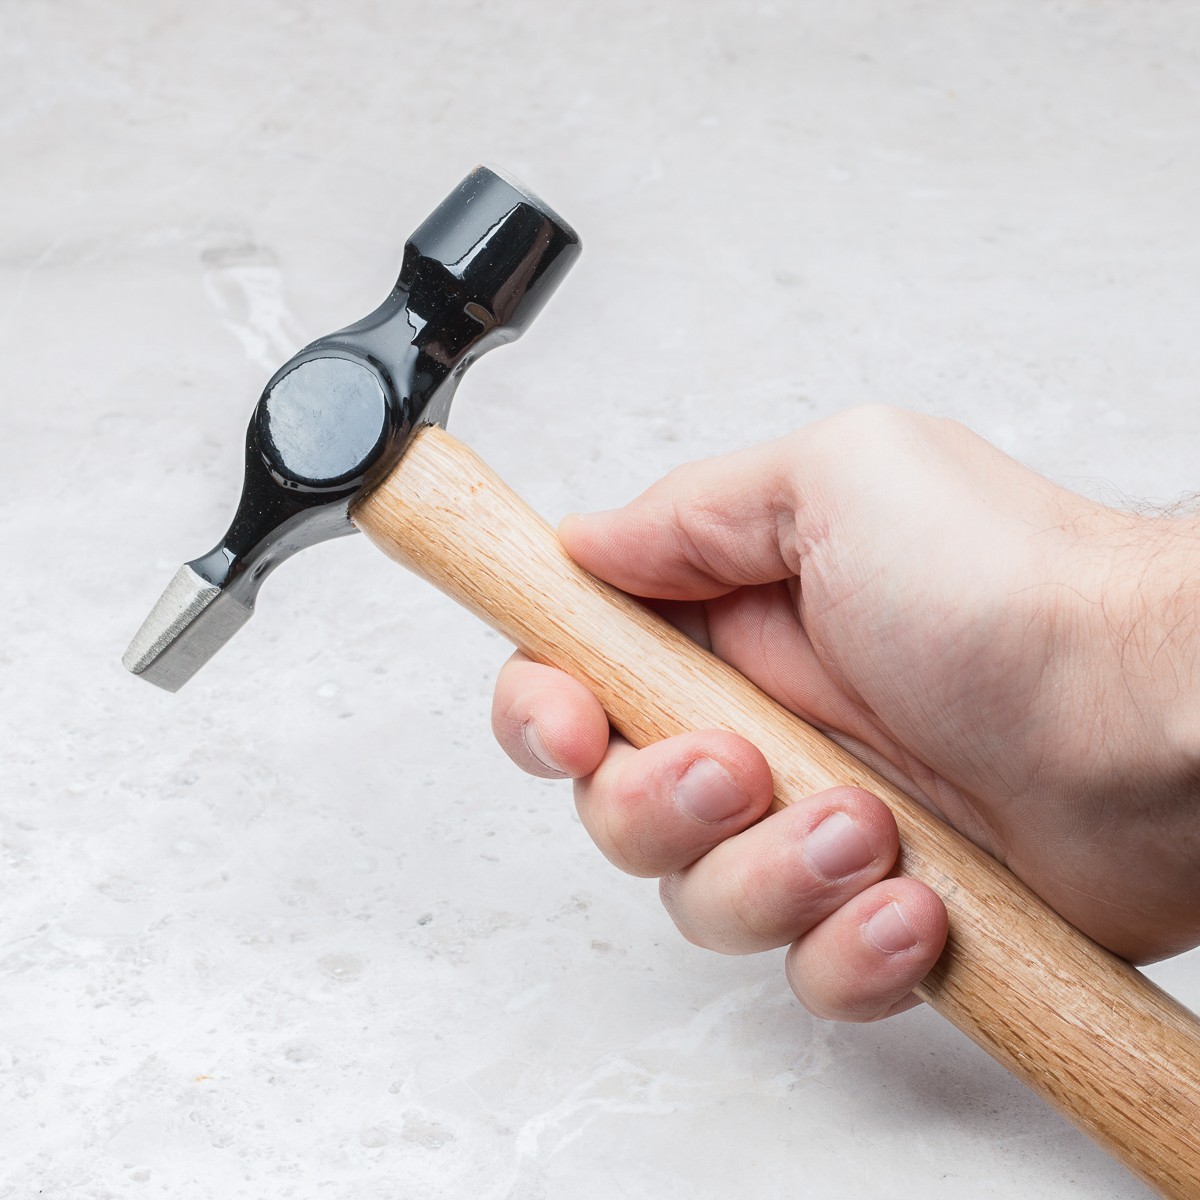
Cross Pein Hammer
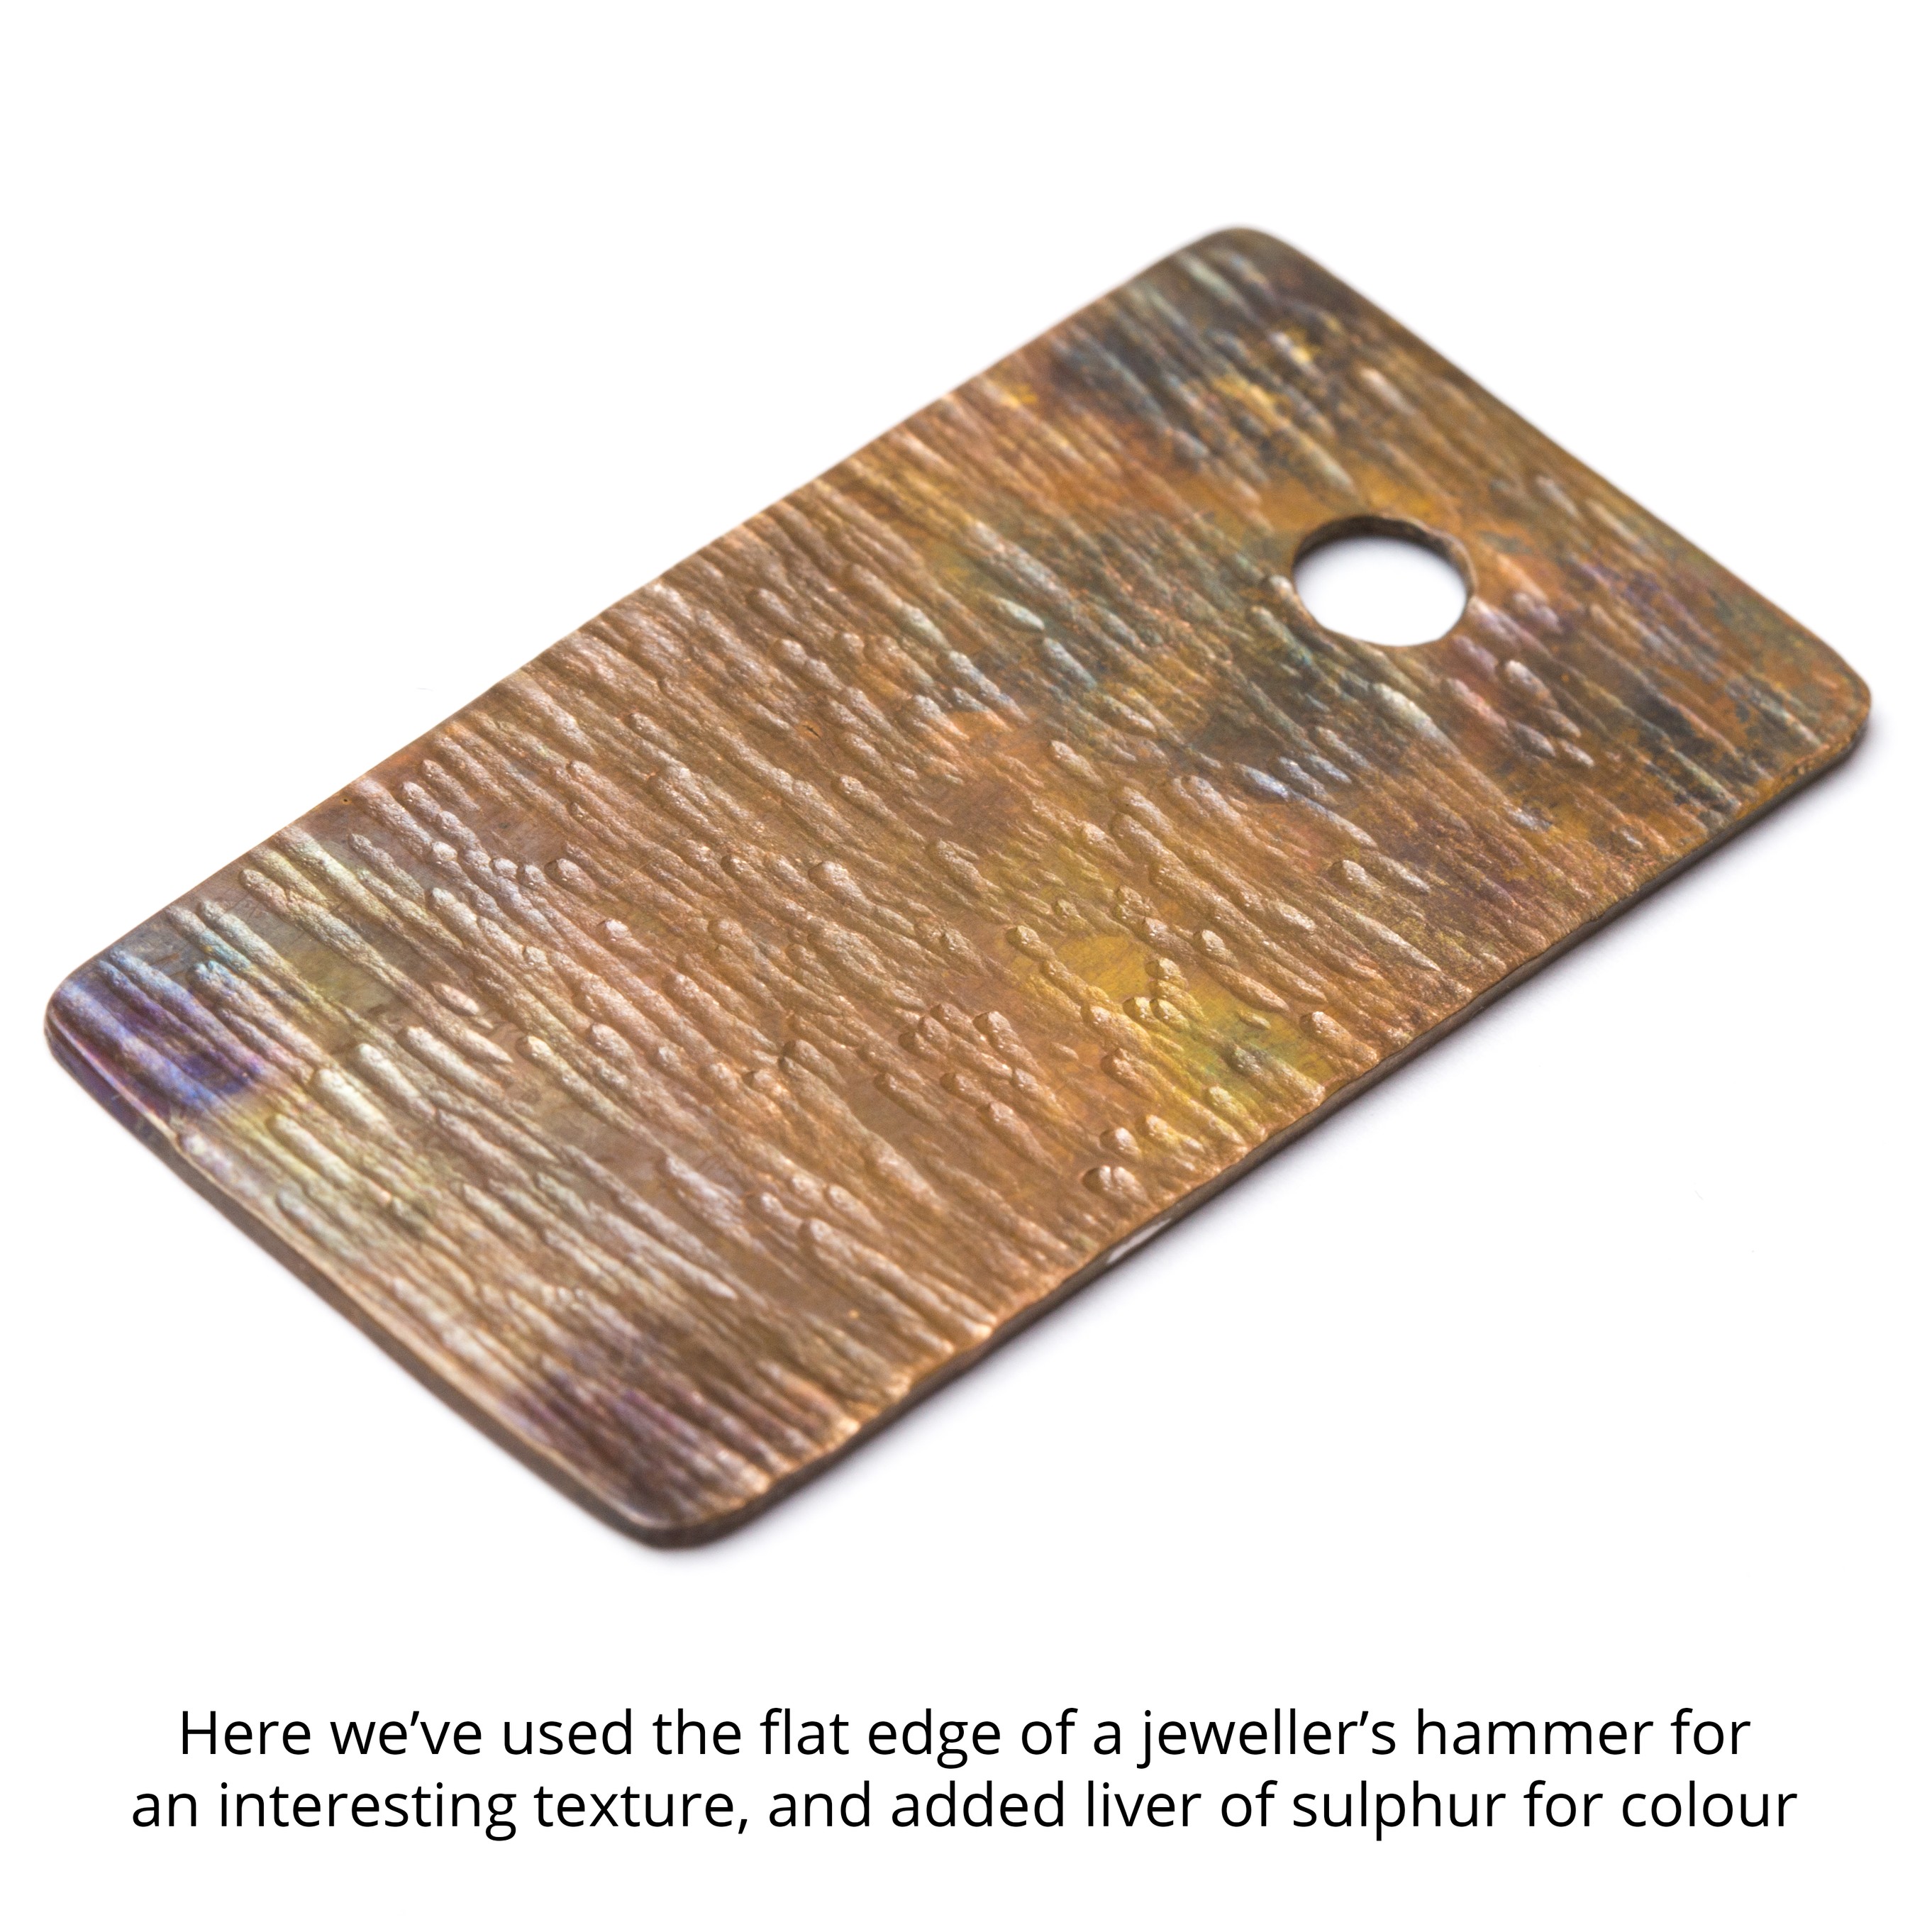
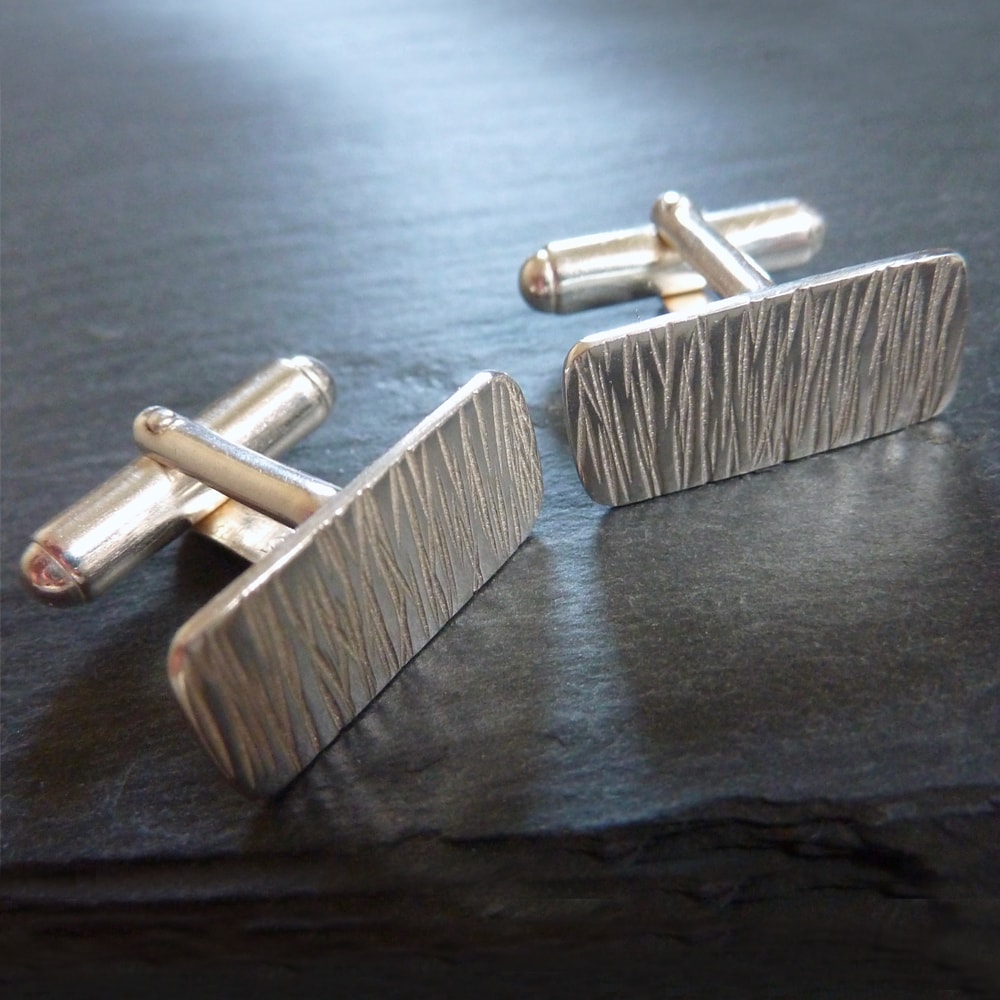
Using the chisel edge of a cross pein hammer will produce lines in your work. When used extensively, this hammering of lines will result in a bark-like effect on the surface of the metal. The jeweller's hammer is much a lighter design and can be used in the same technique. As the hammer weighs less, it will give a more subtle result.
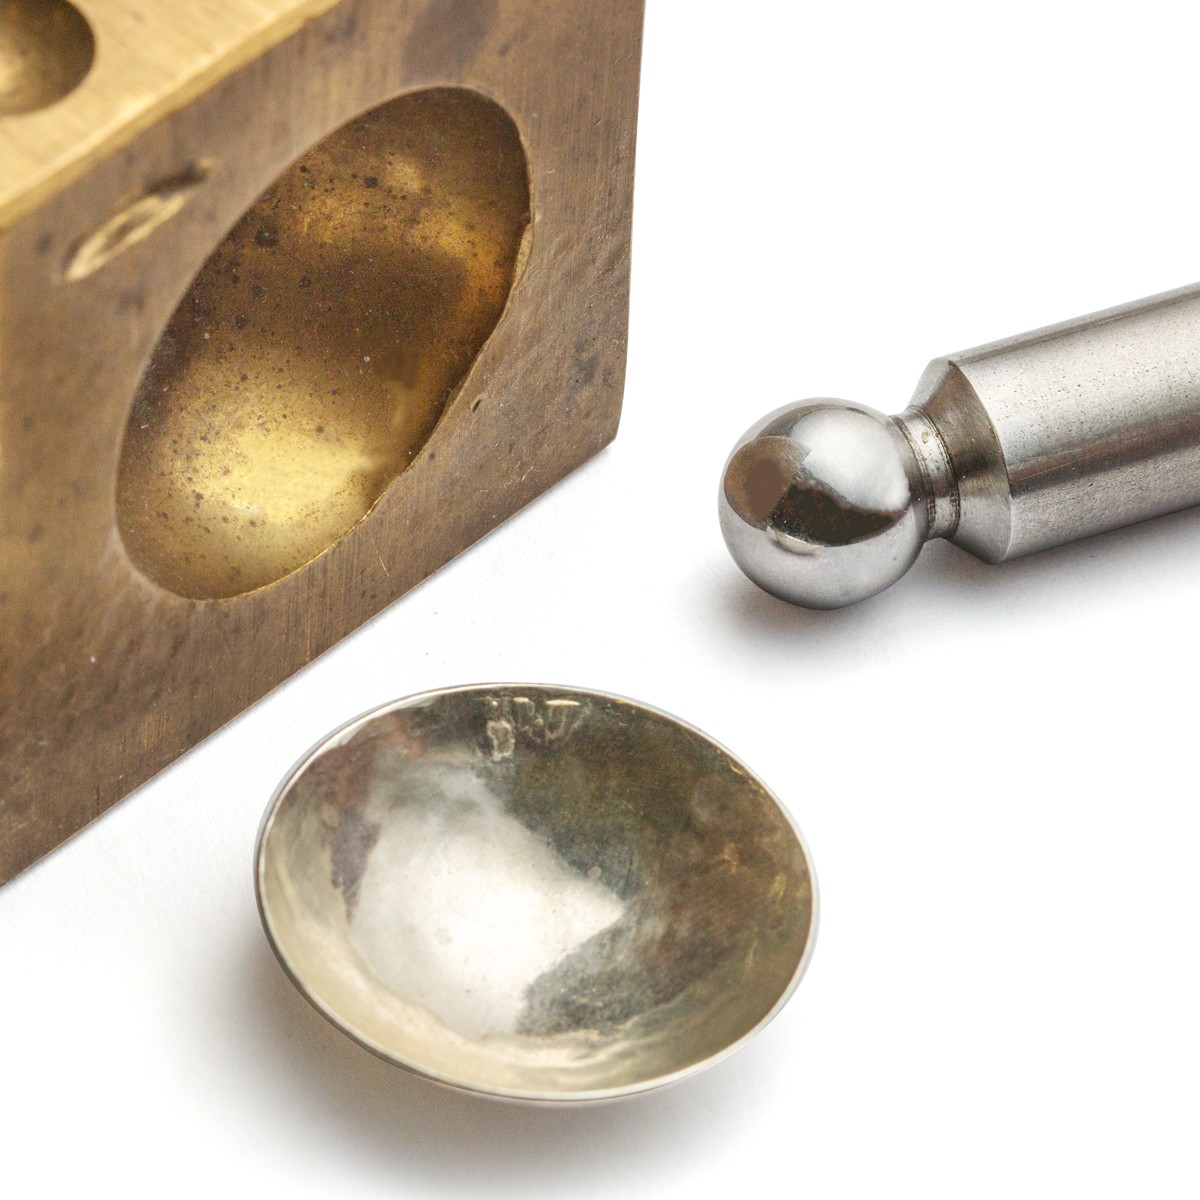
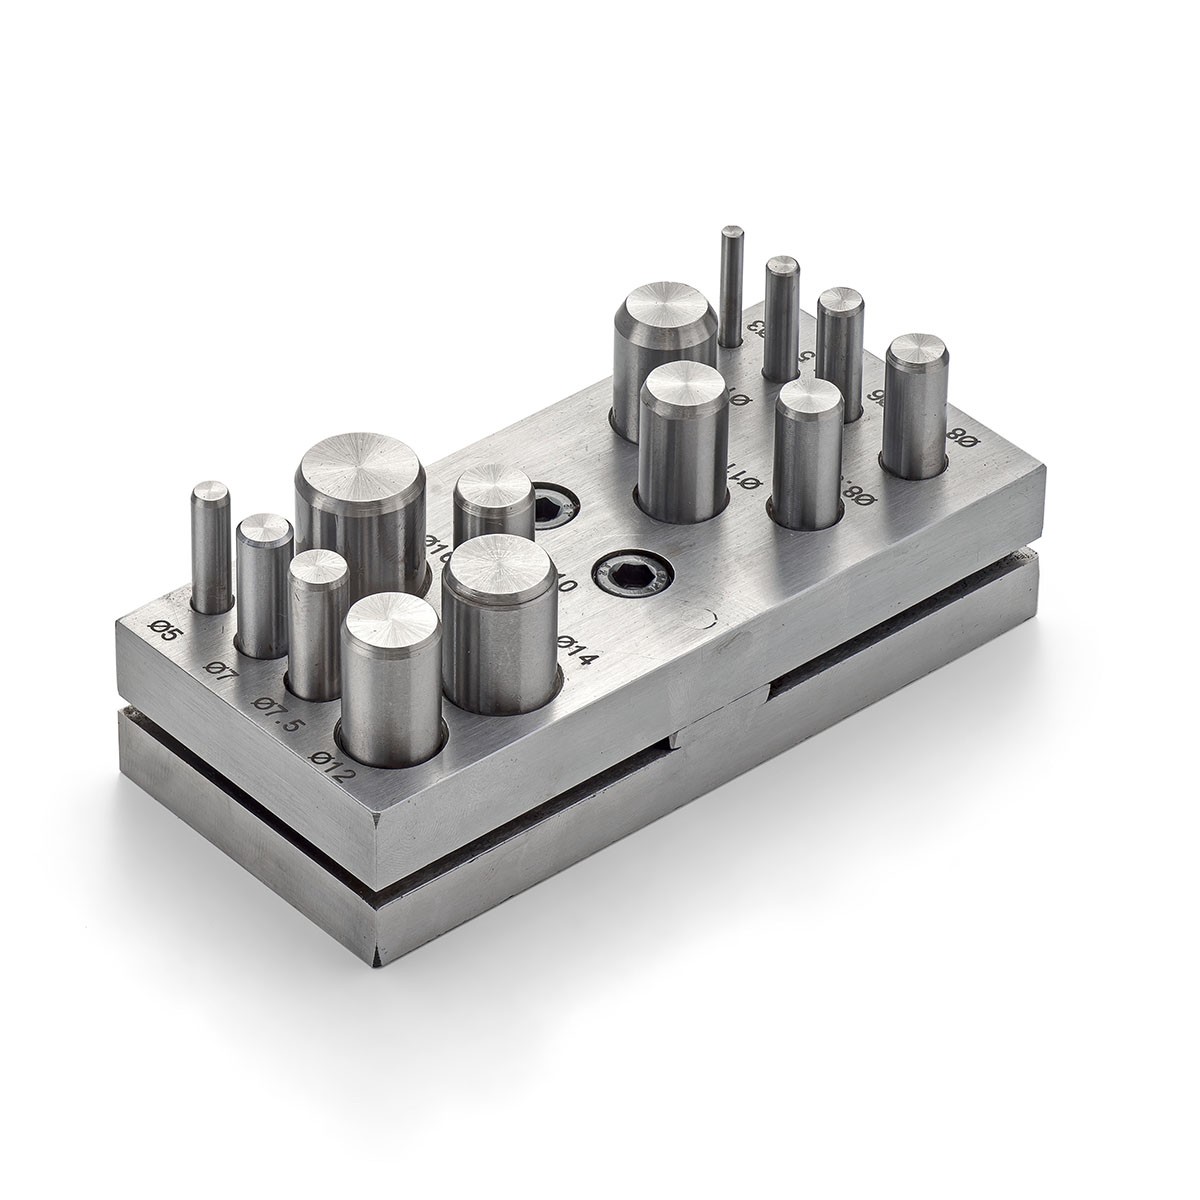
Doming Block & Punches
If you're looking to create dips and rises in your designs, consider using doming punches. If these are used on different surfaces, it will produce distinct effects. For example, using a doming punch to texture your metal against a bench block will create an even depth hammered effect, but hammering against a rolled up piece of leather will create a deeper and more uneven texture. Experimenting will produce new creative ideas and unique styles. To create clean spherical shapes in your piece, you can use the punches in combination with the doming block.
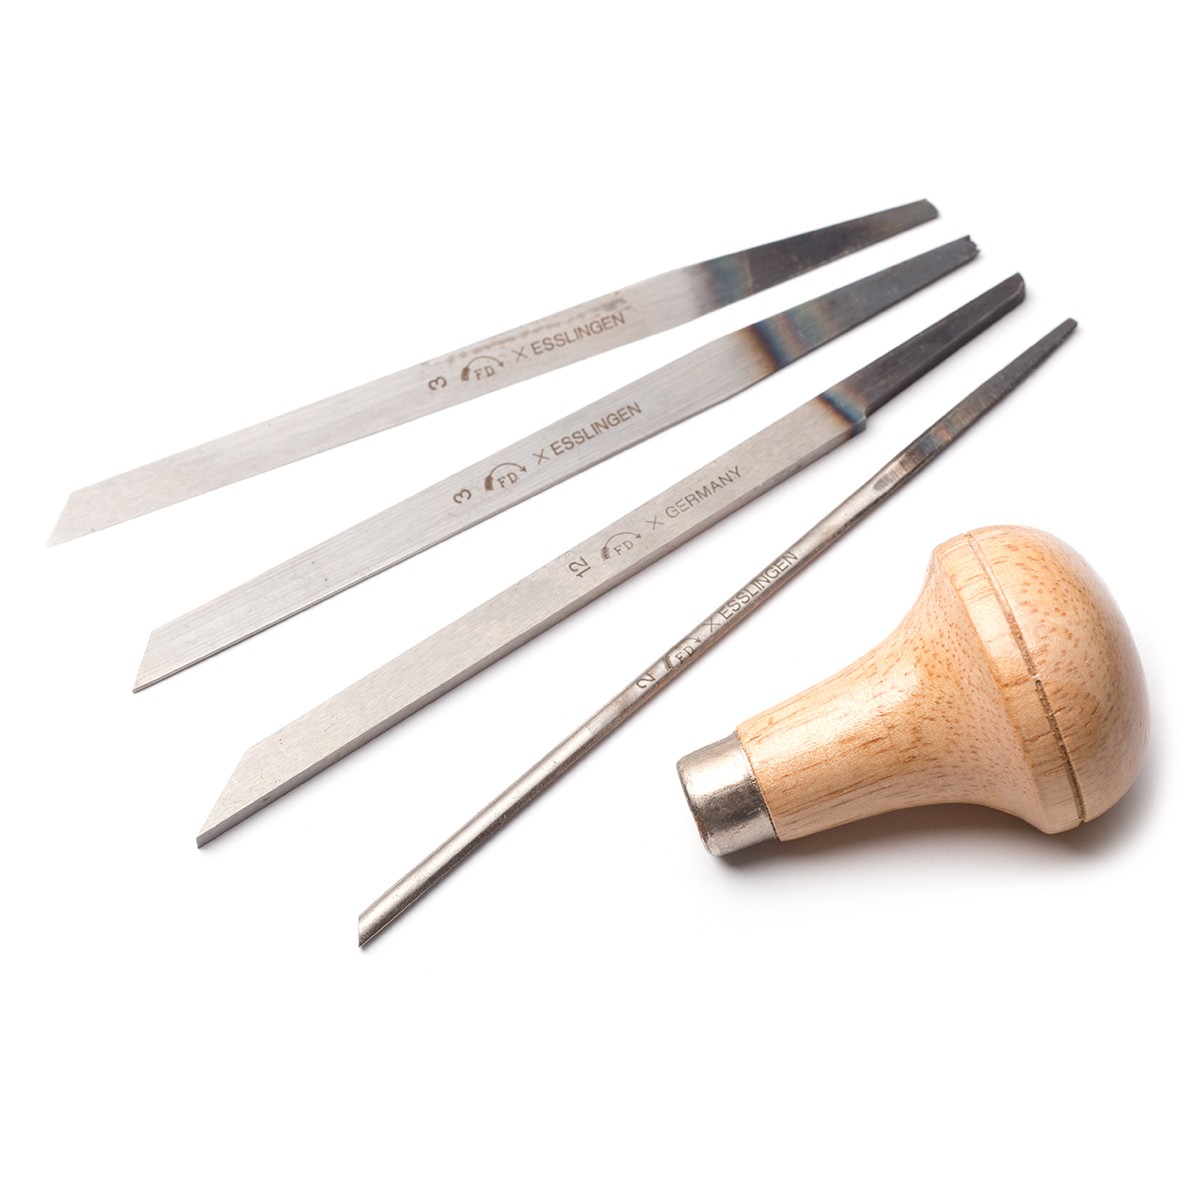
To engrave your own designs into metal, you'll want to use some gravers. When attached to the wooden graver handle, you can gently hammer these against your metal to create marks, engravings, lines, and textures. These marks will then look even more distinct if you choose to apply a patina to your metal. You can read more about achieving a patina below.
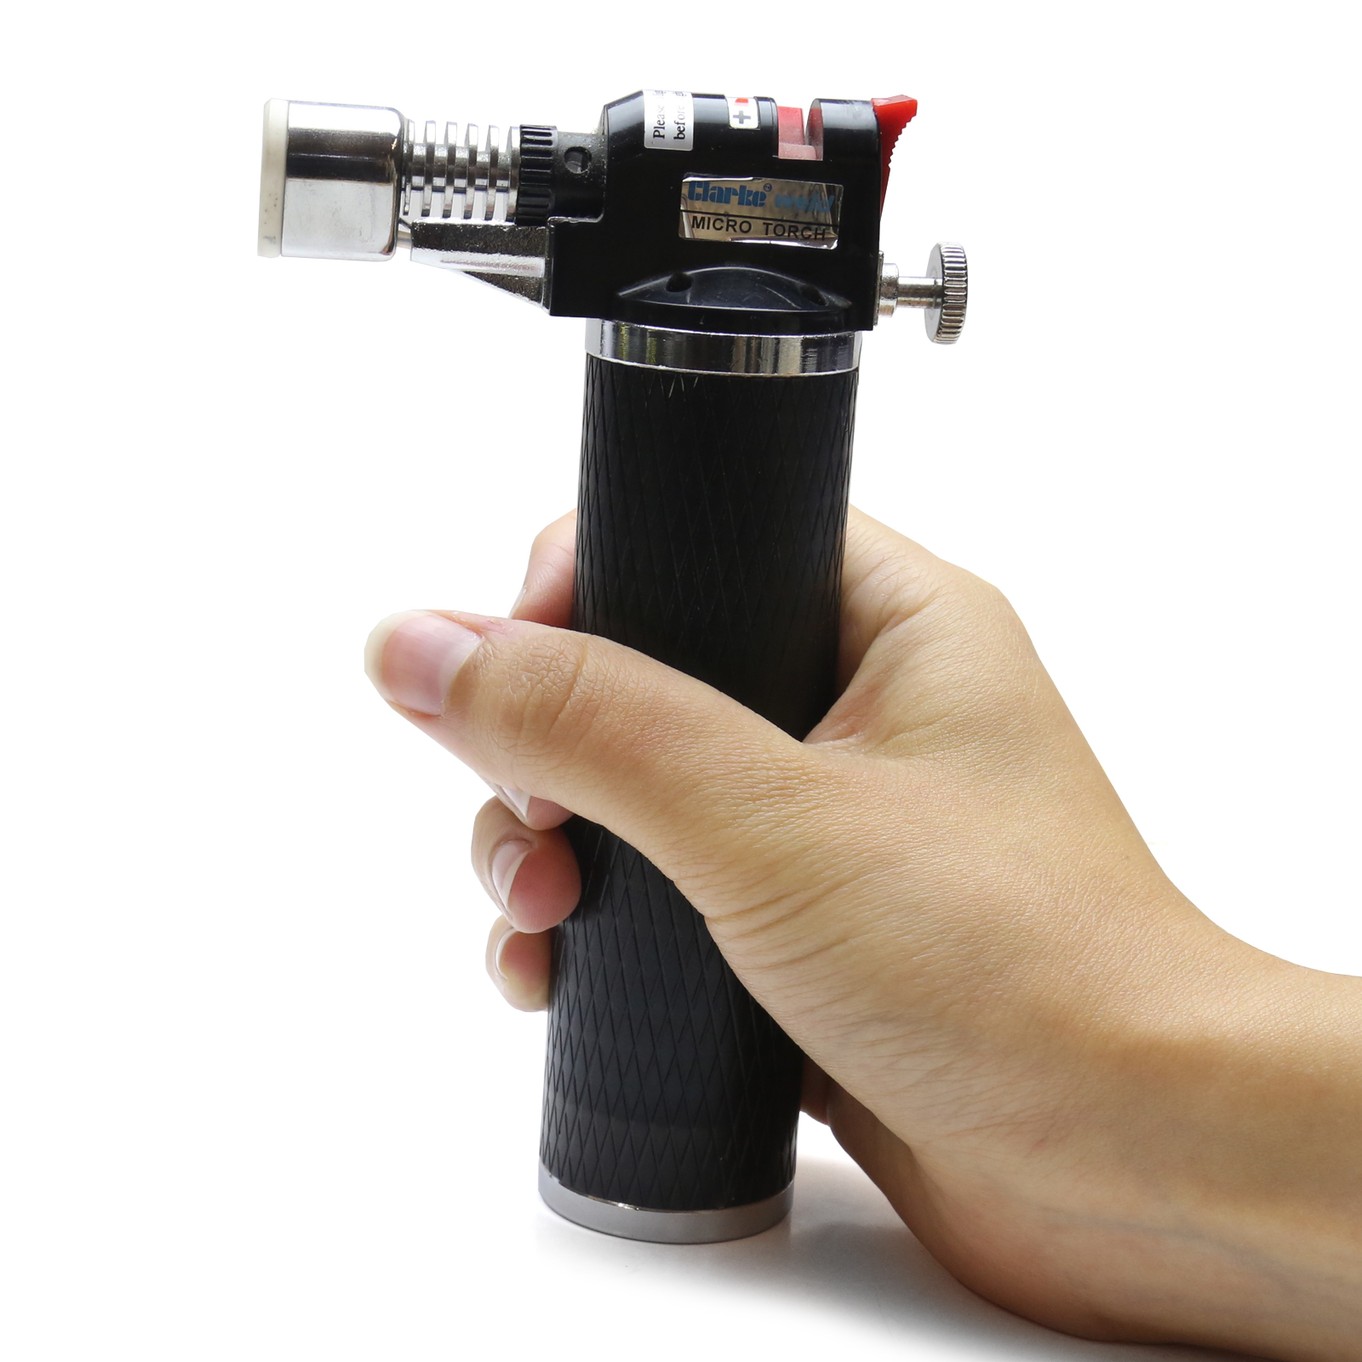
Heat treating your metal
The great and simple technique is heat treating. It's as simple as using your gas torch to apply heat to the surface of the metal you're working with, and you'll see a different effect depending on what metal you're using and how much heat you apply to it.
Every metal will have a unique reaction to heating, and produce different colours as a result. For example, we've found our gilding metal will become a beautiful golden amber colour when heated, and copper will give fantastic autumn sunset hues, producing oranges, reds, and even purples. The depth and shade of this colour can be controlled by varying the heat. Move your torch closer or further away from the surface, and feather the flame, to achieve very different colour variations than if you were to hold the flame in one place.
As soon as you see the colour you want, immediately douse the metal with a thick wet cloth, to cool the heating process, and stop the colour change.
Get creative with heat colouring by texturing the metal first. By hammering the metal before heating, you'll produce a new mottled colour pattern that aligns with your hammer marks, completely different to the uniform colour you'll see on a flat surface.
You can also use the Glass Fibre Scratch Brush to create etched pattern textures on the surface of your metal before heating. The angles of the scratches will catch the light in different ways, and produce an almost hologram styled coloration!
And last but certainly not least - possibly the best thing about colouring your metal with heat is that it can polish off if you're not happy with the result, meaning you can practice until it's perfect!
How do I create a patina on my jewellery?
Creating patinas is an exciting way to add colour to your design! Let's explore some of the options available to use when we're looking to add some extra personality to our metalwork designs.
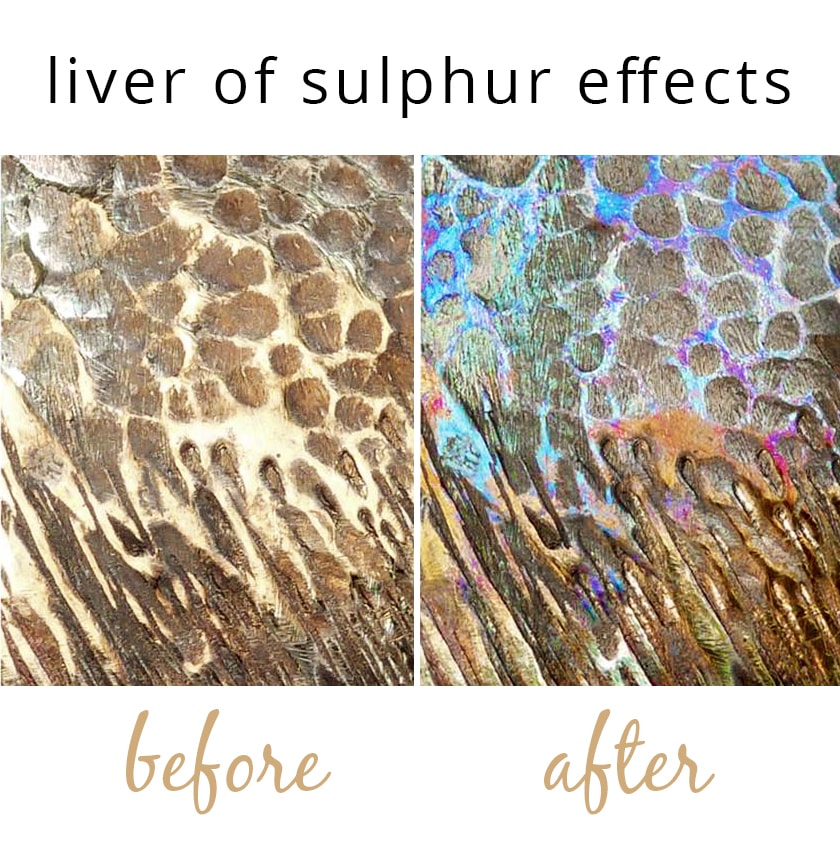
Using liver of sulphur to create a patina on your jewellery
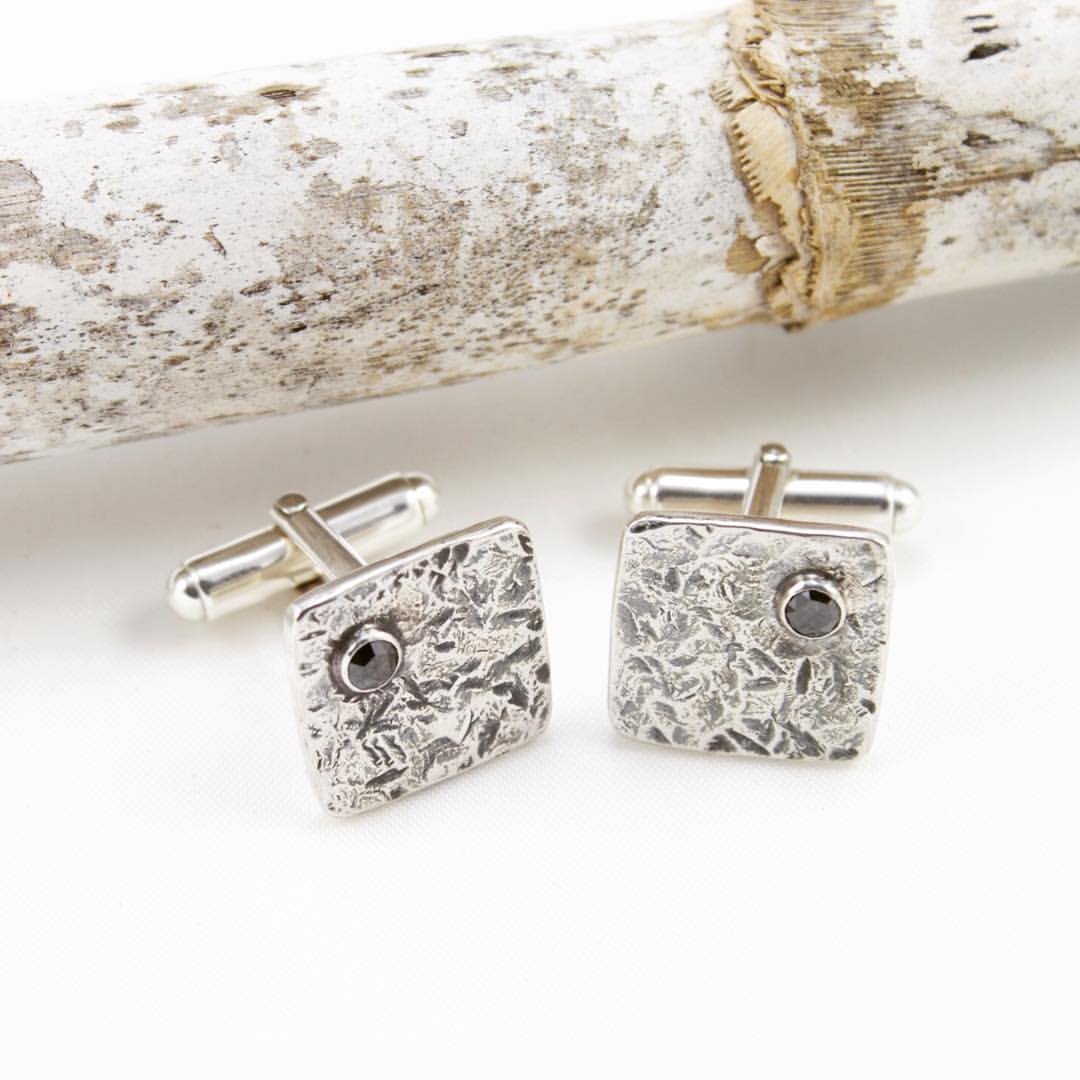
Using chemicals like liver of sulphur (LOS) you can create some fantastic colours and effects. Again these effects change depending on what metal you have used as well as what dilution of LOS you have used, the heat of the solution, and if you have used heat treatment on the metal beforehand. There are so many variables, it presents endless results!
Using a very strong solution of LOS can create a black patina which looks great when applied to metal that you've textured or engraved. You can then polish the surface, whilst leaving the patina to remain in the recesses, creating a dramatic contrast in your design. You can even mask off the areas you don't want the LOS to affect.
To create an even more colourful look, you can heat the metal using a jewellers torch and then apply a layer of liver of sulphur afterwards.
Watch Our Video On How To Use Liver Of Sulphur Below
What are pre-treated textured metals?
We have metals which have been pre-treated to give them a pattern or finish, such as mokume gane and crinkle metal sheet.
Texturing Examples

We spoke to jeweller Caroline Jones who incorporates beautiful textures into many of her designs, a number of which are made for men. Caroline gives us a great insight into how she creates her amazing designs and what tools she likes to use.
"These were textured by striking the metal directly with my favourite old battered jobbing hammer. The dings in the hammer head are transferred to the metal giving it a random aged look".

"This ring was textured using an old blunt chisel-like tool and then struck with a jobbing hammer/ball pein hammer. The lines are random and overlapping to give the effect of natural tree bark"
"These cufflinks were textured in the same way as the previous ring. I used the old bunt chisel-like tool and struck this with a jobbing hammer. Again, the lines are random and overlapping to create the effect of natural bark".
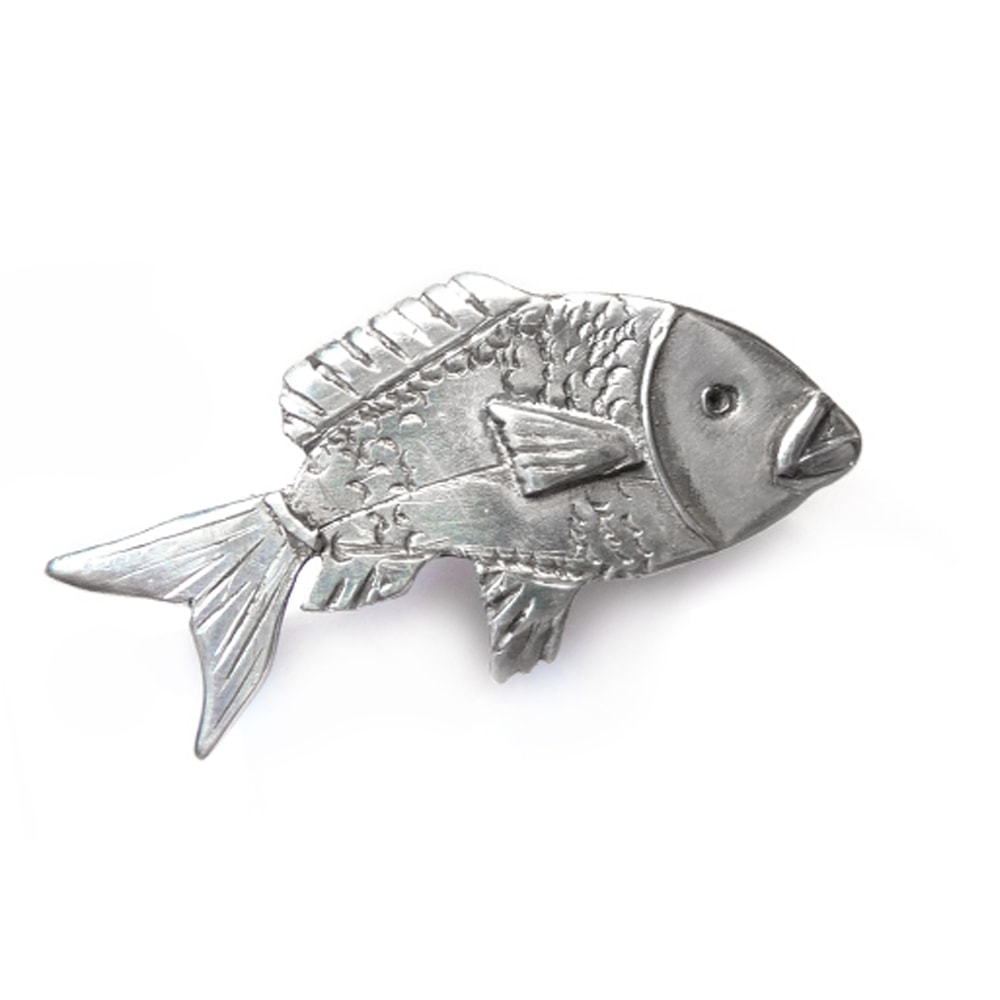
This sterling silver fish brooch featured in this blog was created by our managing director Hannah.
Metal finishing books for further reading
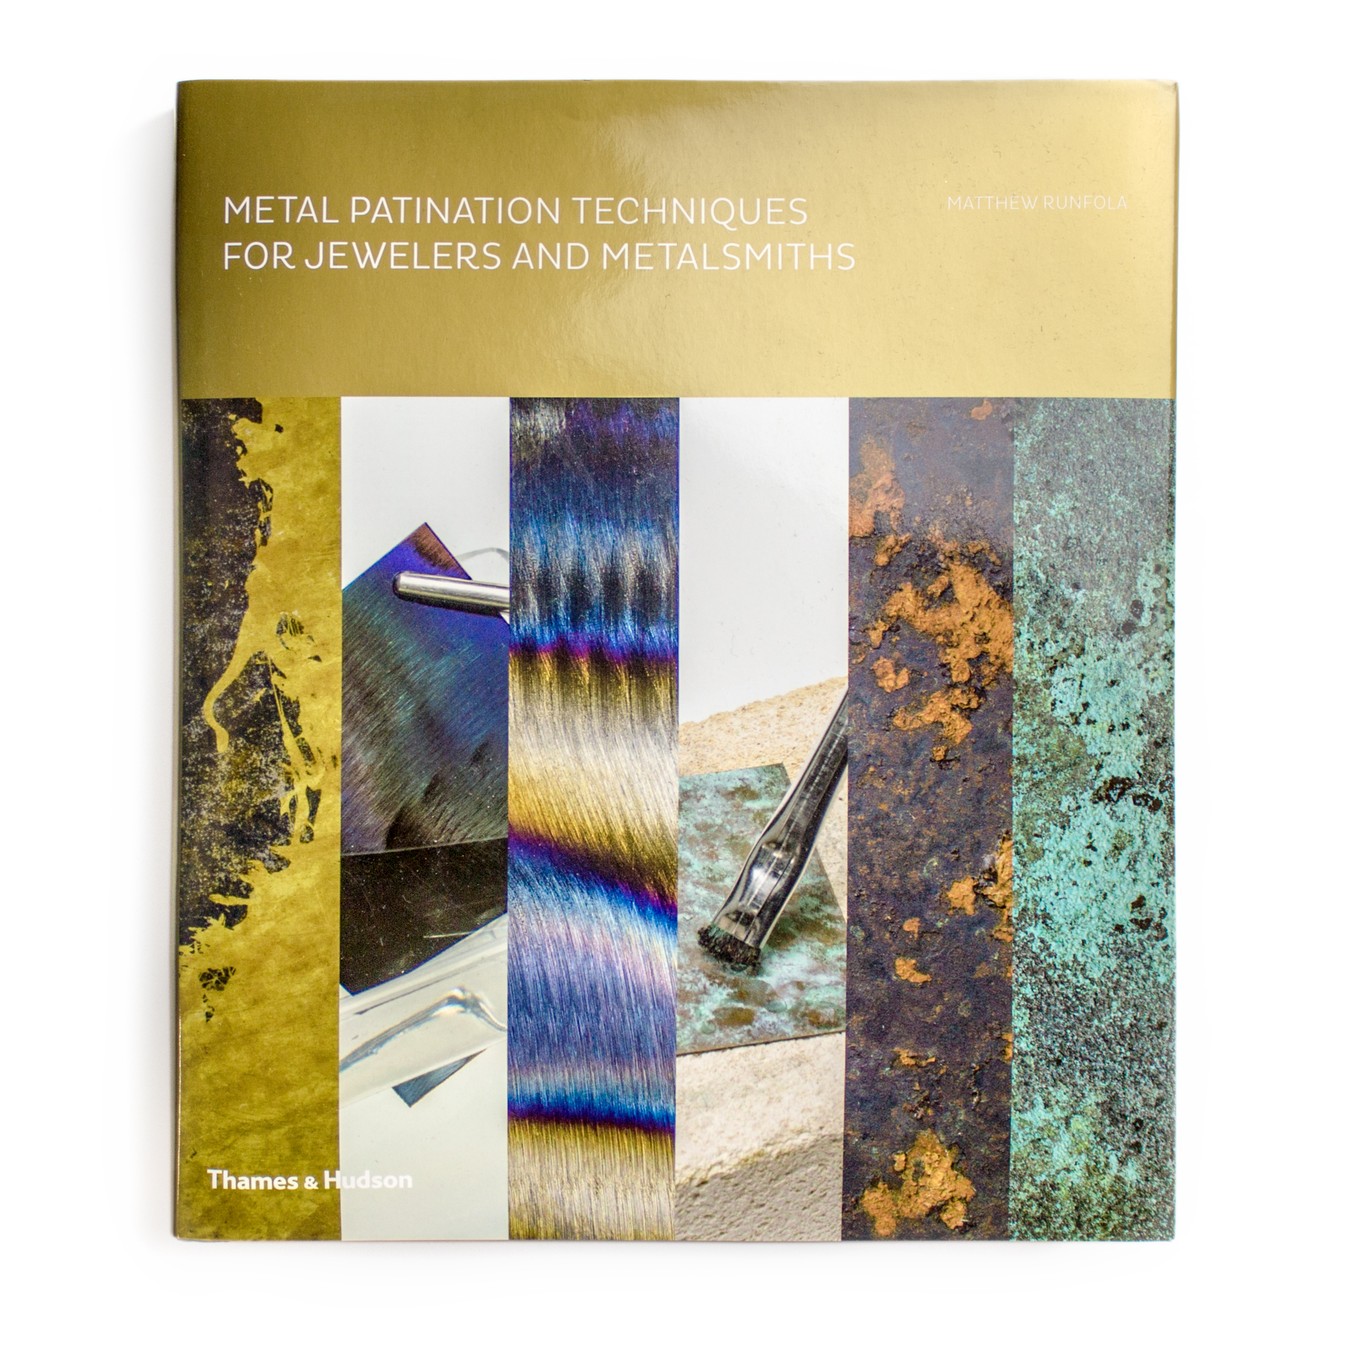
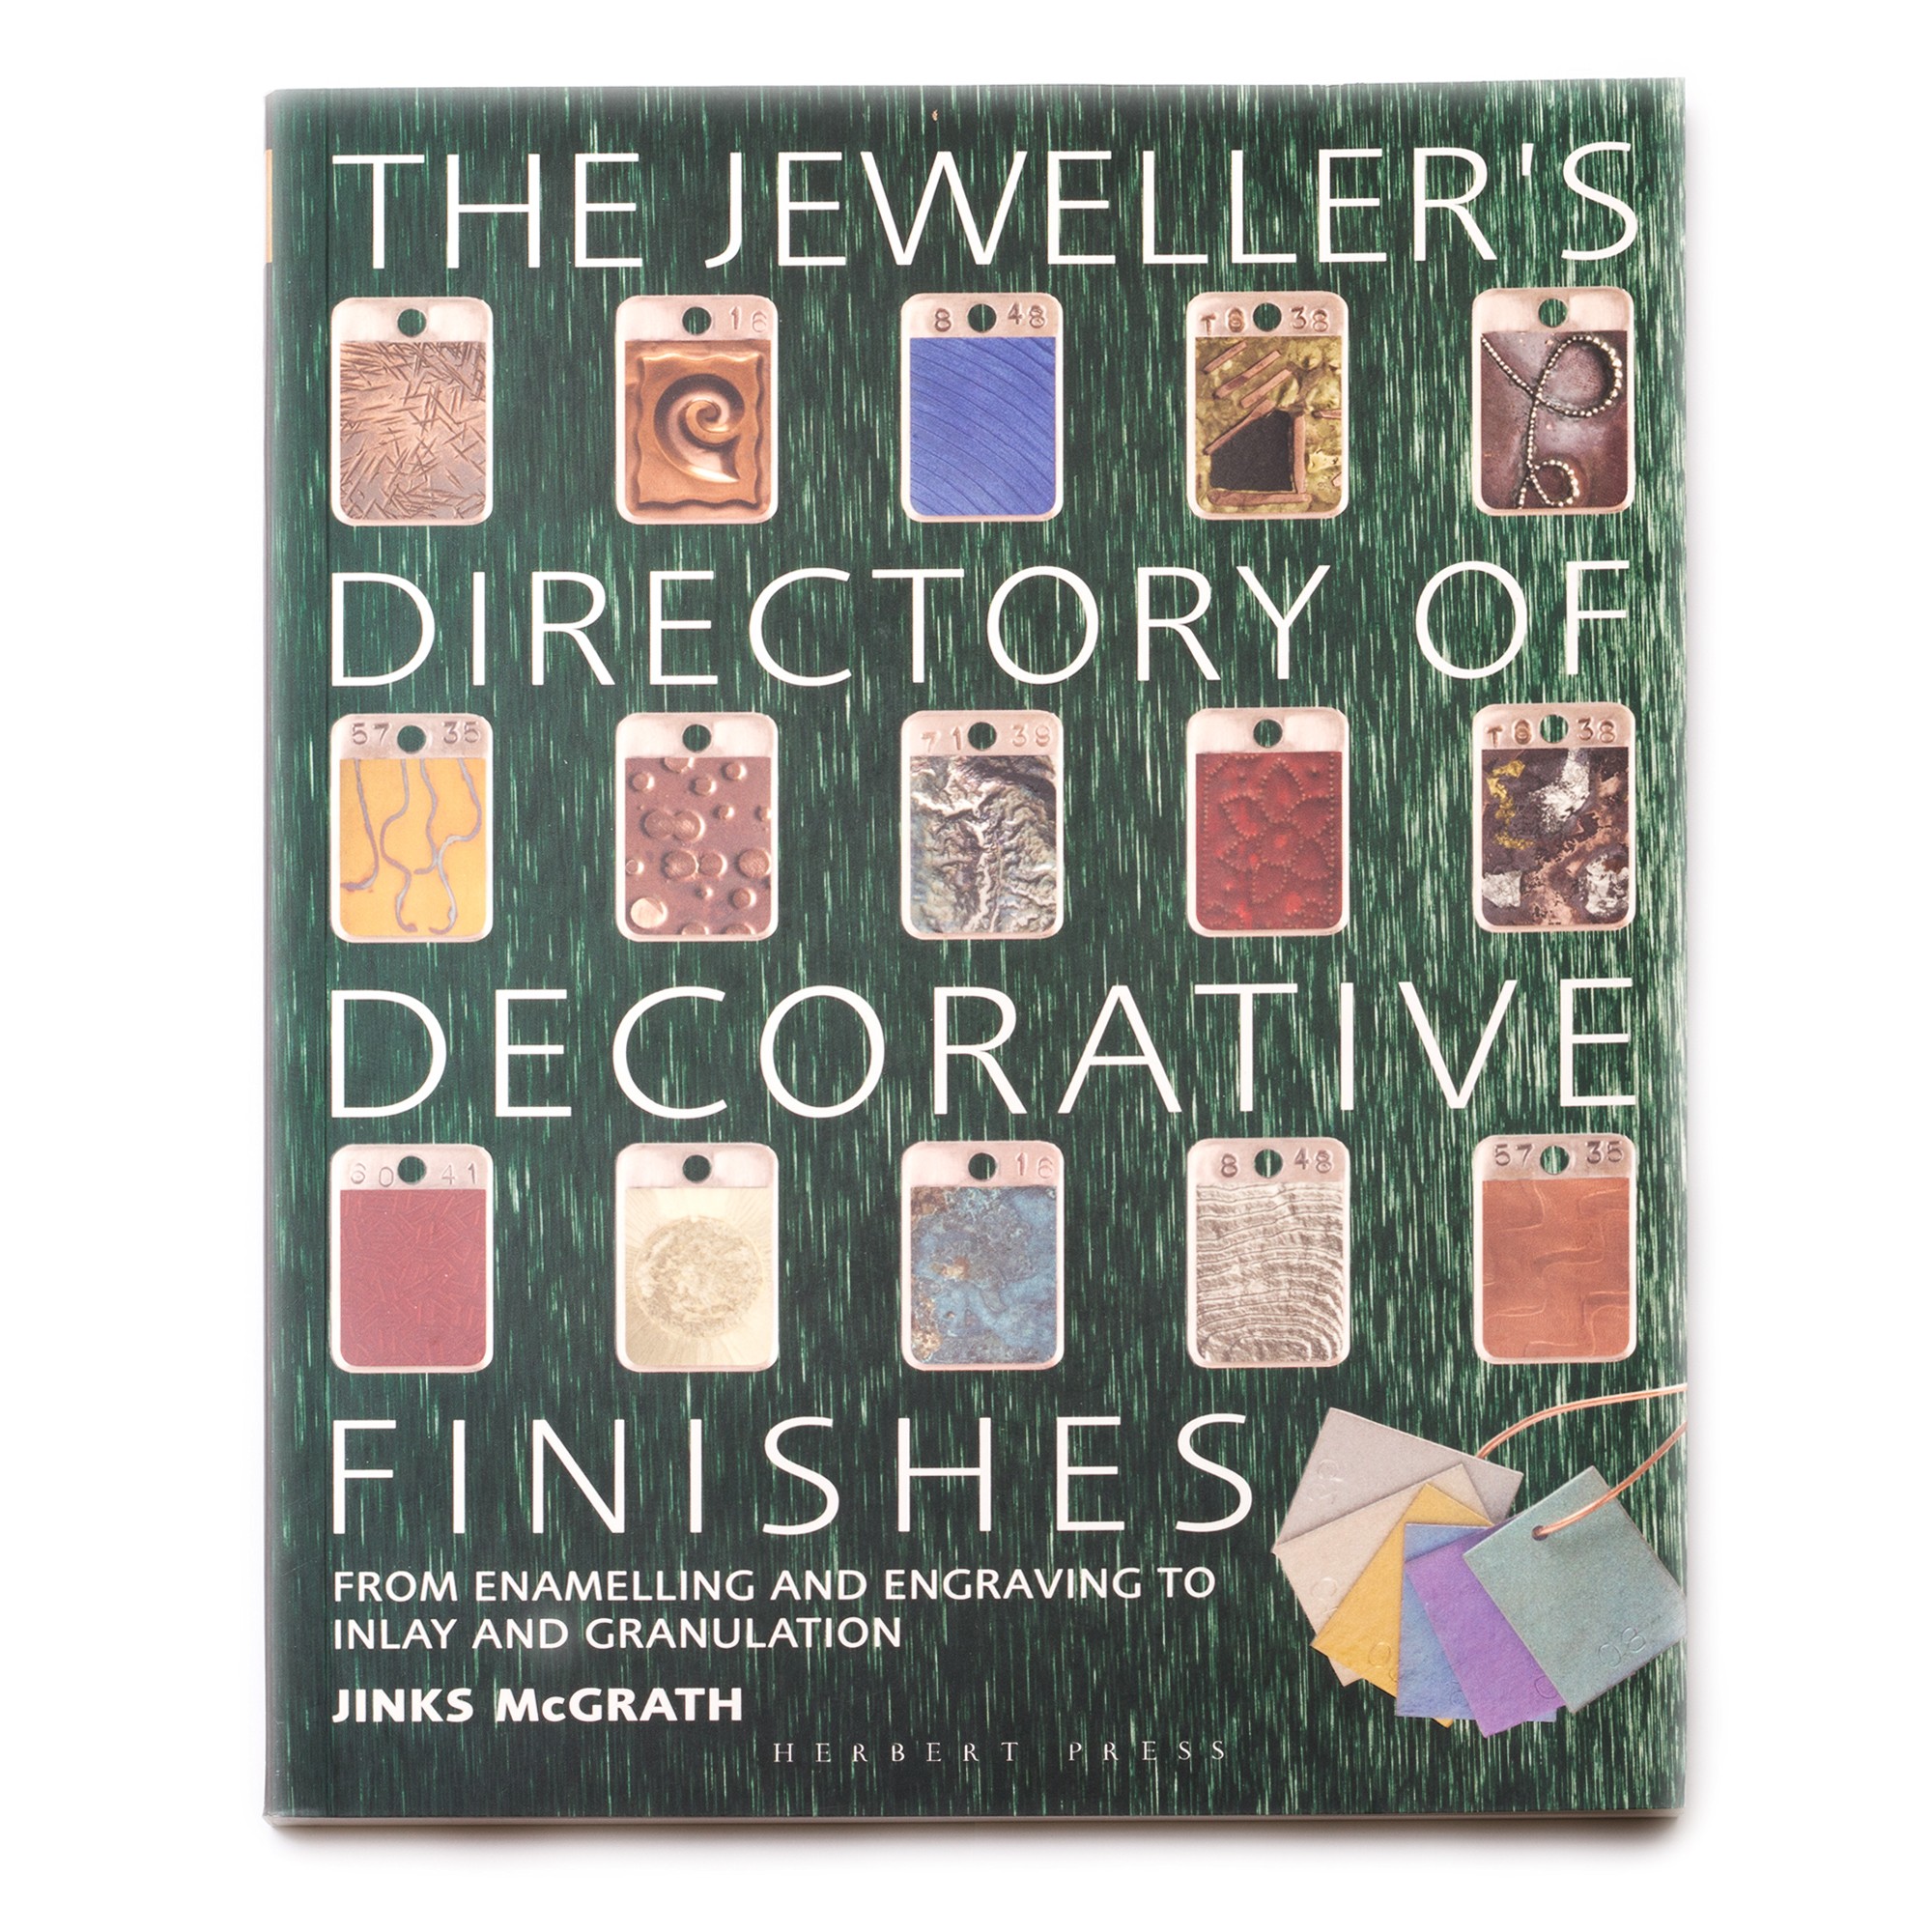
For more information on patinas, metal texturing, and coloration, we highly recommend the following books - Metal Patination Techniques For Jewelers And Metalsmiths & The Jeweller's Directory Of Decorative Finishes. Both absolutely packed with fantastic finishing ideas, with every metal and variation you could dream of. We had a great time looking through these books and they gave us lots of new inspiration. Certainly worth checking out if you feel this is a subject you're interested in.
Also in this section:
- Guide To Sanding & Polishing For Jewellery Making
- Hand Polishing Your Jewellery With Polishing Papers
- A Guide To Texturing Metals For Jewellery Making
- Top Tools For Making Textures On Metal
- Beginner's Guide To Chasing & Repoussé
- How To Make Easy Textured Earrings
- How To Make A Hammered Copper & Silver Heart Pendant
- How To Make A Textured Cuff Bracelet
- How To Make A Metal Leaf Decoration
- How To Use Doming Block & Punches For Jewellery Making
- How To Make Domed Metal Earrings With A Doming Block
- How To Engrave Your Drawings On Art Clay Copper
- Textured Washer Bracelet Tutorial With Guest Jeweller Laura Grey
- Barrelling Machine For Polishing Metal - Everything You Need To Know
- Tumbling Machine For Polishing Stones and Glass- Everything You Need To Know
- Polishing Jewellery Q&A With Stephen M Goldsmith
- Town Talk Products For Cleaning & Caring For Jewellery
- Creating A Resin Bird Pendant With Designer Sarah Hoare
- VIDEO: How To Create Patina With Liver Of Sulphur
- 2 Ways To Apply Liver Of Sulphur
- VIDEO: How To Use Silver Plating Solution
- How To Clean & Prevent Tarnished Jewellery
- Why You Need Anti Tarnish Paper Strips
- How To Use Midas Finish Seal Lacquer
- How To Use Renaissance Wax To Prevent Tarnished Jewellery
- VIDEO: Working With Crinkle Metal Sheet
- A Guide To Using Mokume Gane Metal For Jewellery Making
HAVE A QUESTION?
If you have any questions, feel free to get in touch with our friendly team who will be more than happy to give you advice over email or on the phone.
You can learn more and find inspiration by visiting our Jewellery Making Tutorials, Jewellery Making Kits and YouTube Channel. Don't forget to follow us on social media and tag us in your designs on Instagram & Facebook, we would love to see!