


KITS - TIPS - TUTORIALS
If you’ve ever admired a handmade silver pendant, an organic textured ring, or a piece of jewellery that feels truly unique, you’re about to discover one of the most versatile materials available to makers: silver metal clay. Also known as art clay silver, this remarkable medium allows you to mould, sculpt and shape real silver with your hands, perfect for both beginners and experienced jewellers alike.
What Is Silver Metal Clay? A Beginner’s Guide
Metal clay is made from fine metal particles (usually silver but can also be copper) mixed with a natural binder and water. When you shape your design and then fire it, using either a kiln or a torch, the binder burns away, leaving behind solid, pure metal. It behaves like a soft clay when wet and transforms into precious metal once fired. This means you can roll it, cut it, texture it and sculpt it before firing to achieve designs that would be almost impossible with traditional metalsmithing techniques.

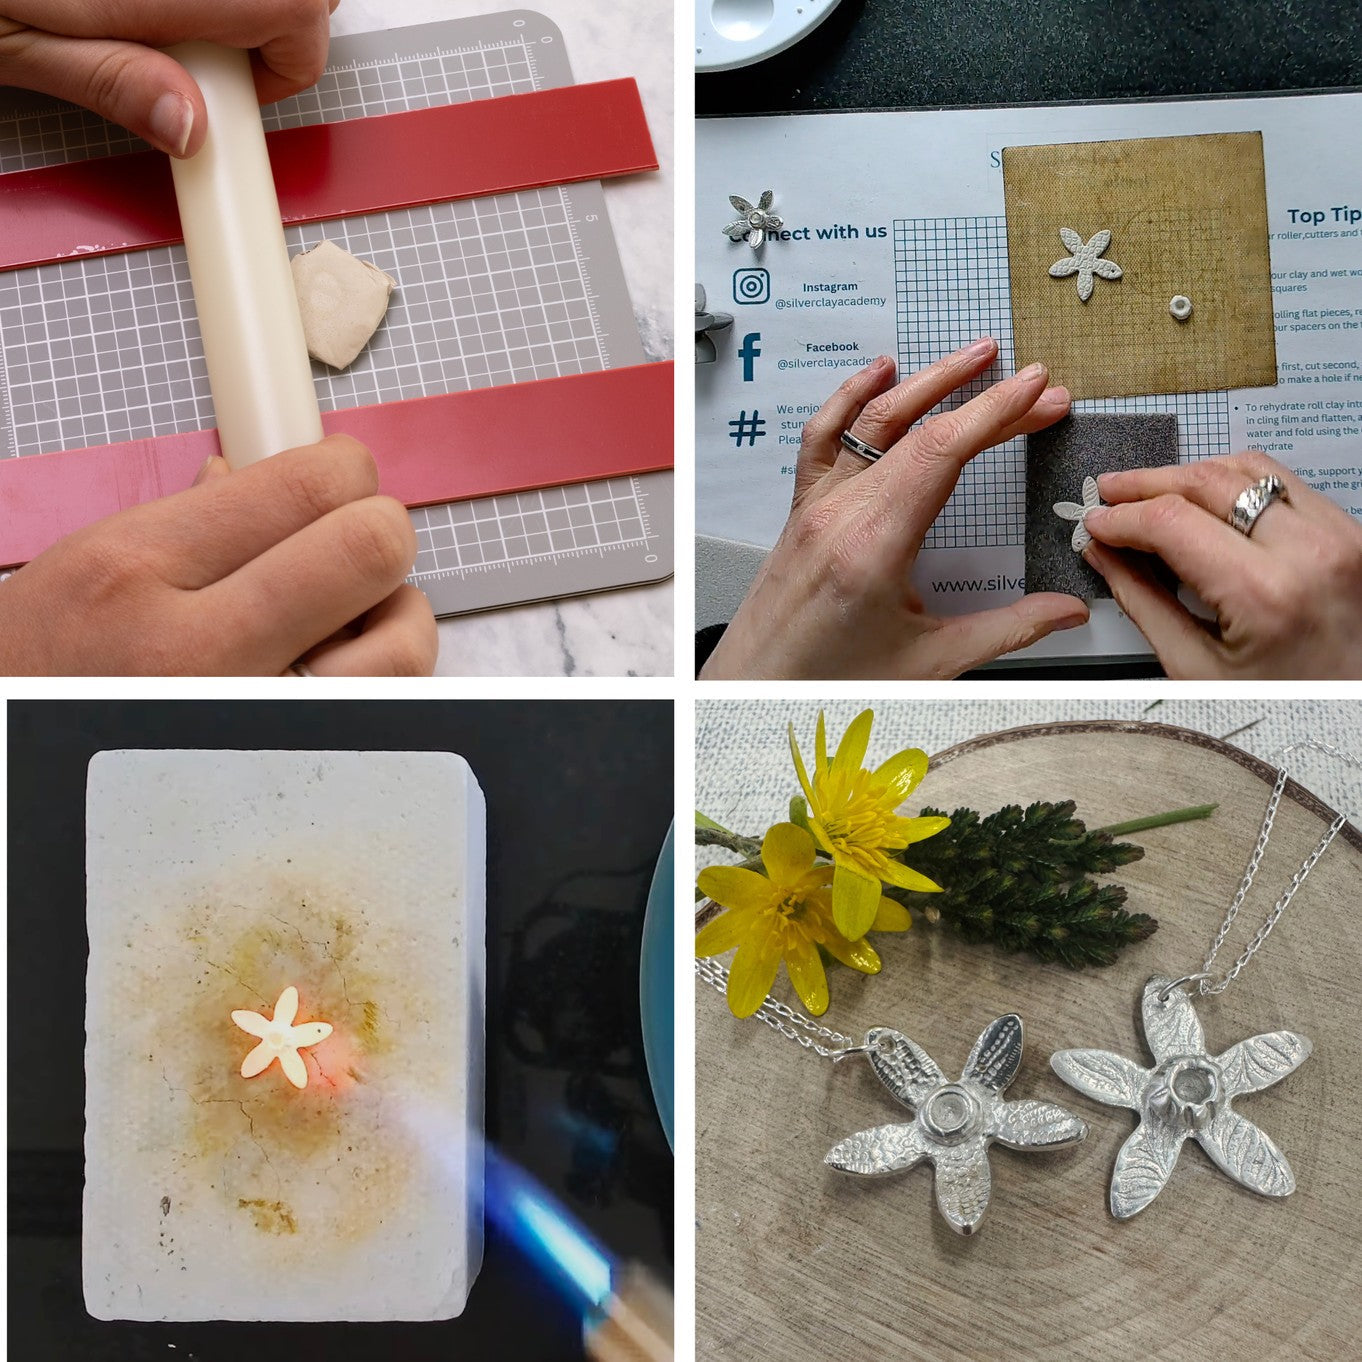
How to Use Silver Metal Clay: Step-by-Step Guide
- Design your piece - plan your shape, size and any textures or imprints.
- Prepare the clay - roll out to your chosen thickness, then cut or shape it.
- Add detail - press in textures, carve patterns or add settings for stones.
- Dry the piece completely - this is crucial to prevent cracks when firing.
- Fire - use a kiln or a torch, depending on the clay type.
- Brush, sand and polish - remove any residue, then bring the surface to a bright shine.
- Finish your design - add findings, patina or a chain to complete your jewellery.
Once fired, your creation is real silver. It’s hallmarkable, polishable, and ready to wear or gift.
Top Tips for Success
- Store unused clay in an airtight container with a little moisture to stop it drying out.
- Always dry thoroughly before firing to avoid bubbles or cracks.
- Plan for around 8–10% shrinkage during firing.
- Use texture sheets, leaves, lace or shells to create unique surface designs.
- Keep your workspace clean - even a small bit of dust can affect your finish.
- If you’re new to silver metal clay, start small - a charm, pendant or earring design is perfect for beginners.
Silver Clay Jewellery Making Kits
Ready to Begin?
Explore our Silver Metal Clay to find everything you need, from silver clay and firing tools to polishing kits and inspiration for your next project. Bring your imagination to life, experiment with texture and form, and experience the magic of transforming clay into real silver.
Start With Our Deluxe Silver Clay Jewellery Making Kit
The best beginner kit for making real silver jewellery at home
The Deluxe Silver Clay Jewellery Making Kit is the perfect starting point for beginners who want beautiful results from their very first piece. It includes all the essential tools, high quality materials, plus findings and chains, so you can finish and wear your jewellery straight away.
You’ll also receive a printed leaflet packed with tips and tutorials, along with access to a video silver clay series. Each episode helps you build confidence and expand your skills step by step as you progress.
With no extra equipment to buy and no overwhelm, this complete kit is carefully designed to guide you through creating your first silver pendant, charm or pair of earrings with confidence.
Other Silver Clay Kit Options
For those who want to start smaller or build their setup over time, we also offer three more basic silver clay kit options.
Basic Silver Clay Jewellery Making Kit

This is a great basic silver metal clay tool kit if you already have a kiln or a torch for firing.
Silver Clay Tool Bundle + Torch Firing Kit

This silver clay kit was designed for firing with a torch - no need for an expensive kiln.
Silver Clay Tool Bundle + Gas Hob Firing Kit

If you have a gas hob, this silver clay kit is designed for you - super easy to fire with the mesh placed over the gas hob.
Silver Clay Moulding and Patina Kit

Essential moulding compound and patina kit for silver metal clay. Create moulds, capture textures, and add a beautiful patina finish.

Why Makers Love Working with Silver Metal Clay
Silver metal clay is loved by jewellery makers all over the world for its accessibility and creativity.
- No heavy equipment needed - you can start with a small torch and basic tools.
- Completely customisable - create your own textures, shapes and finishes.
- Perfect for beginners - forgiving and easy to rework before firing.
- Professional results - once fired and polished, the result is genuine fine silver.
- Ideal for gifts or small-batch selling - every piece tells its own story.
Whether you’re creating for pleasure or profit, silver metal clay gives you total design freedom, all from the comfort of your kitchen table or studio bench.
Why Silver Metal Clay Belongs in Every Maker’s Toolkit
Silver metal clay bridges the worlds of art, design and science, transforming a soft, sculptable material into precious metal through heat and creativity.
It’s the ideal medium for anyone who loves to experiment, create personalised gifts, or craft one-of-a-kind jewellery to sell at fairs or online. At Kernowcraft, we’re passionate about helping makers turn ideas into reality and silver metal clay is one of the best ways to start that journey.
Whether you’re crafting your first silver charm or refining your skills as a jewellery artist, our Silver Metal Clay range, tools, and step-by-step guides are here to support you every step of the way.
Top Tools & Supplies For Metal Clay...
If you’d like to build your own silver clay setup over time, these are the recommended products to get you started.

GAS TORCH
Metal clay can be heated using a gas torch, kiln or on a gas hob with a firing mesh with cover. A gas torch is a popular option as it's quick and easy! This small jewellers gas torch is a great choice as it has a small, controlled flame which makes it great for working on small metal clay pieces. This torch has a black metal body which is comfortable to hold and has a removable base so it can stand upright on your workspace.

SOLDERING BLOCK
It's important that you have a suitable workspace to create fingerprint jewellery using metal clay. A soldering block is a safe surface for you to use and keeps the heat exactly where you want it, which is great when working on small metal clay pieces.

TWEEZERS
These insulated reverse action tweezers are made from sprung steel so they open when you squeeze the handle, meaning that they grip pieces without any effort. They're especially great to use on small items. When firing metal clay pieces, you will need to use tweezers to pick it up as it will be hot and for also transferring to water to quench your metal clay.

SANDING & POLISHING STICKS
When your pieces are dry, you can use these sanding and polishing sticks to gently neaten any edges before firing - they can also be used to pre-polish your pieces. This is a set of 8 sticks, which range in various grades from coarse for sanding up to very fine for buffing and pre-polishing. Their wooden handles make them so easy to use, and having four sides makes them perfect for getting in those hard to reach places.

SILVER CLAY WORK SURFACE
This silver clay work surface designed by the brand Art Clay is the perfect surface for working and creating your silver clay designs on. Not only will it help keep your working area clean, but it also provides a smooth surface for rolling out your silver clay.

BRASS BRUSH
You may notice when your pieces have been fired and quenched that they appear to be frosted white, this is totally normal. A brass brush is great for cleaning up your pieces, and can be used for pre-polishing after firing as well as achieving a 'brushed metal' or satin finish by hand.

POLISHING PAPERS
These popular polishing papers are brilliant for gaining a high sheen on your finished metal clay design, if you don't have power tools for polishing. Simply work through the grades to gently polish you design. These polishing papers are so popular among our customers and are great for getting in awkward to reach spaces. Why not go for our sample pack to give them a test run first?

SILVER CLAY MOISTURISING STORAGE POT
Created by the brand Art Clay, this specially designed pot is the perfect way to store your silver clay to help prevent it from drying out.

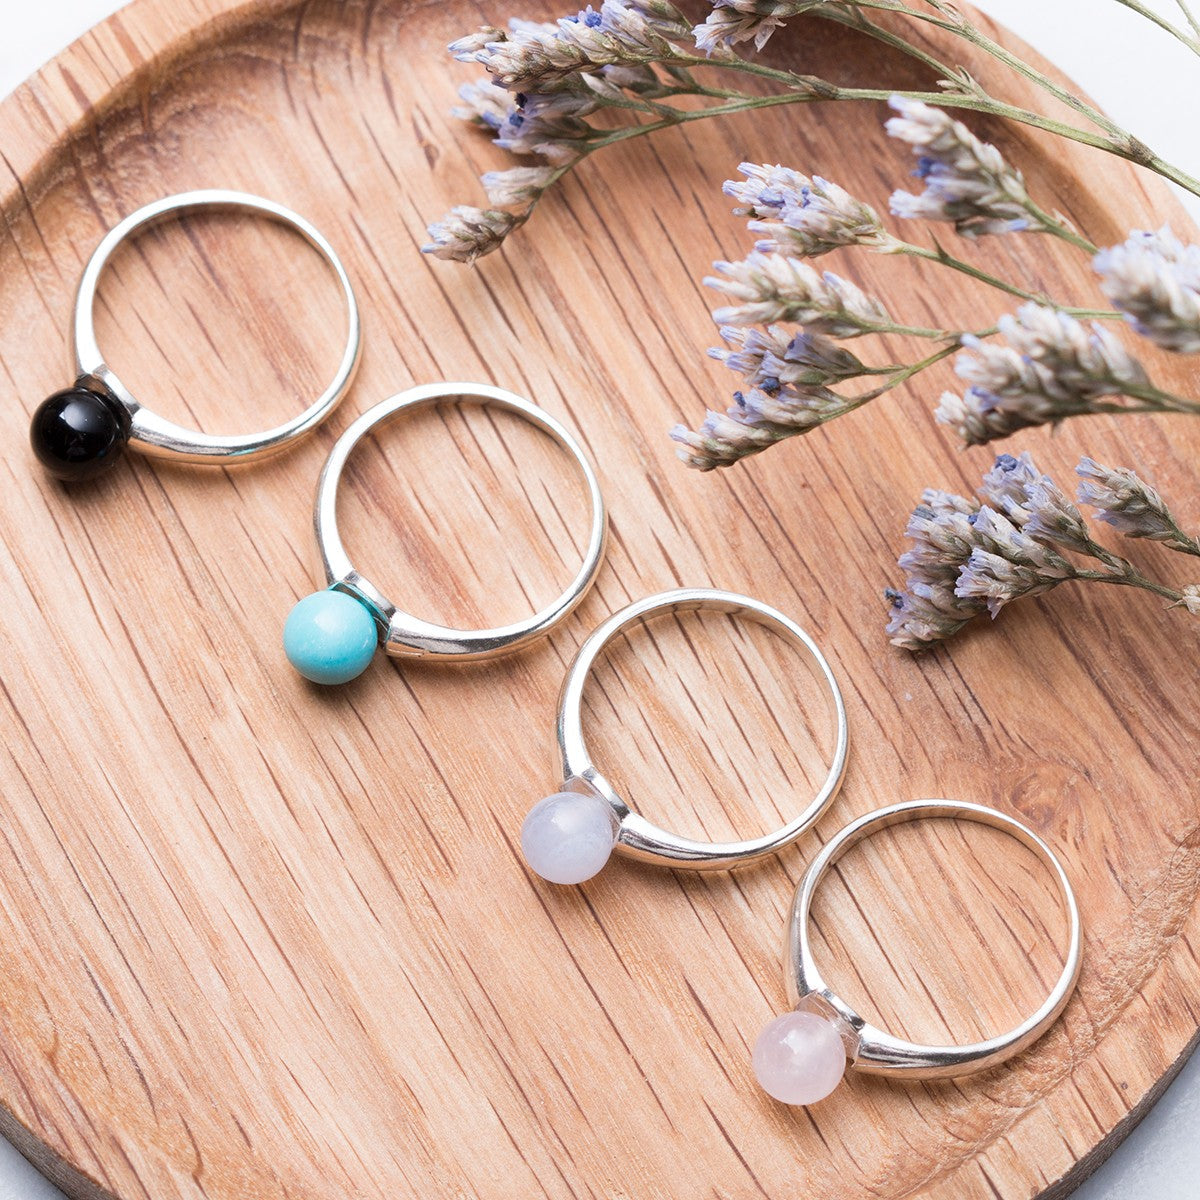
Stone Setting in Silver Clay – Your Options
When it comes to setting stones in silver clay, you have a couple of flexible options depending on the finish you want and your confidence level.
Fire-in-place stones
Clear white cubic zirconia can be set directly into the silver clay before firing by gently pushing the stone into the clay. This allows the clay to sinter around the stone during firing. While our clear cubic zirconias are not certified as firable stones, we have successfully used them ourselves. Results depend on technique — overheating during firing can cause stones to crack, and they must not be quenched in water after firing, as sudden temperature changes can also cause cracking.
Set stones after firing
Alternatively, stones can be added after firing using our fine silver cabochon settings. These are soldered onto the fired silver clay piece, after which the stone is set in the traditional way. This method offers more control and is ideal if you prefer to avoid firing stones or want to work with stones that are not suitable for kiln or torch firing.
Both methods allow you to create beautiful silver clay jewellery - the best choice depends on your tools, experience, and the look you want to achieve.
Watch Our Metal Clay Tutorials...
How To Make Fingerprint Jewellery With Metal Clay
How To Use Moulding Compound
Also in this section:
- A Beginner’s Guide to the Magic of Silver Metal Clay
- Your Questions Answered On Working With Metal Clay
- Essential Tools For Working With Metal Clay
- 6 Months Of Silver Clay With Emma Roy
- Three Ways To Fire Metal Clay
- How To Use Two Part Moulding Compound For Metal Clay
- Working With Art Clay Copper
- Making Metal Clay Pendants Using Flowers With Silver Nutshell
- How To Make Fingerprint Jewellery With Metal Clay
- Metal Clay & Enamel Flower Earring Tutorial
- Copper Clay Pumpkin Pendant Tutorial
- Create Charms & Pendants With Metal Clay Moulds
HAVE A QUESTION?
If you have any questions, feel free to get in touch with our friendly team who will be more than happy to give you advice over email or on the phone.
You can learn more and find inspiration by visiting our Jewellery Making Tutorials, Jewellery Making Kits and YouTube Channel. Don't forget to follow us on social media and tag us in your designs on Instagram & Facebook, we would love to see!