


Moulding compound is a room temperature vulcanising silicone which produces tough, strong, long lasting moulds ideal for using with precious metal clay (PMC). It is safe, non-hazardous and non-toxic and gives off no unpleasant fumes or odours. On this page we give instructions, tips and advice when using the compound to create moulds for metal clay jewellery designs, with examples from a project we created ourselves.
Notes before you start
Great care must be taken not to accidentally contaminate and accidentally start the hardening process of the moulding compound within the bag – follow our instructions to ensure success. With a little care and common sense you will find this easy to avoid.
Always handle the coloured putty first as the white is the activating putty (this will cut down on the likelihood of unwanted contamination of the coloured putty). Make sure you thoroughly wash and dry your hands in between handling the two colours. Never touch one colour and then the other, even when you are taking some out of the bag, as even this can start the hardening process.

Timing
Choose the item you wish to make a mould from and make sure you have it to hand – timing is crucial so you do not want to waste any of the 2
Working time = 2 minutes
Curing time = 15 minutes
The compound will leave an oily residue on your hands whilst working but do not worry – this is ordinary mineral oil, also commonly known as ‘baby oil ’.
Watch Our Tutorial On How To Use Moulding Compound Below
Please note that the colour and brand of moulding compound we stock can vary but the process is the same!

Step 1: Mix
Take equal parts of both coloured and white putty (try to be as accurate as you can but these need not be measured precisely). Mix the two parts thoroughly. Try to mix quickly and remember a uniform colour is not necessary. Here's a simple method of ensuring an even mix: shape 2 parts into thin pancakes on a work surface, place one on top of the other and mix them rapidly by pushing down with your thumbs and kneading or rolling between your palms. Do this for around a minute and be careful not to over mix as this can result in non-curing of the mould, the total moulding process must be completed within a 2 minute working time.

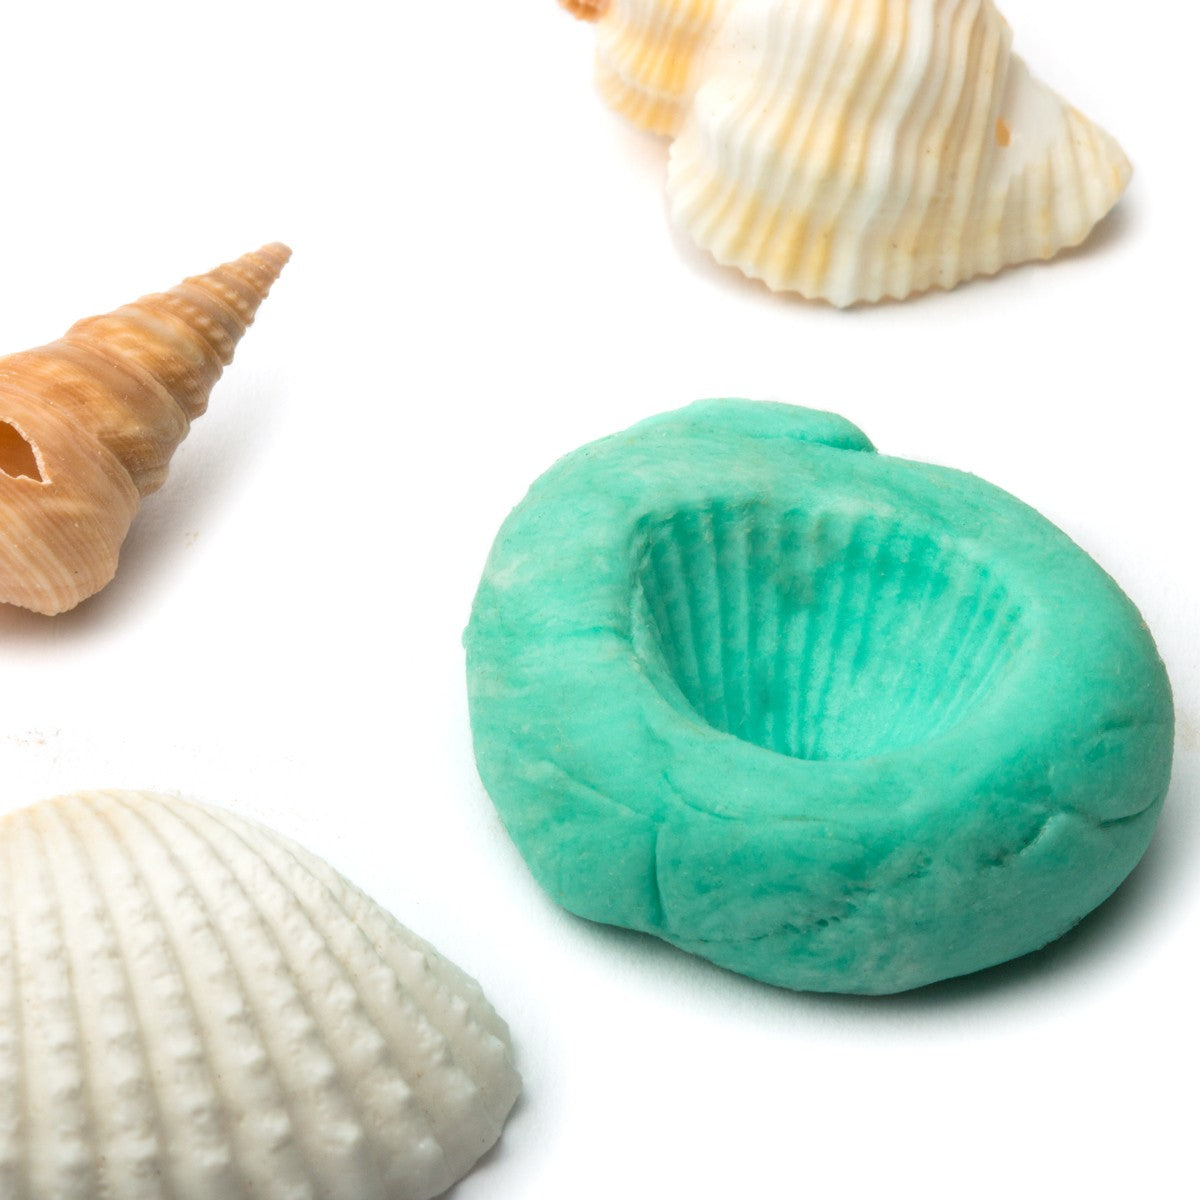
Step 2: Create an imprint
When you have finished mixing firmly press the item you would like to create a mould from into the compound. In these images, we have a used a shell.
Step 4: Wait
Leave the mould for at least 15 minutes. Check it has cured by pushing a fingernail or similar into the mould – if the compound has cured properly it should spring back into shape.

Step 5: Remove
Carefully remove your object. Your mould is now ready to use and fill with metal clay! Place a piece of metal clay into the mould, allow it to dry before carefully removing it from the mould. You can clean any rough edges using our sanding sponges and your piece will then be ready for firing.
This mould can also be used with polymer clay, resin, wax and low melting metals - so a brilliant way to incorporate into your crafts.

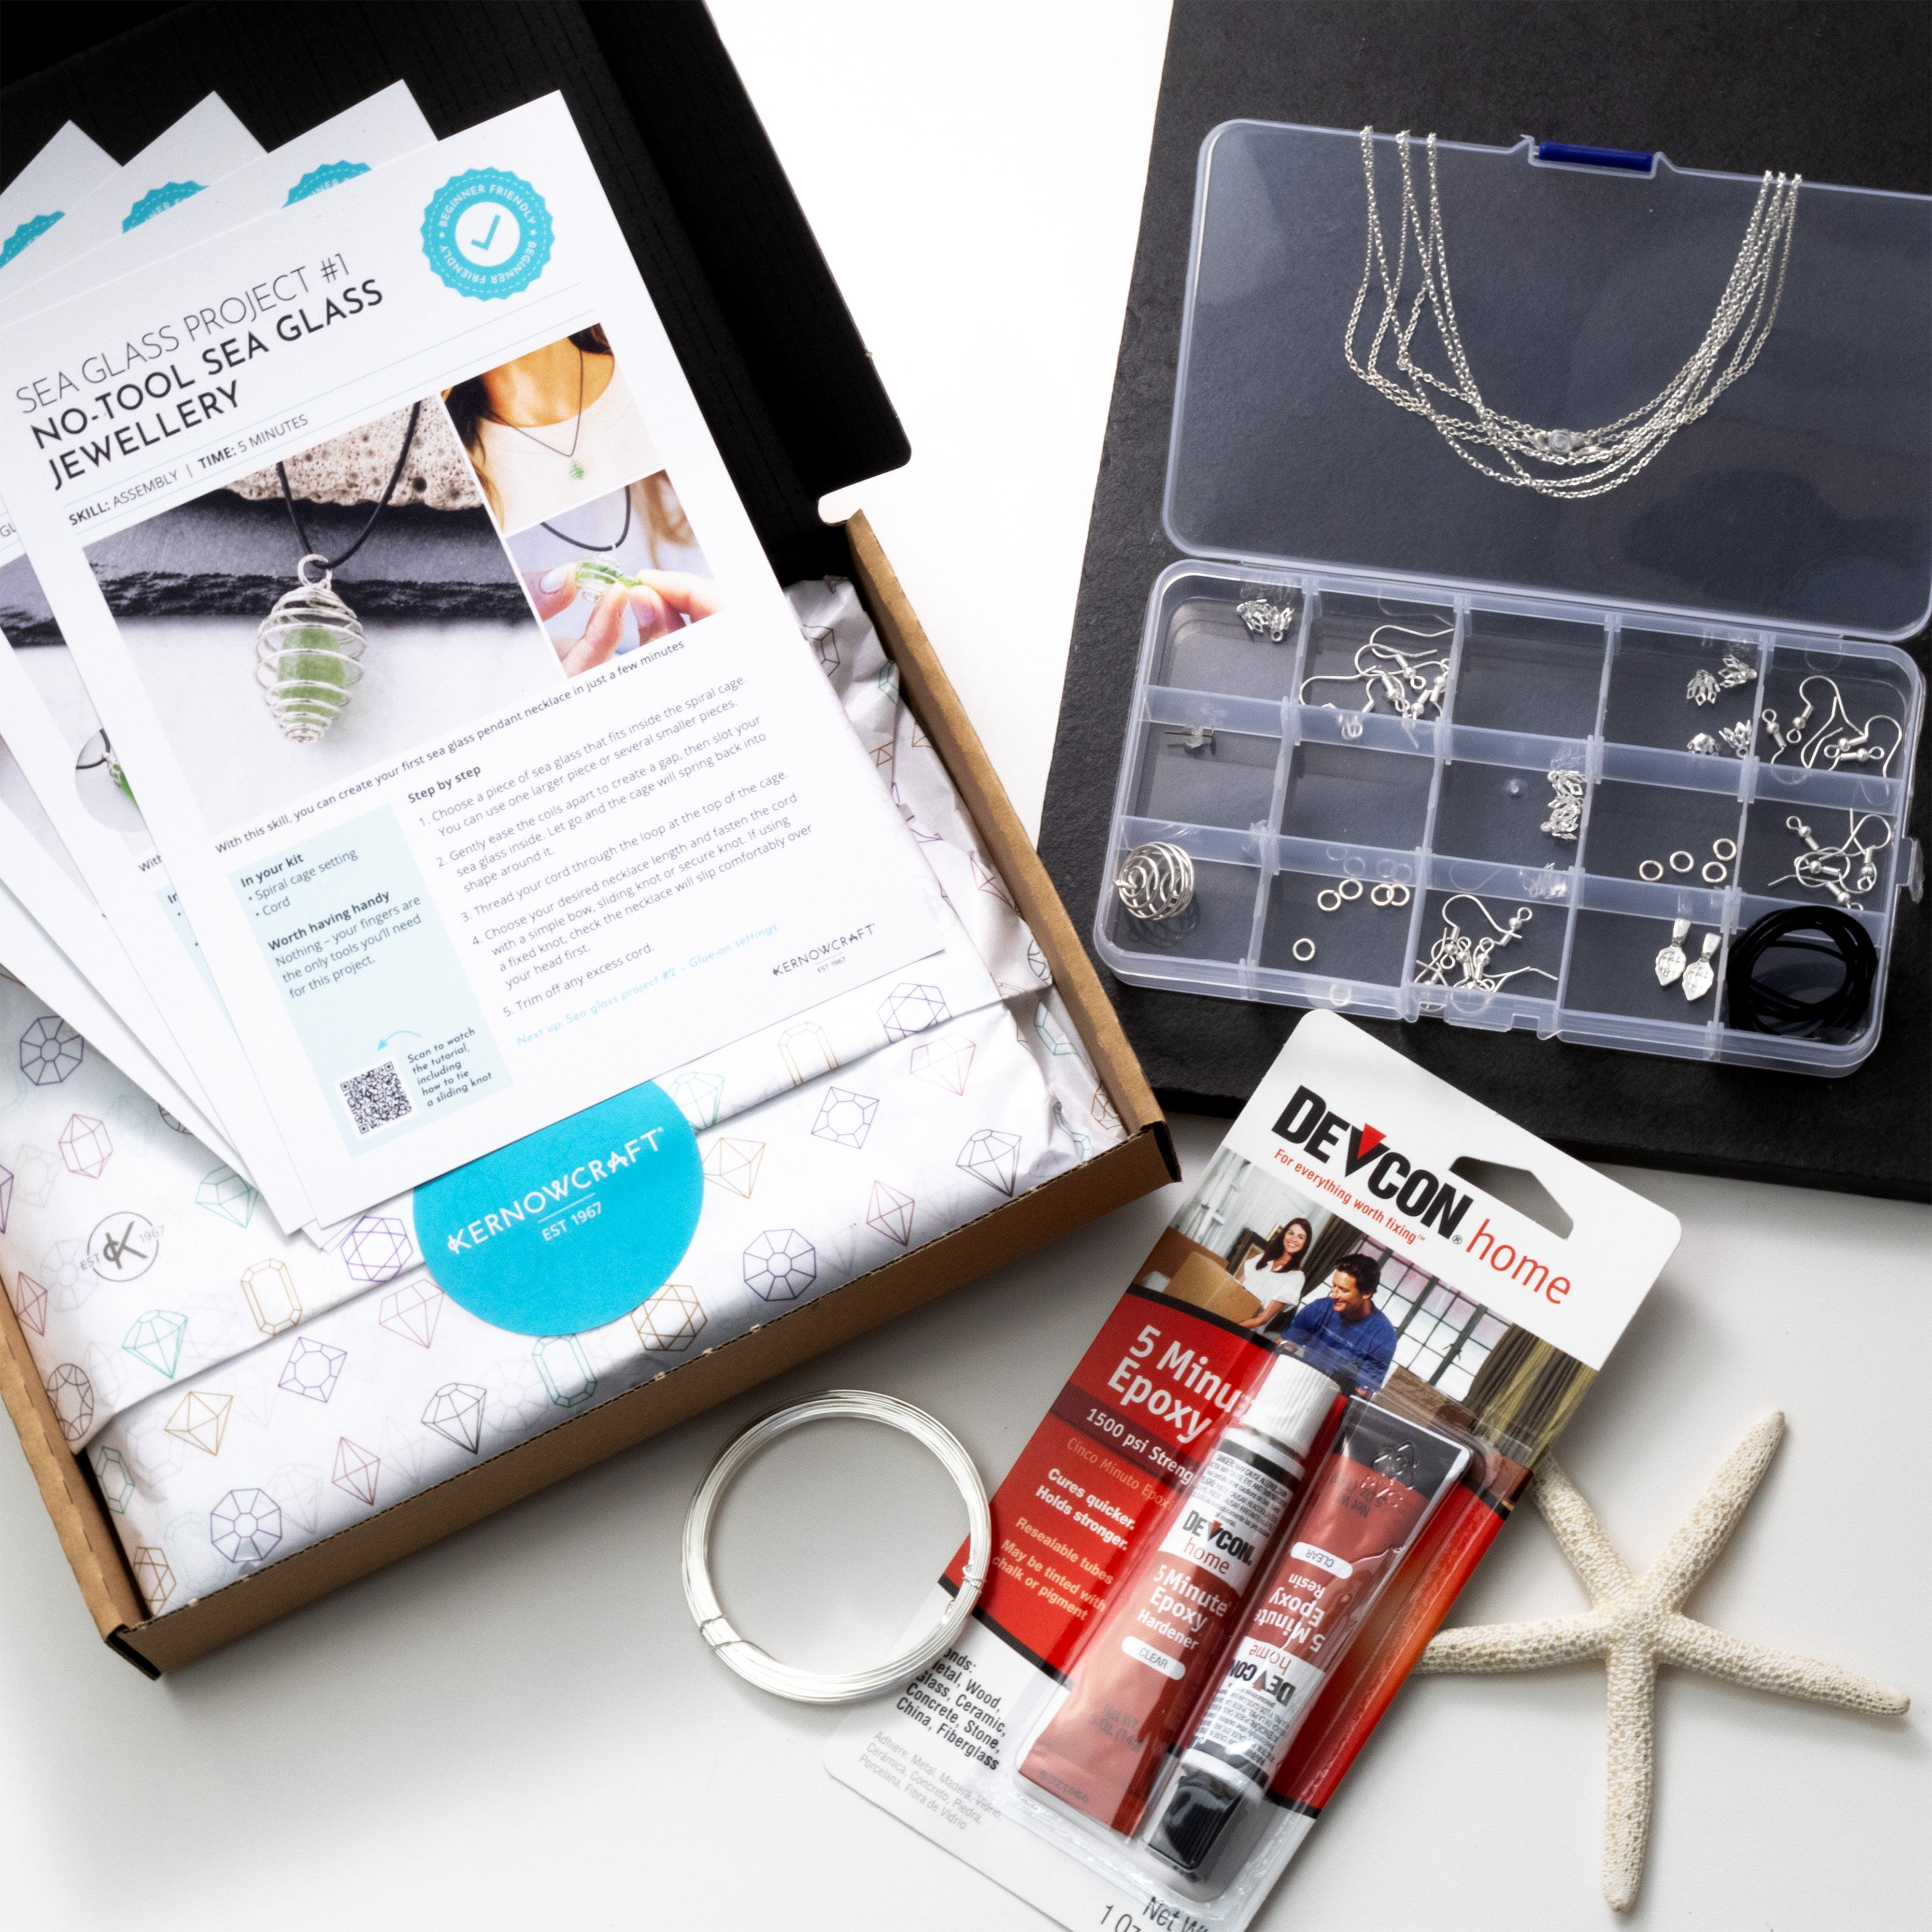
SILVER CLAY KIT
Our silver clay kit contains all the tools you need to make your first metal clay project!

METAL CLAY SUPPLIES
Explore our range of metal clay supplies and tools. Find Precious Metal Clay, Art Clay in a range of forms, plus moulds, texture plates, tools and more.
Also in this section:
- A Beginner’s Guide to the Magic of Silver Metal Clay
- Your Questions Answered On Working With Metal Clay
- Essential Tools For Working With Metal Clay
- 6 Months Of Silver Clay With Emma Roy
- Three Ways To Fire Metal Clay
- How To Use Two Part Moulding Compound For Metal Clay
- Working With Art Clay Copper
- Making Metal Clay Pendants Using Flowers With Silver Nutshell
- How To Make Fingerprint Jewellery With Metal Clay
- Metal Clay & Enamel Flower Earring Tutorial
- Copper Clay Pumpkin Pendant Tutorial
- Create Charms & Pendants With Metal Clay Moulds
HAVE A QUESTION?
If you have any questions, feel free to get in touch with our friendly team who will be more than happy to give you advice over email or on the phone.
You can learn more and find inspiration by visiting our Jewellery Making Tutorials, Jewellery Making Kits and YouTube Channel. Don't forget to follow us on social media and tag us in your designs on Instagram & Facebook, we would love to see!