August: Metal Etching Tutorials
Learn how to etch!
Kim experiments with etching on various metals and shares her findings with you
Kim covers the following topics:
- What is etching?
- Types of resists
- Prepping and applying a basic resist
- What minerals can you use for electro etching?
- Mixing up your electrolyte and making your circuit for electro etching
- Health and safety
- Electro etching sterling silver and comparing other metals
If you try any of the techniques featured in the series, please tag us in your designs - we would love to see and share! Find Kernowcraft & 'Make It With Kim' on Instagram and use the hashtags #12monthsofmetal & #Kernowcraft
What is etching?
Etching is a process of creating patterns, designs or textures on metal by 'eating' or etching parts of that metal away while keeping other parts protected so they remain the same.
There are two main ways of etching, acid etching is where you use an acid to eat away at the metal or electro etching were you use an electric current and electrolyte solution. The electrolyte solution is usually a salt, dissolved in water. Because of this, electro etching is often referred to as salt etching. It can be a much safer and quicker alternative to traditional acid etching.
How does electro etching work?
Kim: "I'm going to try and explain but bare with me, physics and chemistry are NOT my strong points to say the least. But basically, we are creating an electrical circuit by passing energy out through the positive anode and then back out the negative cathode and the electrolyte solution enables that energy to pass through it from the anode to the cathode.
"I have to admit I have read SO MANY articles and tutorials on this over the years and it still isn't crystal clear in terms of how that creates the etch so if anyone is up to explaining in layman's terms hit me with it. You only want your power source set to low amps. A maximum of 8 amps as anything over 10amps could become unsafe. Low and slow is the way forward!
"If you stick to low and slow rather than upping the amps for a faster etch, then this is a very safe technique and it does not give off harmful fumes or pose as much of a health and safety risk as traditional Acid etching. However, always research the exact set up you choose to use so you can keep risk to a minimum and use a suitable combination or metals and materials. I'll post more on this soon."
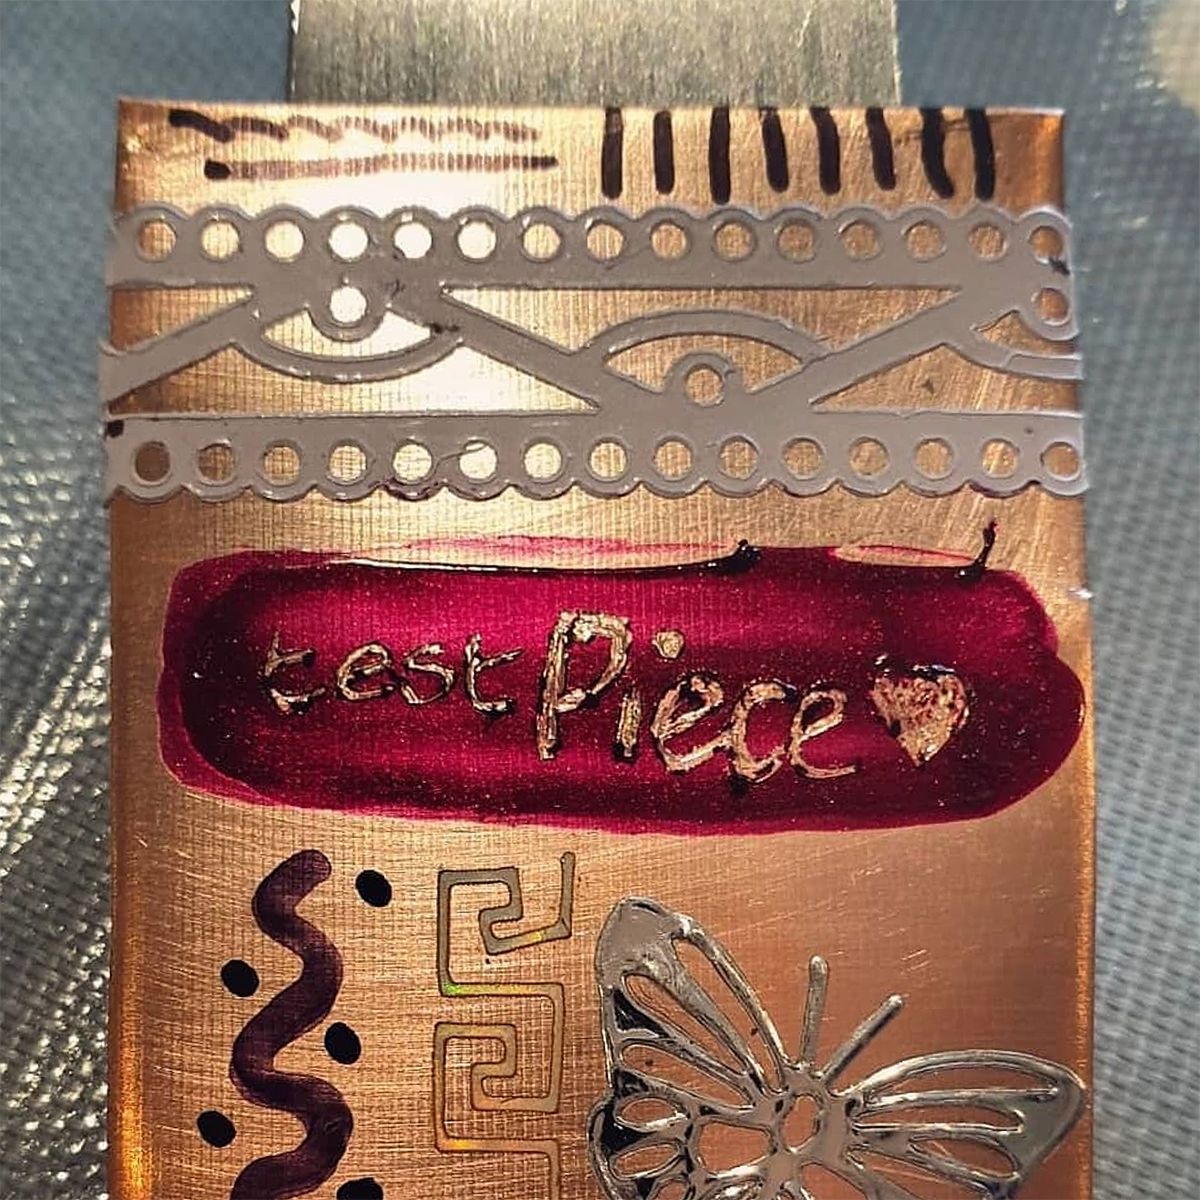
Types of resist
A resist is something you put on your metal that resists the etching solution so it acts as a barrier, protecting the metal. Usually you put a resist on parts of your metal while leaving other parts exposed to the etching solution. This is how you create patterns in the metal. You can use many things as a resist so watch these videos to see a selection of the most popular and easily accessible options. Different resists give different possibilities but also vary in reliability.
Prepping and applying a basic resist
When applying a resist for metal etching, its important to make sure your metal is clean and grease or oil free. A quick way to do that is by rubbing it with acetone. Normal nail polish remover won't work as it generally has moisturising agents or oils in it so its kinder to your skin. Many shops have started restricting acetone as it's a crucial part of purifying methamphetamine so you may have to ask stores if they stock it as they may not have it out on the shelves. Watch Kim's video on how you can apply stickers or tape and sharpie permanent marker.
What minerals can you use for electro etching?
Kim shares her set up for electro etching and runs through a few options. Always remember to store things safely and make sure you label them so you know what they are.
Mixing up your electrolyte and making your circuit for electro etching
Once your metal has been etching for 10 minutes or more, you can take it out of the solution and check the depth of your etch - make sure you switch the power off first. Then make sure you remove as much of the solution from your piece as possible before rinsing. Although the water and salts aren't bad for the environment, the metal particles that dissolve into the solution are, so never tip your used solution down the drain. You should be able to use your solution for years and if you do need to dispose of it, label it and take it to your local waste recycling centre. You can check the depth of the etch before removing the resist by running your fingernail around the edges of your pattern. If you don't think it's deep enough, pop it back in the solution and etch for longer.
Etching Health & Safety
Kim: "As I mentioned in the previous videos, I've never come across a technique with so much contradictory advice when it comes to health and safety. I've read SO MANY articles and tutorials now. One article will say you need to wear a respirator, face shield and thick rubber gloves while working under extraction while the next will mention very little safety advice and say it's a very safe technique. What they did all seem to have in common was they told you the 'hows' but very little, if any 'whys'. BUT I always think it's the 'whys' that are the most important! How do you know advice is correct if you don't understand why you're being told to do it? It all seems to boil down to the huge amount of variables in this technique. From the exact salt or mineral you use to make your electrolyte to the combination of metal you're etching and anode and cathode you're using. Every combination can have very different health and safety considerations. Personal protection equipment such as a respirators and gloves only help if you know why you are wearing it. For example, the food industry have done many tests that show people who wear gloves while handling food are statistically less hygienic than those who don't. It's easy to be lulled into a false sense of security because we see health and safety in place but if it's not being used or understood correctly as we forget or don't understand the 'why's' then it's not actually doing its job. I think we all as individuals should be asking more 'whys' so we can make informed decisions and actually work in the ways that best suit ourselves, our working spaces and set ups. In the meantime if you know any 'whys' then please share! Stay curious everyone!
"Salt etching with sodium chloride and water should be very safe if done correctly. You need to keep your volts low (below 10) and obviously anything that involves and electric current and water should be done with caution so make sure you double check your connections and keep the plug/wall outlet away from the water. Here are some basic considerations: avoid contact with skin and eyes by wearing waterproof gloves and goggles. If storing electrolytes, make sure you store them in a leak proof plastic container and label them. If disposing of electrolytes follow local council guidelines. Use the correct electrolyte for the metals and anode/cathodes you are using. Before connecting your power supply make sure all electrical connections have been made correctly. Only turn on the power once everything is connected correctly and your metal has been placed in the etching bath. Only use a low voltage (under 10 volts) as at higher voltages it is possible for hydrogen and oxygen to be produced and combine into an explosive gas."
Electro Etching Sterling Silver & Comparing Other Metals
In this video, Kim shows you a tutorial on electro etching sterling silver with sodium nitrate. As Kim explains, sodium nitrate can be an irritant so it's important to wear eye protection and gloves - if you splash it on your skin, make sure you rinse it under water.
Kim also shares her thoughts on the comparison of metals including brass and copper.
Watch More From The 12 Months Of Metal Series
- 12 Months Of Metal: Basic Cutting & Texturing Metal For Jewellery Making
- 12 Months Of Metal: Sawing Metal For Jewellery Making
- 12 Months Of Metal: Forming Metal
- 12 Months Of Metal: Soldering For Jewellery Making
- 12 Months Of Metal: Cabochon Setting Tutorials
- 12 Months Of Metal: How To Use A Rolling Mill
- 12 Months Of Metal: Riveting & Cold Connections For Jewellery Making
- 12 Months Of Metal: Metal Etching
- 12 Months Of Metal: Claw Setting Tutorials
- 12 Months Of Metal: Reticulation
- 12 Months Of Metal: Hollow Jewellery Tutorials
- 12 Months Of Metal: Casting & Granulation For Jewellery Making
- Larkman's Legacy & Kim's Trip To Geevor Tin Mine, Cornwall