Beginner's Guide To Chasing & Repoussé
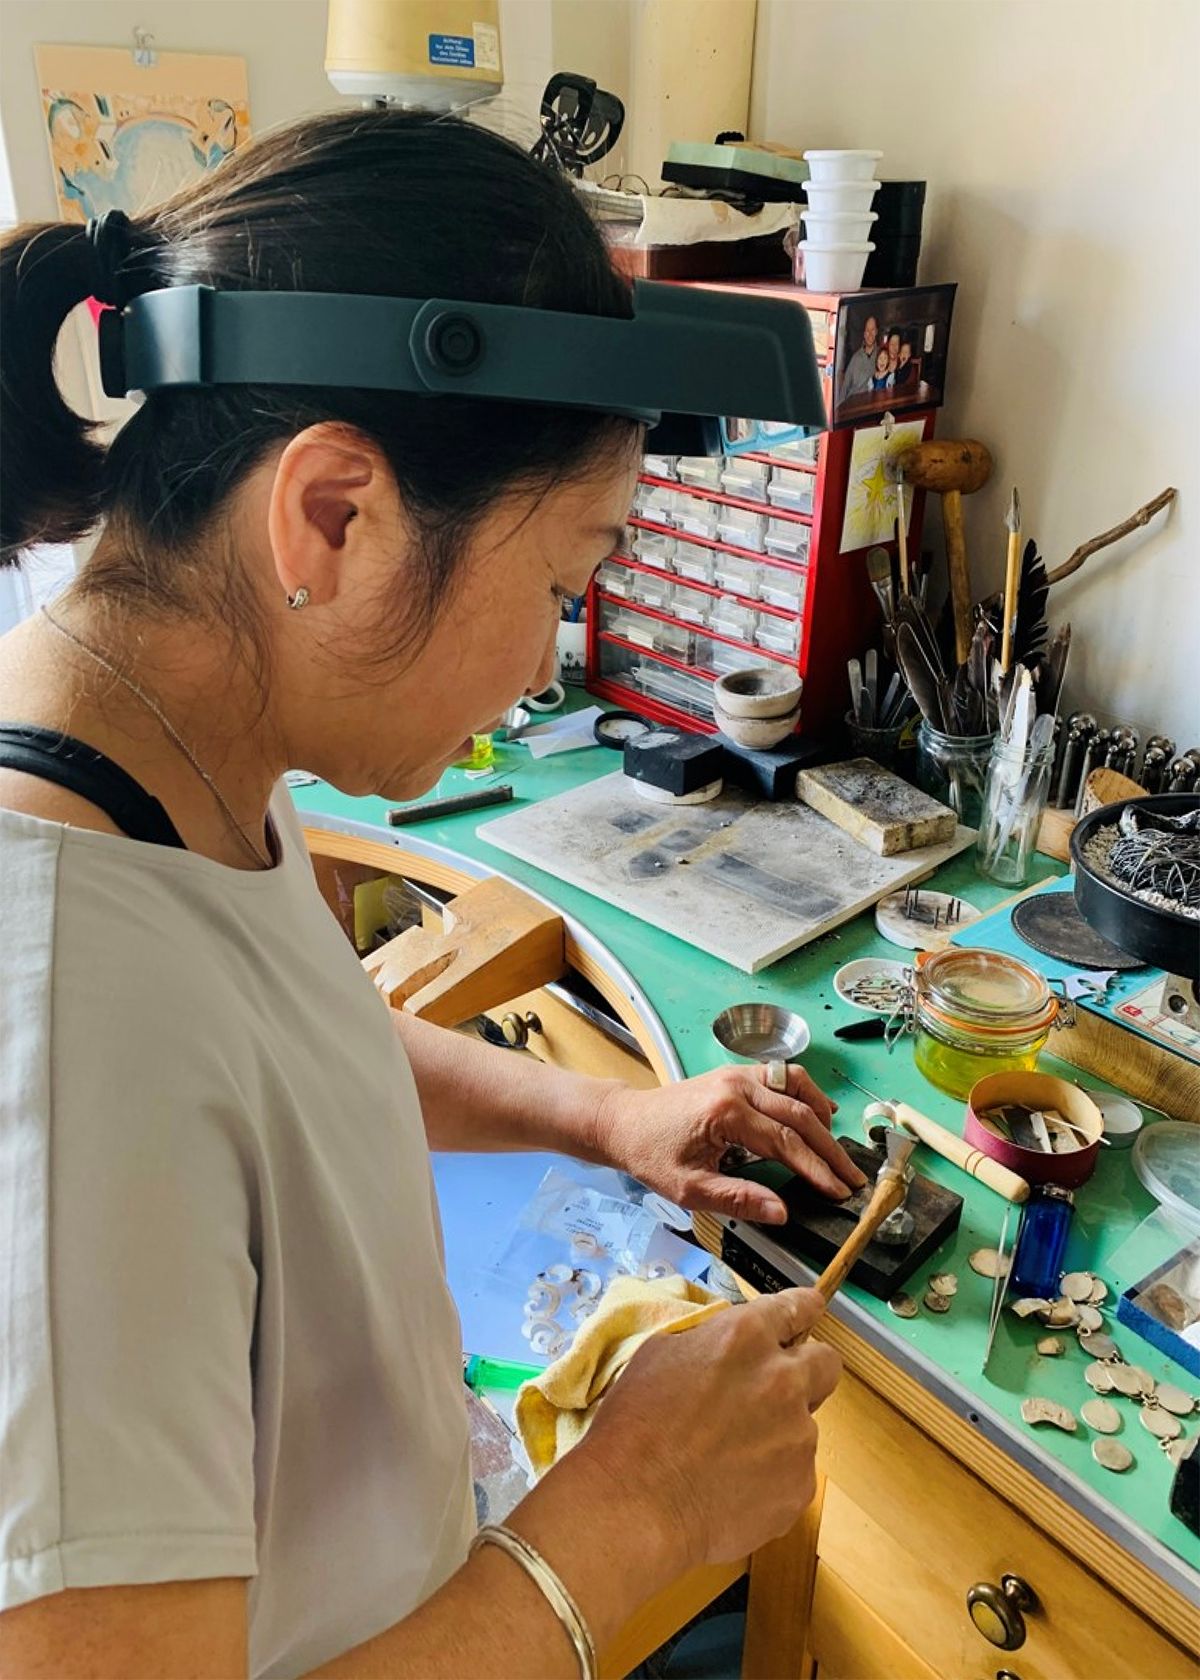
Guest tutor, Kumiko shares with you a beginner friendly guide on the popular jewellery making techniques of chasing and repoussé. Sharing a breakdown of the essential tools needed, a step-by-step guide as well as top tips to help you get started. You can find out more about Kumiko in our interview over on the blog, where she also features in our series, 'A Day In The Life Of A Jeweller' sharing her fascinating creative process which includes left-hand drawing, Japanese ink, beeswax lost wax casting and of course chasing & repoussé. We hope this guide inspires you to get creative with forming metal and experimenting with textures for those unique jewellery designs.
What Is Chasing & Repoussé?
Chasing and repoussé are some of the oldest techniques of silversmithing and goldsmithing. They involve the use of a hammer and several chasing punches which are used to create outlines and to hammer a sheet of metal to give volume. Apparently, the famous Tutankhamun mask was made using these techniques!
The names originate from the French words, “chasser” “to chase” consisting of creating a design on the front of the metal and “repoussé” “push up” which is the act of pushing the metal up from behind - the two techniques are often used in conjunction.
The beautiful thing about these techniques is that although it takes time, you can hammer, anneal, re-hammer and re-anneal to reach the image you have in your mind.
I love these techniques because the finished objects are so tactile and unique with every hammer strike.
Health & Safety
Always work where you have ventilation, especially when you are burning a pitch.
Wear an apron and safety goggles to protect yourself from the hot pitch in case the segments of the pitch break.
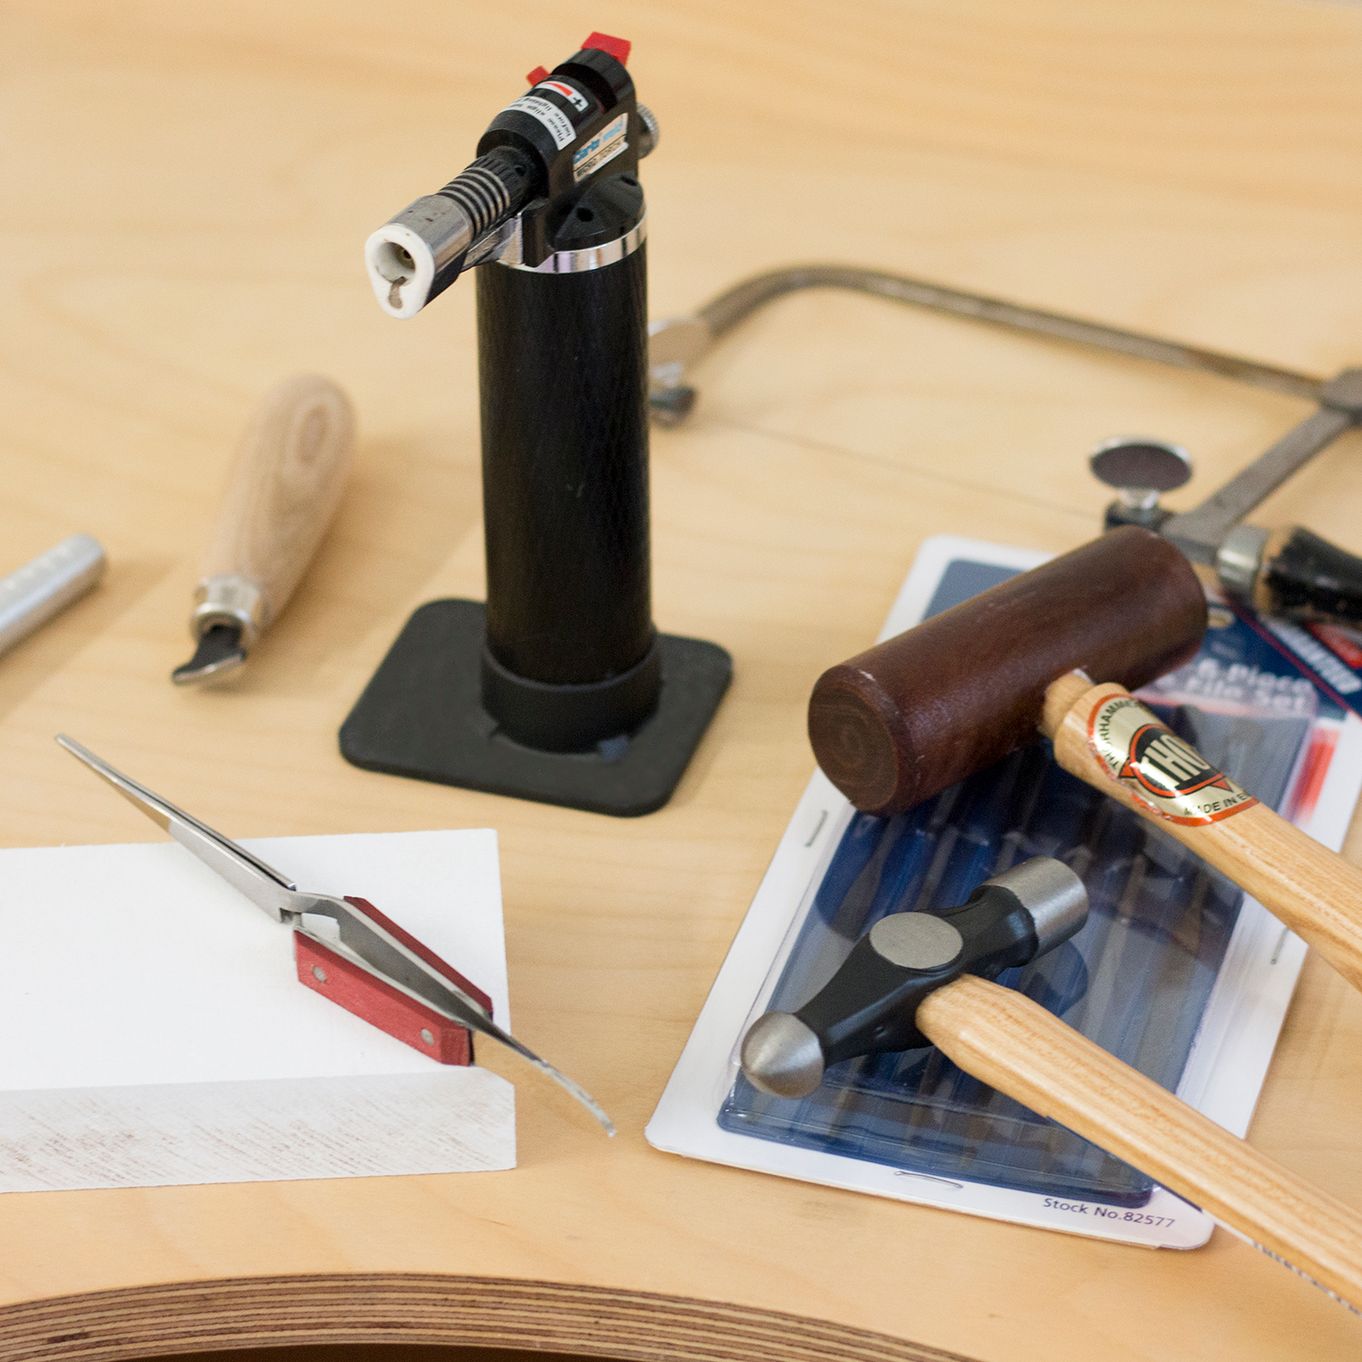
Recommended Tools For Chasing & Repoussé
- Chasing hammer
- Chasing and repoussé punches
- Metal sheet
- Doming punches
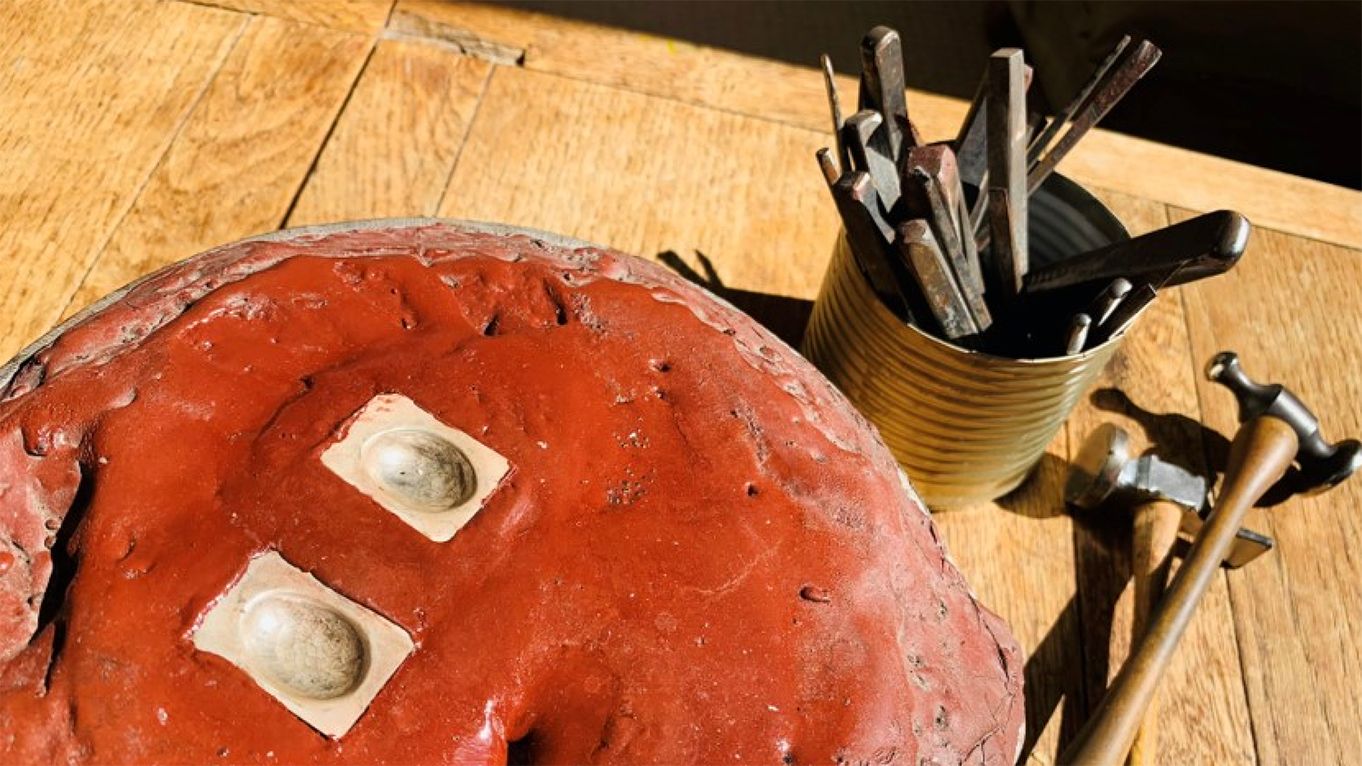
- Pitch (I use red pitch)
- Metal block
- Pliers
- Tweezers
- Spoon or spatula (dedicated to the pitch use)
- Marker pen
- Olive oil
- Blow torch or heat gun
- Soldering block
- Safety pickle
- Water
- Masking tape
- Old thick book or catalogue
- Apron
- Goggles
About The Speciality Chasing & Repoussé Tools
Punches
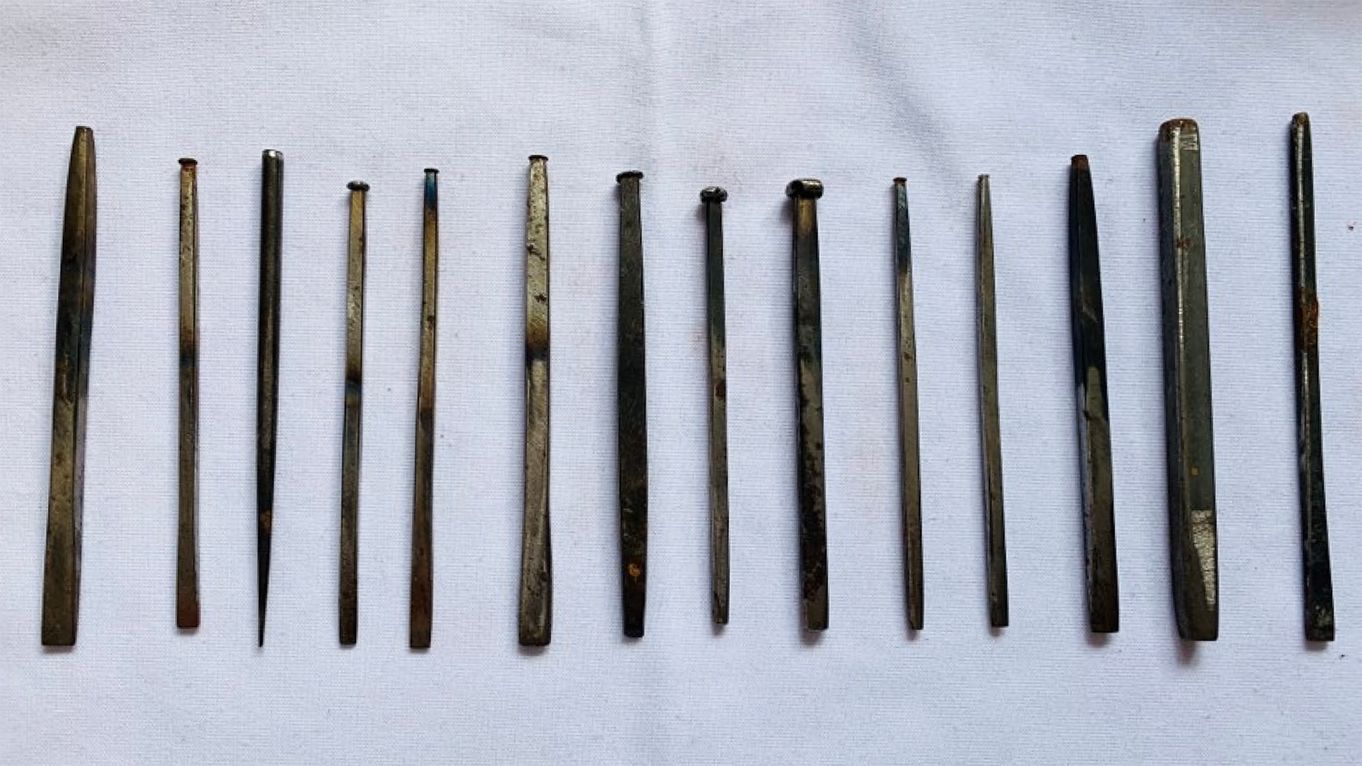
You can buy chasing-punches but also you can make your own (using concrete nails). You don’t need many.
The punches have different purposes:
- Straight or curved punches for making lines (liner punch)
- Rounded, domed punches for creating volume
- Flat faced punches for planishing
- Doming punches can also be used

Doming Punches Can Also Be Used For Forming
The punches are designed for using with a doming block to create gentle curves, bowl shapes or deep half round domes which can then be used to make bead caps or fixed together to make round or lentil shaped hollow beads.
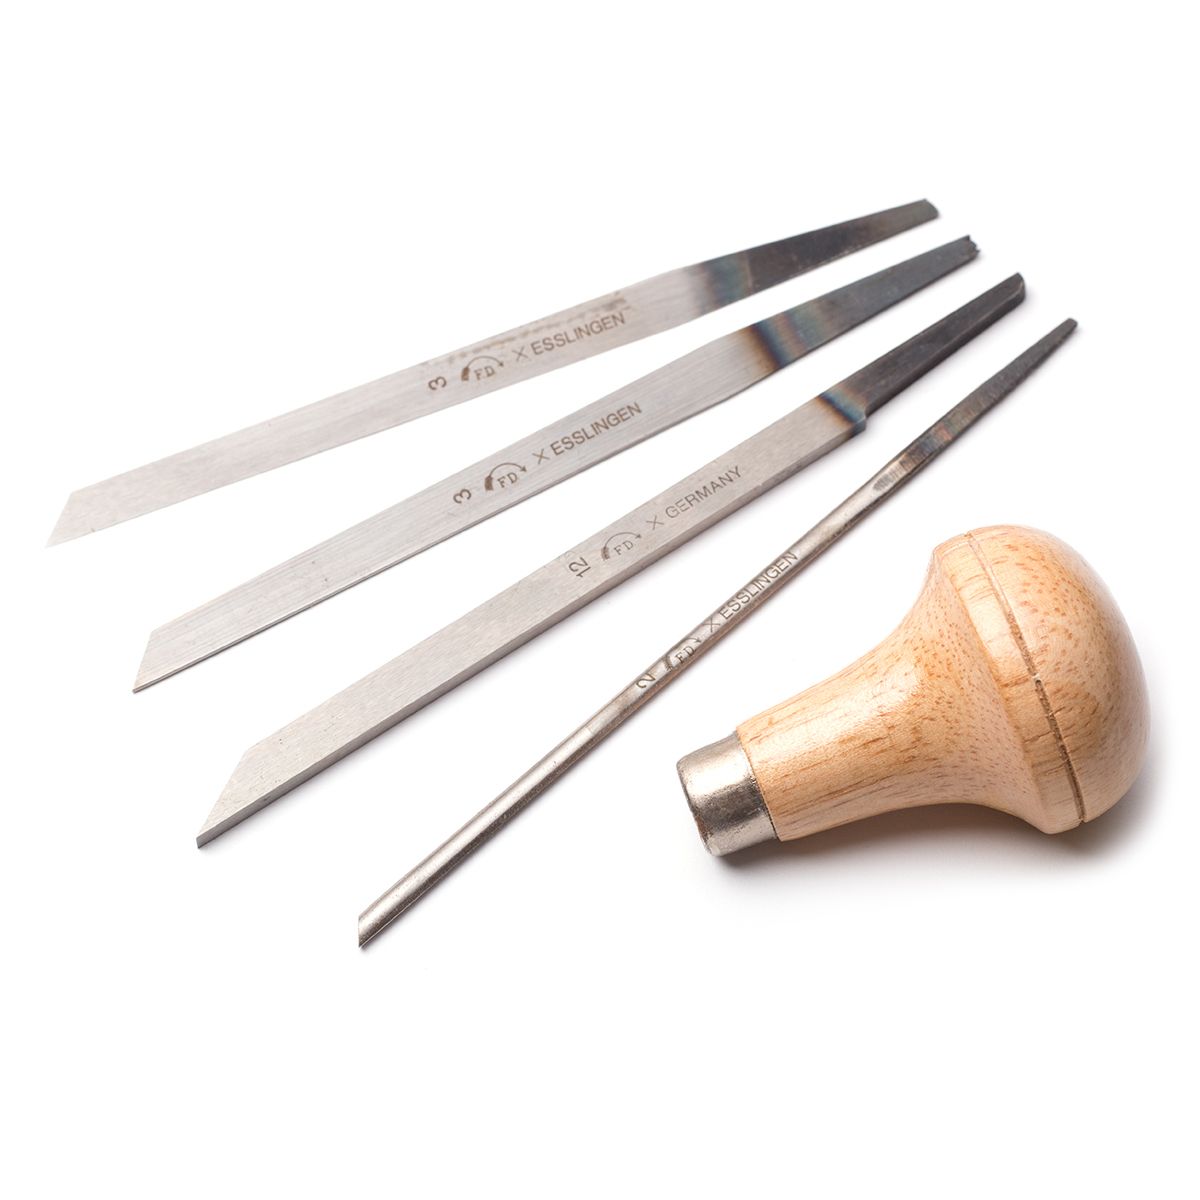
Gravers Can Also Be Used For Texture
To engrave your own designs into metal, you can use gravers. When attached to the wooden graver handle, you can gently hammer these against your metal to create marks, engravings, lines, and textures.
TIP: These marks will then look even more distinct if you choose to apply a patina to your metal.
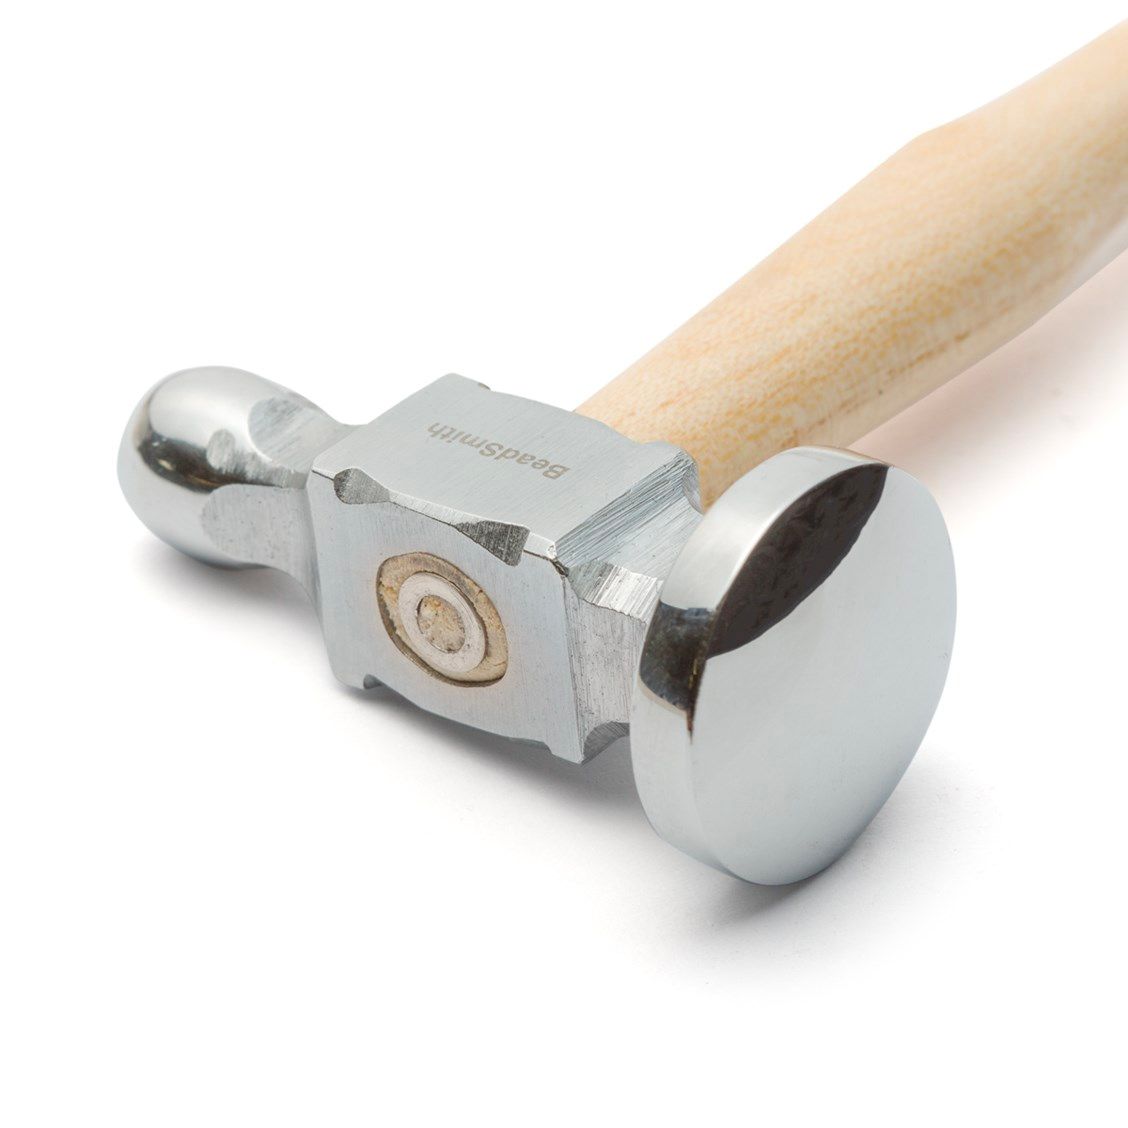
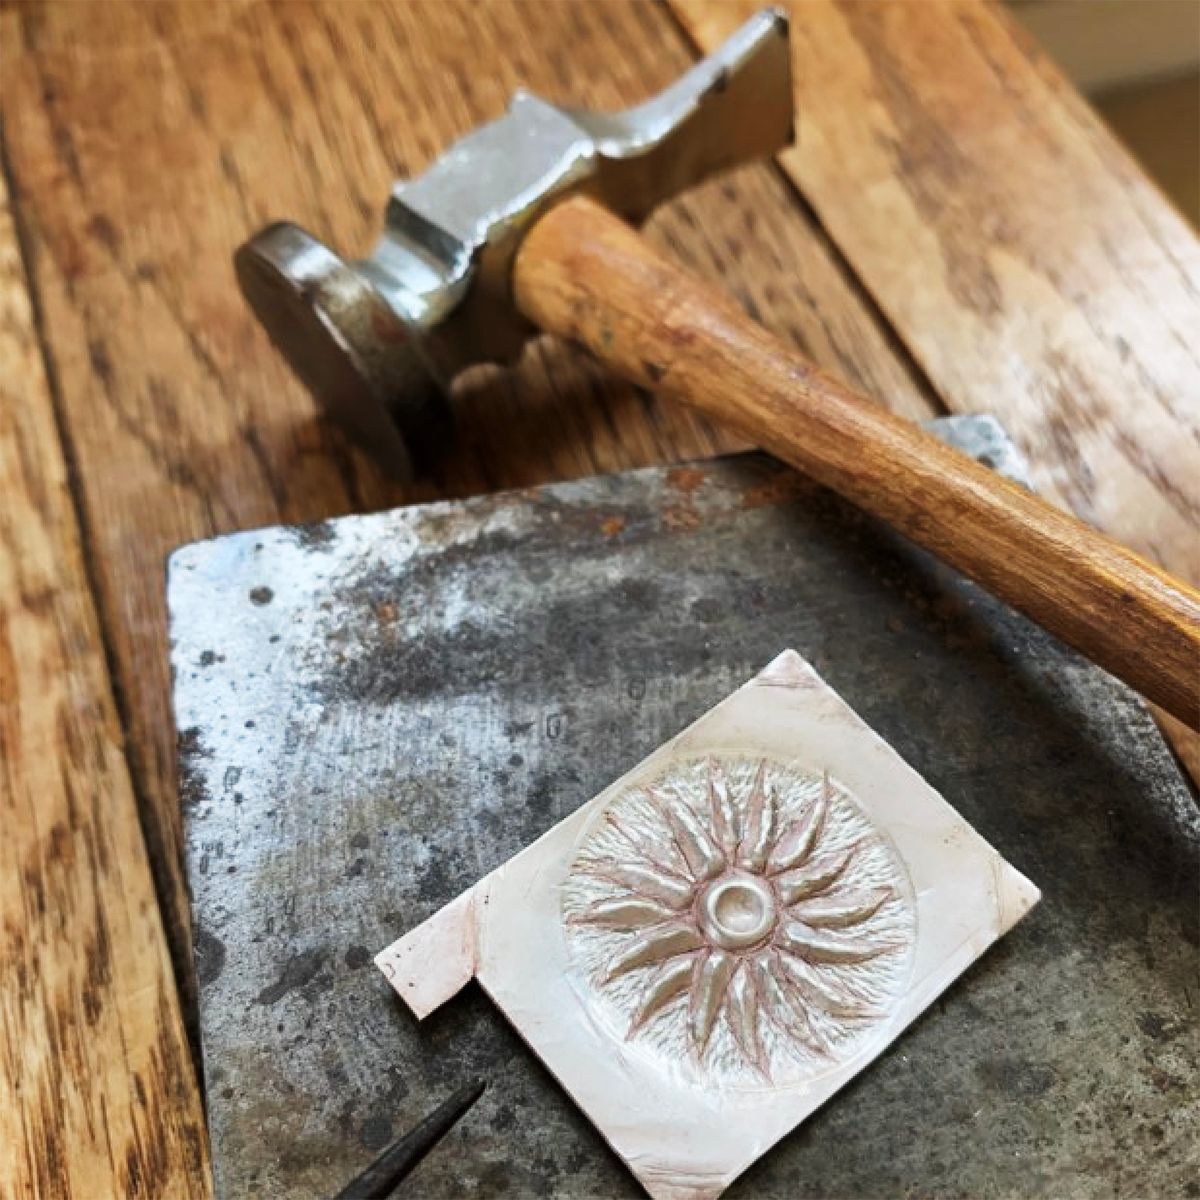
Chasing Hammer
The chasing hammer has a nice curved handle so it springs back to your hand, it also has a large face so that you are focusing on the punch hitting a sheet of metal, but not focusing on the hammer hitting the punch.

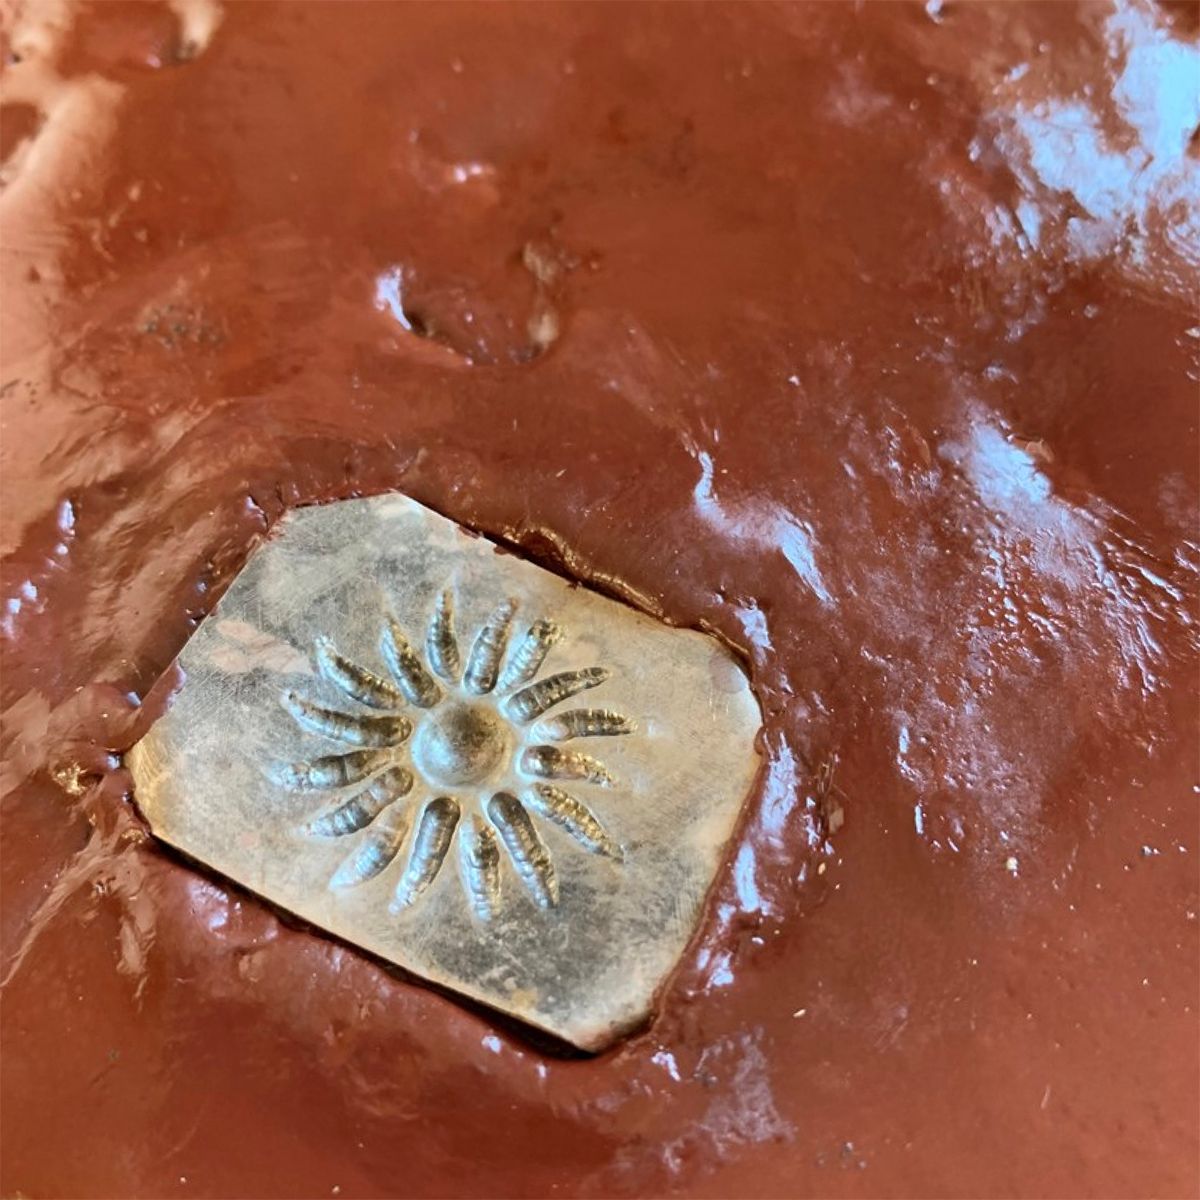
Pitch
The pitch is hard enough to hold a sheet of metal and it is soft enough to receive hammer blows. I use resin based red pitch in a cast iron bowl.

Use an old catalogue as an alternative to a pitch
You can also chase and repoussé on a thick, soft book instead of using a pitch as long as you are not hammering the metal too deep and your design is shallow. It is an easier and faster method to use, compared to a pitch because you do not need to take your metal off the pitch. Simply secure the metal with masking tape.
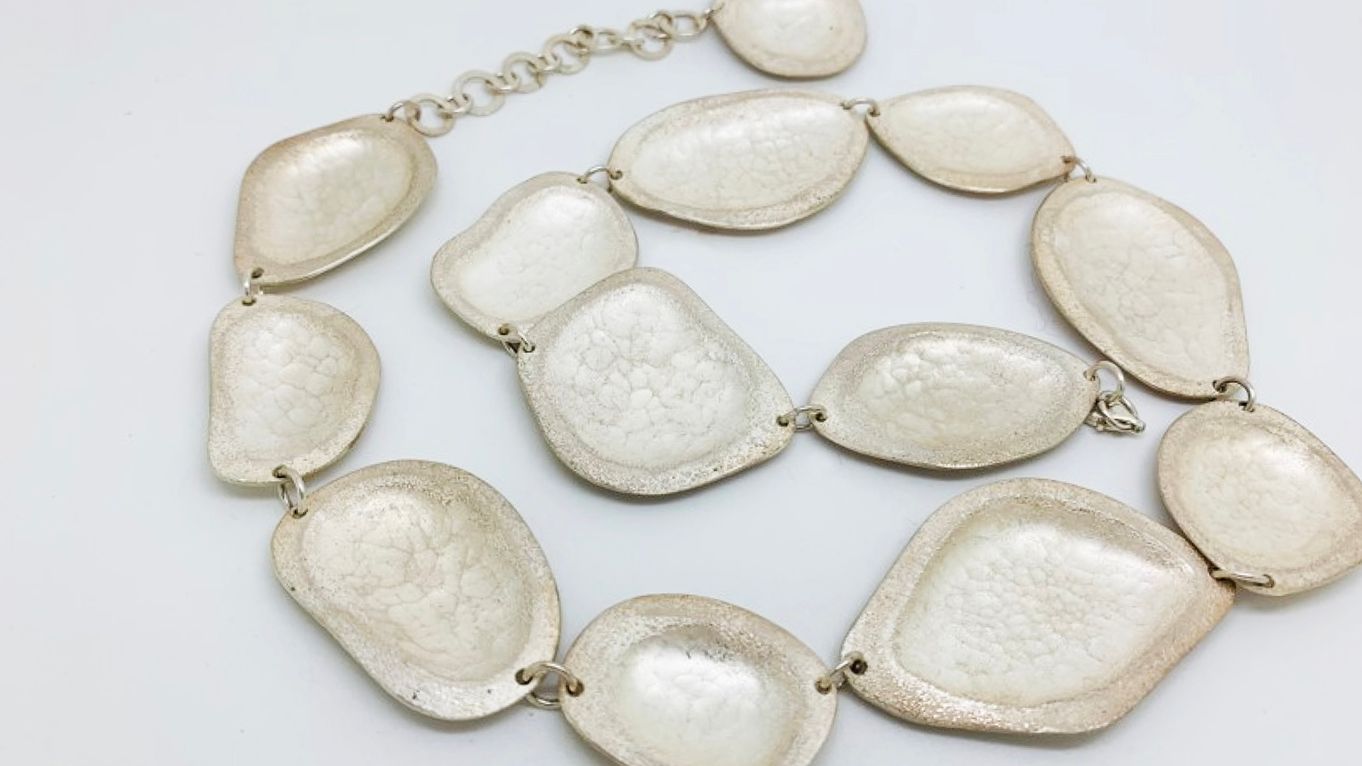
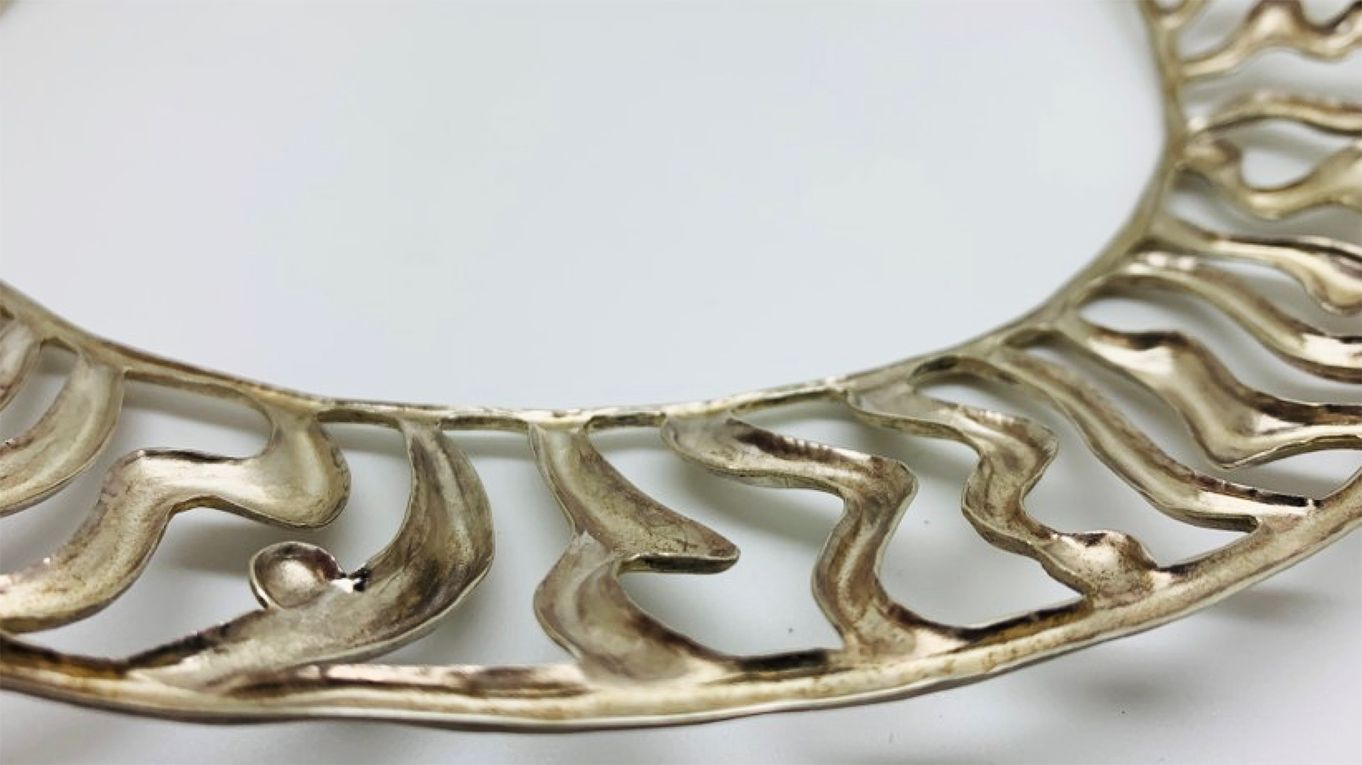
Example Of Kumiko's Necklace Design Using Chasing & Repoussé Techniques.
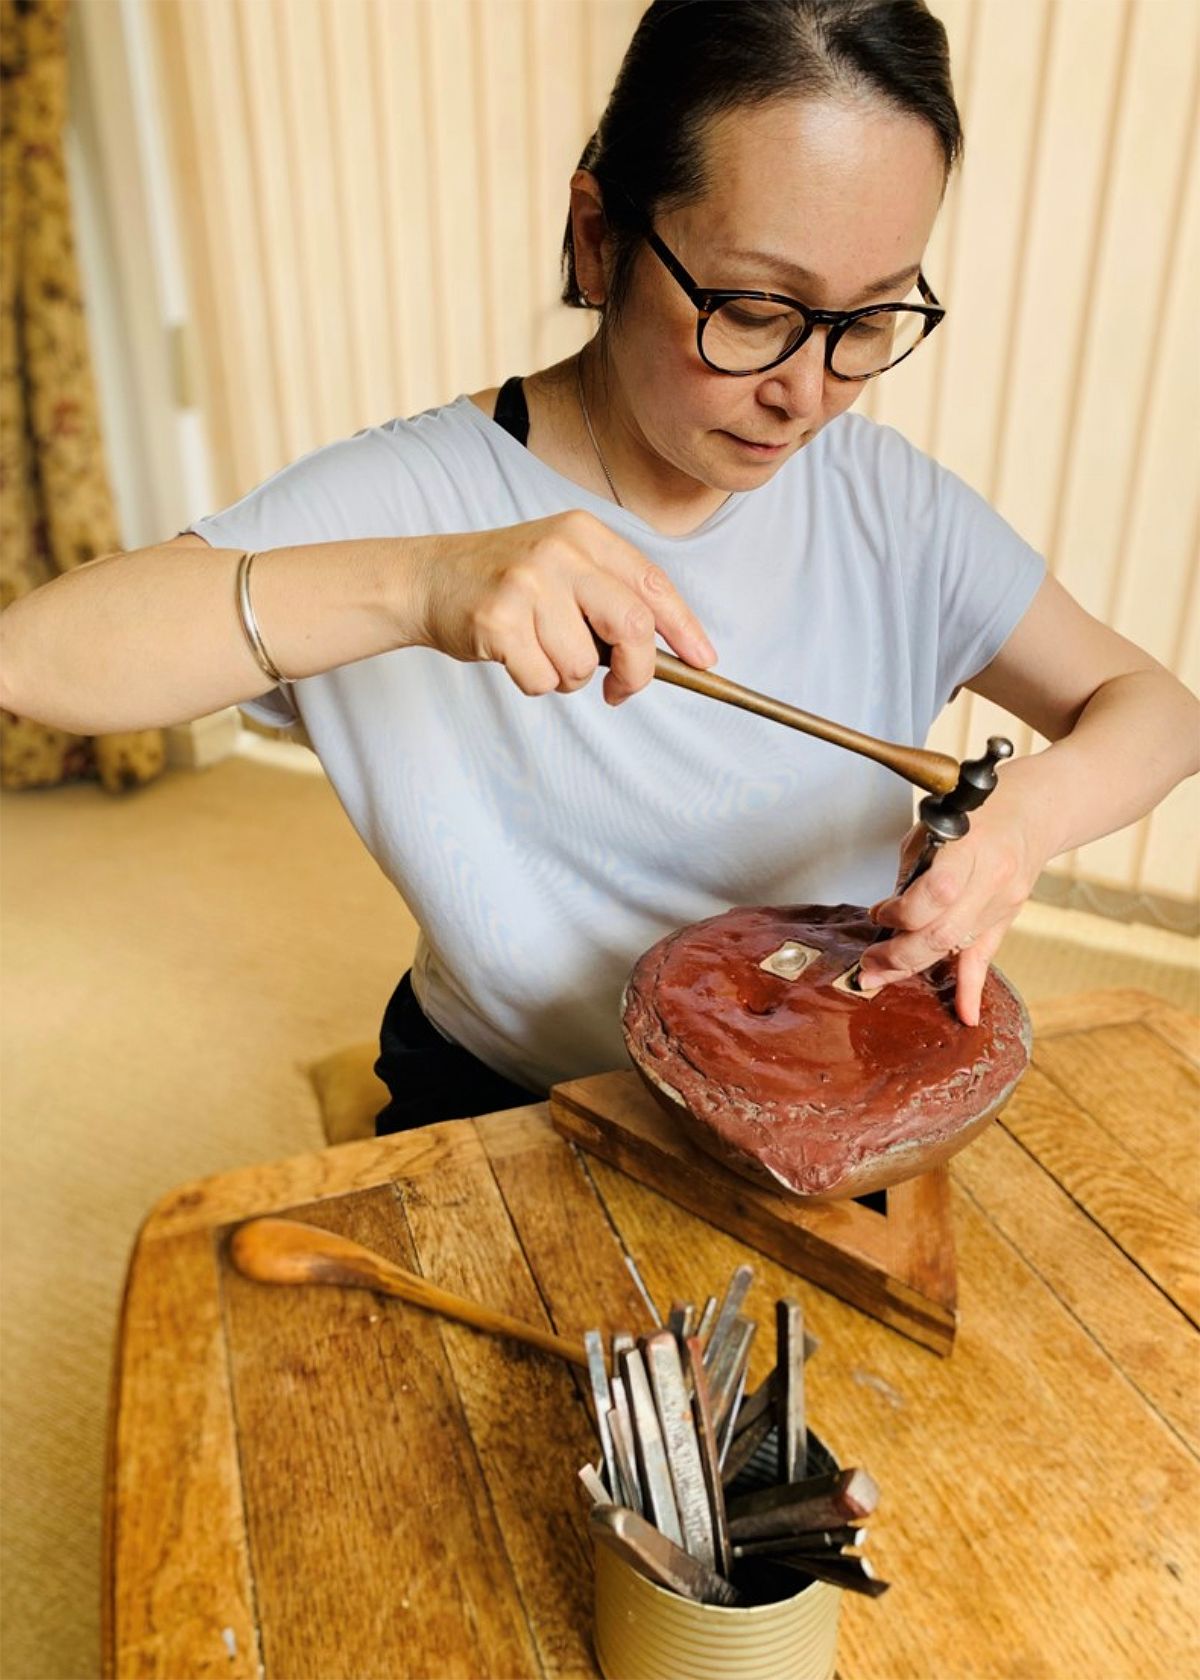
Posture
Relax your shoulders and hold the hammer very lightly so it springs back to your palm.
How To Hold A Punch
Use your thumb, middle and ring fingers to guide the punch and the index finger to hold it straight.
Chasing & Repoussé Step By Step Guide
- Draw your design on paper and transfer onto a sheet of desired metal. I would use copper as a metal to start with, because it’s a softer metal. I use a marker pen to draw on the metal.
- Rub olive oil lightly on the back of the metal to avoid it sticking too hard to the pitch.
- Bend the 4 corners of the metal to anchor to the pitch.
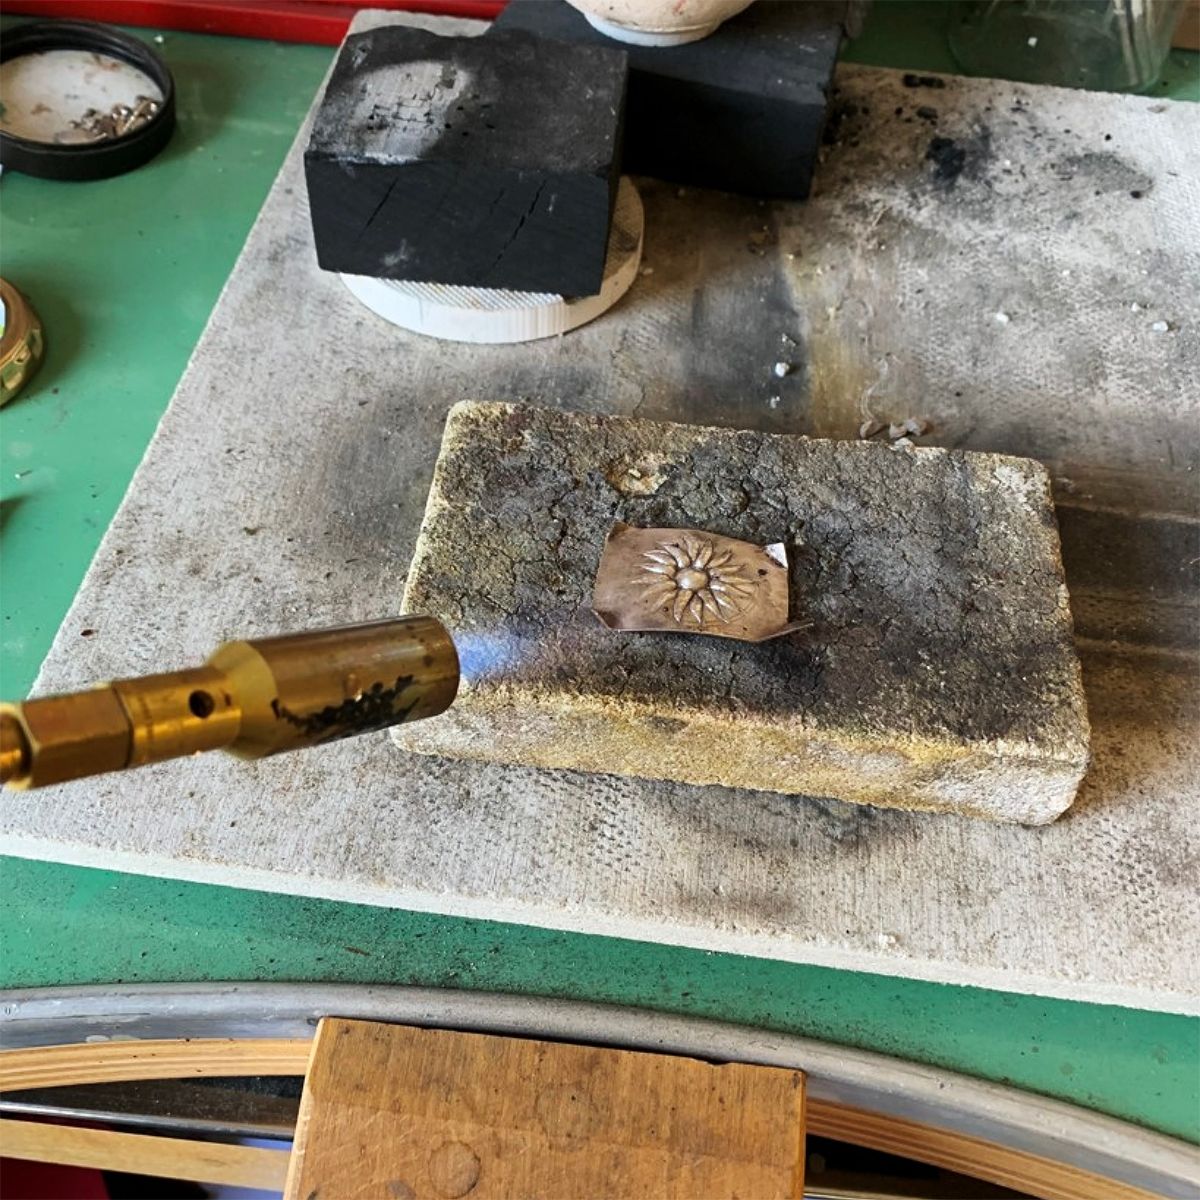
- Warm the pitch with a gentle flame to soften and flatten the surface. Keep moving the torch to prevent burning the pitch.
- Push the metal down on the pitch and make sure that it is supported by it.
- Wait until the pitch cools down to the room temperature.
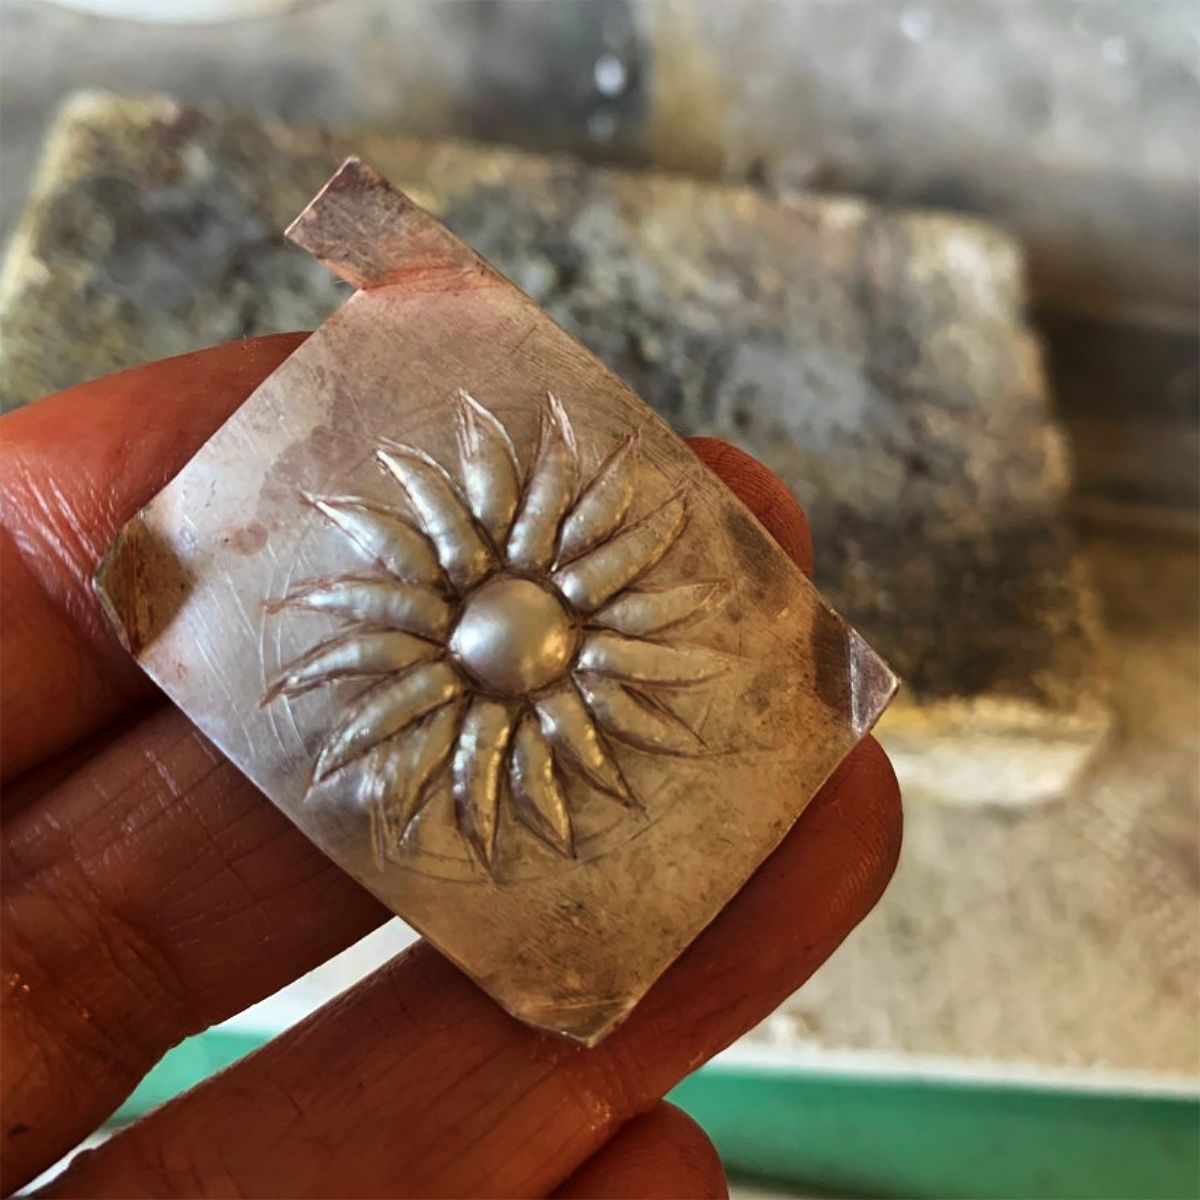
- Use a tracer punch to go over the design.
- Use straight or curved punches to draw (well, to hammer really but it is almost like drawing) over the mark you have just made. Hit the punch with a hammer lightly and slowly. You are almost pushing the punch down and pulling it towards you so you are making a continuous line.
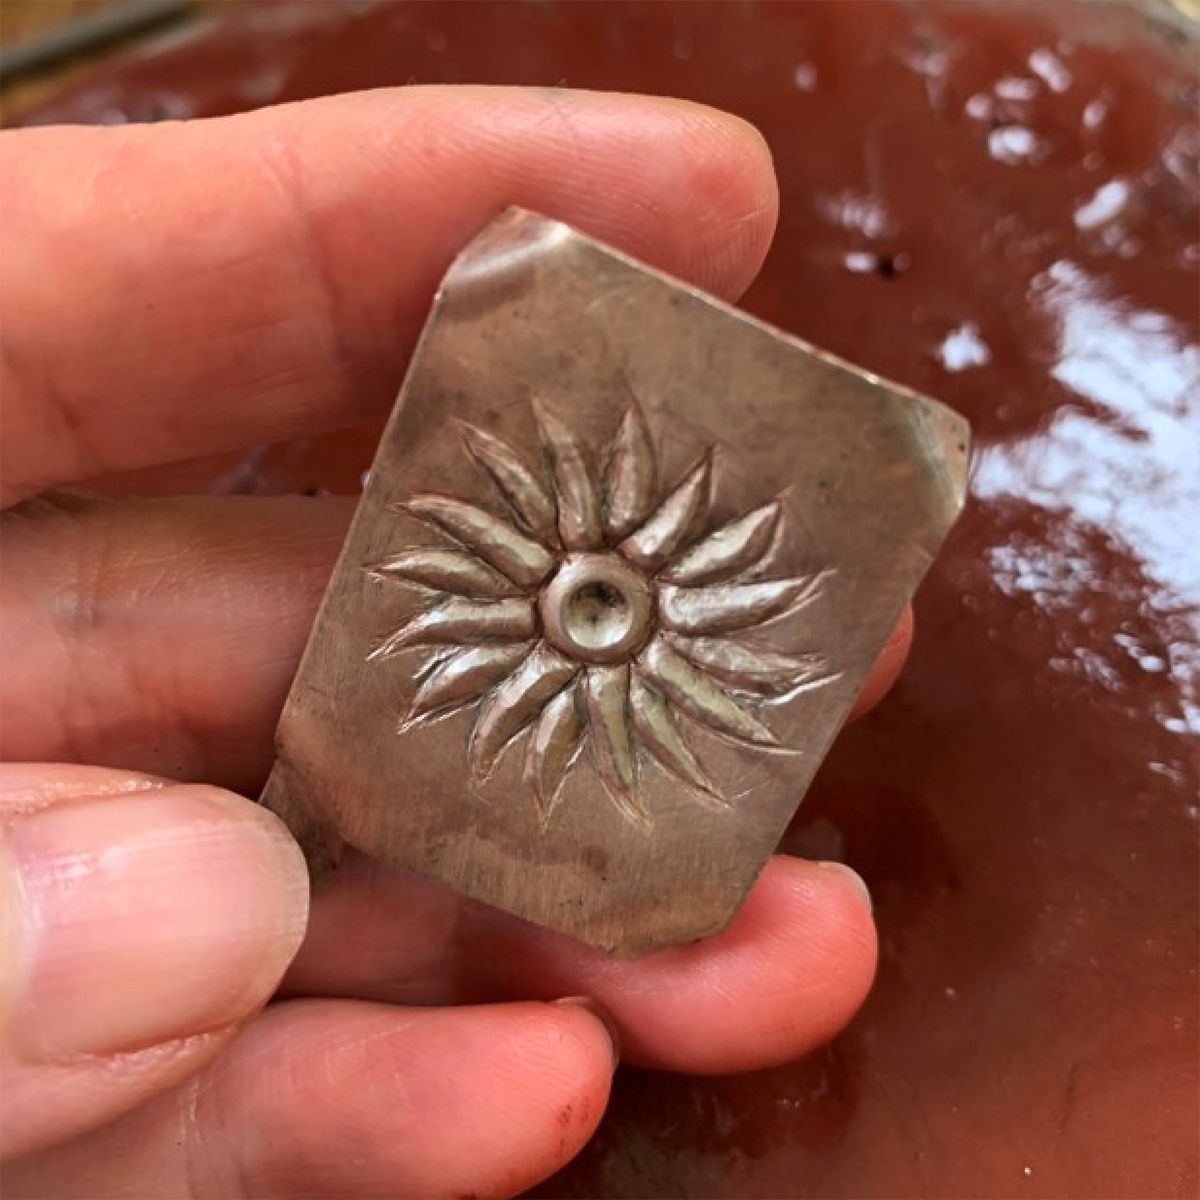
- After finishing the outline of the design, remove the metal by warming up the pitch then lifting it with tweezers.
- If there is only a little pitch residue left on the back of metal, remove it by burning it off, but if there is a lot left on there it is best to warm it and drip it back to the pitch bowl. (Don’t put the burnt pitch back onto the bowl, it will ruin the pitch). Remember to ventilate whilst burning the pitch.
- Anneal the metal and clean it, dry it well, then oil it. (Pickle it if necessary)
- Warm the pitch again using a torch.
- Turn the metal over and put it back on the soft pitch. Anchor it well on the pitch using a pair of pliers to bend the corners.
- When the pitch has cooled down, hammer the metal with the round or domed punch to create the desired volume.
- When the metal is getting harder, it will need annealing again. (repeat steps 9-12)
- The corners of the metal are curled and disturbed, these need to be straightened by using a liner punch on a metal block.
- Anneal and clean in pickle if necessary.
- Return the metal to the pitch for more work and repeat working on the front or back until you are happy with your design.
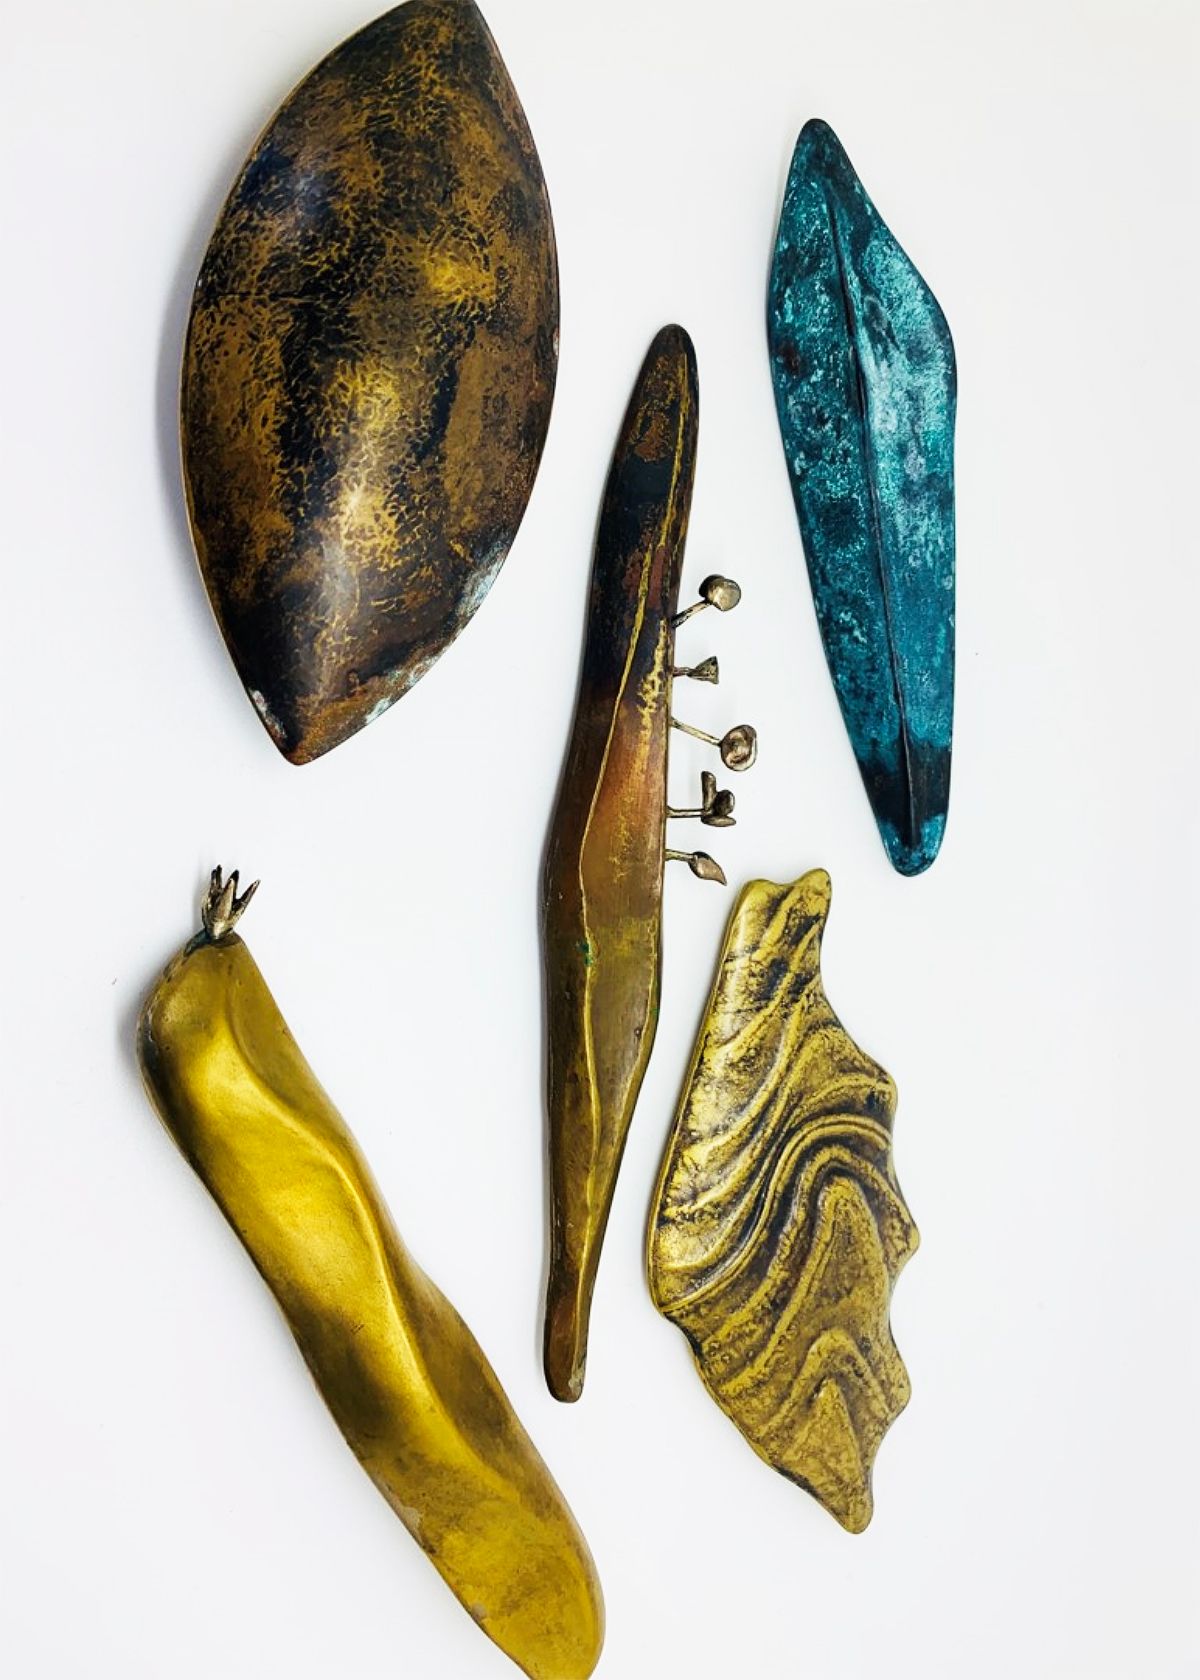
Examples of kumiko's jewellery using chasing and repoussé techniques
Chasing & Repoussé Top Tips
- Check your posture; try to relax the arms and shoulders.
- Draw and glide the punch towards you whilst hammering.
- Change the weight of the hammer as required for the more delicate lines.
- Work the edges then work towards the middle.
- Define the outlines to see the actual volume.
- Have a mental image of your design.
- Listen to the rhythm of the hammer.
- Do not worry if the line is not perfect, it is a “give and take” process.
- When you are not using the punches for a while keep them clean and oiled.
- Anneal the metal when it is getting harder.
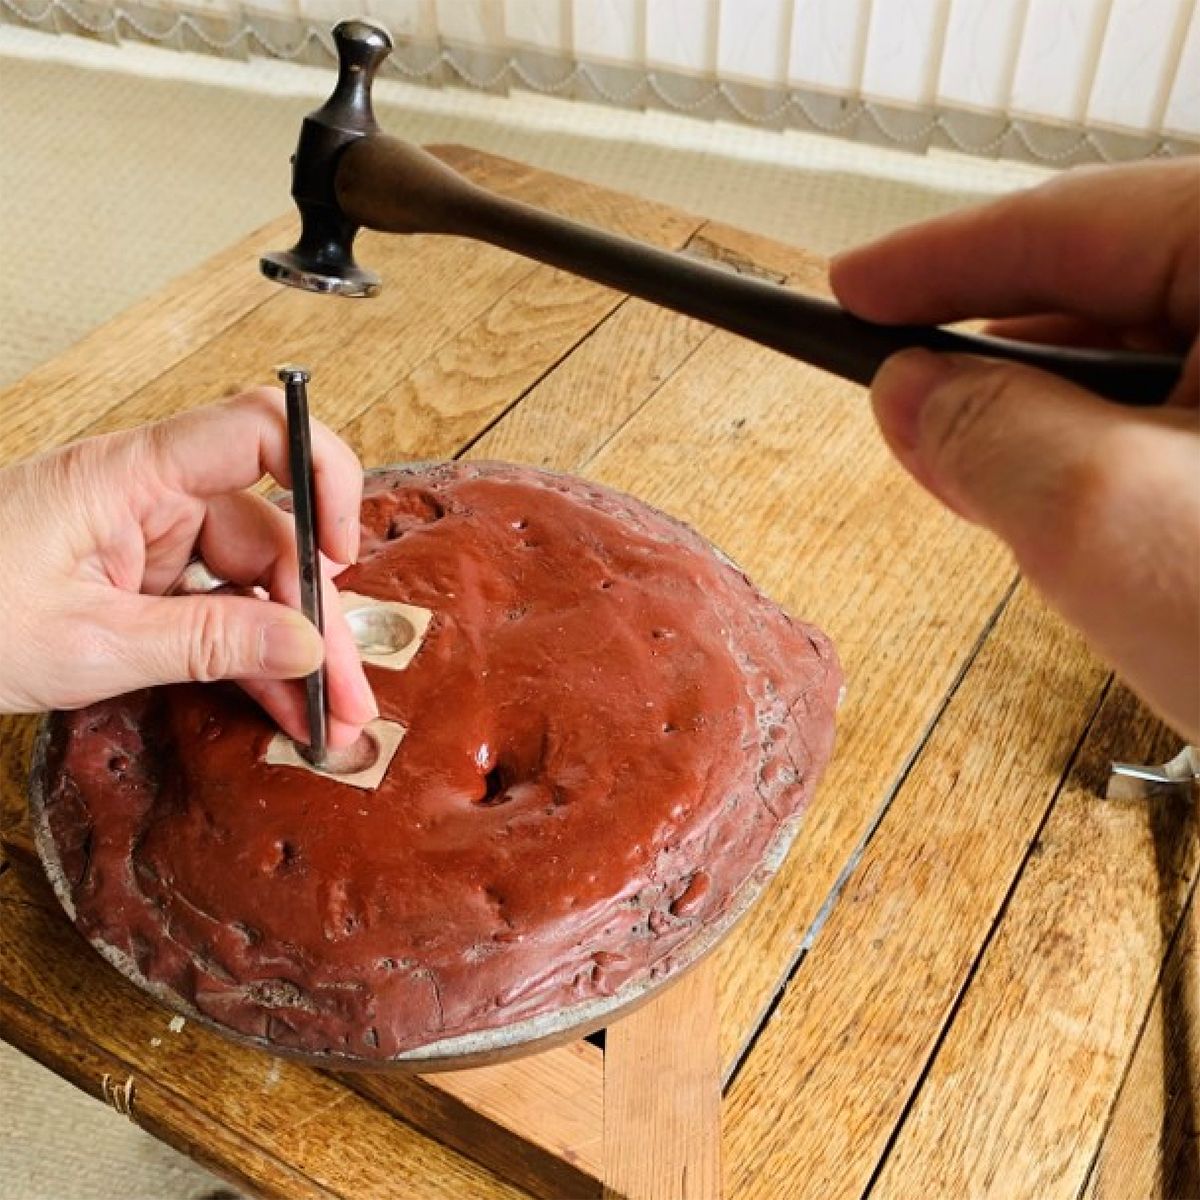
The metal is bent in the corners to anchor it to the pitch.
This photo shows that the metal was only hammered from the back.
This photo shows the metal was chased from the front as well.
This photo shows that the metal surrounding the design has been chased, so the motif appears more defined.
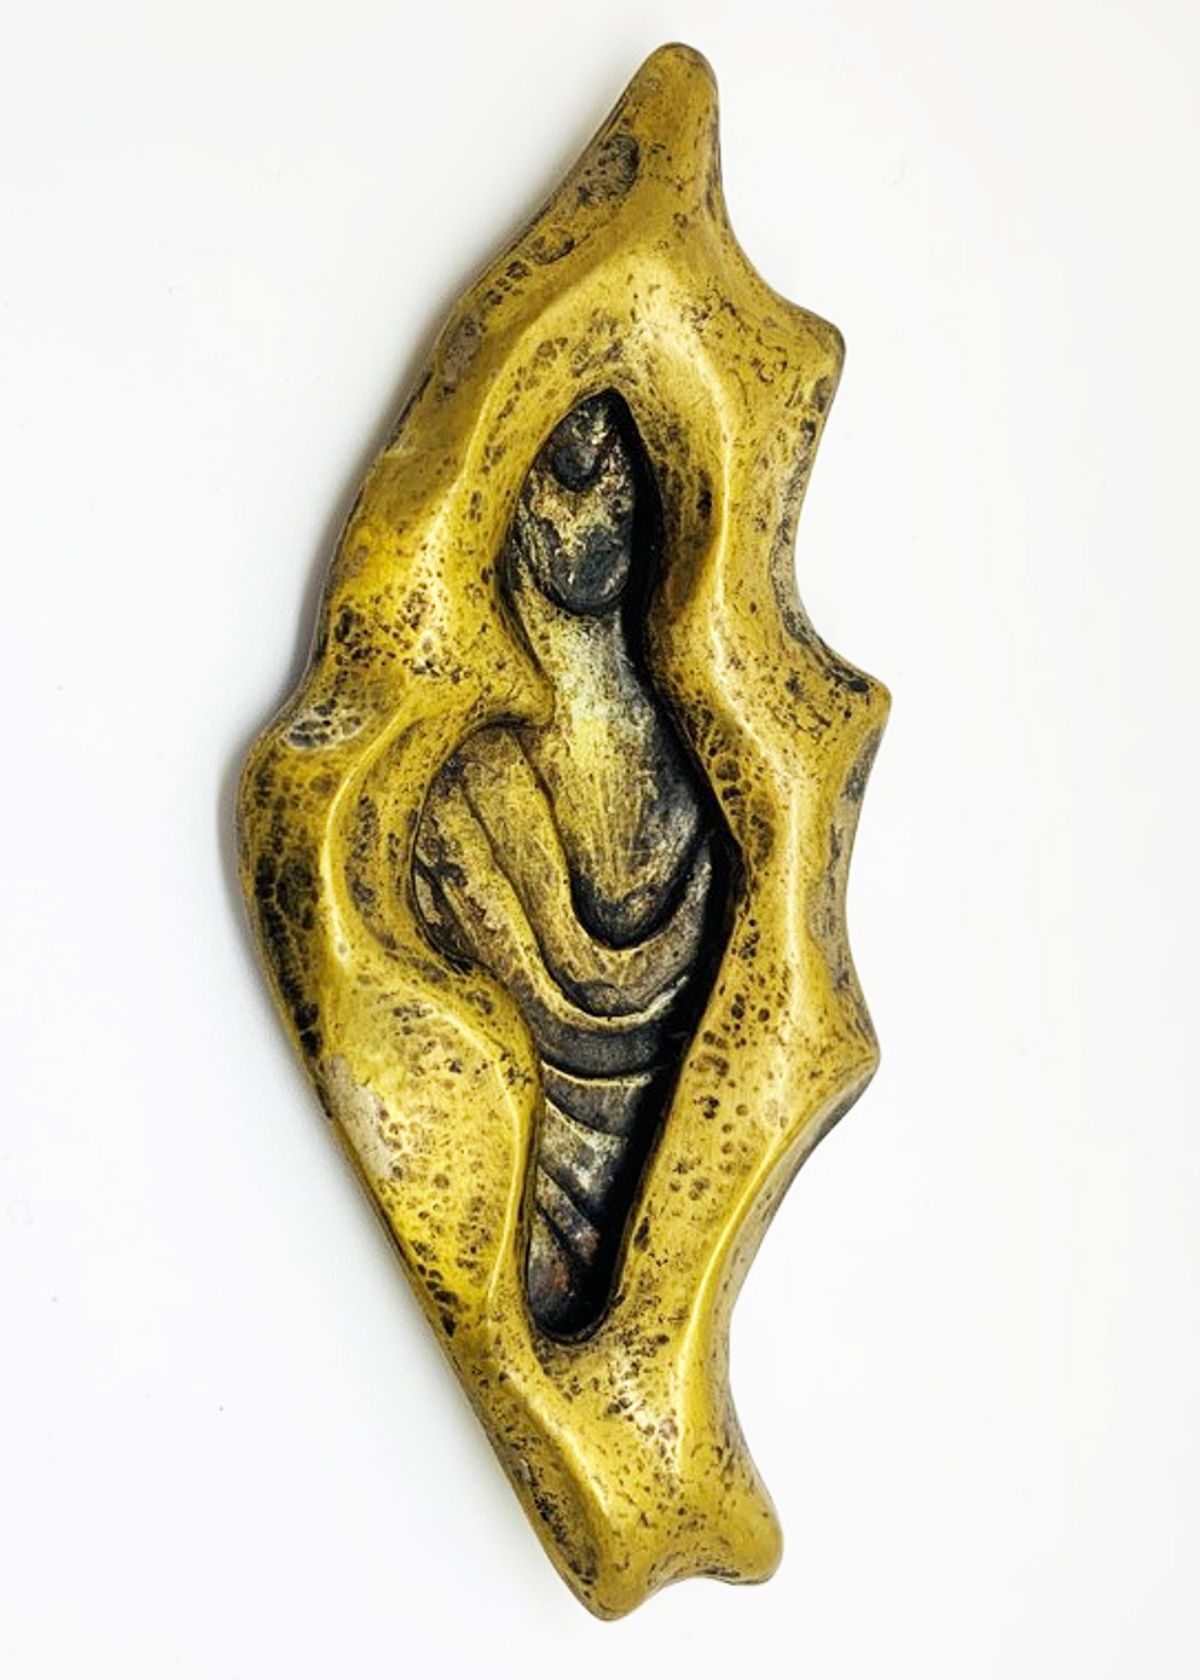

Photos above of examples of Kumiko's jewellery using chasing and repoussé techniques.

Meet Guest Tutor, Kumiko & Read Interview
In our interview with Kumiko, we learn all about her jewellery making experience, how Japanese heritage and philosophy inspires her designs, more about her love for texture and show you some of Kumiko's incredible designs.
Kumiko also takes us on a day in the life of a jeweller! Watch Kumiko's fascinating creative process which includes left hand drawing, Japanese ink, beeswax lost wax casting, chasing & repoussé in the video below - also available to watch on the interview page.

A Guide On Texturing Metals For Jewellery Making
There are so many different effects that can be achieved with metals, whether that's adding a patina, texturing or shaping. All textures and finishes can be created easily on a budget, so you don't have to spend a lot of money for amazing results! Read our advice page for all the inspiration you need to get started.

How To Use Doming Block & Punches
Doming, also known as 'dapping' is a popular jewellery making technique used for creating curves and domes in soft metals. Learn about the essential tools, watch videos and follow step by step tutorials of various projects, including how to make domed disc earrings.
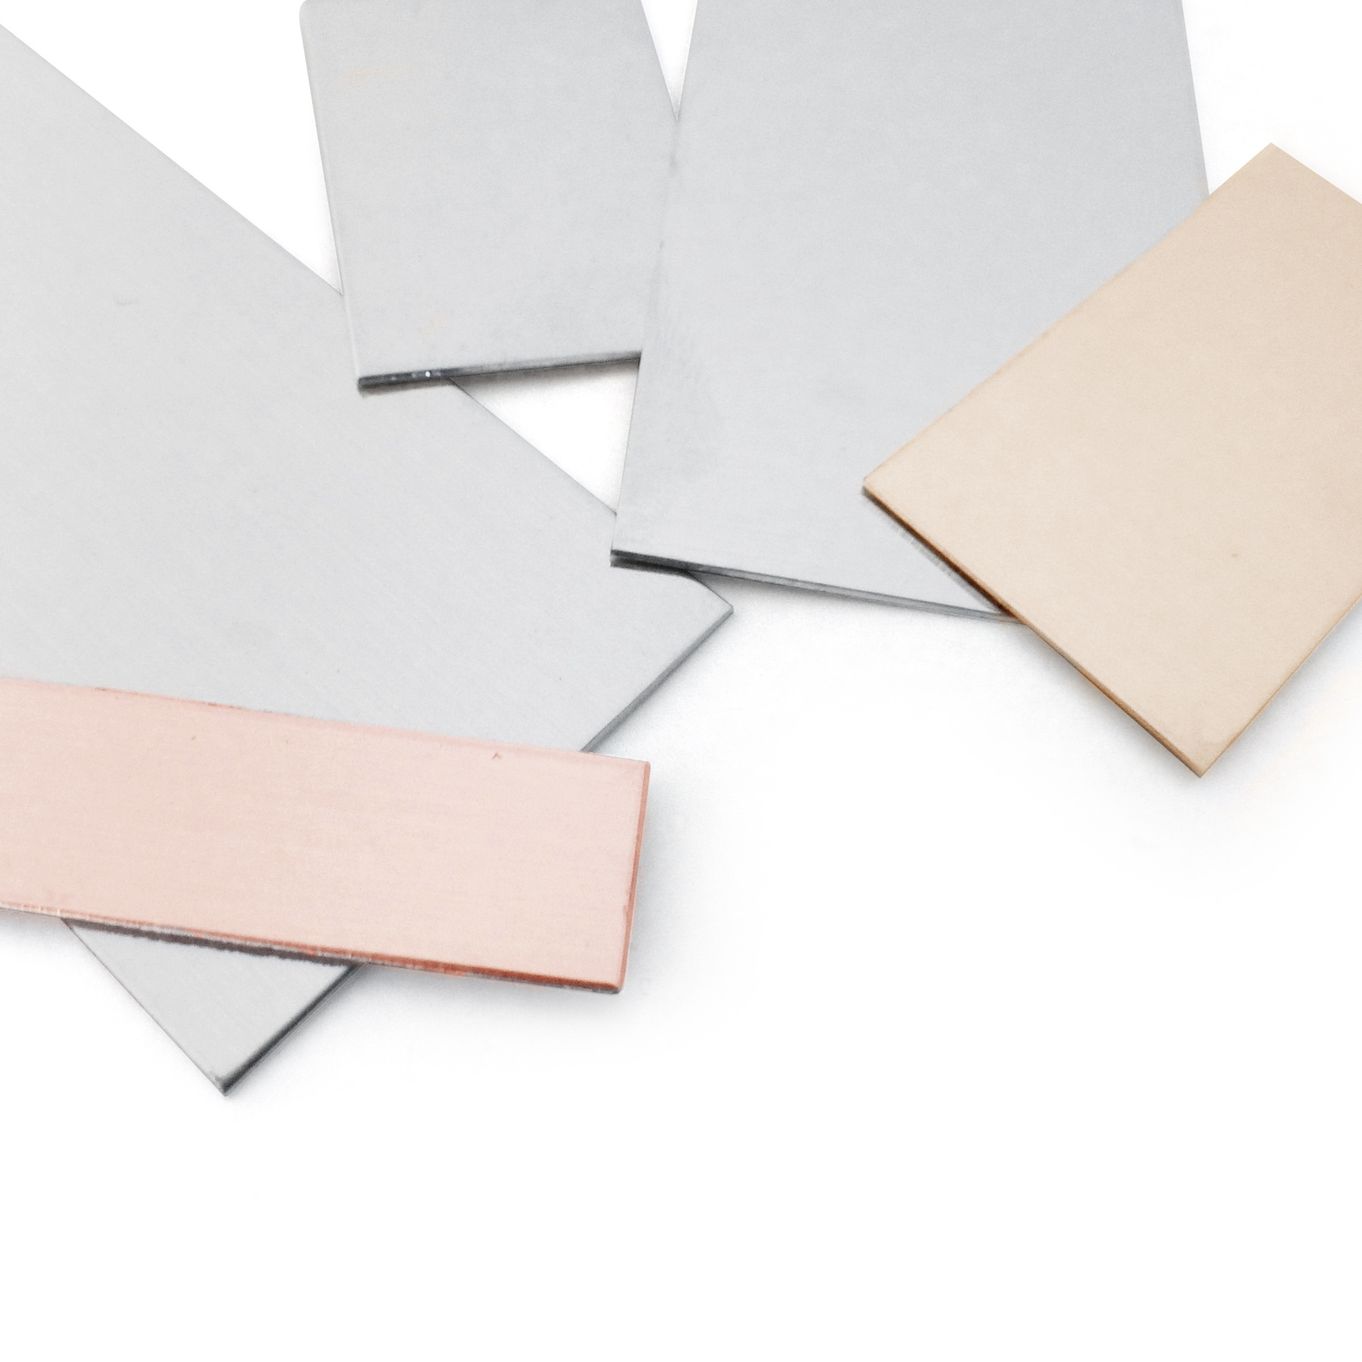
Metal Sheet
Explore our wide range of metal sheet to suit your jewellery making needs. Including sterling silver, copper, brass, bronze, gilding, 9ct gold as well as recycled metal sheet.
Explore Jewellery Making Tools
Shop Kernowcraft's high quality jewellery tools that have been tried and tested in the workshop. Whether you want jewellery pliers, jewellers hammers, doming blocks or small hand tools, our range of jewellery making tools have been carefully chosen to provide you with tools that are built to last.
Also in this section:
- Guide To Sanding & Polishing For Jewellery Making
- Hand Polishing Your Jewellery With Polishing Papers
- A Guide To Texturing Metals For Jewellery Making
- Top Tools For Making Textures On Metal
- Beginner's Guide To Chasing & Repoussé
- How To Make Easy Textured Earrings
- How To Make A Hammered Copper & Silver Heart Pendant
- How To Make A Textured Cuff Bracelet
- How To Make A Metal Leaf Decoration
- How To Use Doming Block & Punches For Jewellery Making
- How To Make Domed Metal Earrings With A Doming Block
- How To Engrave Your Drawings On Art Clay Copper
- Textured Washer Bracelet Tutorial With Guest Jeweller Laura Grey
- Barrelling Machine For Polishing Metal - Everything You Need To Know
- Tumbling Machine For Polishing Stones and Glass- Everything You Need To Know
- Polishing Jewellery Q&A With Stephen M Goldsmith
- Town Talk Products For Cleaning & Caring For Jewellery
- Creating A Resin Bird Pendant With Designer Sarah Hoare
- VIDEO: How To Create Patina With Liver Of Sulphur
- 2 Ways To Apply Liver Of Sulphur
- VIDEO: How To Use Silver Plating Solution
- How To Clean & Prevent Tarnished Jewellery
- Why You Need Anti Tarnish Paper Strips
- How To Use Midas Finish Seal Lacquer
- How To Use Renaissance Wax To Prevent Tarnished Jewellery
- VIDEO: Working With Crinkle Metal Sheet
- A Guide To Using Mokume Gane Metal For Jewellery Making