Carnelian & 'Ruby' Earrings
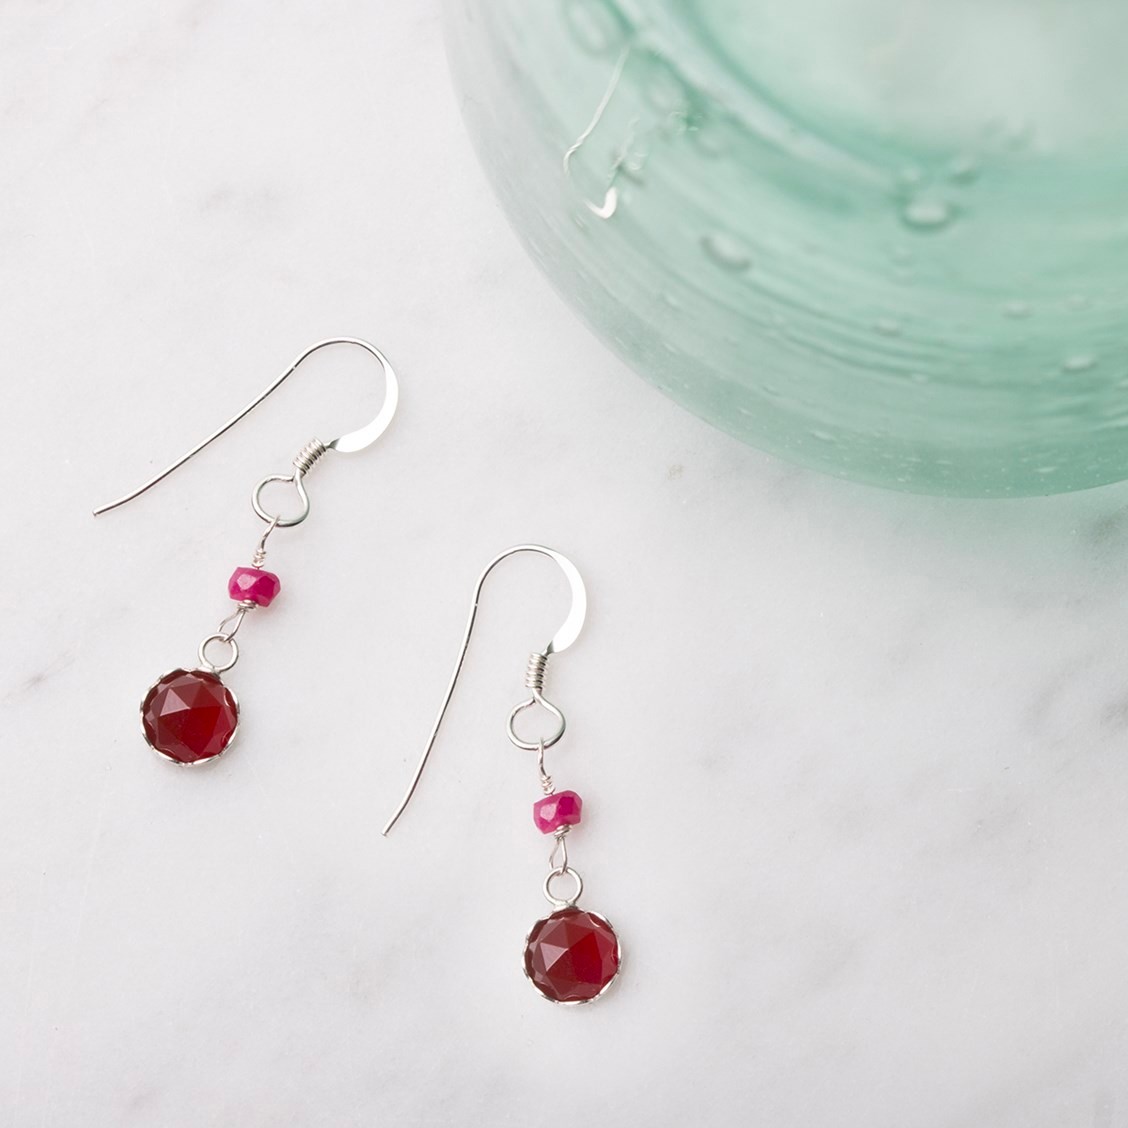
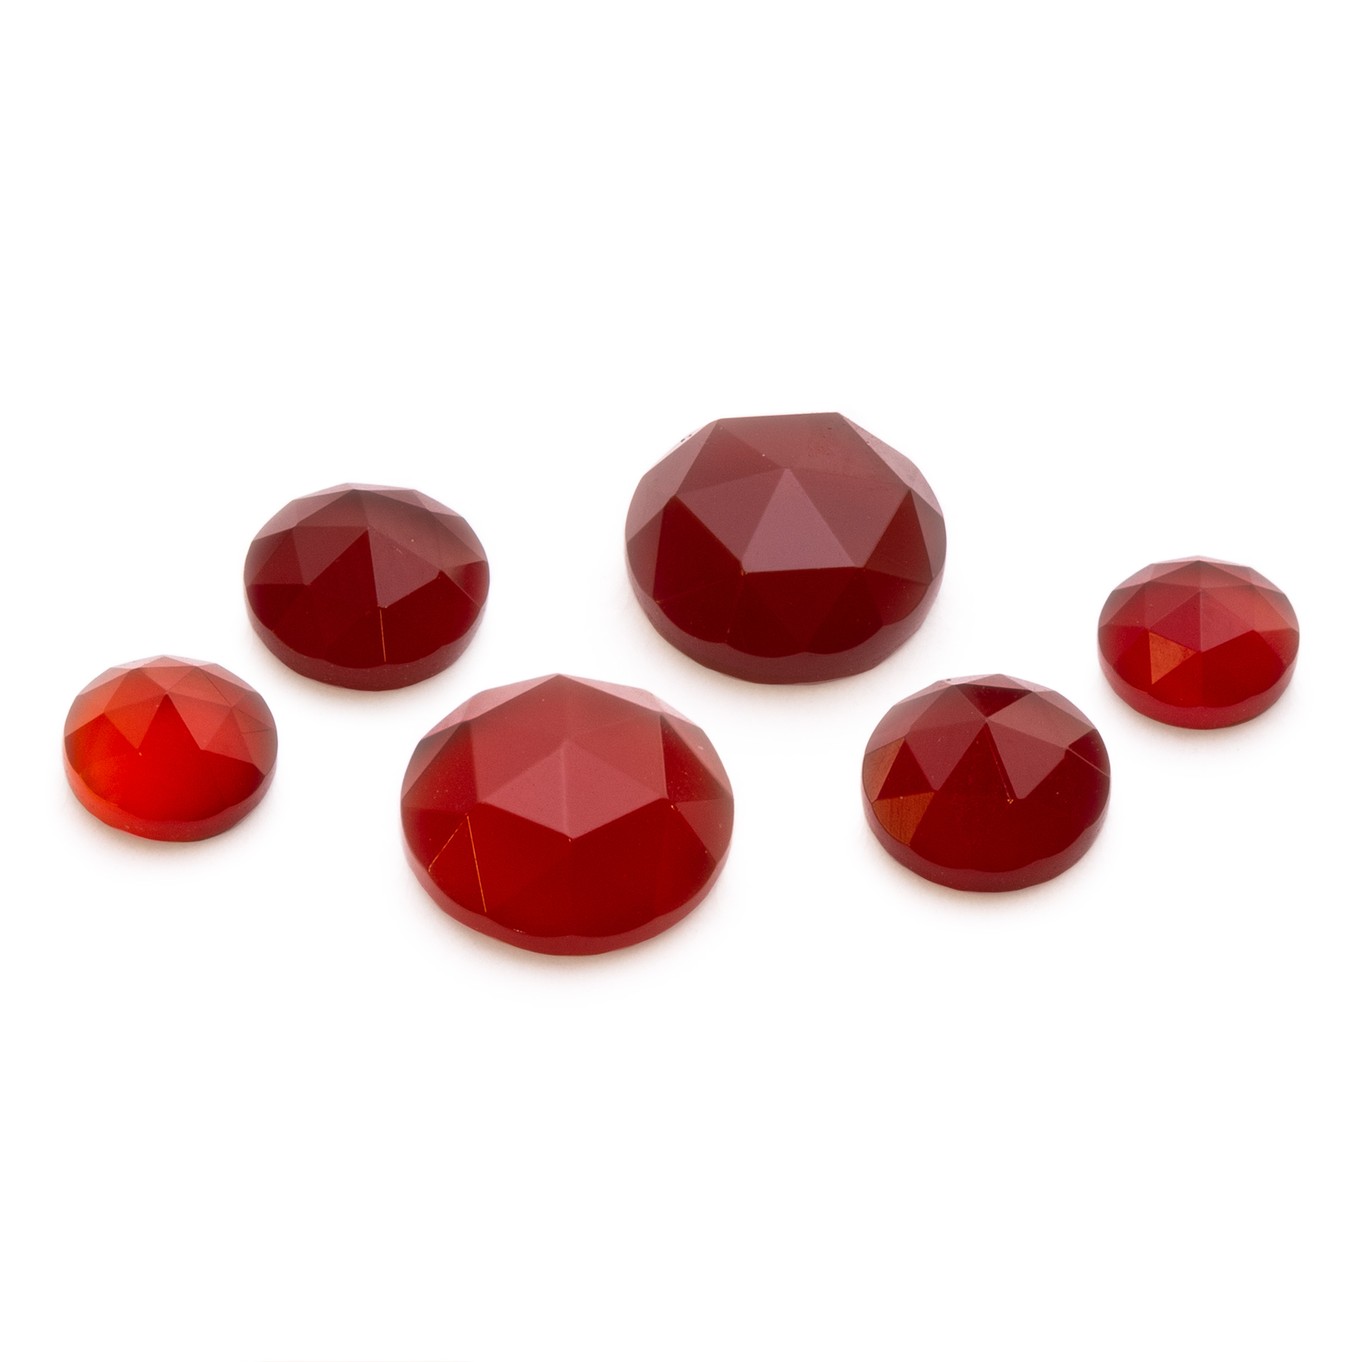
This project features our stunning new range of rose cut cabochons! These carnelian and ruby earrings add that pop of colour to your outfit.
STEP BY STEP INSTRUCTIONS
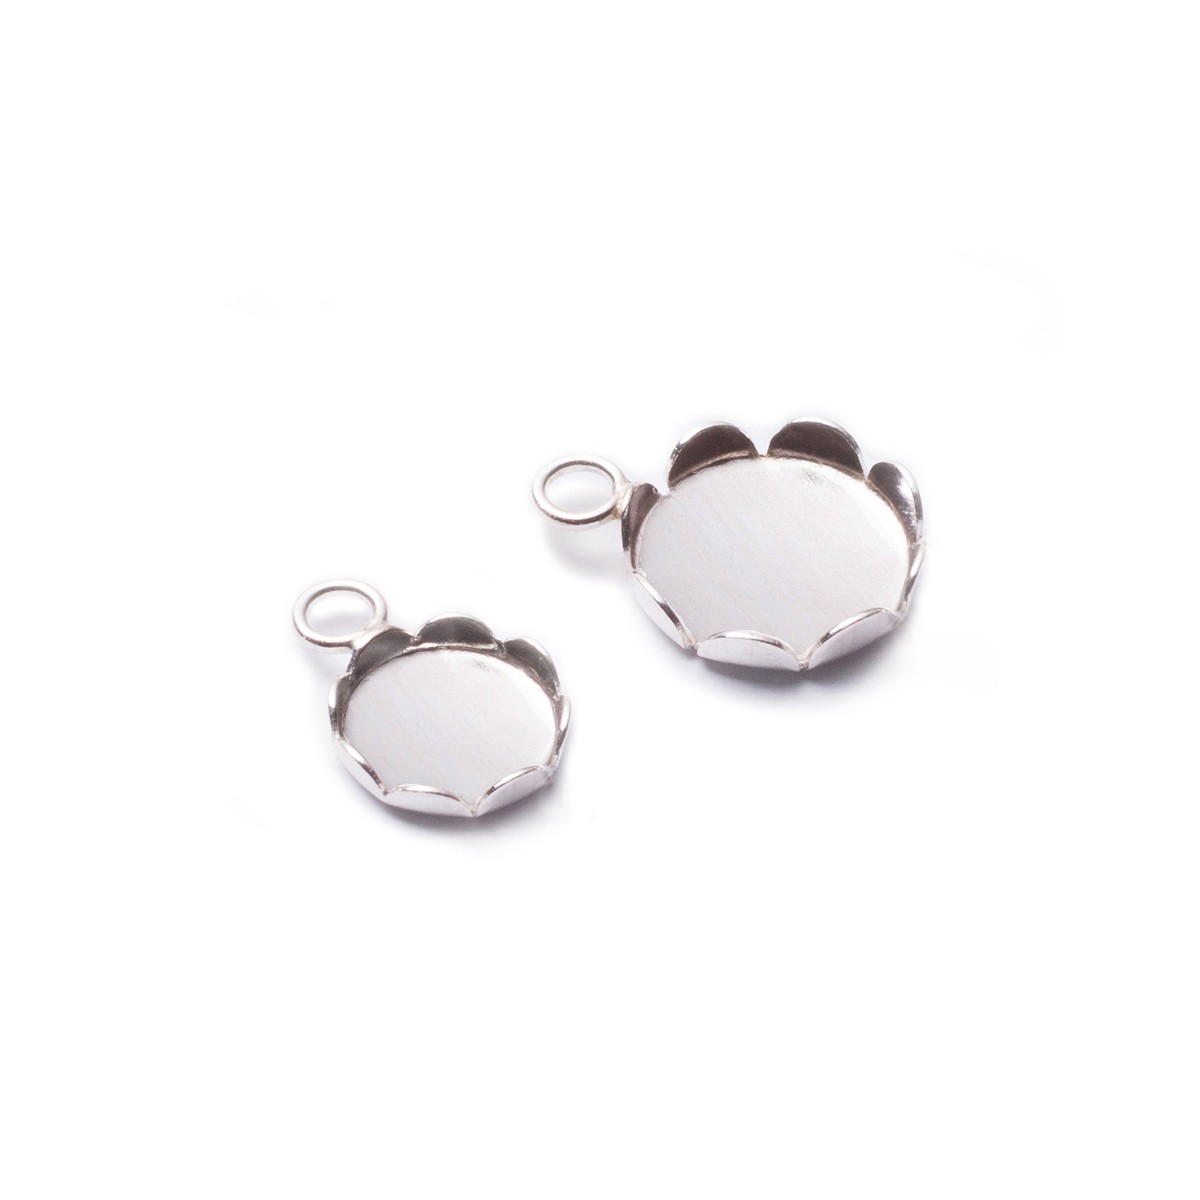
1. Begin by applying glue to the petal edge settings and set the carnelian cabochon. Leave to dry.
2. Use side cutters to cut 5cm of 0.3mm sterling silver wire.
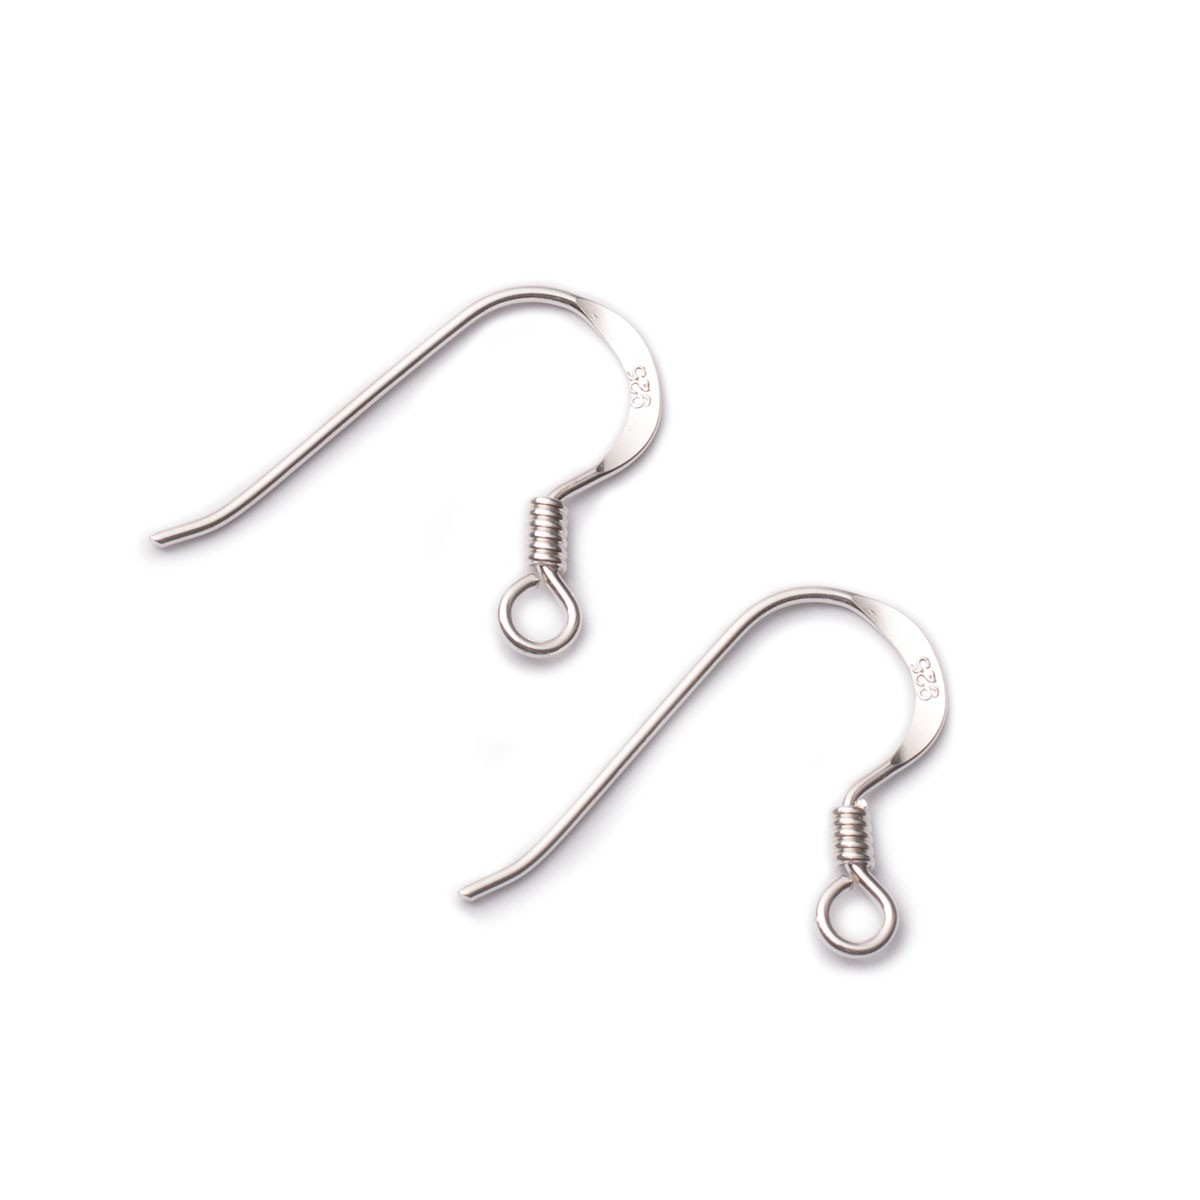
3. Wire wrap the bead (see a detailed step by step instructions with photos here) by taking the wire and forming a loop one end using the round nose pliers, leaving a short length one side of the loop. Before you begin to wrap the wire, catch in the loop of the earstud. Take the shorter length of wire and wrap it around the longer length to create a tight neat coil, 2 or 3 twists should be enough. You can use your pliers to help hold the wire whilst wrapping.
4. Cut off any excess wire as close to the coil as possible then use the snipe nose pliers to make sure it's tucked in and there are no sharp points.
5. Thread the bead onto the open end of the wire then place your round nose pliers after the bead and bend the wire to a right angle. Form another loop and catch in the petal edge setting. Repeat the process of wrapping the wire back down the pin towards the bead. Again, neatly cut off any excess wire and tuck in any sharp points.
6. Repeat the steps for the other stud and your design is complete!
SUGGESTED TOOLS FOR THIS PROJECT
Snipe nose pliers or flat nose pliers
You may like to get our pack of pliers & side cutters which is an economical way of buying all the pliers you will need for every project!
CUSTOMISE YOUR KIT
Make the design your own by using your favourite jewellery supplies
HELPFUL PAGES
Read our wire wrapping advice pages with tutorials
JEWELLERY MAKING BOOKS
The Basics of Bead Stringing by Debbie Kanan
Beading Design by Kim Glover
Kernowcraft's jewellery making kits are aimed to inspire you - therefore the step by step instructions are available online only with a shopping list, where you can easily customise the design to suit you. We recommend printing or bookmarking this page ready to follow.
The suggested products used in this project are suggestions to inspire you. Products used were compatible at the time of making but do be aware that gemstones are natural and hand cut stocks can vary, so do use your own common sense as to the compatibility of each item when making.
Your Shopping List
There are one or more items out of stock at present.