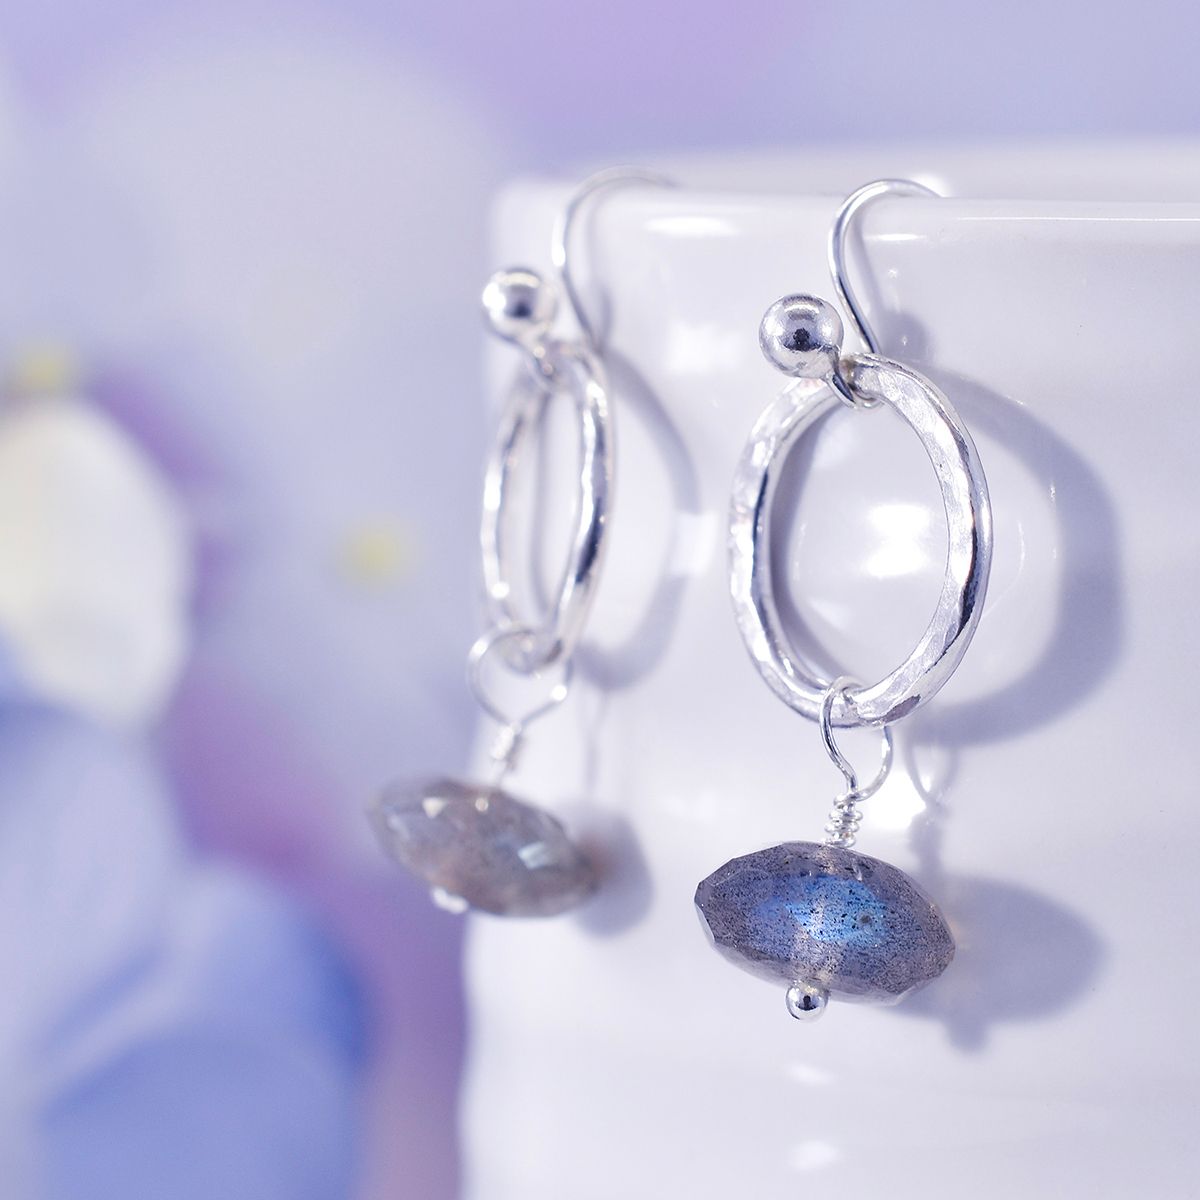
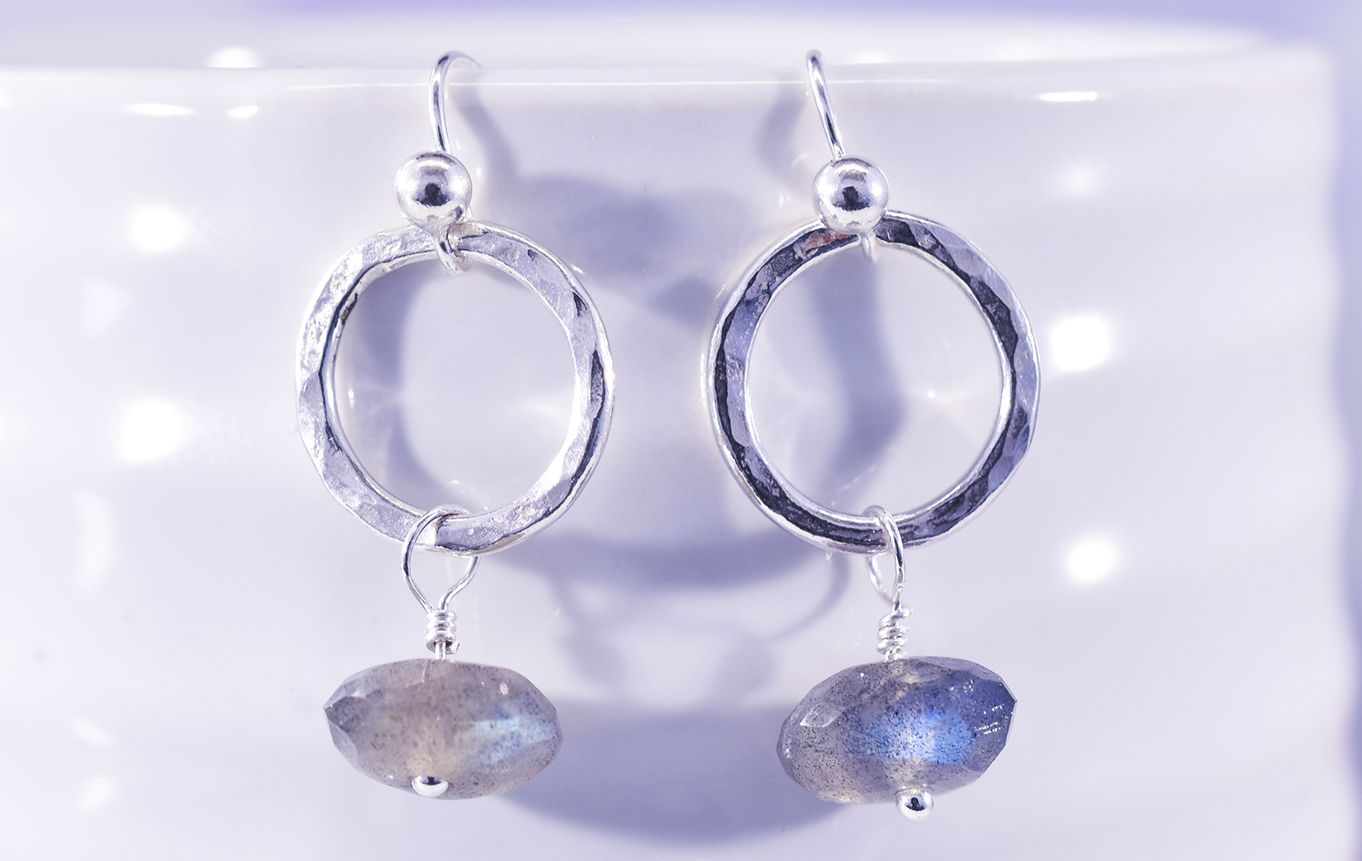
Soldered Circle Hoop Earrings With Beads Tutorial
Today we are so excited to share with you a guest tutorial, brought to you by Kirsty from Little Black Cat Jewellery!
In this project you will combine a range of techniques including forming metal, sawing, soldering, polishing and wire wrapping.
This is a great design to try if you want to dip your toes into the wonderful world of metalsmithing.
Or perhaps you've always focused on metalsmithing, so now could be the time to add some beads into the mix - as you can see the results can be beautiful!
If you try this design, we'd love to see your creations on social media! Make sure to tag @kernowcraft & @littleblackcatjewellery for a chance to feature
Recommend tools & supplies for this project
This project is perfect for experimenting with various wire, textures and beads - get creative!
For the soldered circles
- 1.5mm sterling silver round wire
- Looping pliers or something round like a dapping punch or solid round pen
- Bench peg and anvil
- Jewellers saw & blade
- Safety goggles
- Easy solder paste
- Gas torch
- Soldering block
- Soldering tweezers & third hand
- Water for quenching, safety pickle & plastic tweezers
- Chasing hammer or your chosen hammer
- Steel block
- Masking tape
- Your chosen polishing method: we recommend polishing papers/barrelling machine
For the wire wrapped beads
- Headpins (ensure they are flexible enough to wire wrap and also fit through your chosen bead) - this project featured our sterling silver extra fine 52mm heapins with balls, sold as a pack of 10
- 2 beads - this project features labradorite rondelle beads
- Sterling silver earwires with ball
- Round nose pliers
- Snipe nose pliers or bent nose pliers as featured (only available as part of our pack of pliers)
- Side cutters/flush cutters
Watch Kirsty's video tutorial below
Follow Basic Step By Step Instructions
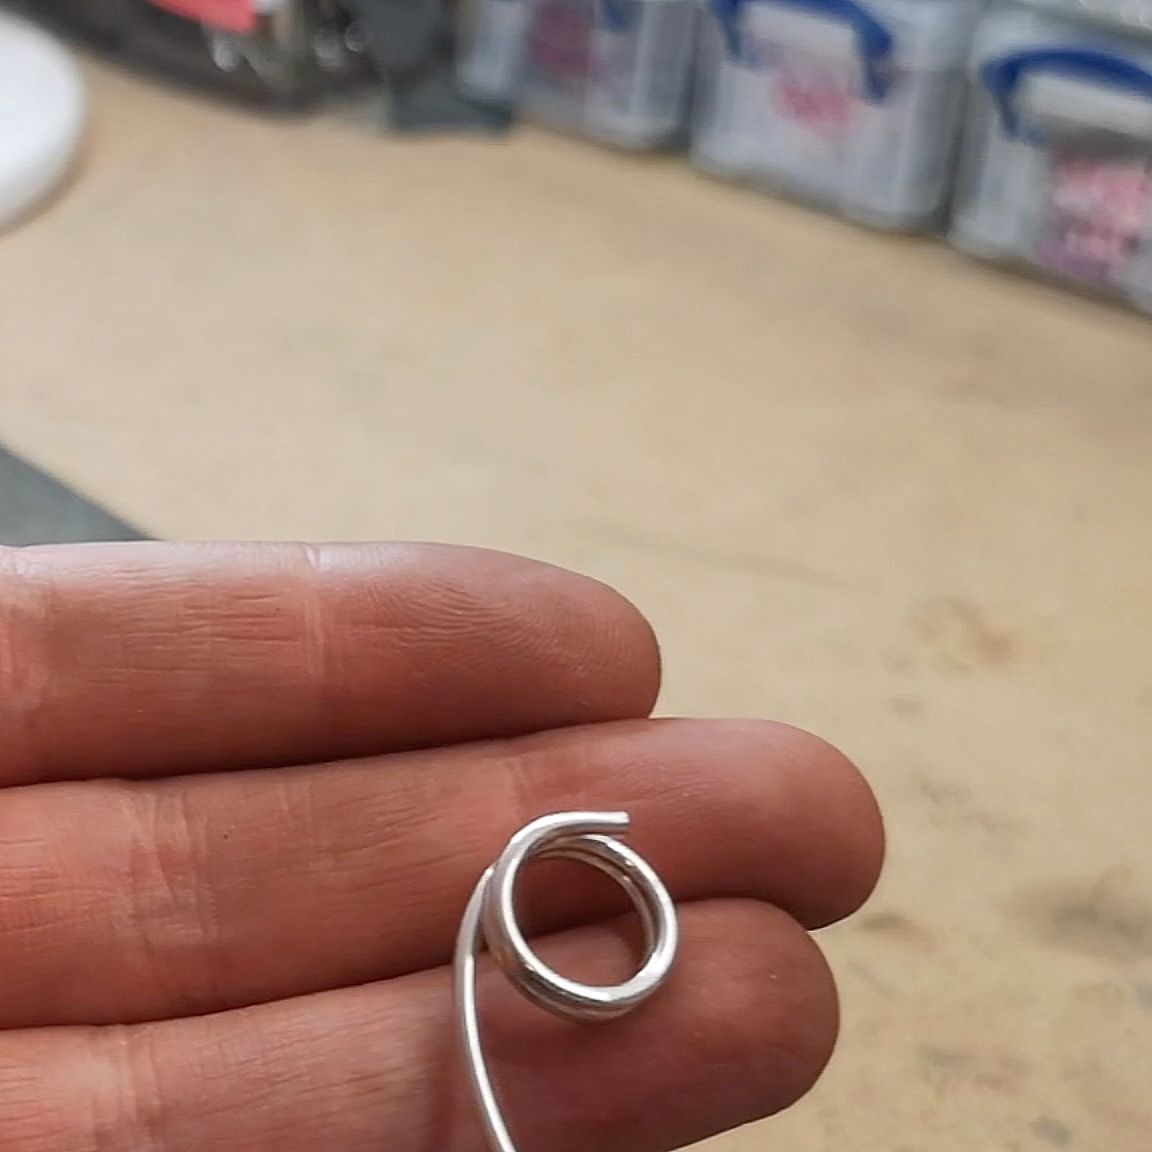
Step 1: Form The Loops
Use your wire looping pliers to wrap the sterling silver round wire to create a double wrap of silver, which should look like the one pictured above!
Step 2: Saw Loops To Create 2 Rings
Use your saw to cut through the loops to create 2 rings and ensure the ends of the rings are flush together and as tight as possible ready to solder.
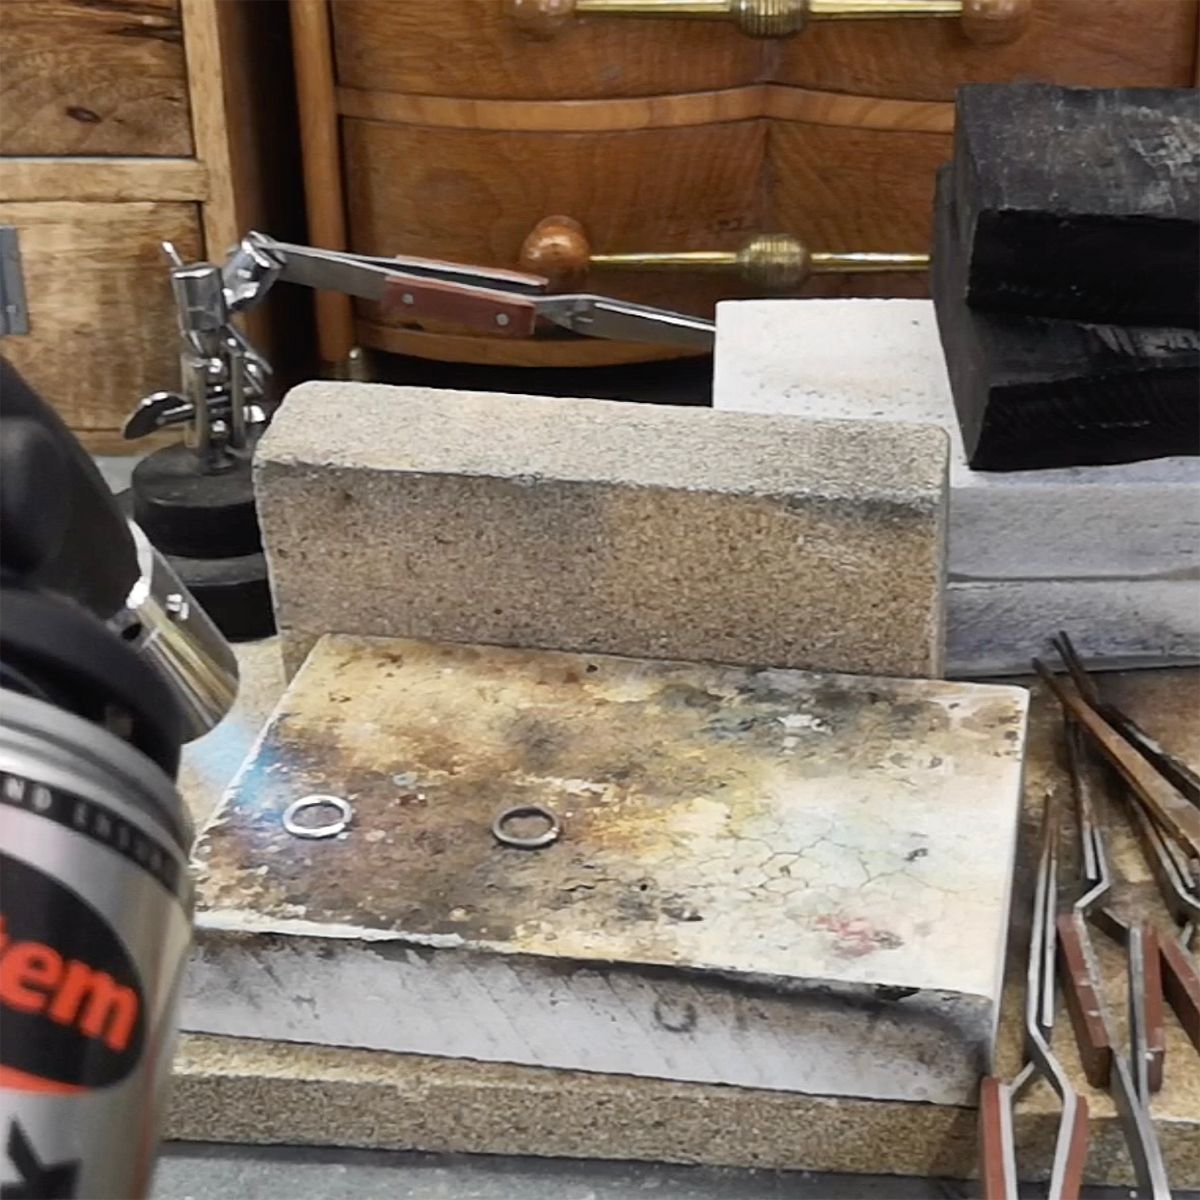
Step 3: Solder Rings Together
Apply solder paste to the joins and use a gas torch to heat the rings until the solder flows, then quench in water.
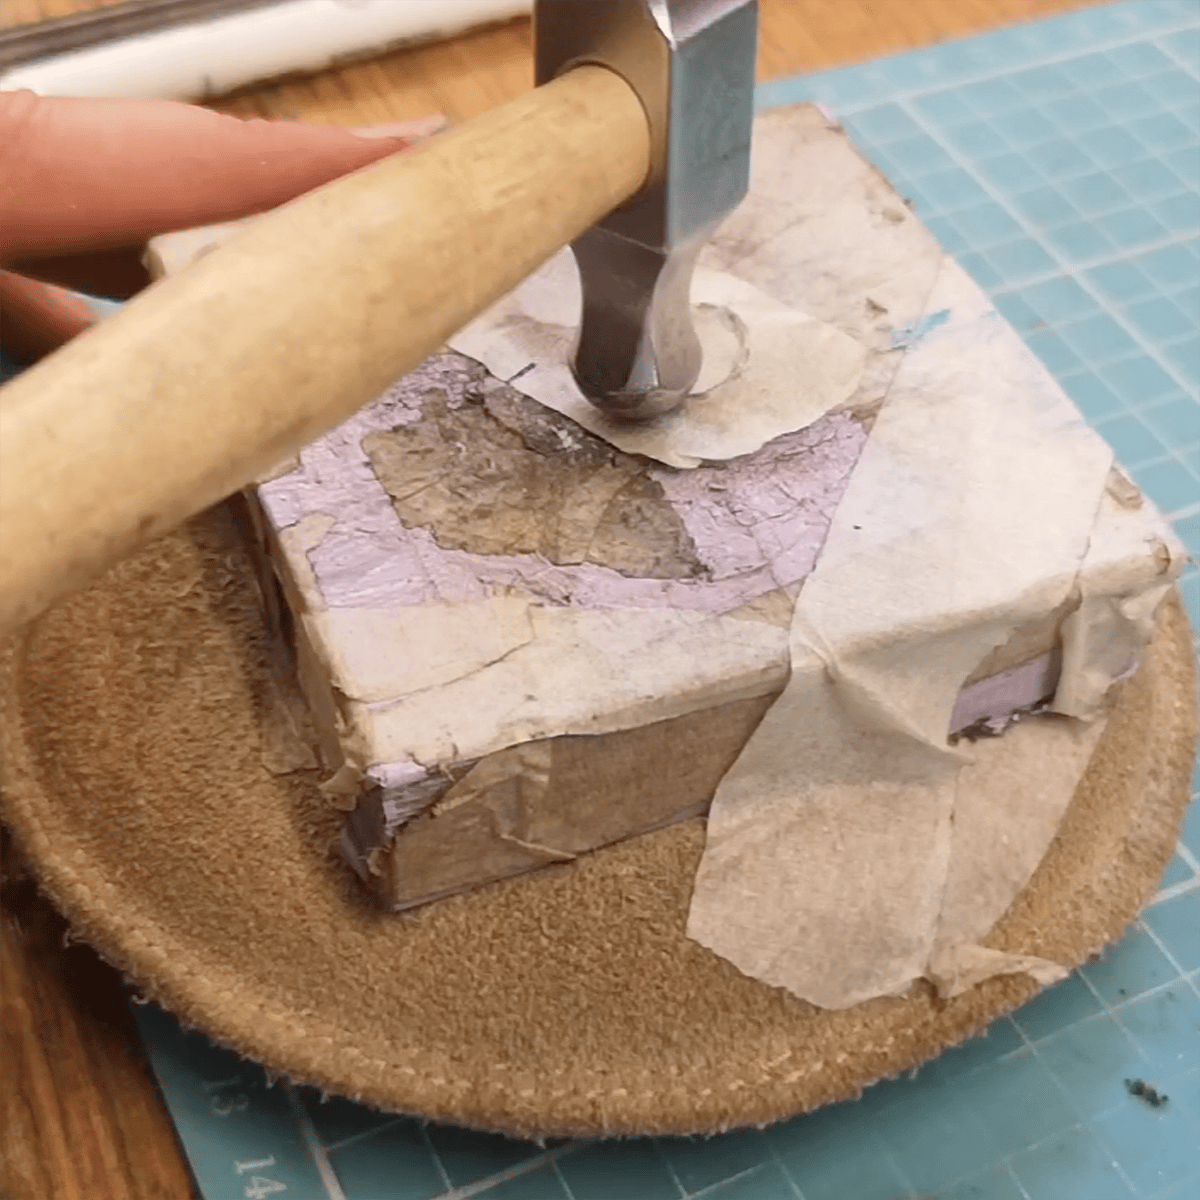
Step 4: Texture & Pickle
Tape your circles down onto a steel block and use the round end of the hammer to texture the circles on both sides until your desired texture is achieved. Place into safety pickle solution to clean, ready for polishing.
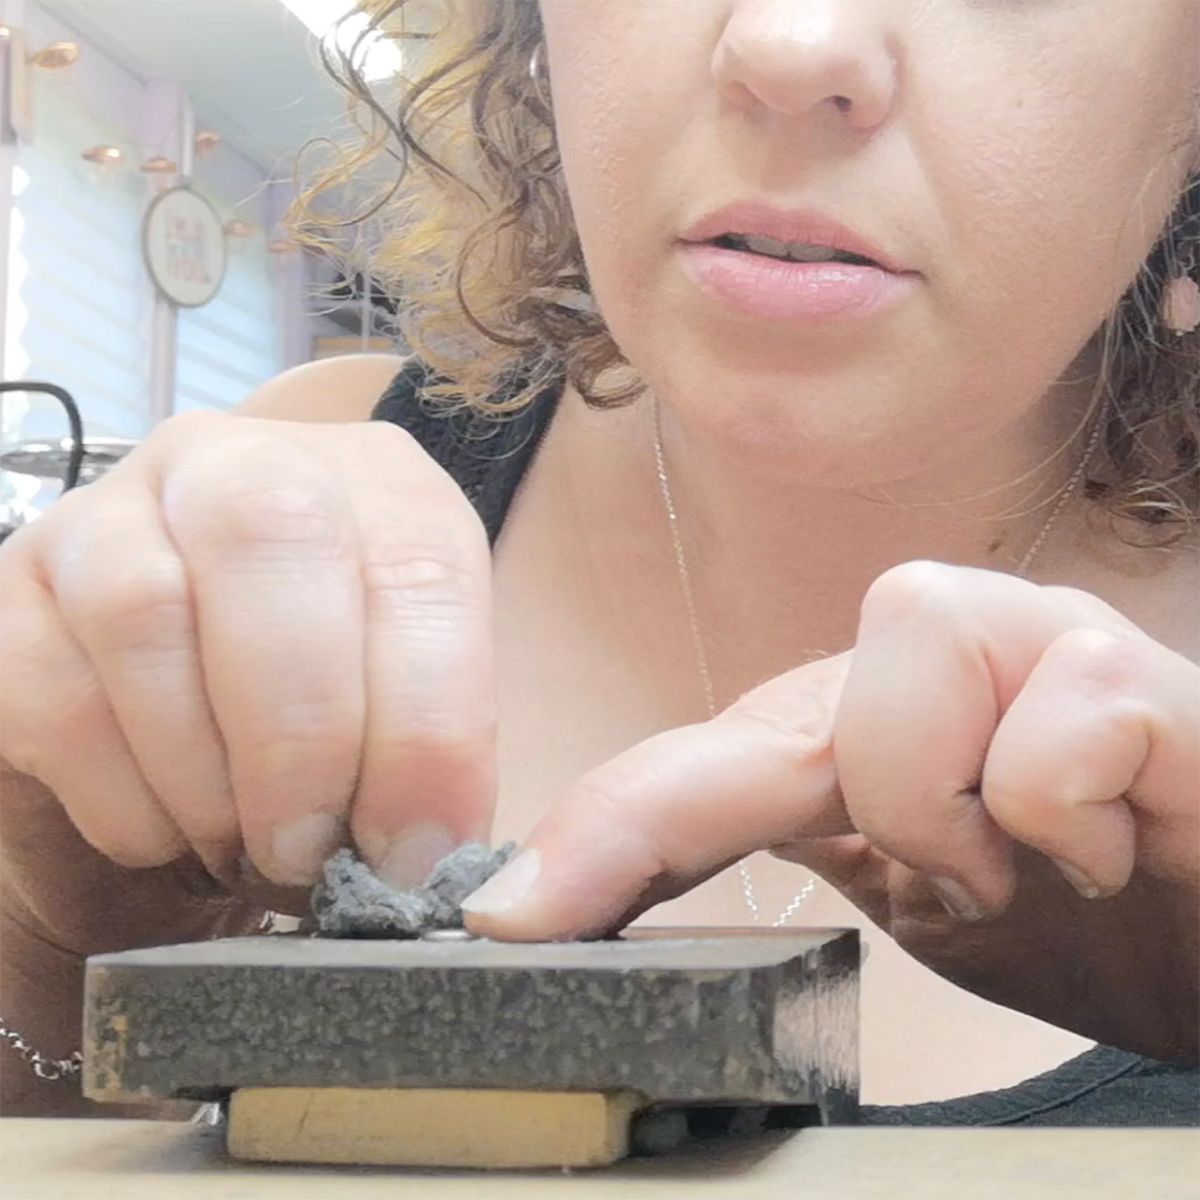
Step 5: Polish
Pickle the circles to clean the use your favourite polishing method to give them a shiny finish - we personally love using polishing papers! Kirsty uses wire wool and then pops the circles into a barrelling machine to polish hers.
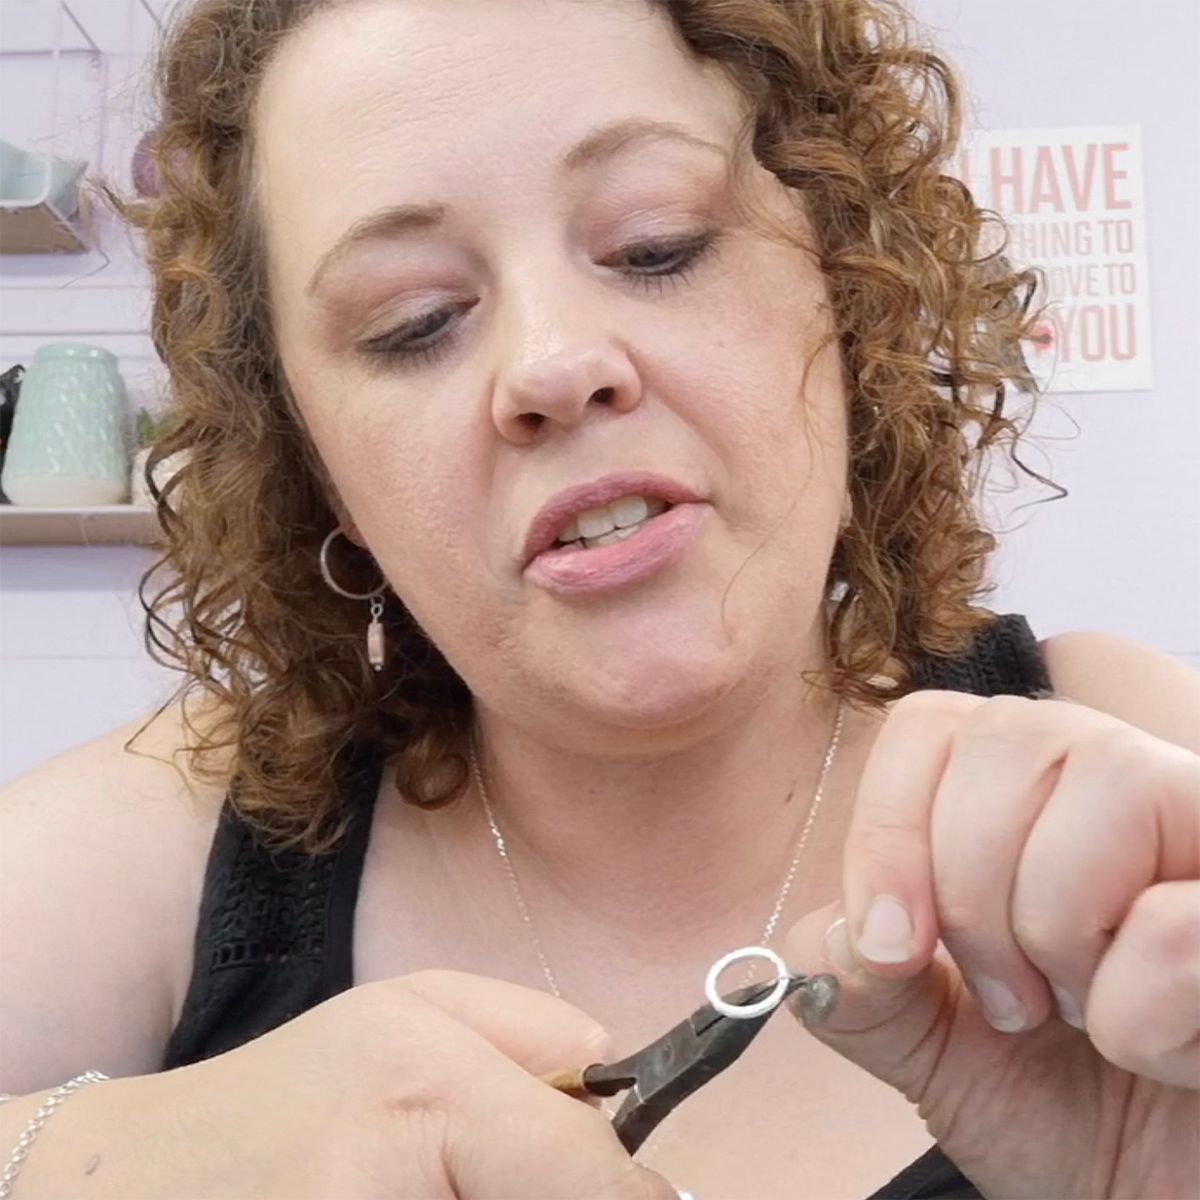
Step 6: Attach Wire Wrapped Beads
Thread your bead onto the headpin so that it sits on the head. Create a loop with the headpin by wrapping it around the tip of round nose pliers. Before wire wrapping to secure, add the loop to your soldered circle and use snipe nose pliers or flat nose pliers to hold the loop flat whilst you wrap the remaining headpin wire around on its self and down towards the bead. You can use round nose pliers or your hands to wrap the wire. Wrap the headpin until there is no excess remaining - if you can not do this before the bead starts you can trim it off with side cutters. For a neat finish use snipe nose pliers to squeeze the end of headpin close into the coil. Repeat for the other earring.
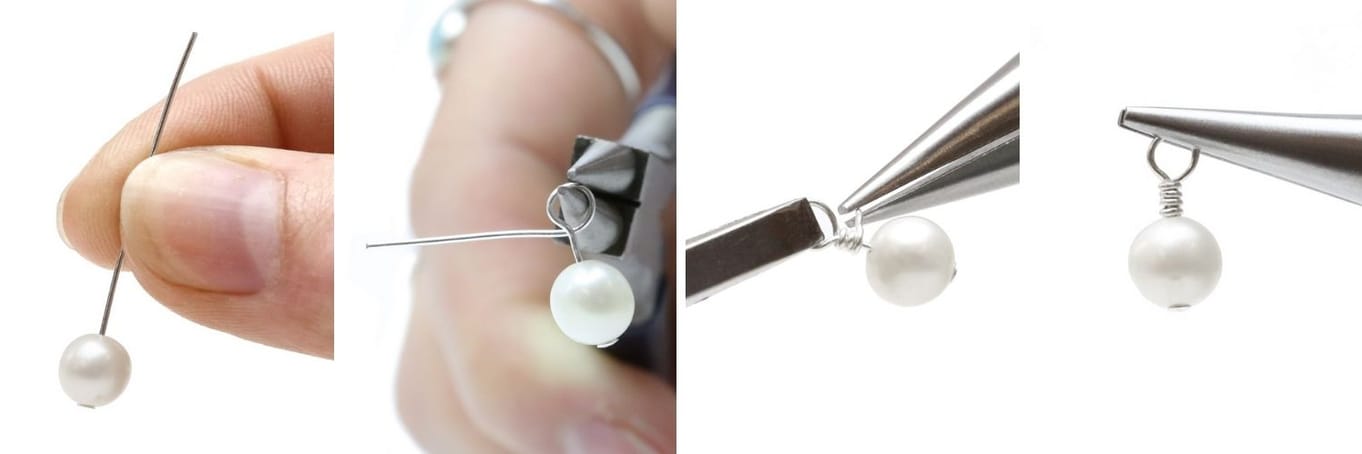
Here is a visual guide on how to wire wrap a headpin with a bead
Step 7: Add Your Earwires & Your Earrings Are Complete!
The final step is to hook your soldered circles onto the earwires with ball and pinching closed to secure. Your beautiful handmade earrings are now ready to be worn!
Join Kirsty In A Day In The Life Of A Jeweller!
We invited Kirsty to take part in our video series, where jewellers share with us a day in their life. Watch below as Kirsty gives us a tour of her garden shed studio, meet her adorable cats and watch as she makes some incredible designs.
Learn more about Kirsty in our interview here.
Also in this section:
- Tools For Making Jewellery Using Wire
- Your Guide On Choosing Wire For Jewellery Making
- Compare Jewellery Designs Using Different Sized Wire
- Wire Gauge Coversions
- How To Work Harden Jewellery Making Wire
- How To Use Nylon Jaw Pliers For Jewellery Making
- How To Use A Thing-A-Ma Jig For Jewellery Making
- How to Wire Wrap a Bead With a Headpin
- How To Wire Wrap A Bead
- How To Make A Wire Wrapped Bead Chain
- How To Wire Wrap A Briolette
- Wire Wrapped Cluster Briolette Earring Tutorial
- How To Make Wire Wrapped Bead Necklace With Handmade Clasp
- How To Wire Wrap A Rough Crystal
- How To Make Valentine's Day Earrings: Wonky Wire Hearts
- How To Make A Wire Wrapped Crystal Necklace
- 6 Wire Wrapped Ring Projects & Essential Tools
- How To Make A Wire Wrapped Bead Ring
- How To Make An Anxiety Ring
- How To Make A Wire Wrapped Gemstone Ring
- How To Make A Wire Wrapped Cabochon Pendant
- How To Make A Tree Of Life Pendant
- How To Wire Wrap A Gemstone Donut
- How To Make Christmas Tree Earrings
- Simple Sterling Silver Wire Scroll Earrings
- Soldered Circle Hoop Earrings With Beads Tutorial
- How To Make Wire Hoop Earrings & Customise Them
- Metal Charm Hoop Earring Tutorial
- How To Make A Wire Word Necklace
- 4 Wire Wrapped Gemstone Tube Bead Projects
- Festival Inspired Crystal Necklace Tutorial
HAVE A QUESTION?
If you have any questions, feel free to get in touch with our friendly team who will be more than happy to give you advice over email or on the phone.
You can learn more and find inspiration by visiting our Jewellery Making Tutorials, Jewellery Making Kits and YouTube Channel. Don't forget to follow us on social media and tag us in your designs on Instagram & Facebook, we would love to see!