How To Make Christmas Tree Earrings
This fun Christmas inspired jewellery making project is such a great way to practice your wire wrapping techniques.
It's a really simple project suitable for beginners, using only a few tools and supplies to create a design you can wear yourself or give as a handmade gift this Christmas.
Watch our video tutorial below and get all the supplies you need with Kernowcraft. Why not pop your design into one of our gift bags or boxes?
Supplies & tools you will need:
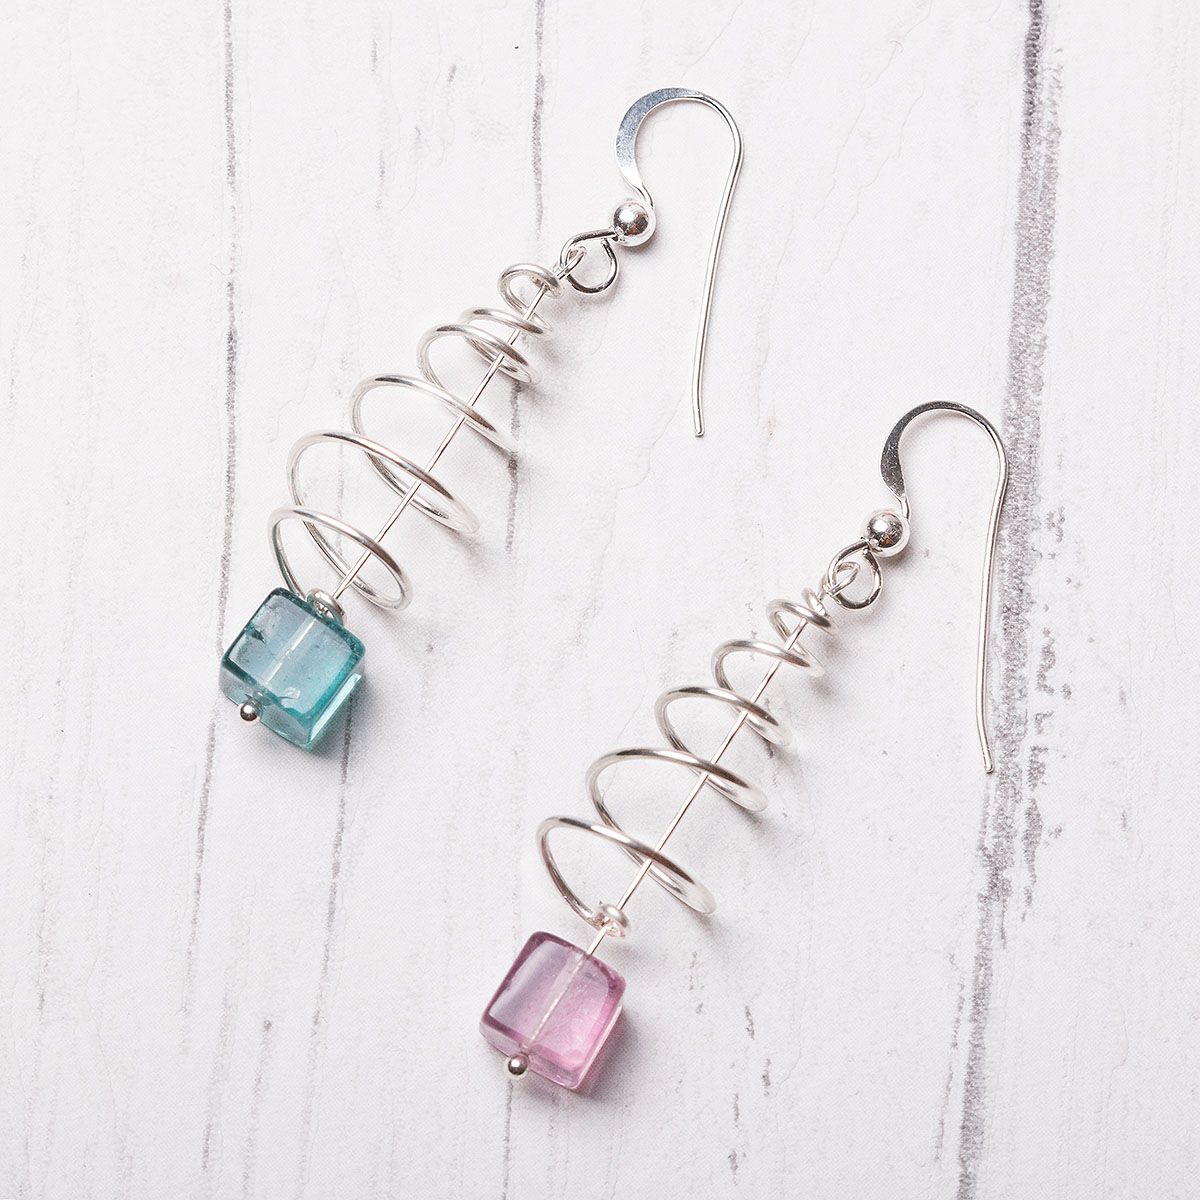
- 2 beads of your choice - we have used fluorite cube beads (size approx 6mm)
- Earwires
- 2 headpins
- 50cm of 0.8mm sterling silver wire
- Snipe nose pliers
- Round nose pliers
- Side cutters
Watch Our Tutorial On How To Make Your Own Christmas Tree Earrings Below
Step by step instructions
1. Cut the length of wire in half, one half for each earring.
2. Bend a small loop in the wire with round nose pliers.
3. Use snipe nose pliers to form a spiral - hold the spiral flat between the plier jaws and keep adjusting your grip as you bend your wire around itself.
4. Stretch our the spiral to form the shape of a tree.
5. Create a loop at the bottom of the tree and thread a bead onto a headpin and then through the tree.
6. Cut any excess wire using side cutters, leaving enough room to form a loop at the top of the tree.
7. Attach an earwire to complete the look.
8. Repeat this process to create another Christmas tree earring.
Be Inspired By More Christmas Jewellery Designs
The products used in this project are suggestions to inspire you. Products used were compatible at the time of making but do be aware that stocks can vary, so do use your own judgement as to the compatibility of each item when making.
Also in this section:
- Tools For Making Jewellery Using Wire
- Your Guide On Choosing Wire For Jewellery Making
- Compare Jewellery Designs Using Different Sized Wire
- Wire Gauge Coversions
- How To Work Harden Jewellery Making Wire
- How To Use Nylon Jaw Pliers For Jewellery Making
- How To Use A Thing-A-Ma Jig For Jewellery Making
- How to Wire Wrap a Bead With a Headpin
- How To Wire Wrap A Bead
- How To Make A Wire Wrapped Bead Chain
- How To Wire Wrap A Briolette
- Wire Wrapped Cluster Briolette Earring Tutorial
- How To Make Wire Wrapped Bead Necklace With Handmade Clasp
- How To Wire Wrap A Rough Crystal
- How To Make Valentine's Day Earrings: Wonky Wire Hearts
- How To Make A Wire Wrapped Crystal Necklace
- 6 Wire Wrapped Ring Projects & Essential Tools
- How To Make A Wire Wrapped Bead Ring
- How To Make An Anxiety Ring
- How To Make A Wire Wrapped Gemstone Ring
- How To Make A Wire Wrapped Cabochon Pendant
- How To Make A Tree Of Life Pendant
- How To Wire Wrap A Gemstone Donut
- How To Make Christmas Tree Earrings
- Simple Sterling Silver Wire Scroll Earrings
- Soldered Circle Hoop Earrings With Beads Tutorial
- How To Make Wire Hoop Earrings & Customise Them
- Metal Charm Hoop Earring Tutorial
- How To Make A Wire Word Necklace
- 4 Wire Wrapped Gemstone Tube Bead Projects
- Festival Inspired Crystal Necklace Tutorial
HAVE A QUESTION?
If you have any questions, feel free to get in touch with our friendly team who will be more than happy to give you advice over email or on the phone.
You can learn more and find inspiration by visiting our Jewellery Making Tutorials, Jewellery Making Kits and YouTube Channel. Don't forget to follow us on social media and tag us in your designs on Instagram & Facebook, we would love to see!