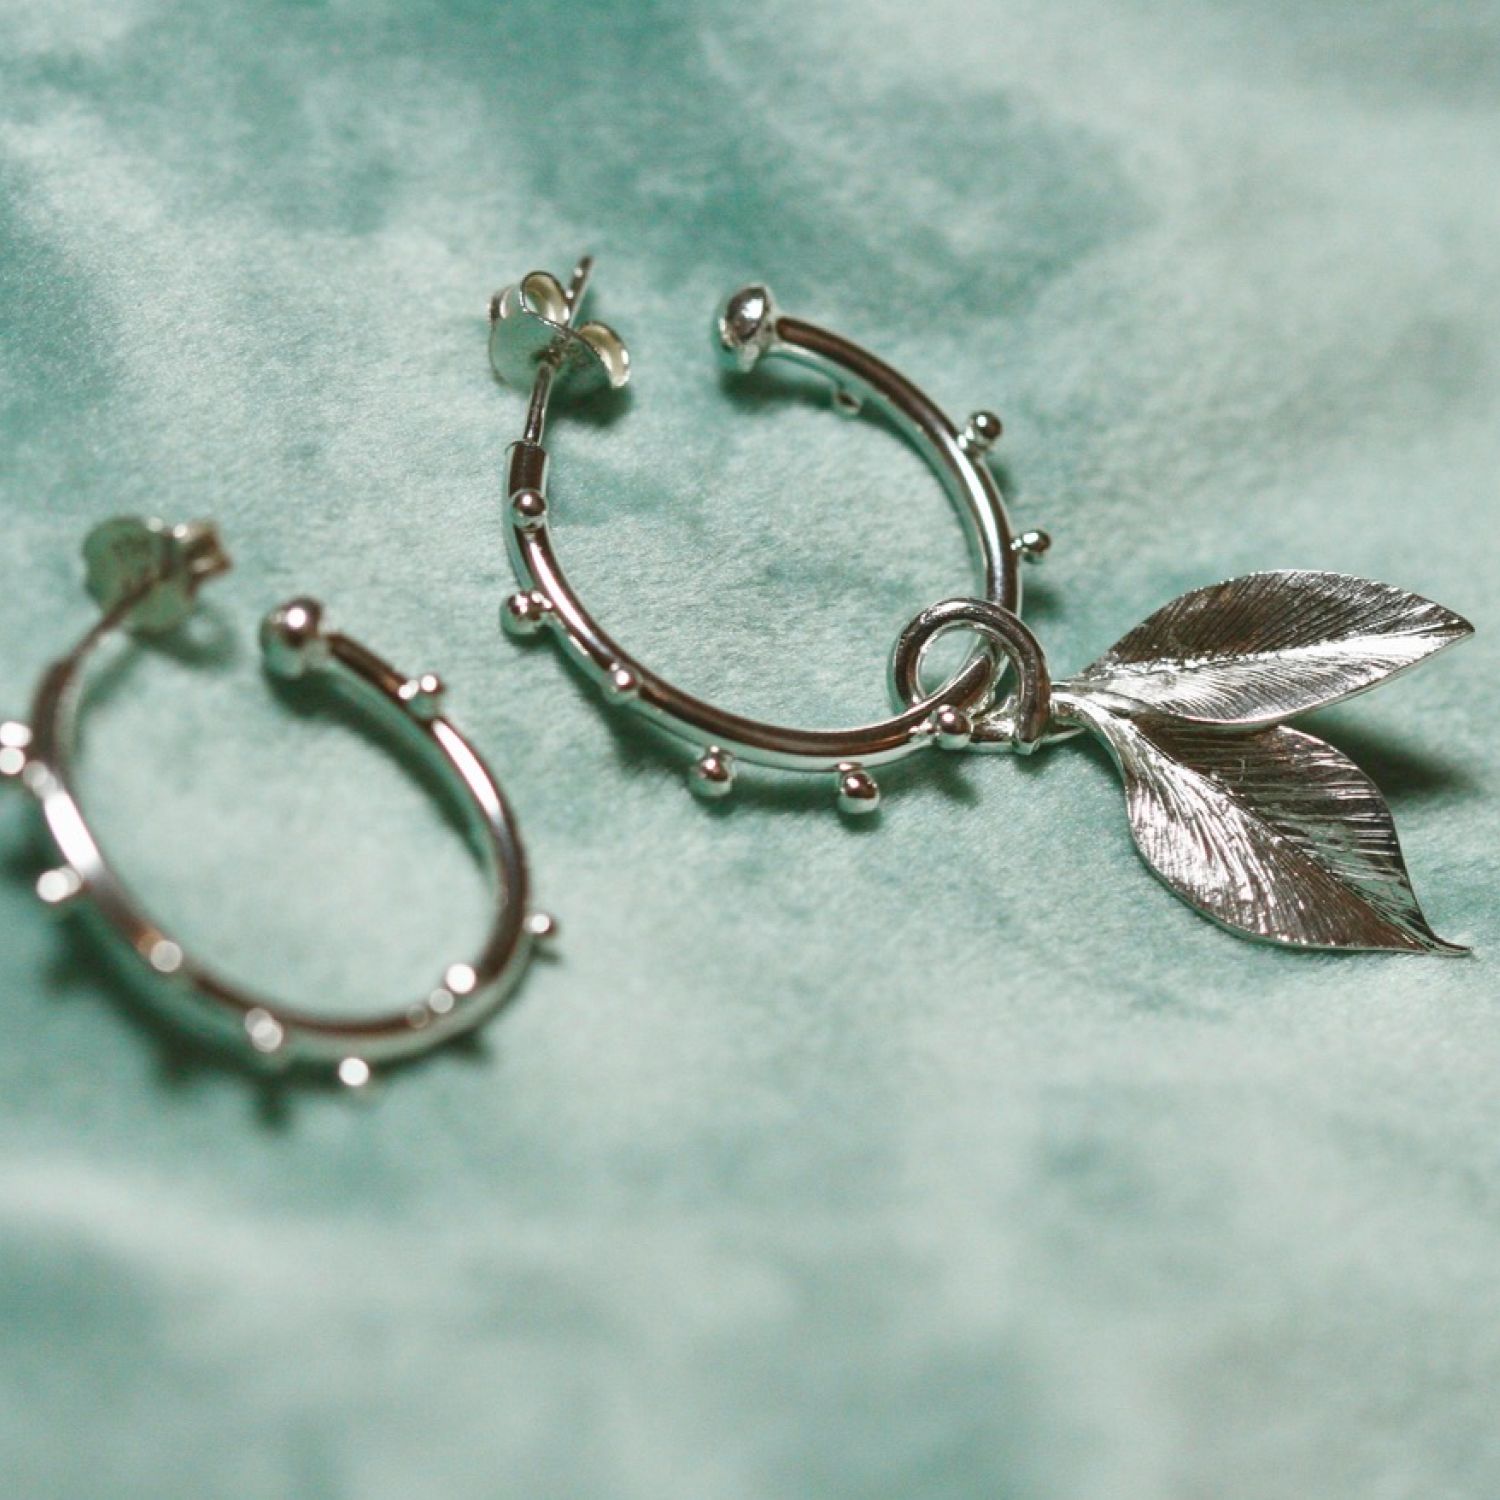
How To Make Granulated Hoop Earrings
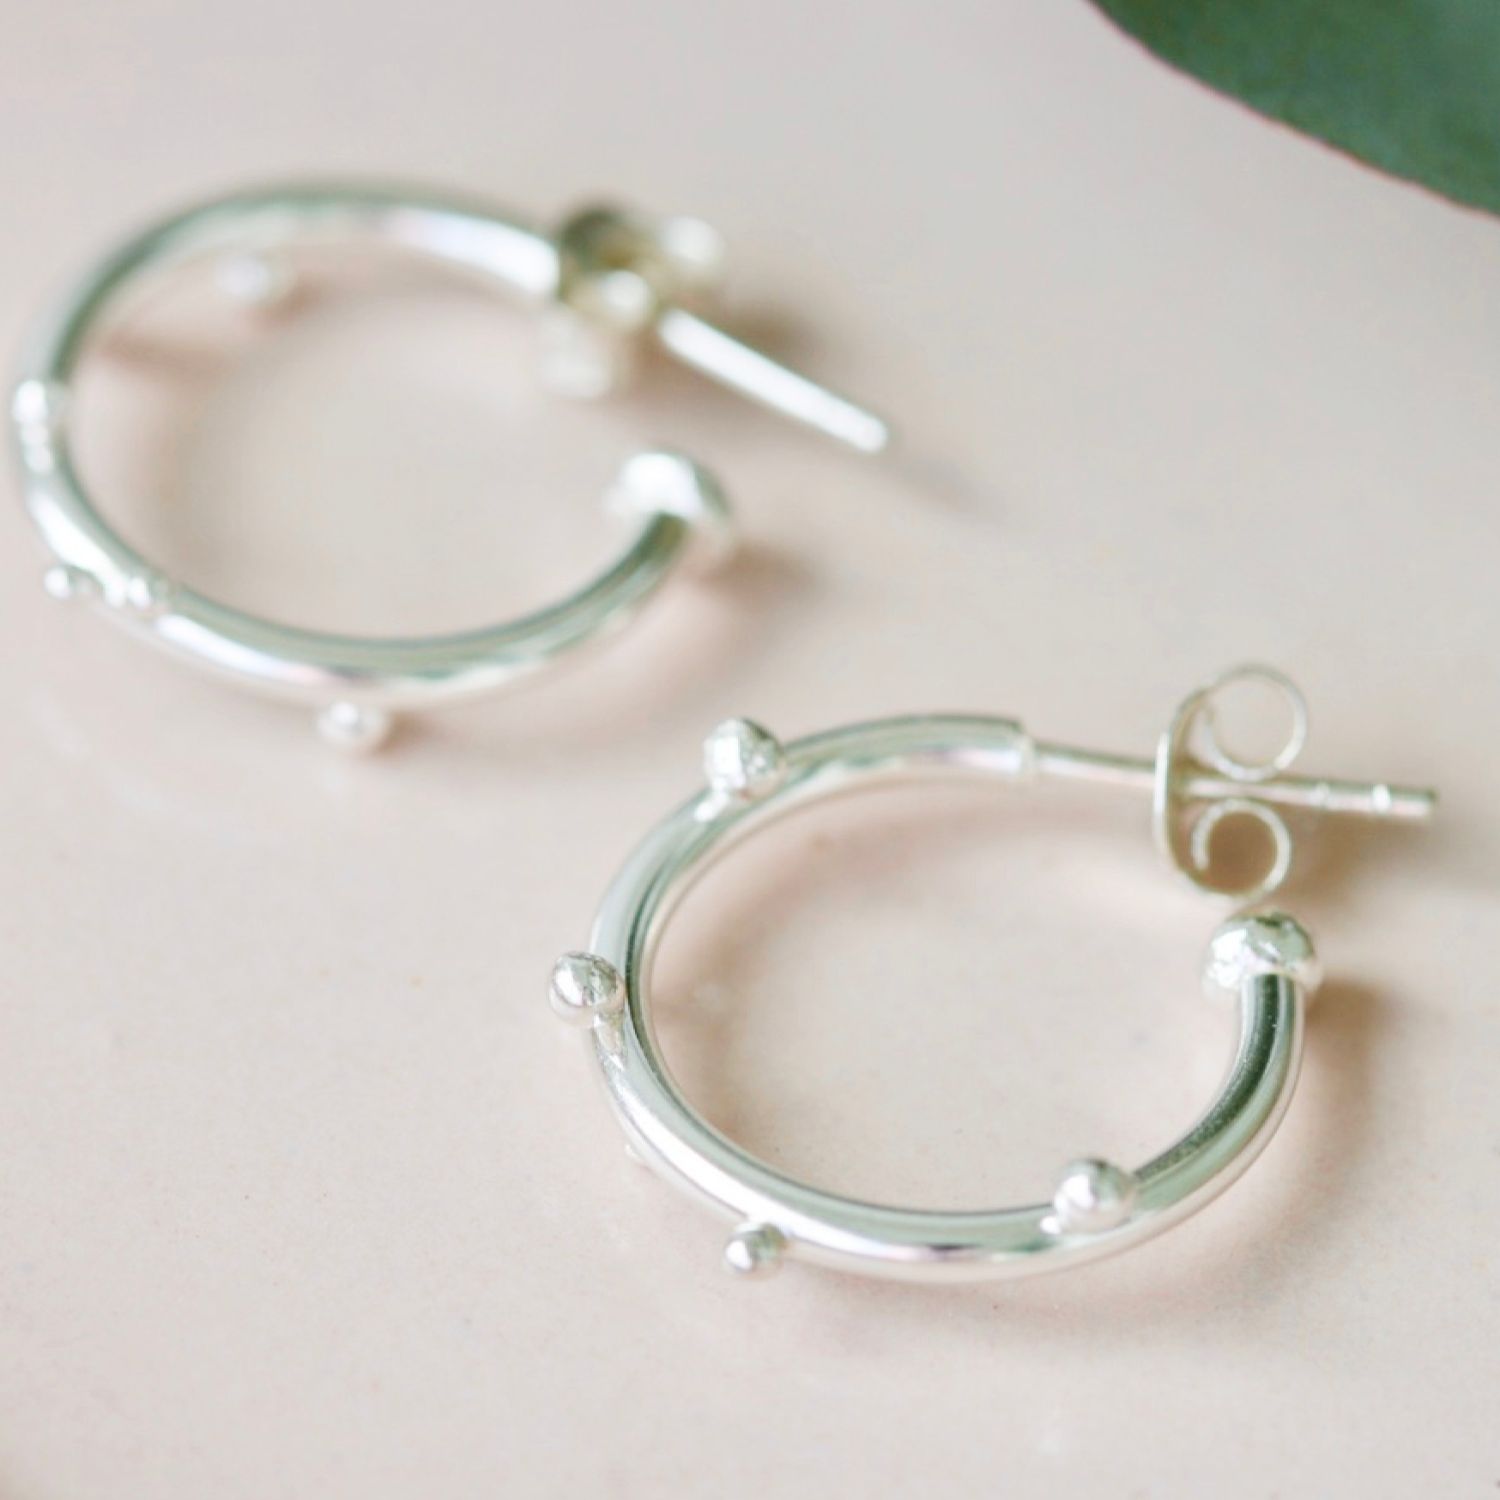
Today we're joined by jeweller Hanne, the founder of HISO to bring you a brilliant step by step tutorial on how to make your own granulated hoop earrings.
This is a great project to practice and develop your soldering skills and the technique can be used to create all kinds of designs! This project is beautiful alone but you can easily customise the design by adding charms as they have a larger granule at the end and will protect the charm from falling off.
What is granulation?
Granulation is an ancient technique of applying tiny spheres or granules of metal onto a surface such as a piece of jewellery. This is fast becoming a really popular jewellery making technique among jewellers and is a great chance to experiment with detailed designs and textures. We hope this tutorial inspires you to get creative!
Feeling inspired by the project? Tag us in your designs on Instagram @kernowcraft - we would love to see and share.
Project recommended tools and supplies:
- Calipers/ruler
- 2mm sterling silver round wire
- 0.8mm sterling silver round wire or ready made earring posts
- Earring backs that fit your wire/earstud posts
- Scrap silver for making granules
- Flux
- Safety pickle and accompanied safe-to-use tweezers
- Easy, medium & hard silver solder
- Gas torch
- Charcoal block for soldering and granulation
- Your choice of rotary tool
- 1-3mm ball burrs
- Cup burr
- Cutting pliers
- Round nose pliers
- Jewellers piercing saw and blades
- Round mandrel, preferably non-tapered
- Rawhide mallet or plastic hammer
- Jewellers hammer if you want texture
- Flat file
- Soldering tweezers
- Soldering probe
- Titanium tweezers
- Brass brush, or magnetic pin tumbler
- Your choice of polishing method: Polishing papers, barrelling machine, or polish with mops and polishing compound
Follow the step by step tutorial
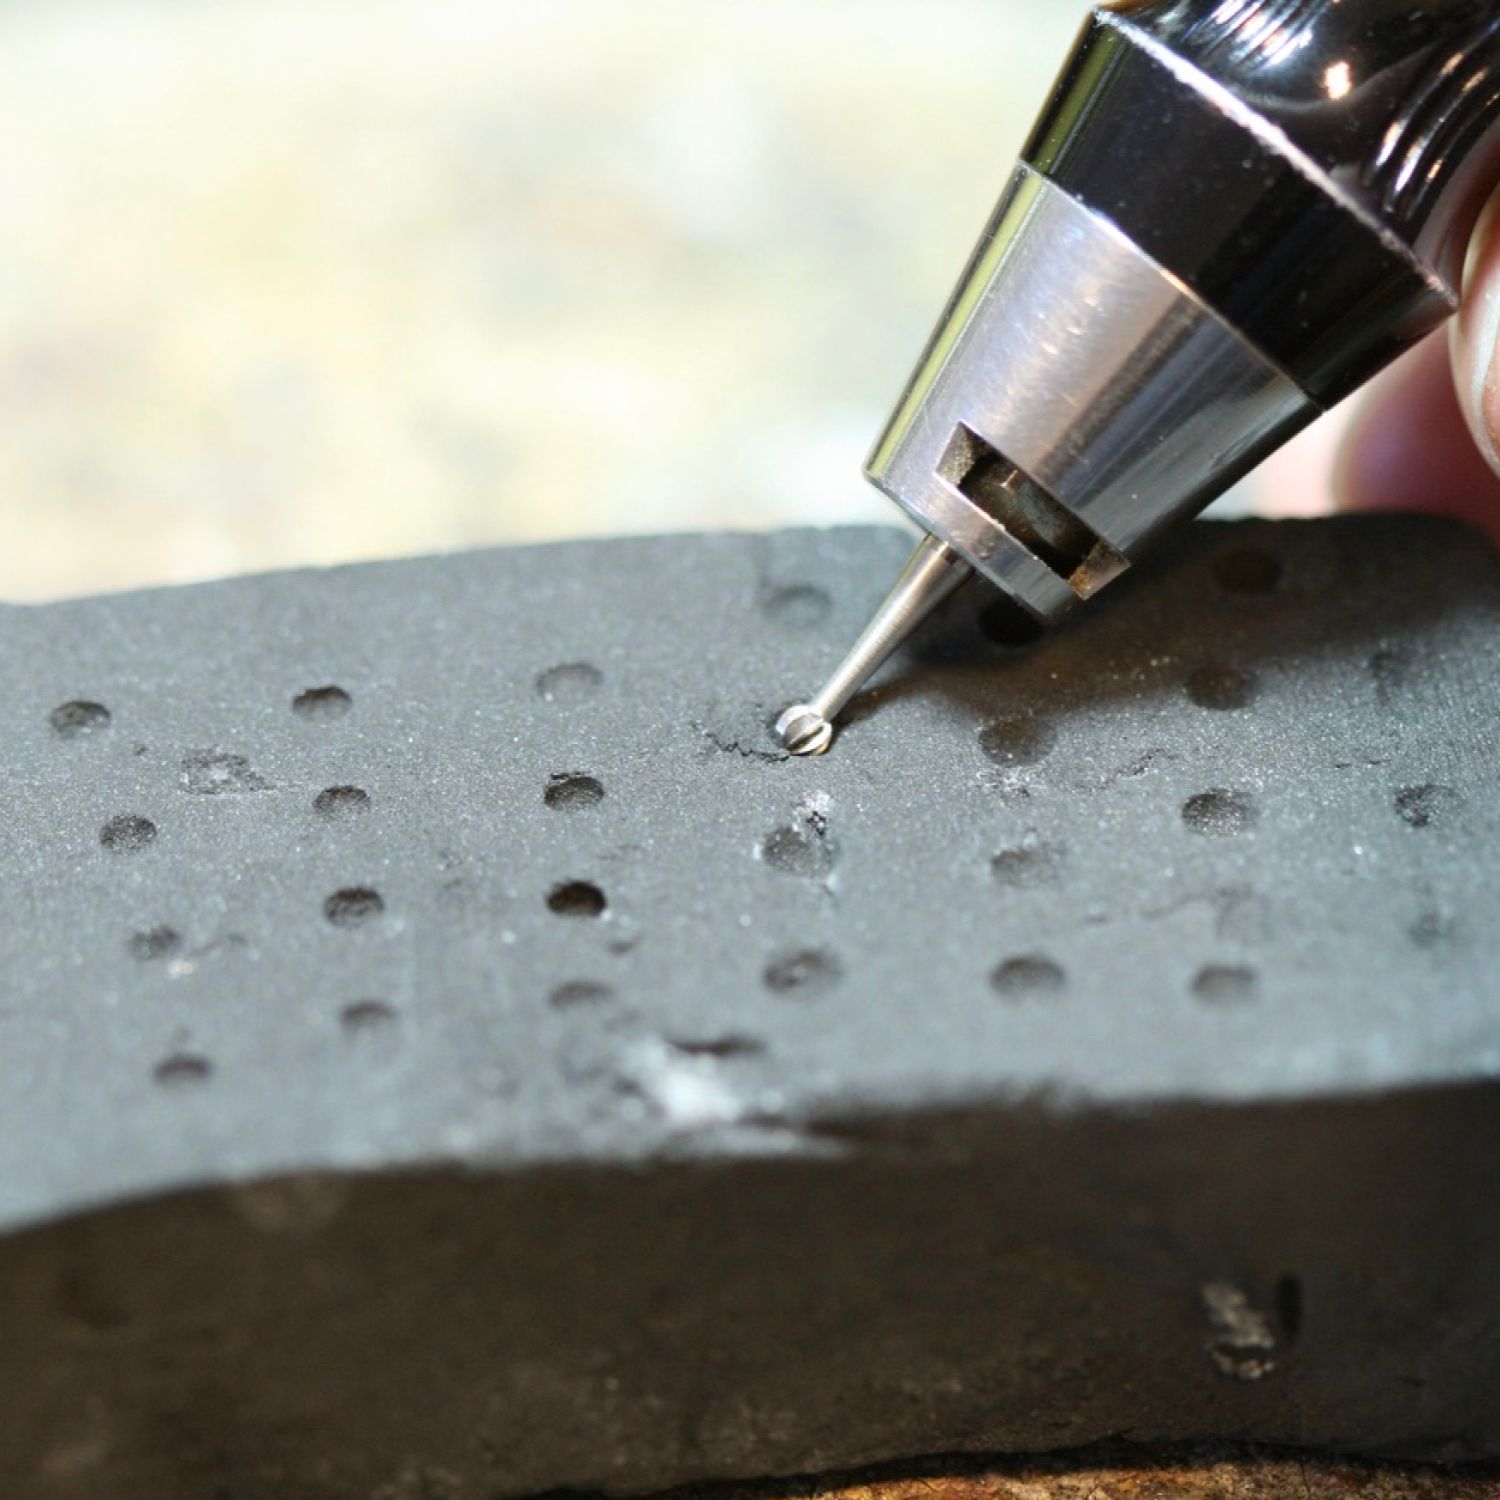
Step 1
To begin drill some holes in your charcoal block with a ball bur. These holes will help you make rounder granules.
Step 2
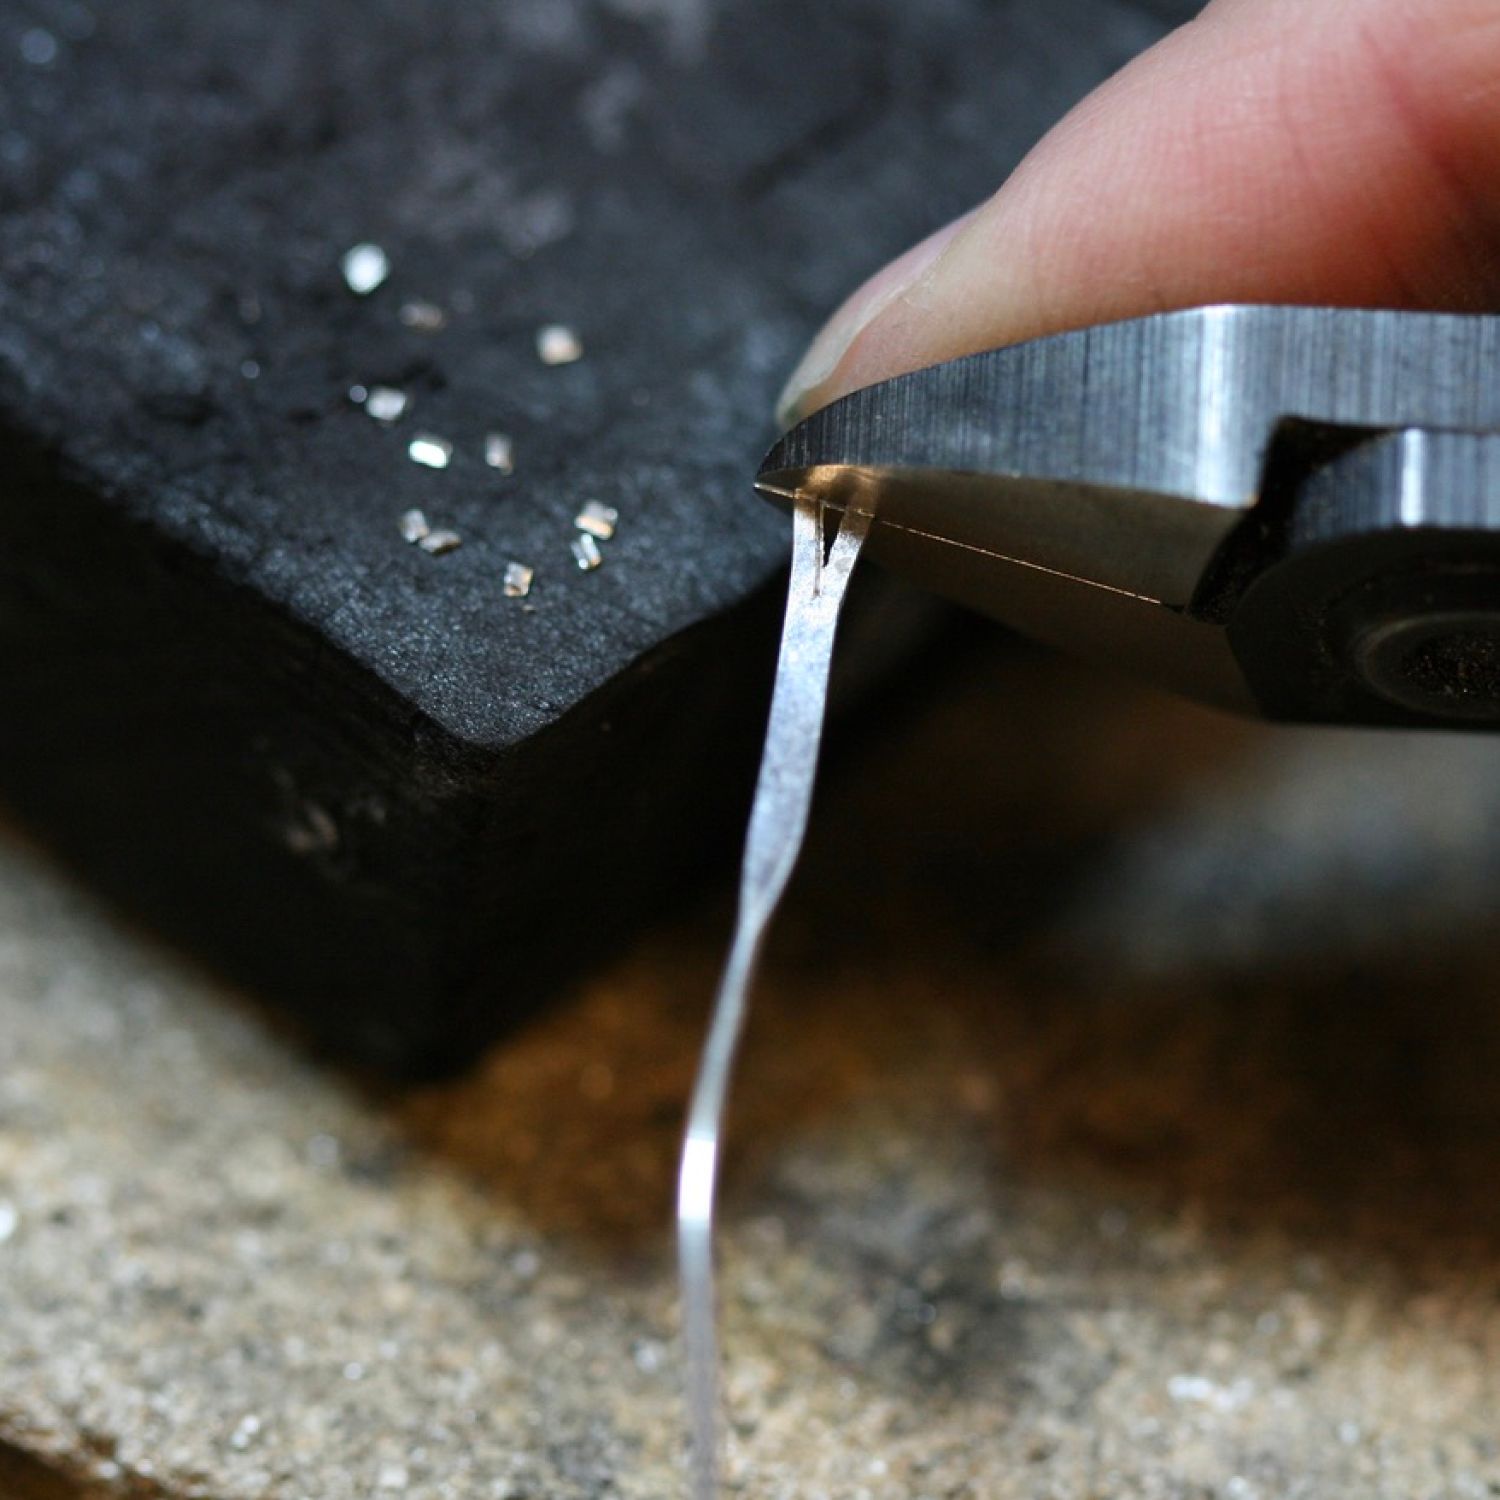
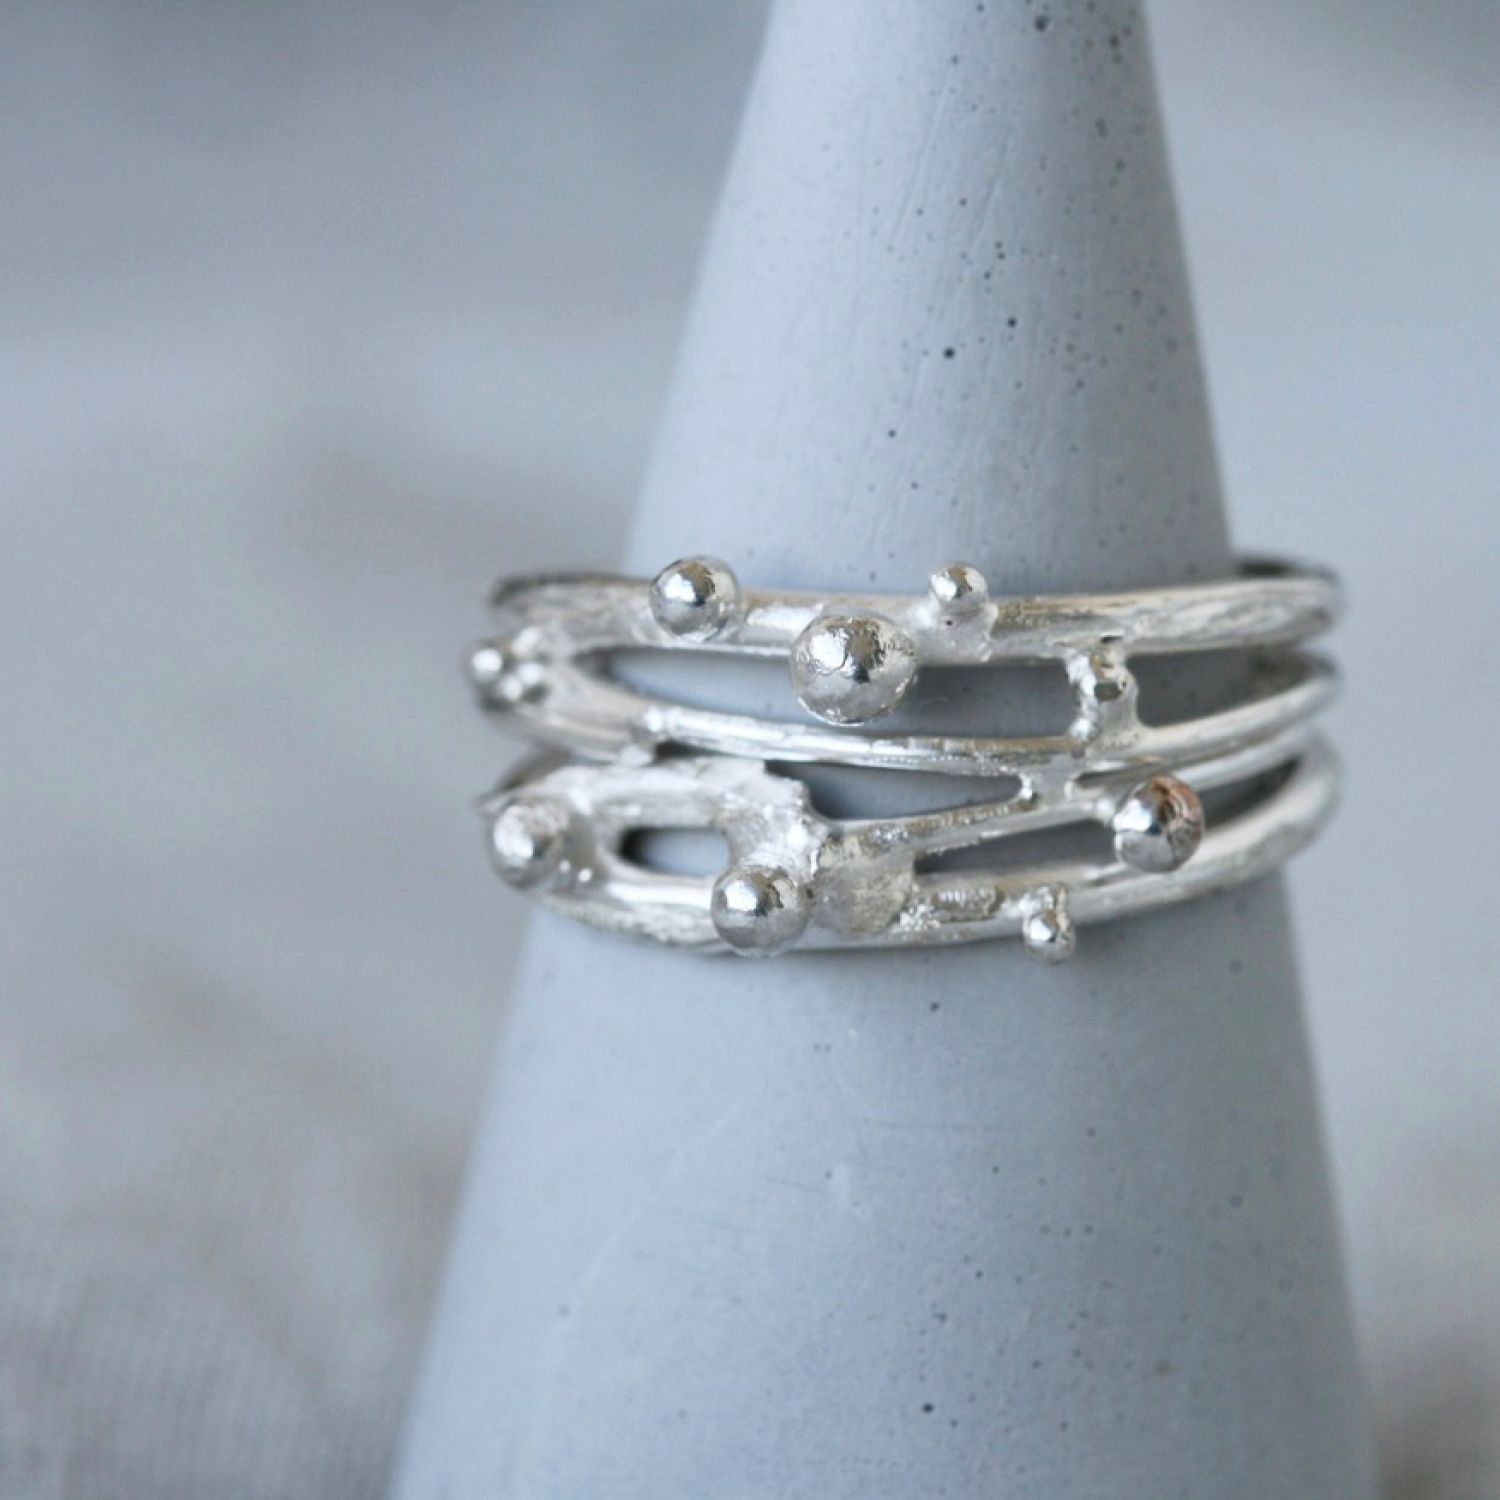
I usually make pieces with different sizes of granules, but if it’s important to you to make uniform granules you should make them out of equally sized jump rings or weigh your silver before melting. I like to use all kinds of scrap pieces (clean with no solder on), sometimes bits of sheet, jump rings and wire cut-offs.
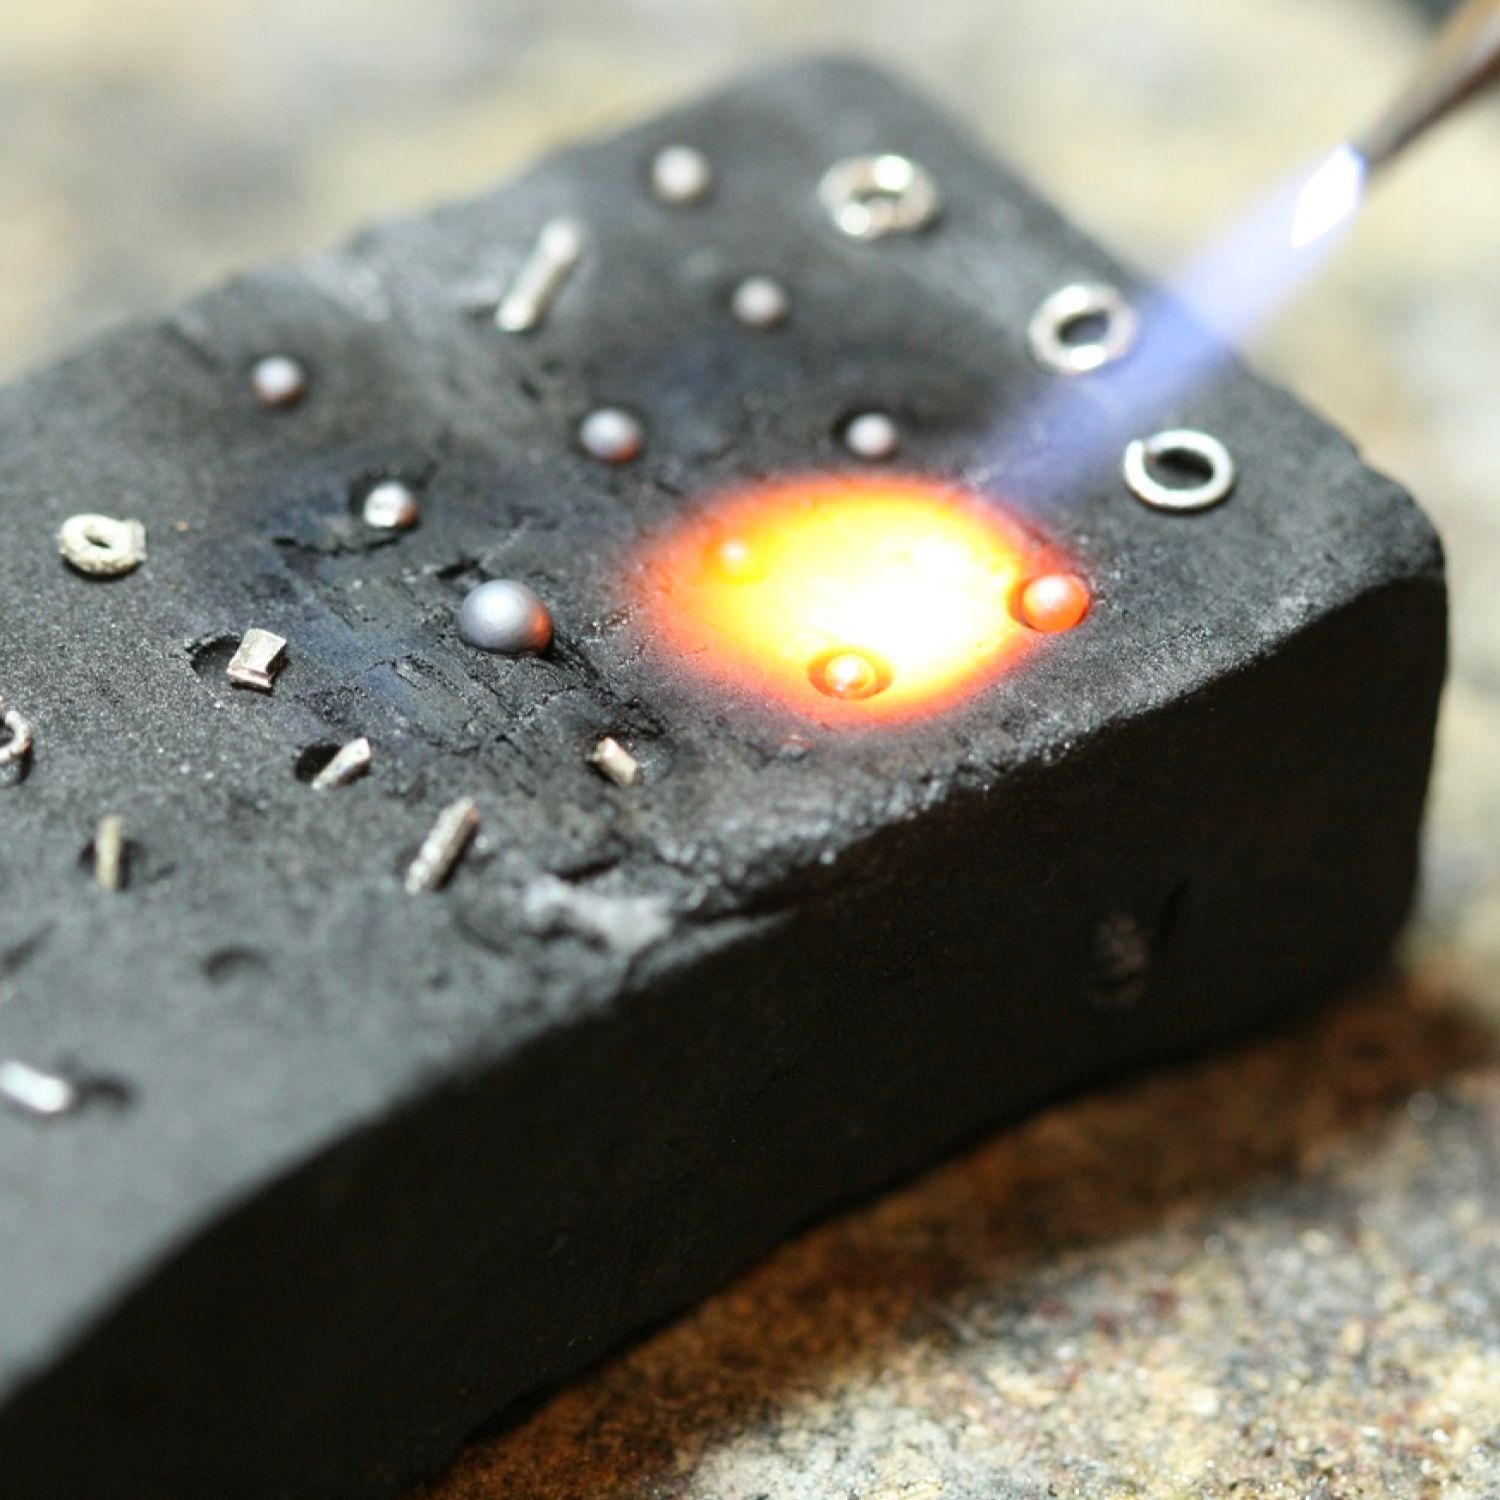
Step 3
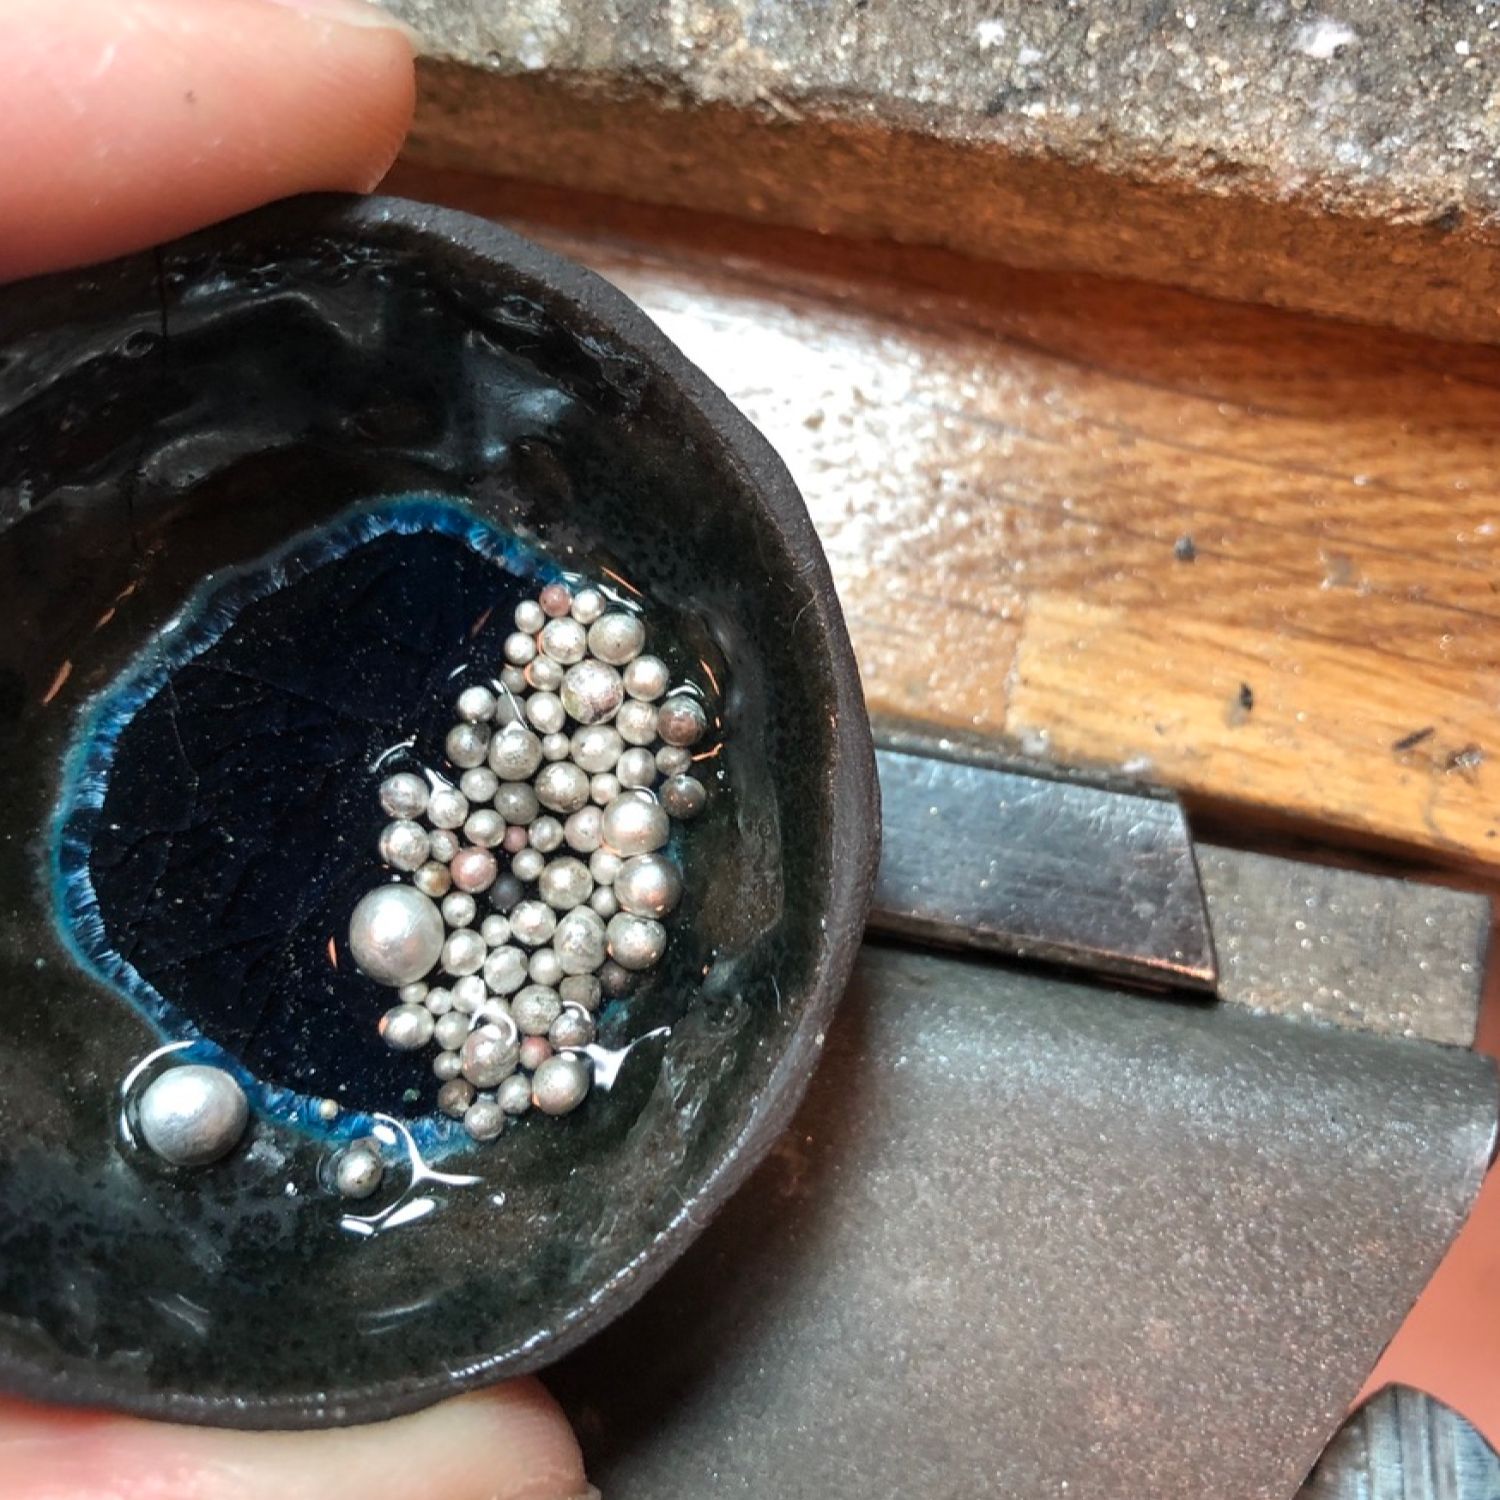
Place them all out, add a tiny bit of flux, and melt them into granules. I then clean the granules a little in the pickle before I use them.
Step 4
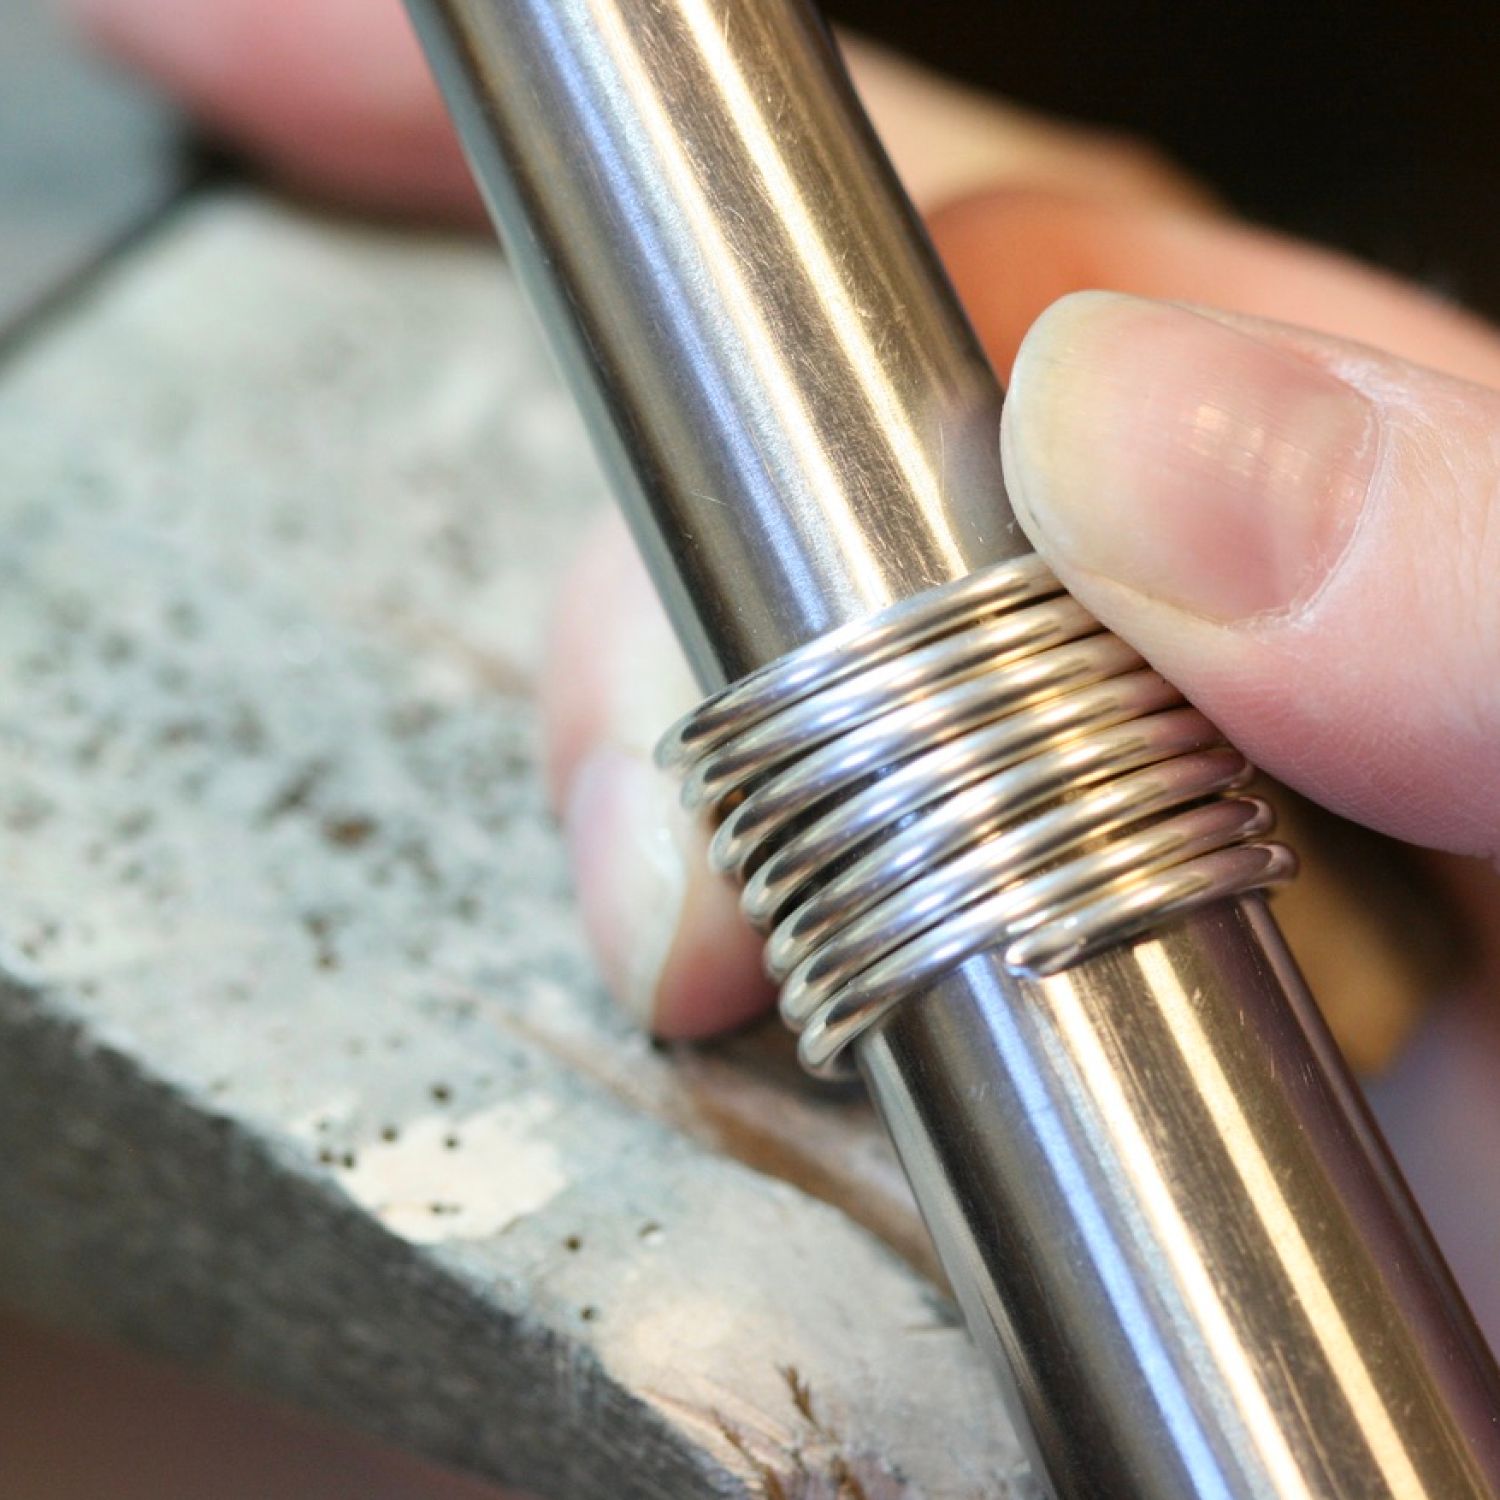
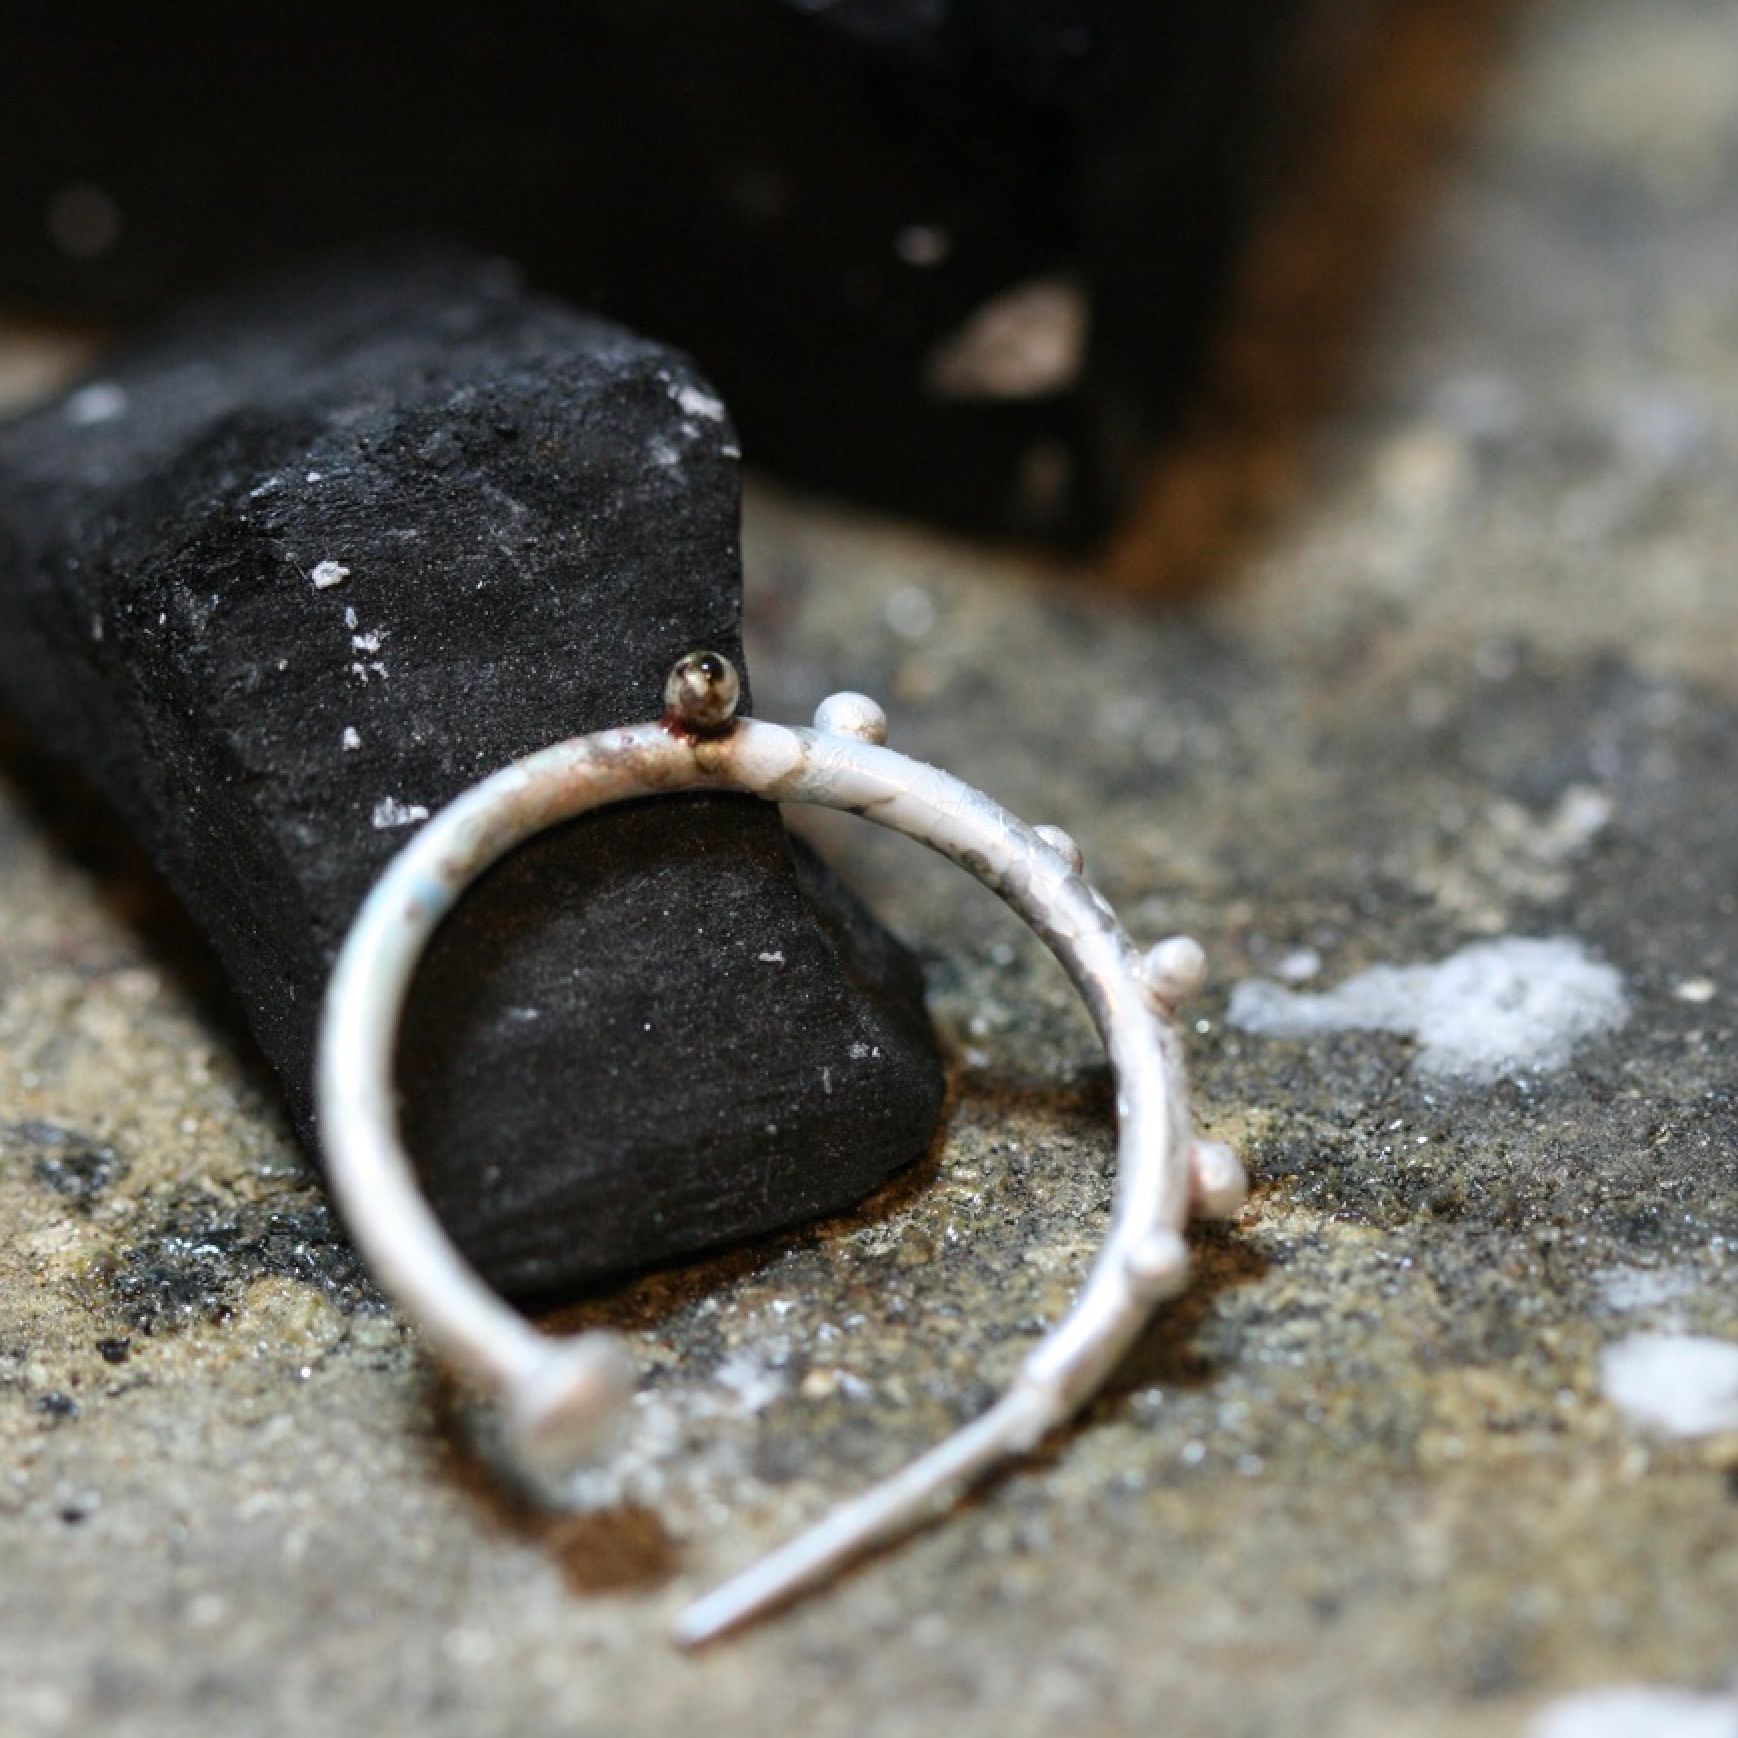
Use a non-tapered mandrel to coil up the wire you want for your earrings. Here I used round 2mm sterling silver round wire.
Step 5
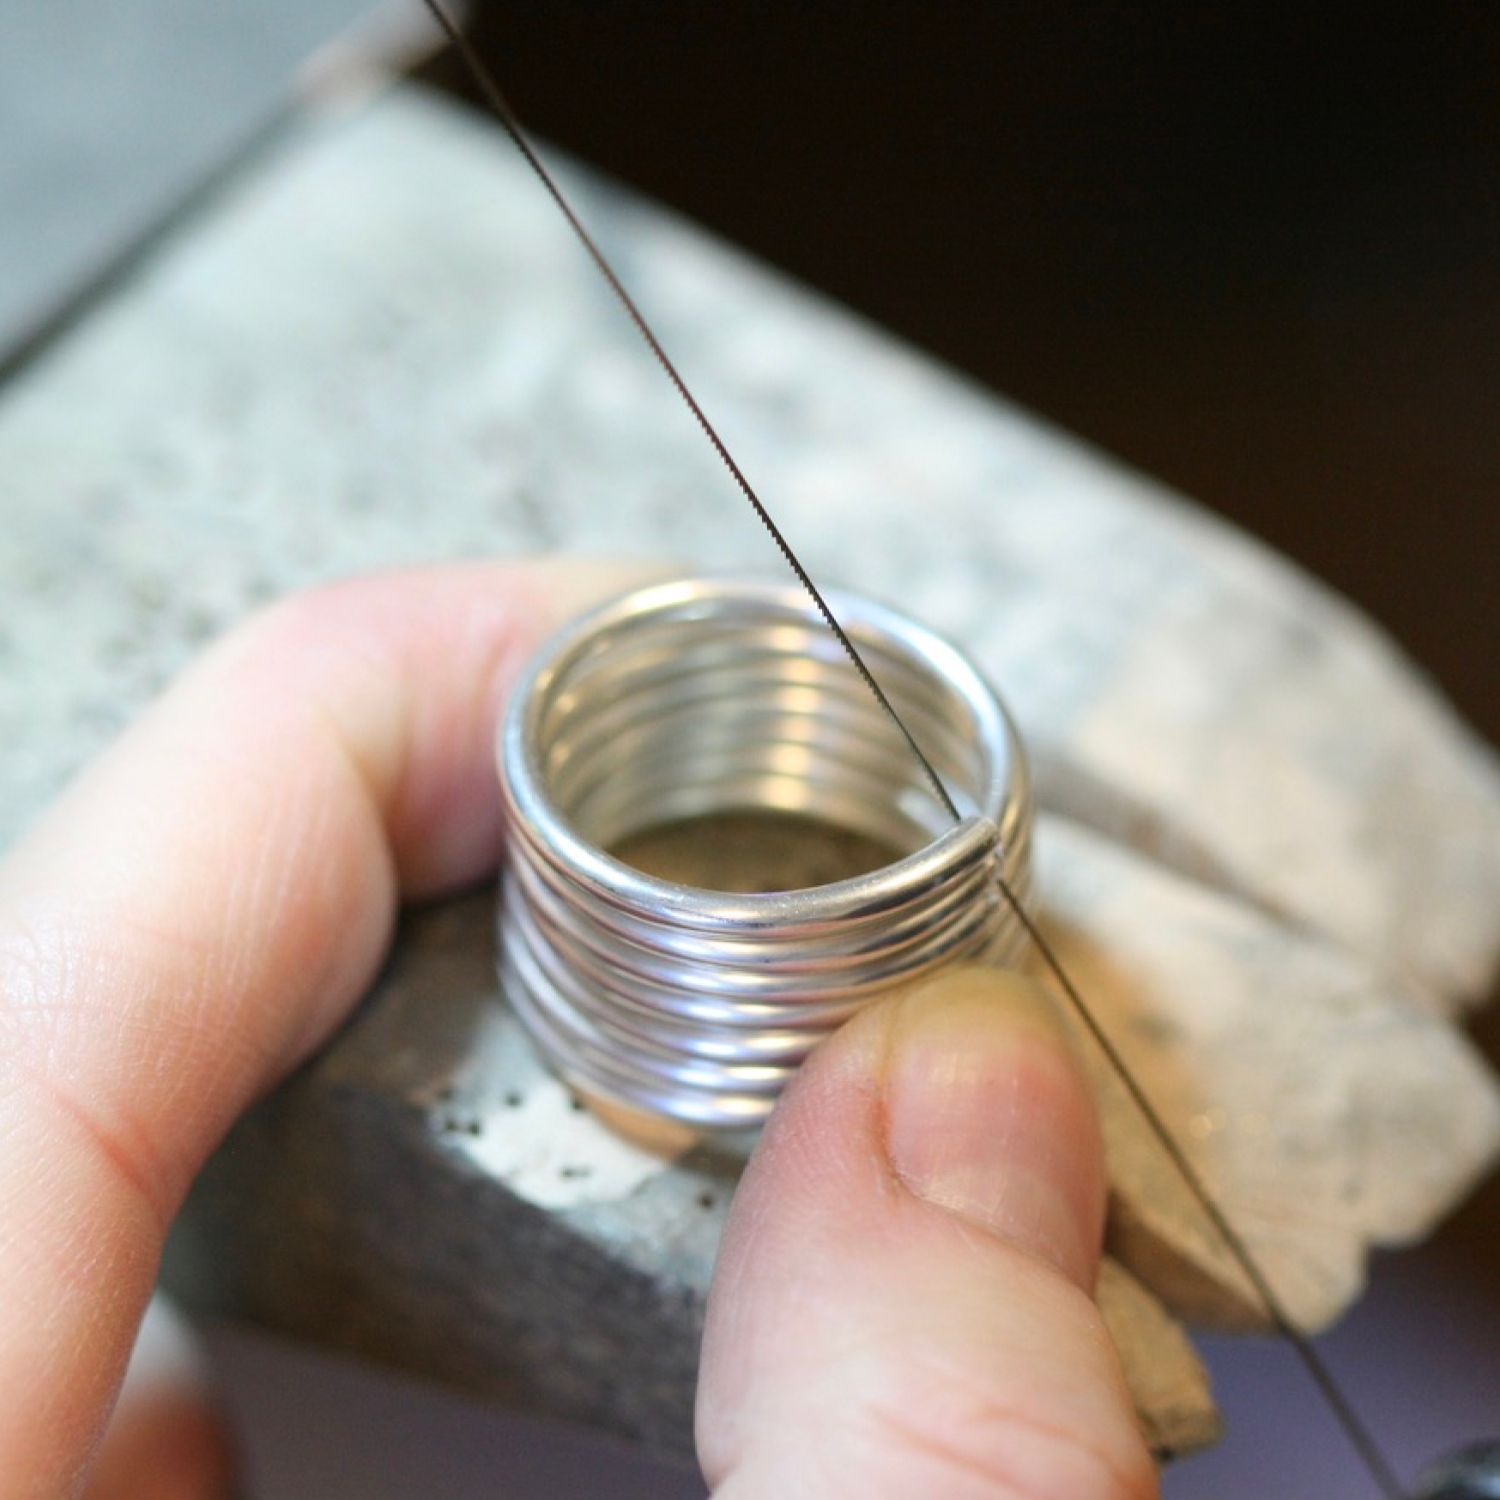
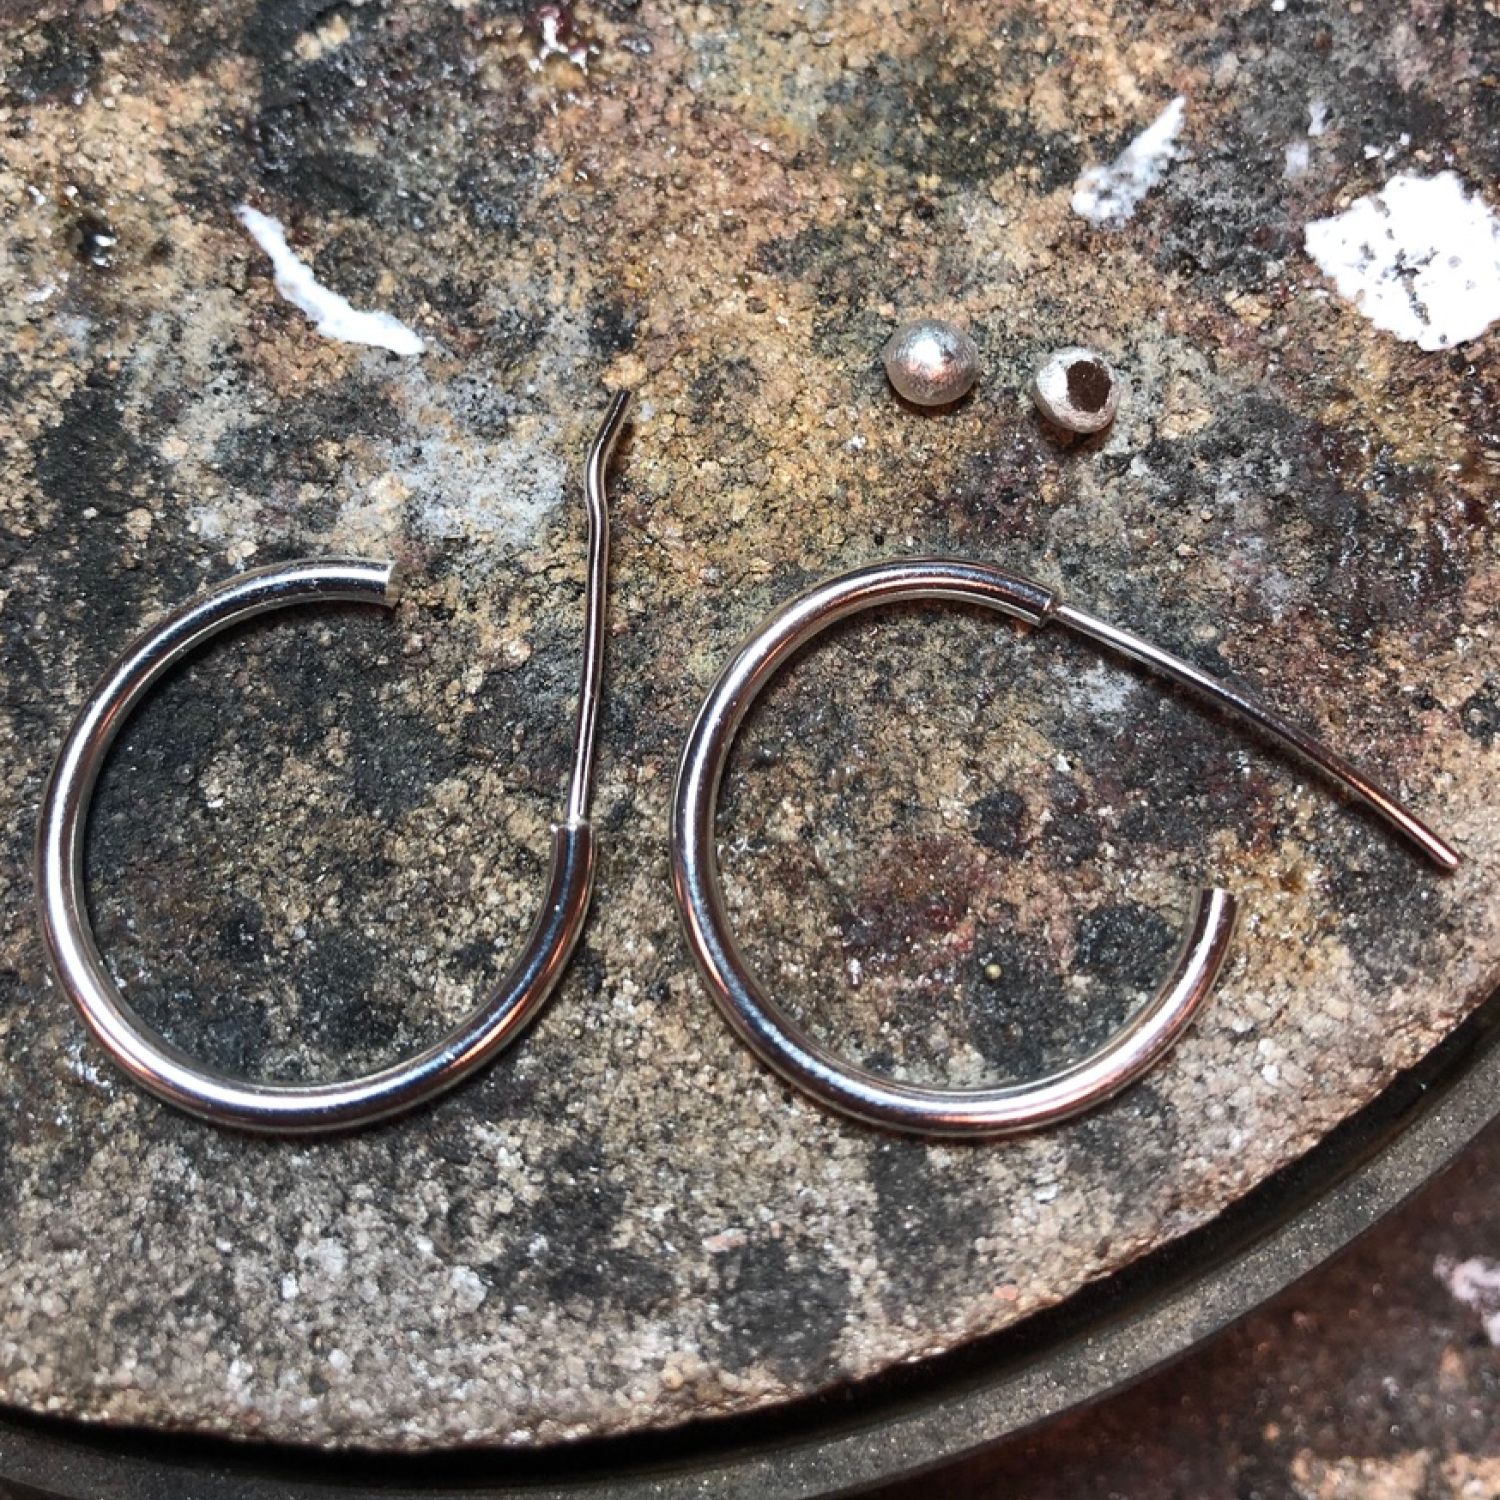
Split them with your jewellers saw, and then take out about a quarter of each piece. This way you don’t have to distort the shape and you keep the surface clean of hammer marks. If this is not important to you: you can skip the part with removing the quarter, and just expand the earrings on your ring mandrel with a hammer, shaping them nice and round until they have an opening that’s about a quarter of the hoop size. File the ends flat.
Step 6
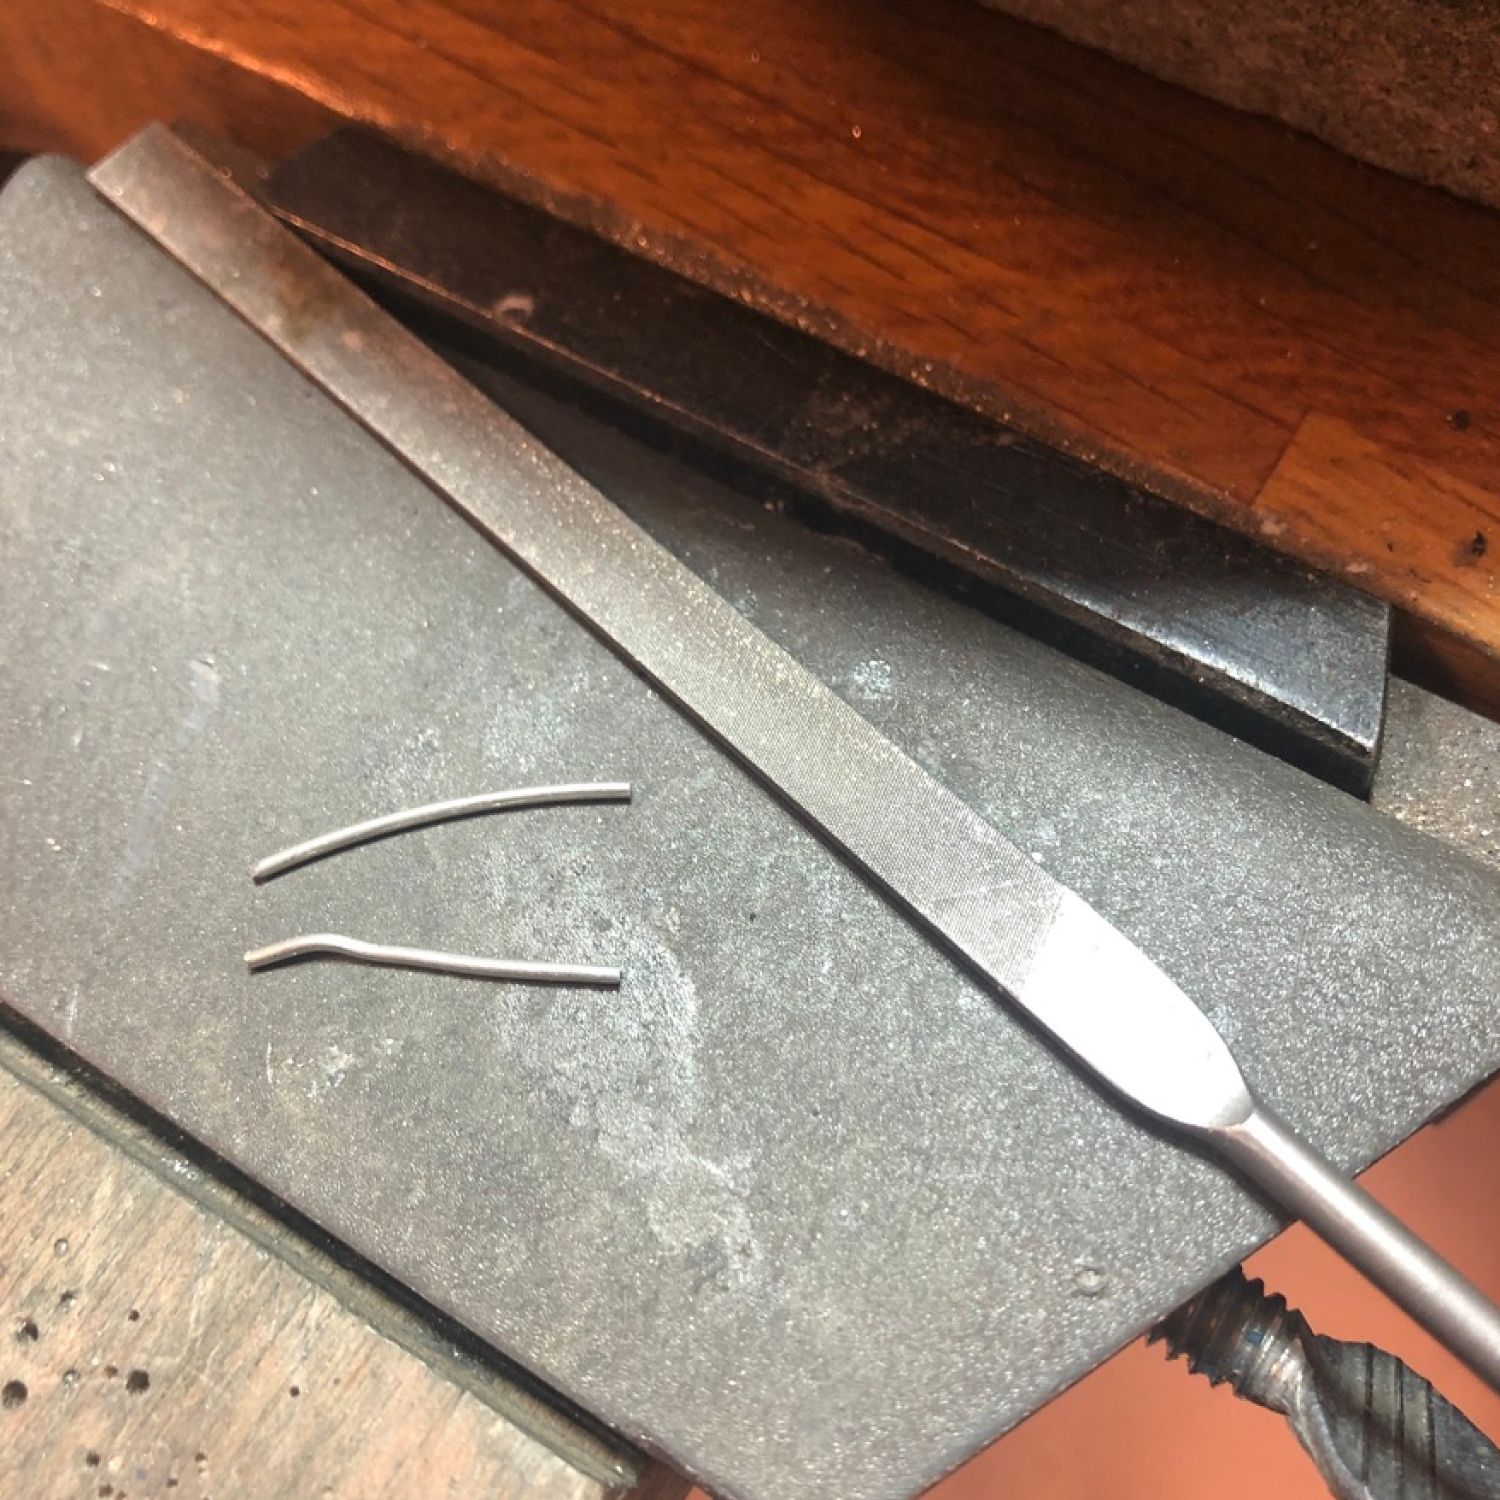
Cut two pieces of 0.8mm sterling silver round wire, a little longer than your usual ear studs, or use regular earstud posts and be sure you have the earring-backs that fit your posts. File one of the ends flat (the other side will be cut to the correct length after soldering, but it is nice to have a little extra to hold onto).
Step 7
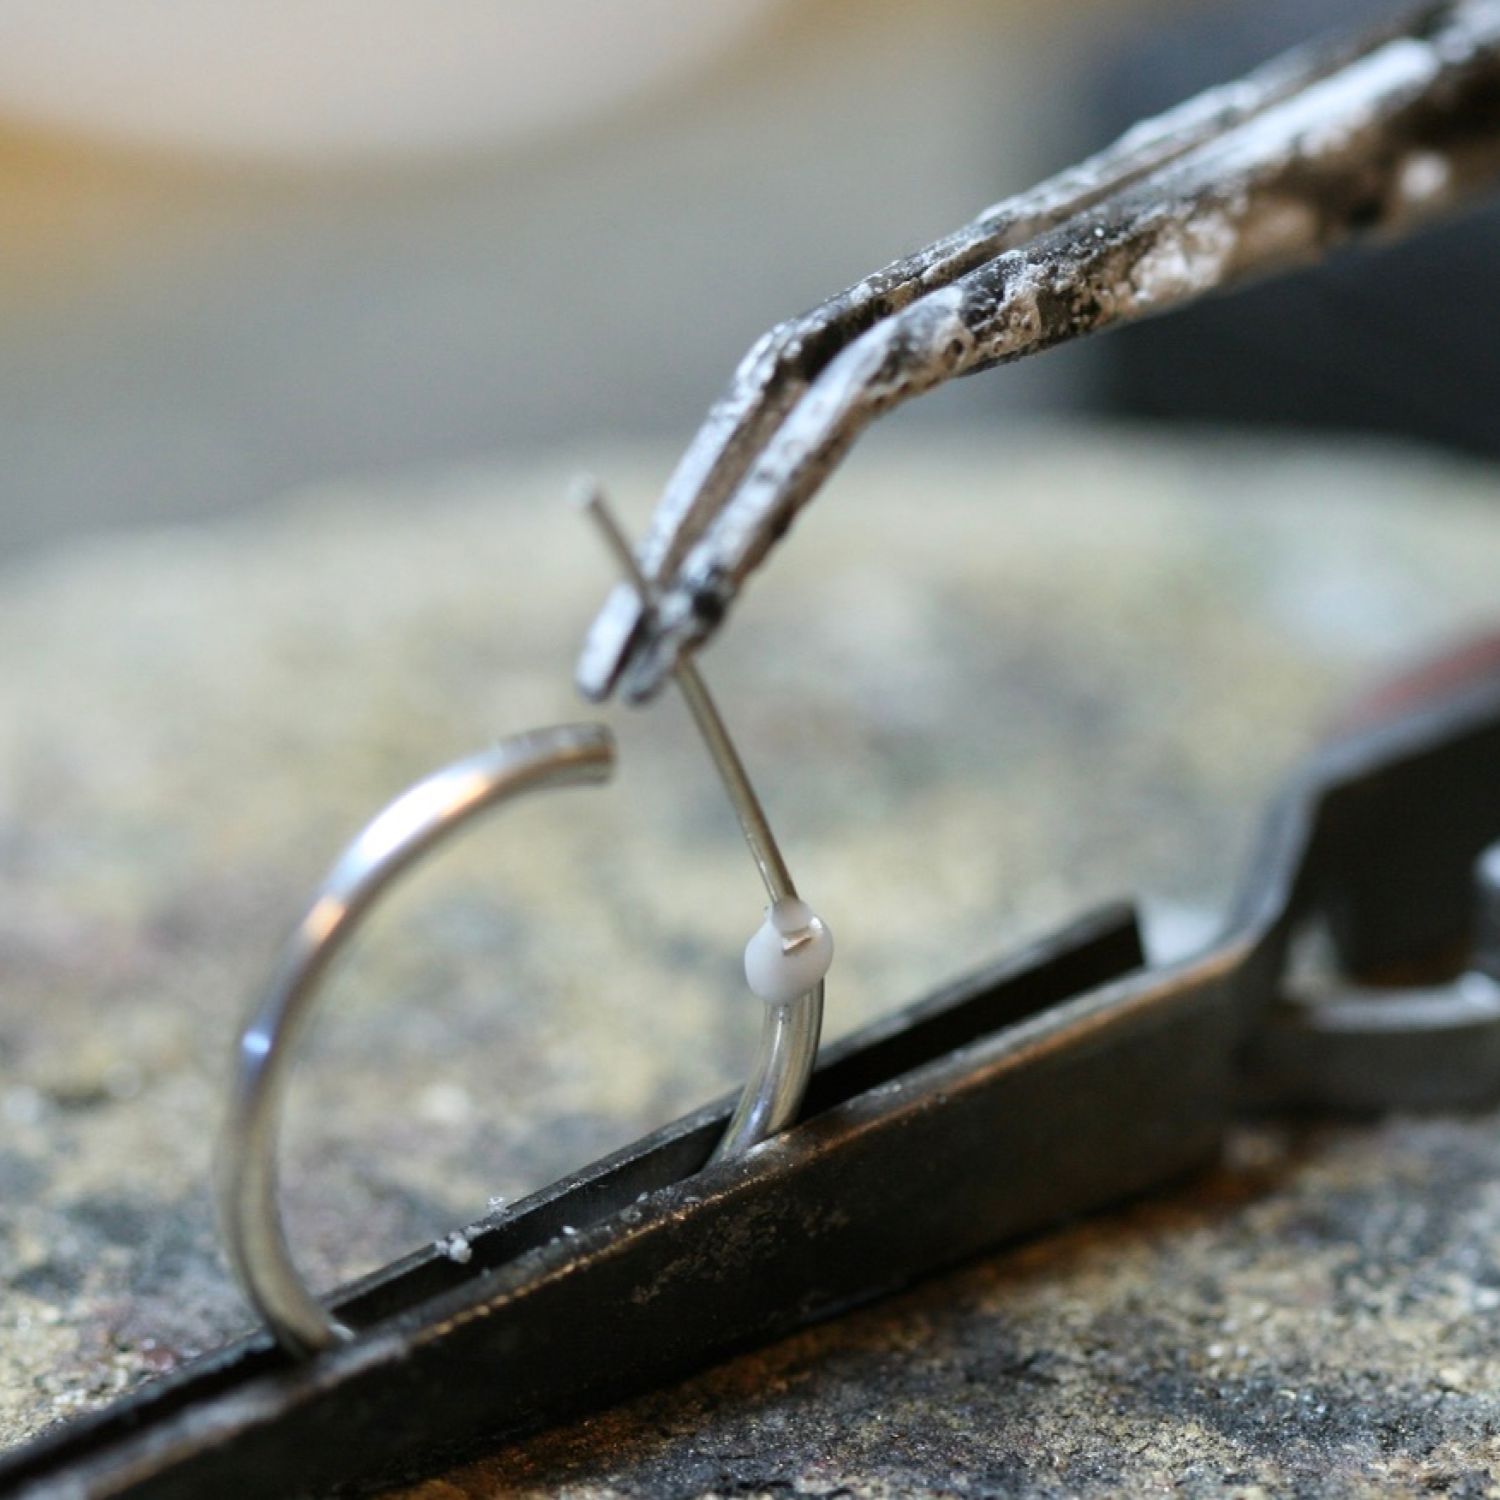
Set up your earring to solder. I prefer to balance the post on top of the earring, with my soldering tweezers. I put flux and a little pallion of hard solder in between. If this is too challenging - it’s usually easier to solder them laying flat, but your posts with be located on one side of the earring.
Tip: you can also use a single third hand to help support your work, it has an adjustable arm so you can grip your work, leaving both hands free for soldering and enabling you to join pieces accurately in the correct position.
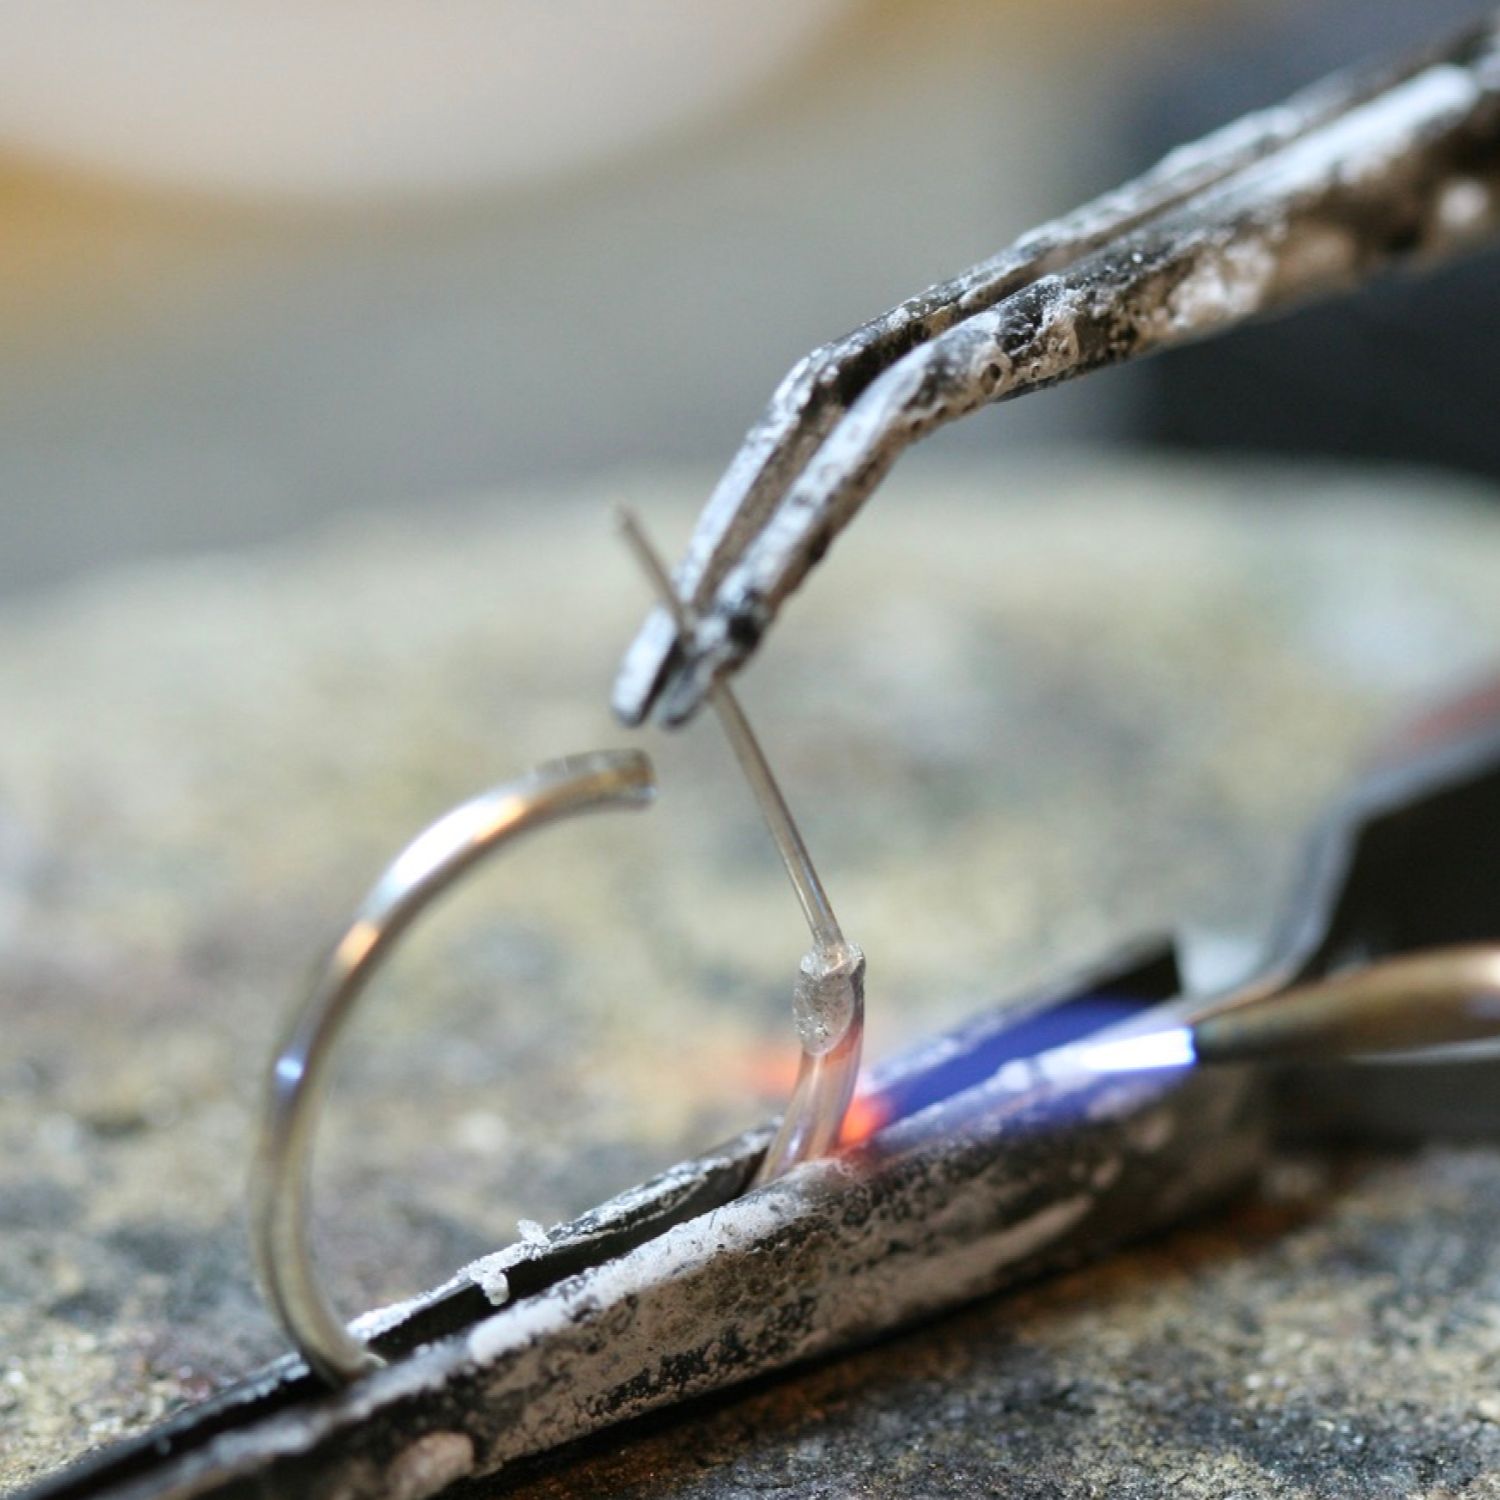
Step 8
Remembering that heat rises - and my thinnest part is on top, I prioritise 95% of my heating on the earring itself, and not the post. When the flux is getting clear and less, I move towards the connection more, and they solder together. Repeat with the other earring.
Step 9
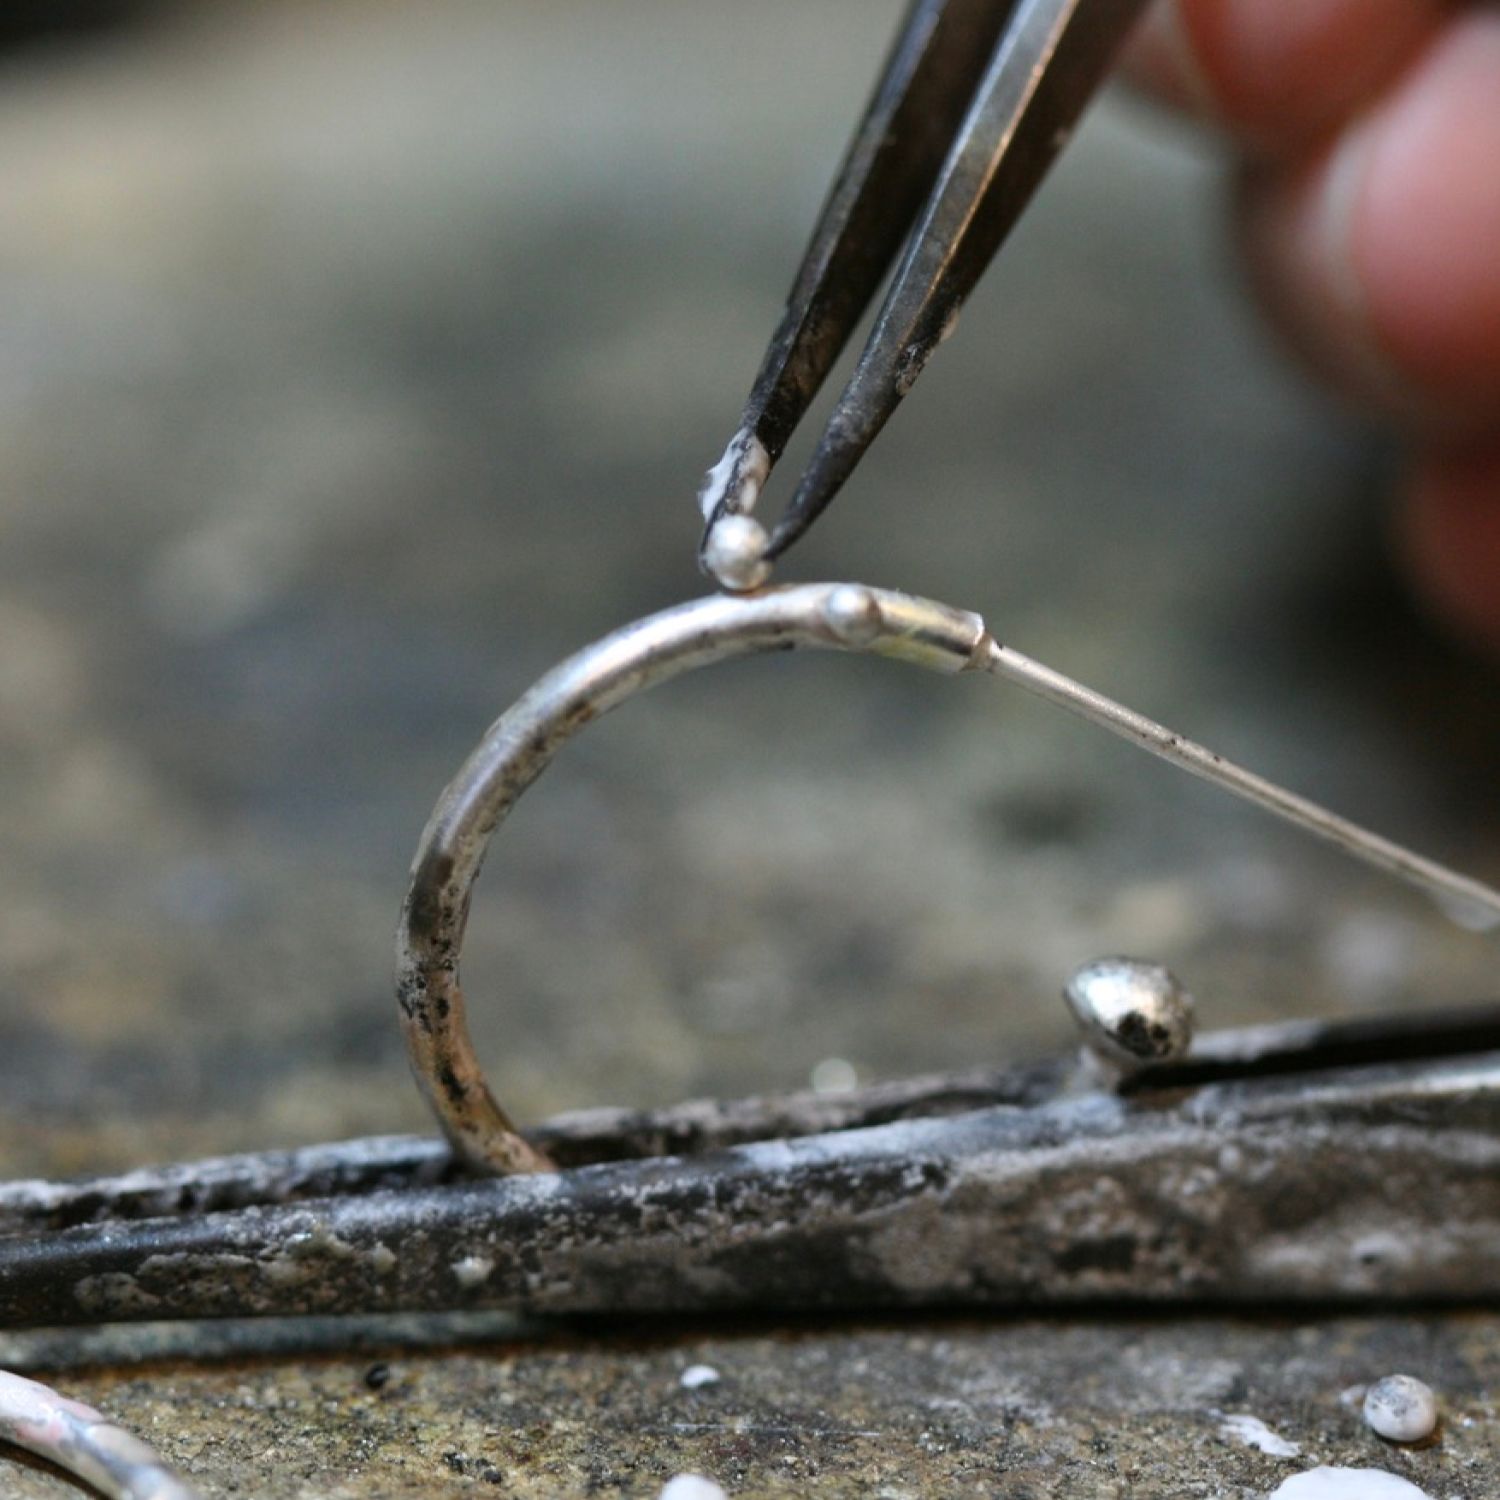
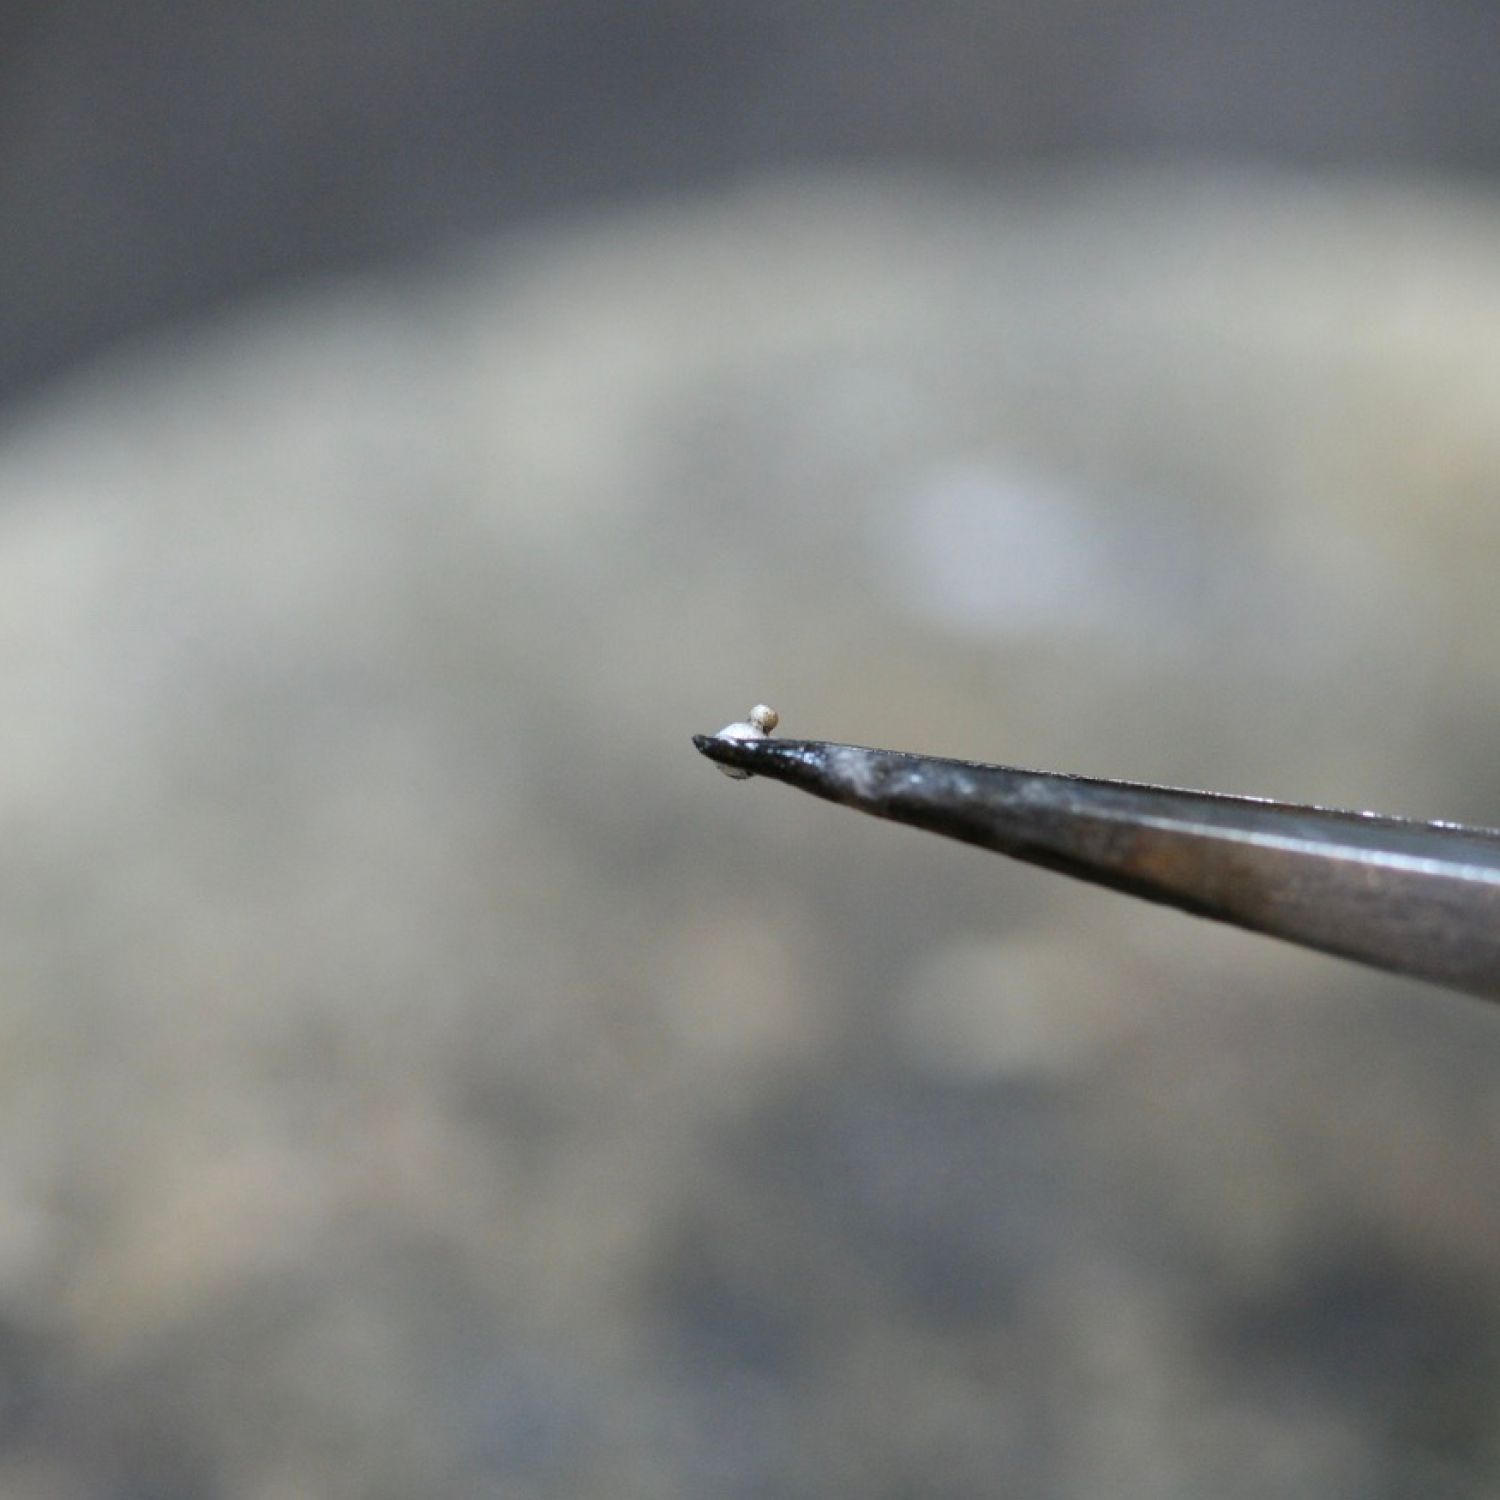
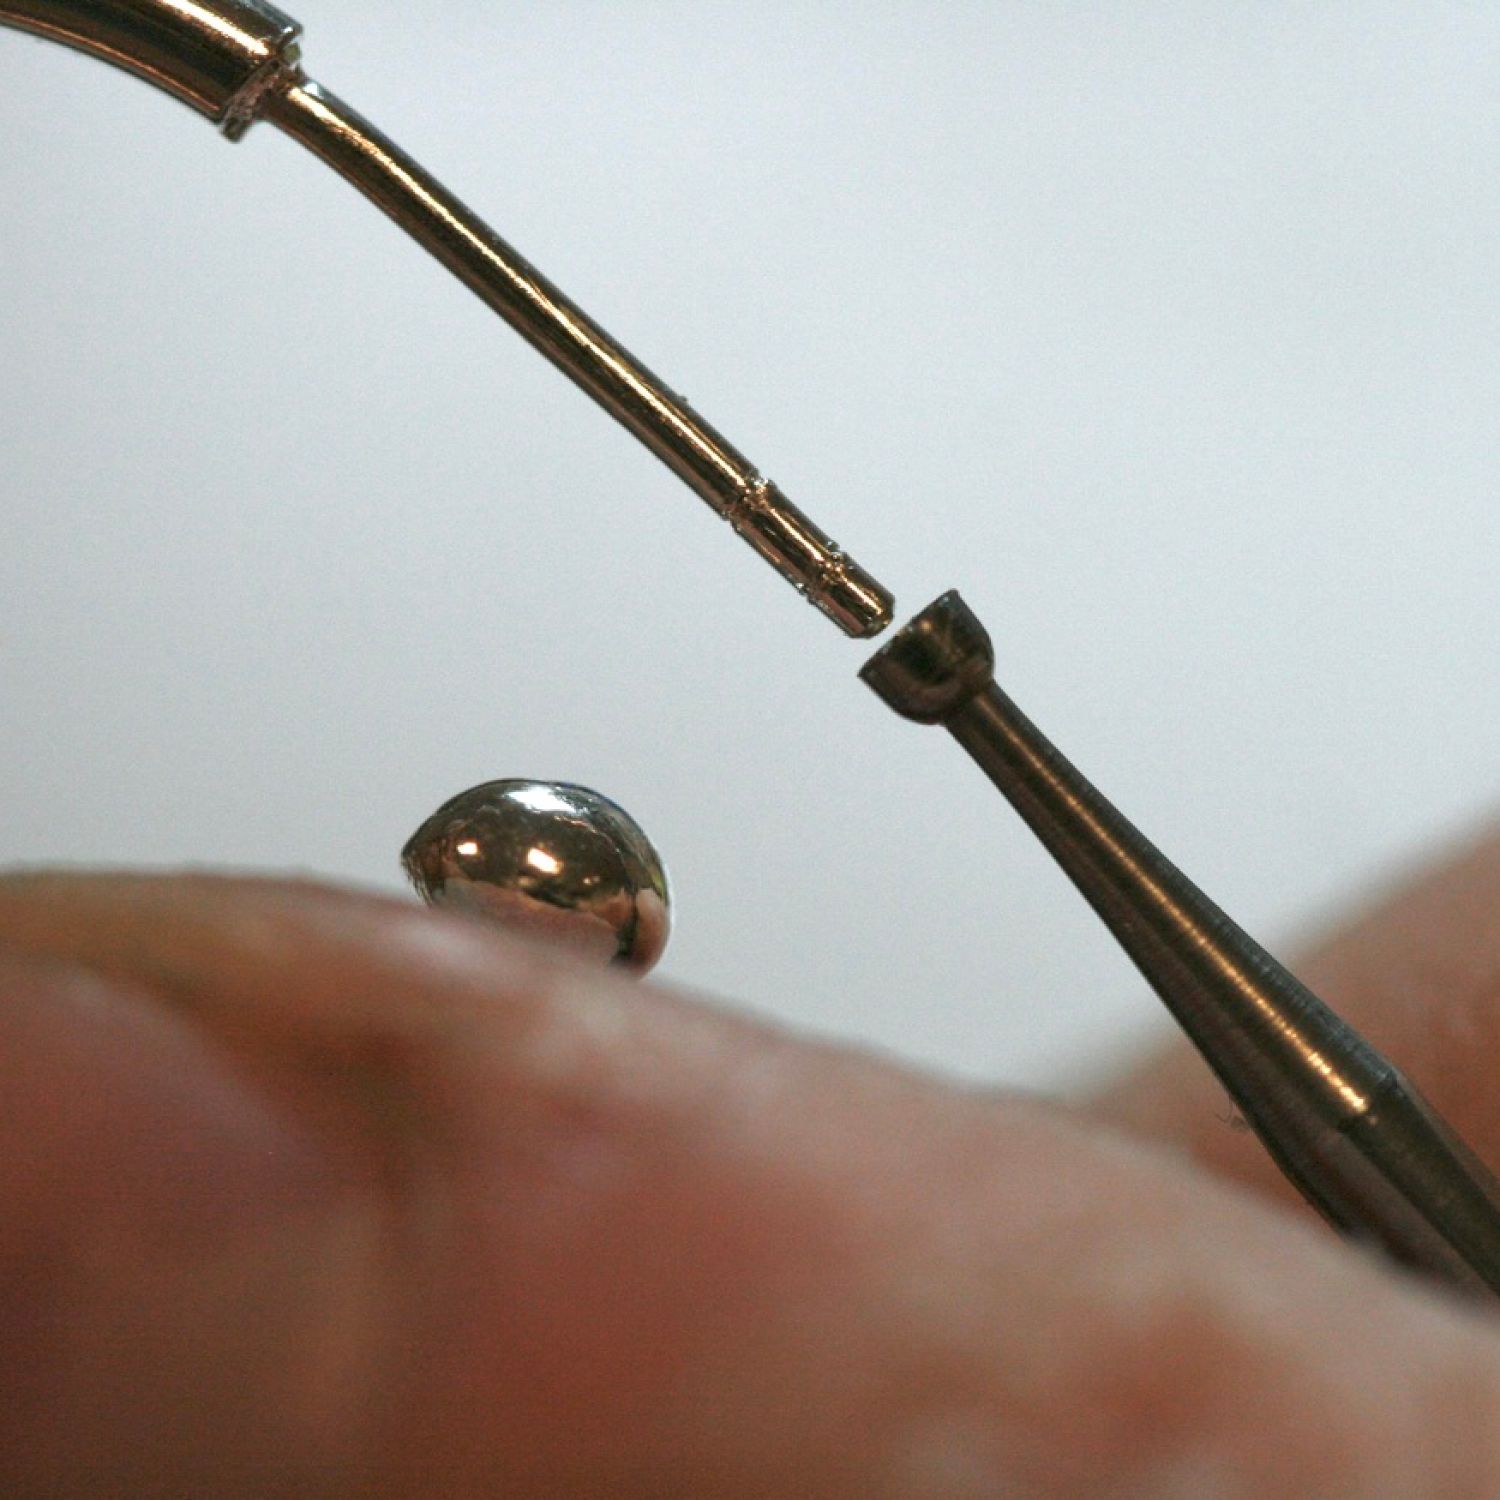
Find two larger granules in your collection, or melt two new ones out of the cut-offs you just made. File a flat spot on one side.
Step 11
Time to start adding the small granules. I recommend starting closest to the posts, and moving chronologically down the earrings. I use hard solder, for as long as possible, and only move on to easy solder if I start to struggle, or want to add more at the end of the process. I cut the tiniest pallions of hard solder.
Step 10
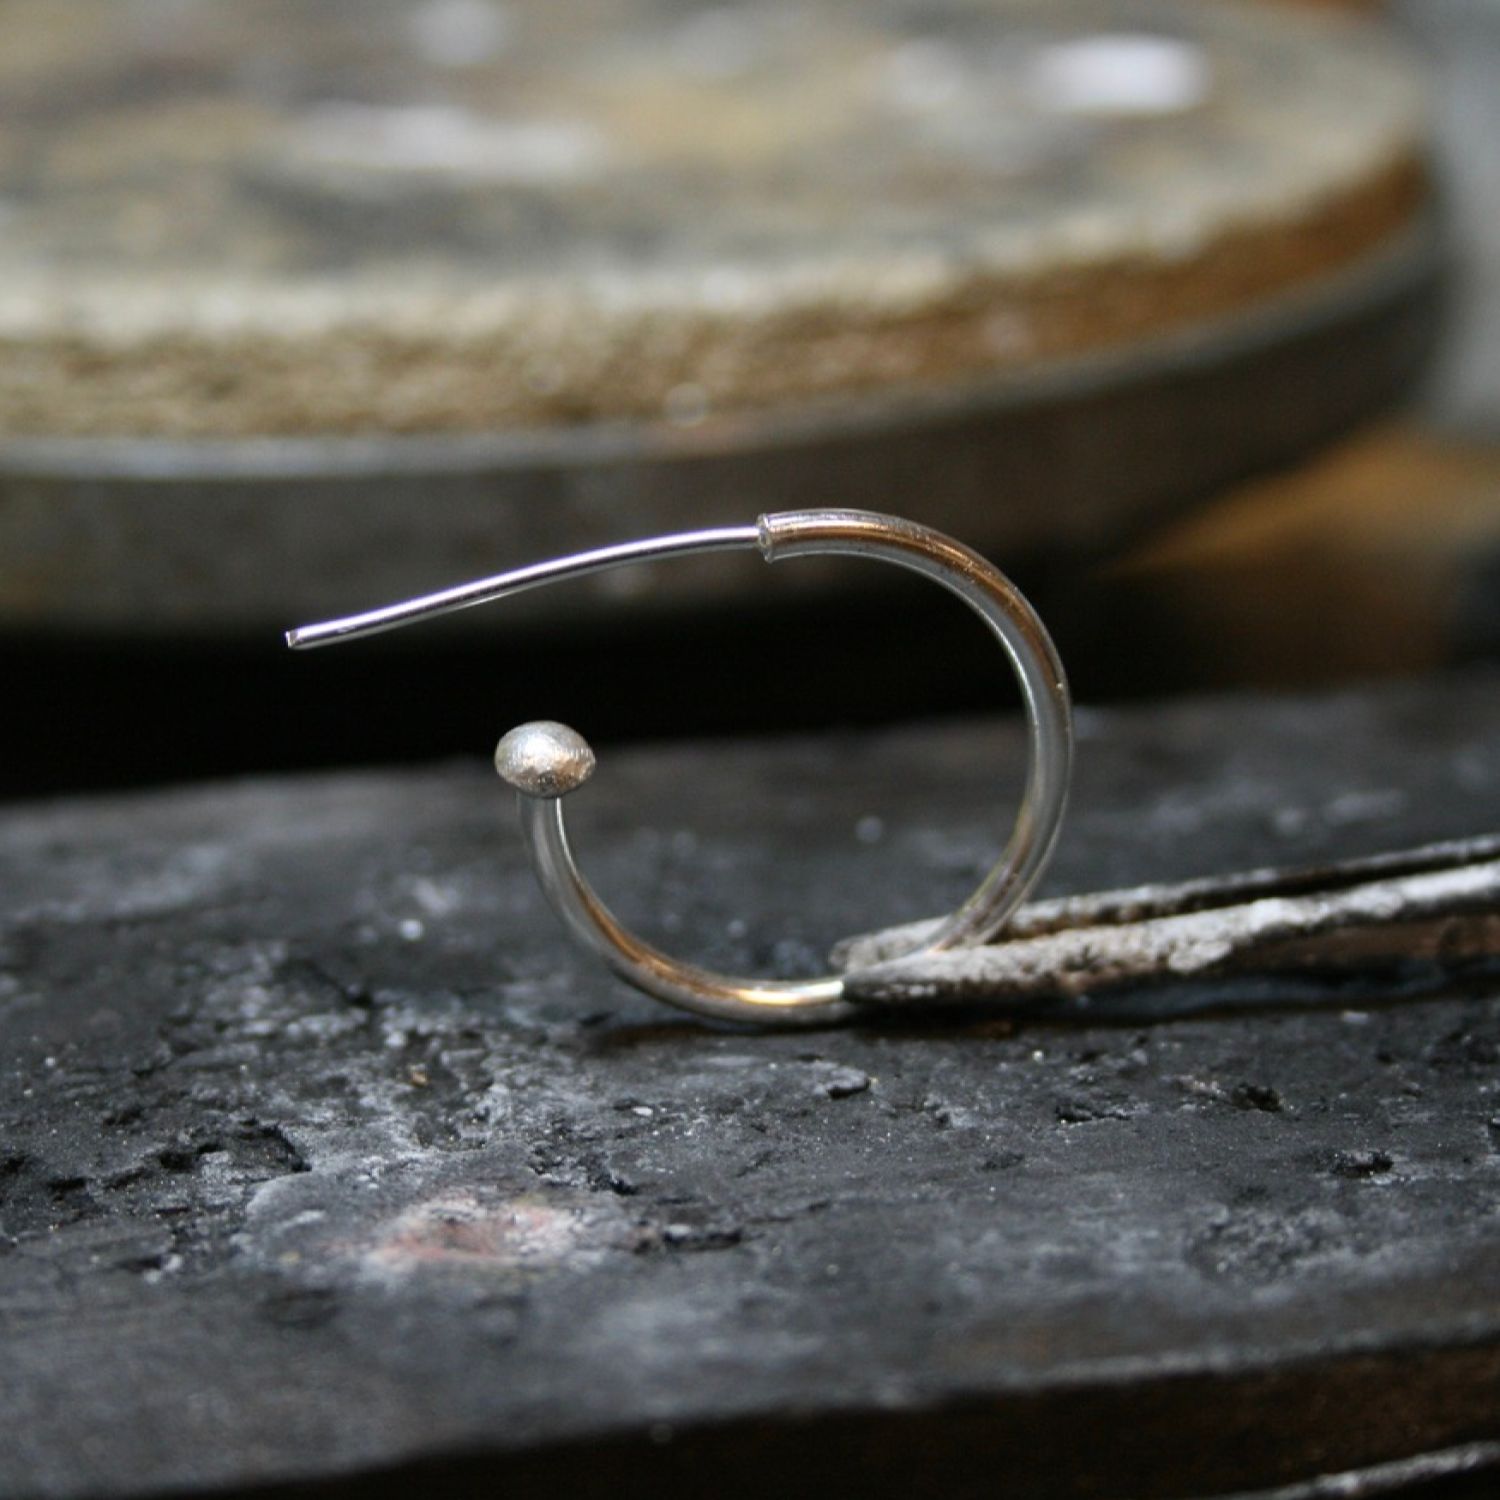
Balance the big granule at the end with a hard solder pallion and flux in between. Solder. You might need to support the granule during soldering with some tweezers, because the flux might bubble and throw it off. When the flux settles, it’s usually fine to not hold the granule, but just to let it solder into place, resting onto the earring. Clean in the pickle.
Preparing a granule...
I hold my granule in titanium tweezers. If you’re quick with the torch, you can ball up the solder pallion, and make it sit half-melted on the granule.
Step 12
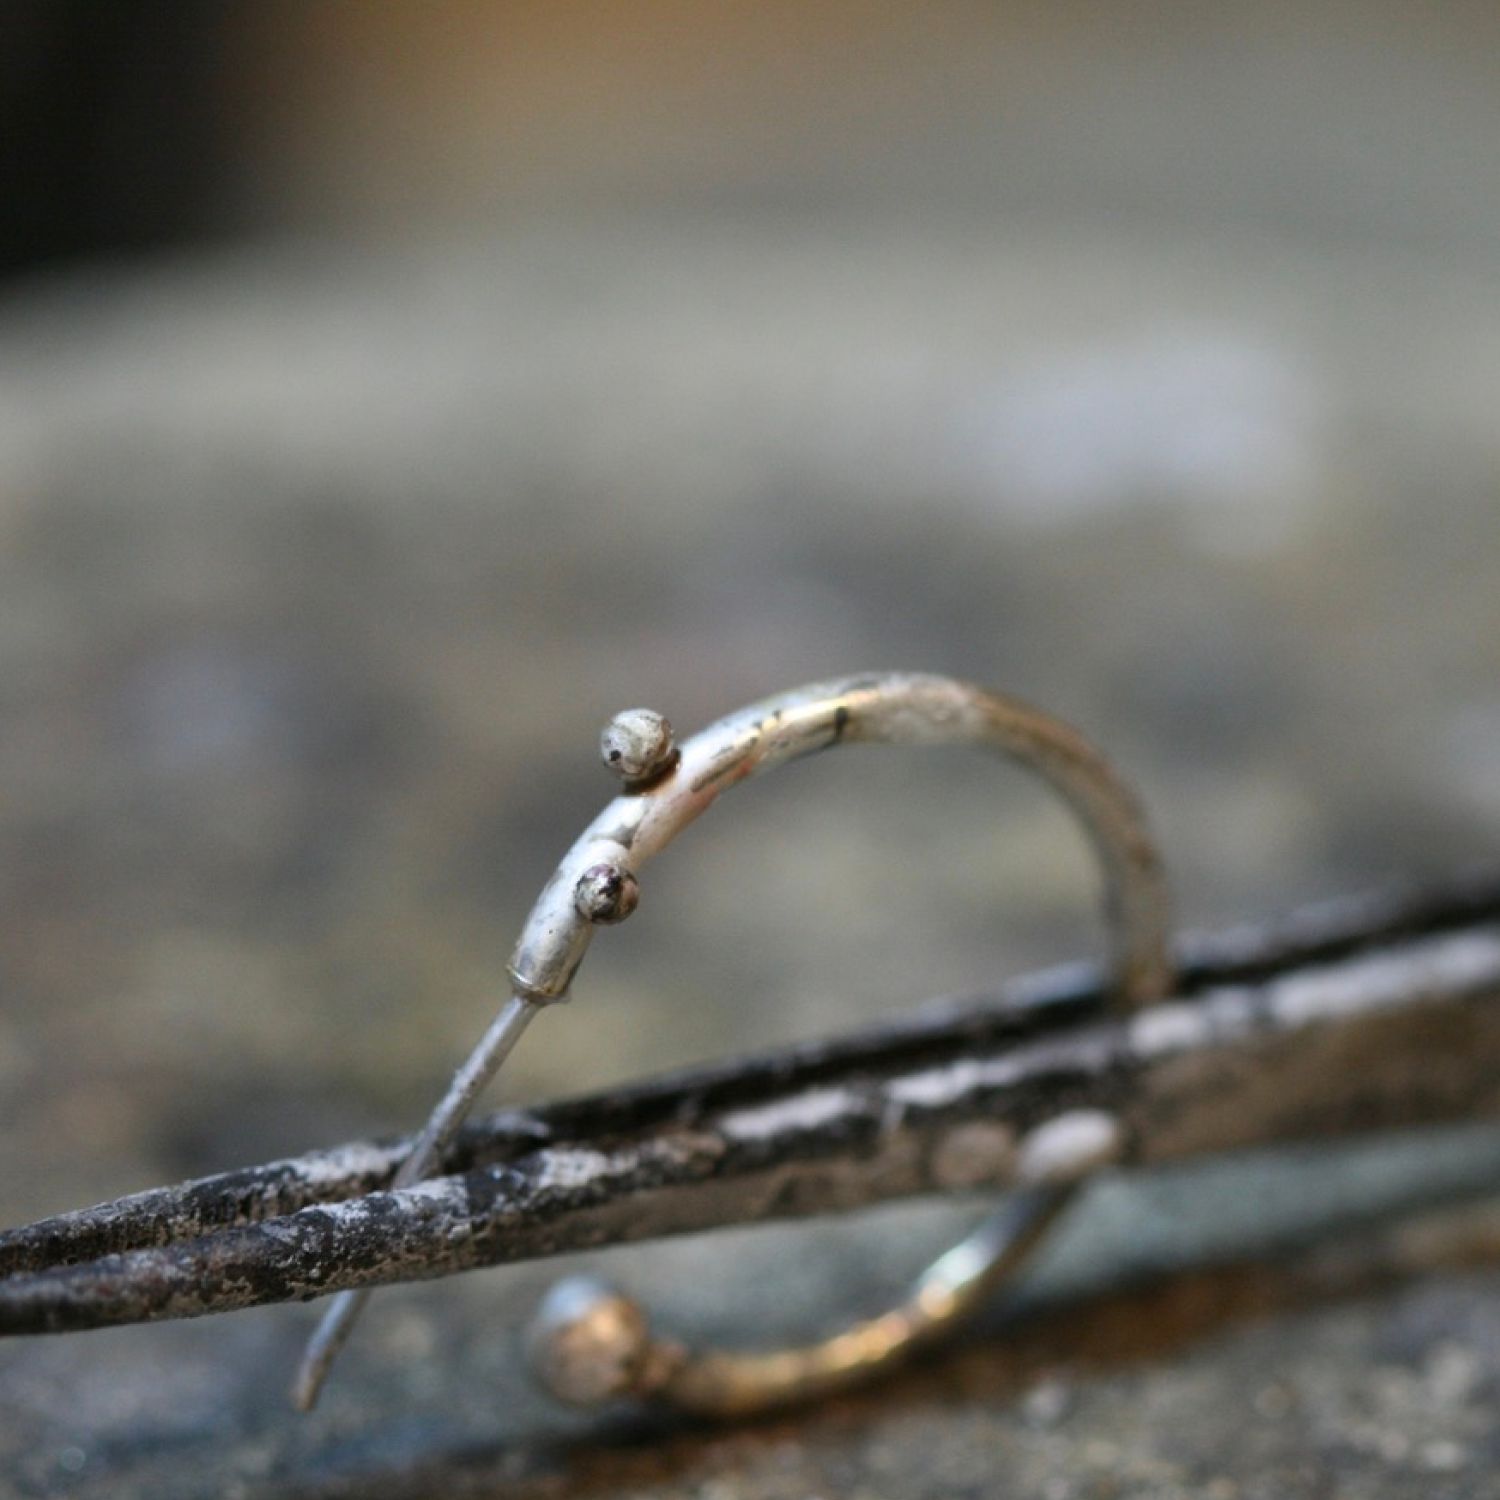
Follow a plan, or just wing it! You can make little divots in the earrings with a small ball burr where you want the granules to go, but it’s not necessary. Heat rises. Therefore I always solder my granule on the highest spot, and just turn my earring accordingly. I flux the entire earring, and now I focus a litte more heat just where I want the granule to solder onto. With sufficient flux, I can solder more granules on before the earrings have to go the pickle. When it’s getting hard to solder the granules to the earring - it could be a sign that they need a little clean.
Step 13
Fit check. If you want mirroring earrings, it’s an idea to check the placement as you go.
Step 14
I don't want all of the granules in the middle on top of the earring, I also want some a bit off to the sides. Laying the earrings flat on the soldering block, or slightly rested on a piece of charcoal, I alter the earring's highest point. Do remember to flux before you move on to more soldering after the pickle bath. Finally, after adding all your granules - the earrings need a good pickle bath. When you take them out, inspect that all granules are soldered completely and are well connected. Here’s when you can do some repairs or add some more if you want with easy solder. If all seems good, give them a clean with a brass brush or in a magnetic pin tumbler.
Step 15
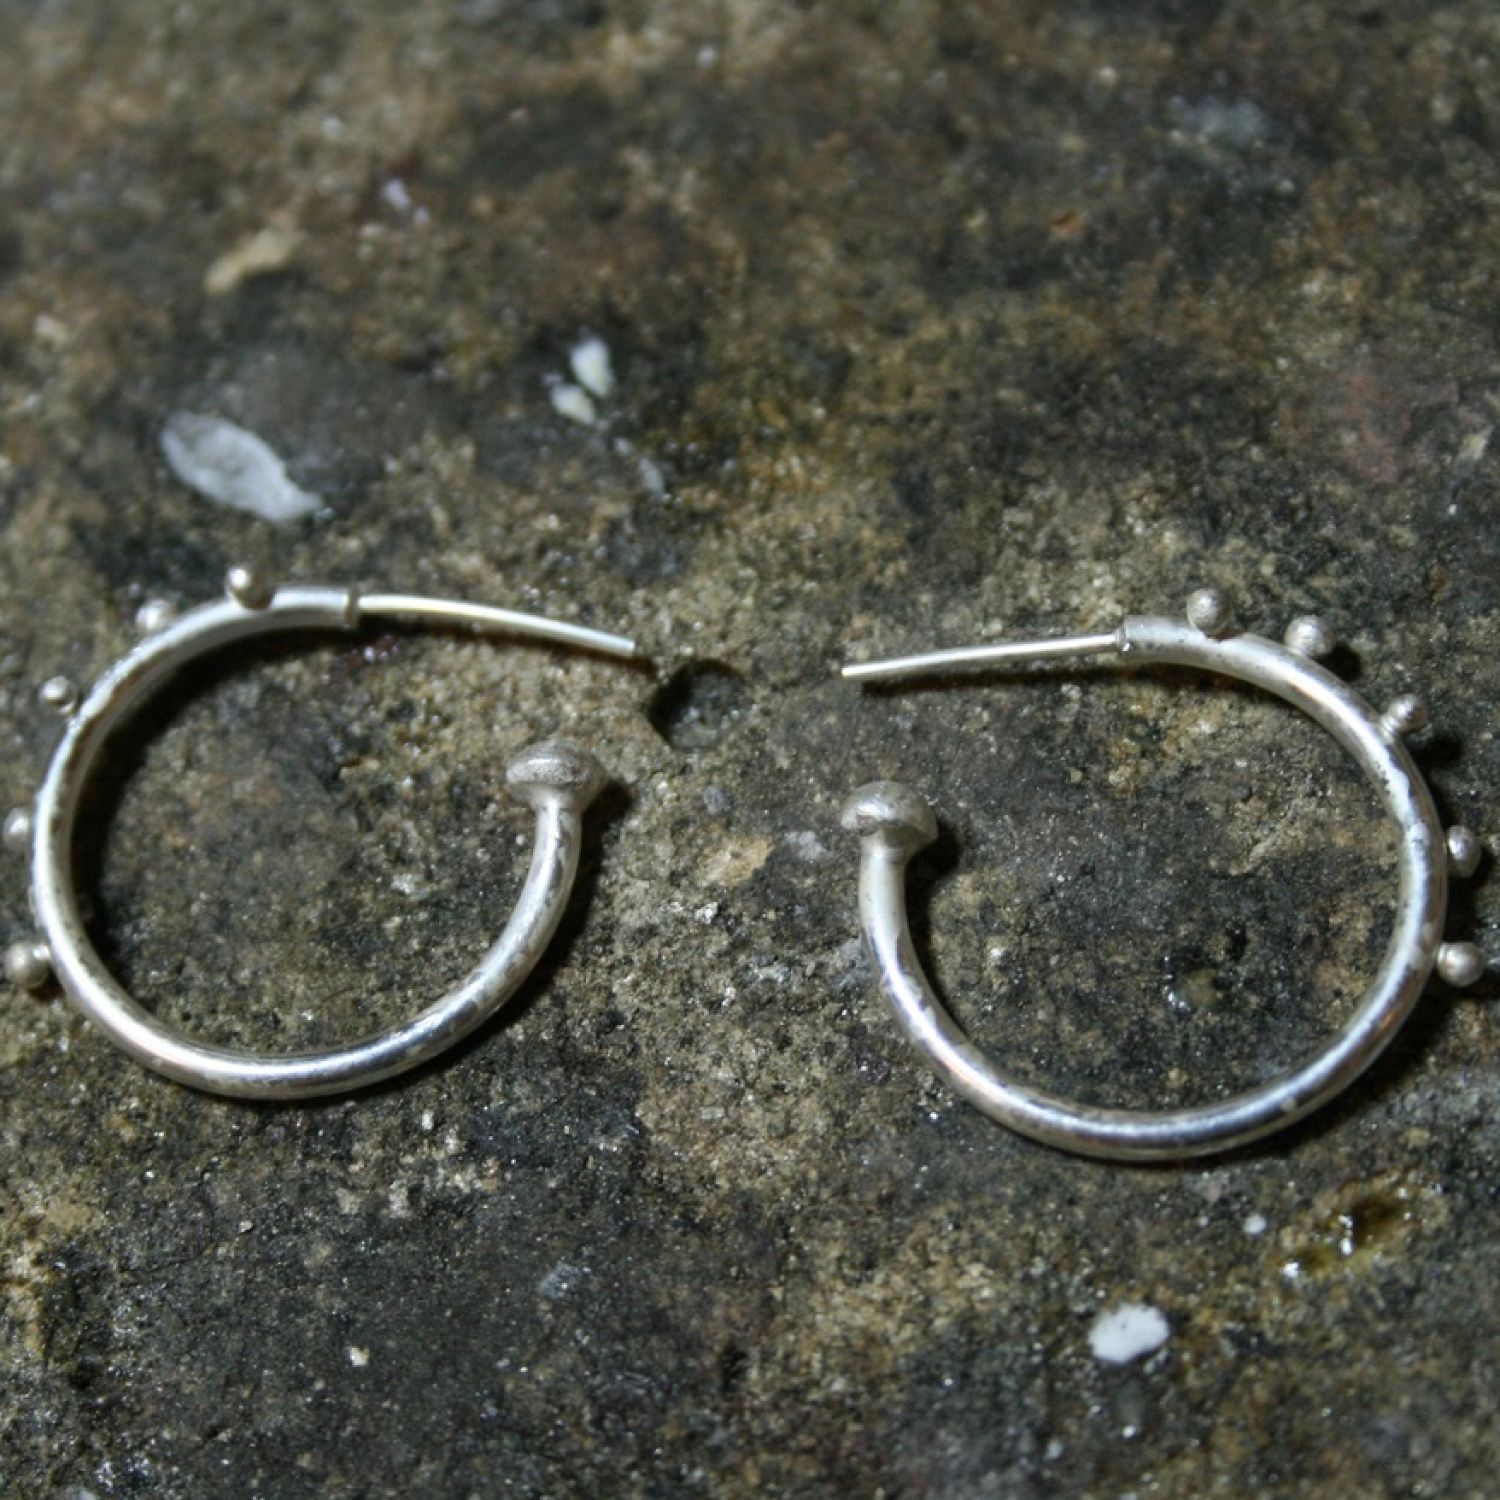
Finishing touches: If you’re making earstud posts from scratch like I do, now is the time to cut them into the right length, approximately between 11-13 mm long. File or use a sanding stick to shape the ends slightly pointed like a bullet, or round them off with a cup burr.
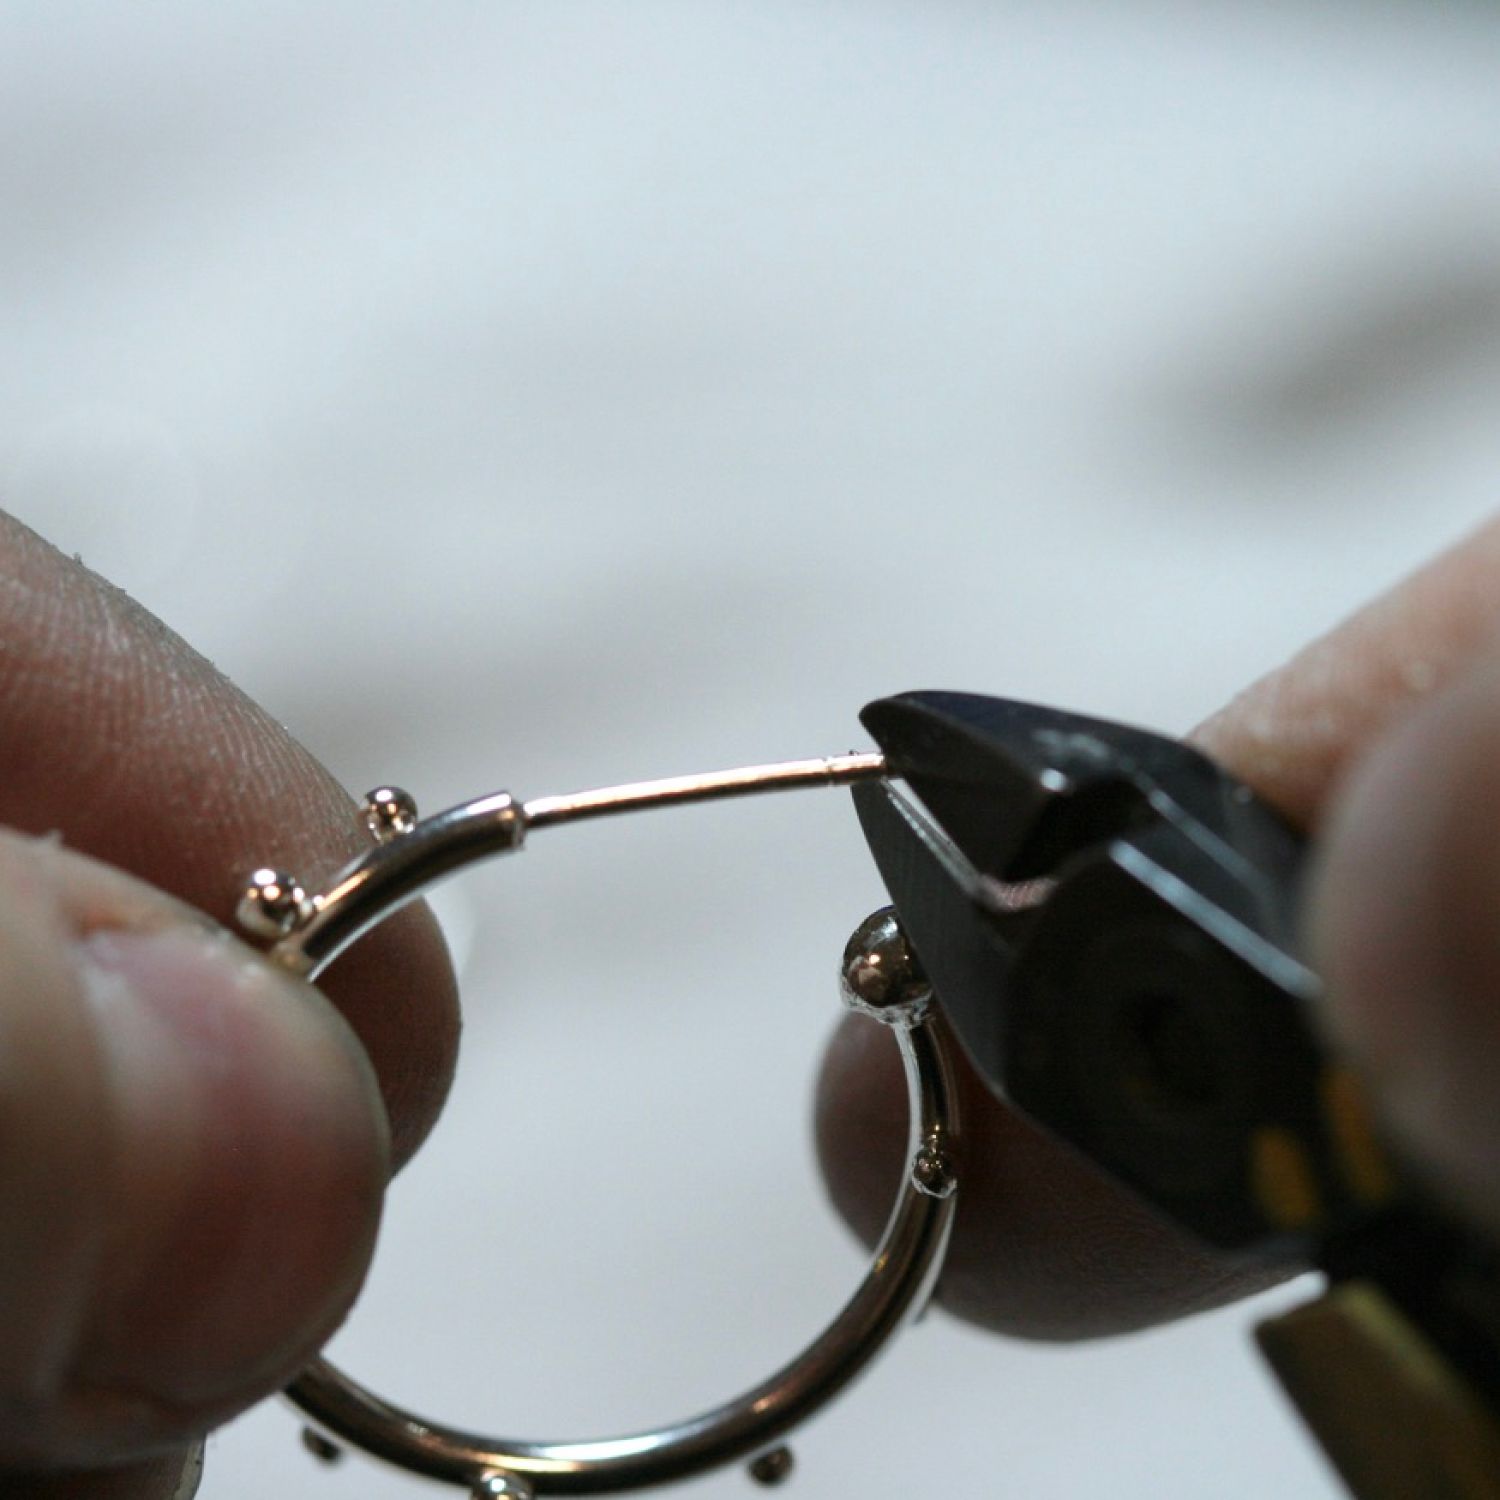
Step 16
Use your cutting pliers to carefully make one or two groove tracks near the end. Round these grooves by turning around the very tip of your round nose pliers.
Step 17
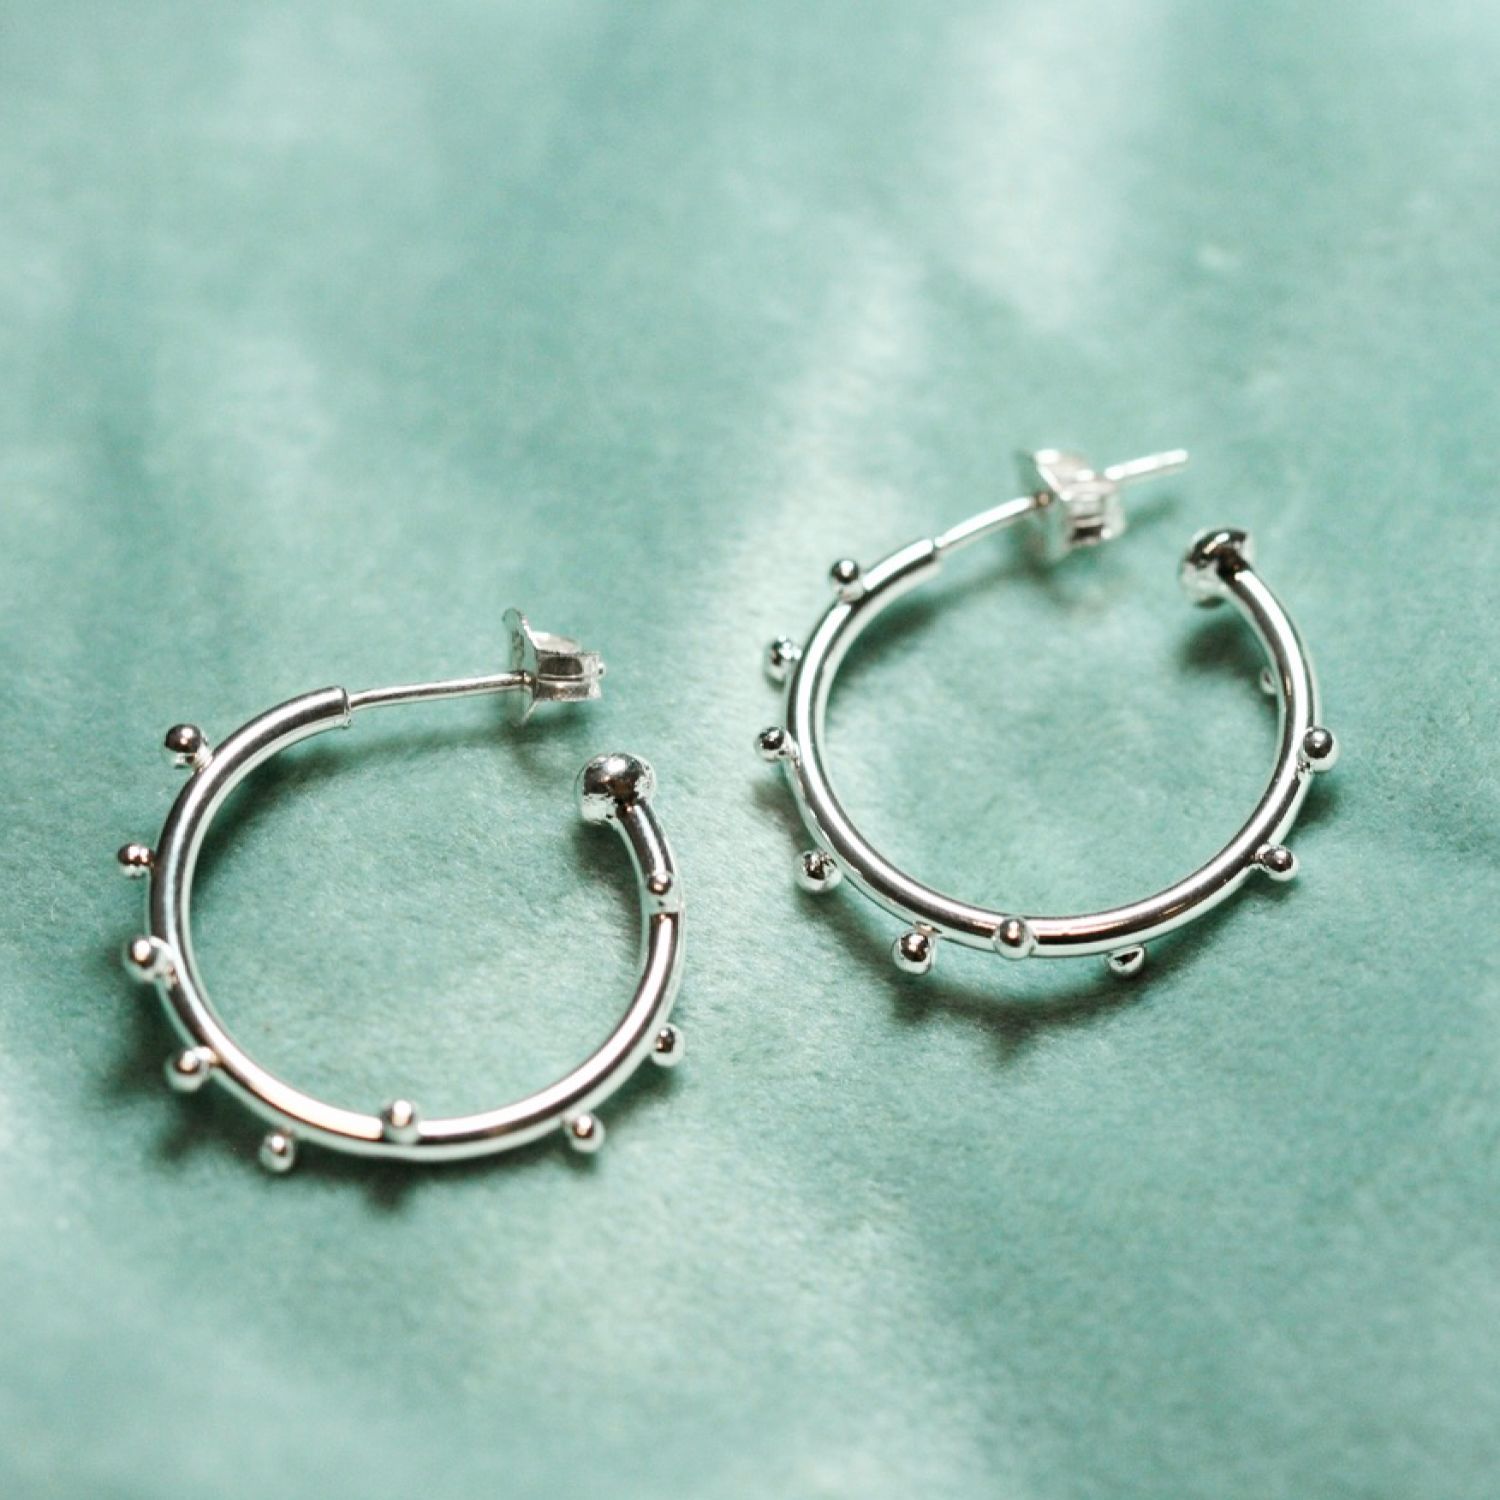
Polish the earrings with your preferred polishing method such as using polishing papers and then add earring backs to finish.

Customise with charms
If you want you can add charms to the hoops. Just make sure the jump ring is front-facing, and big enough to move over the small granules. The large granule at the end should protect the charm from falling off.
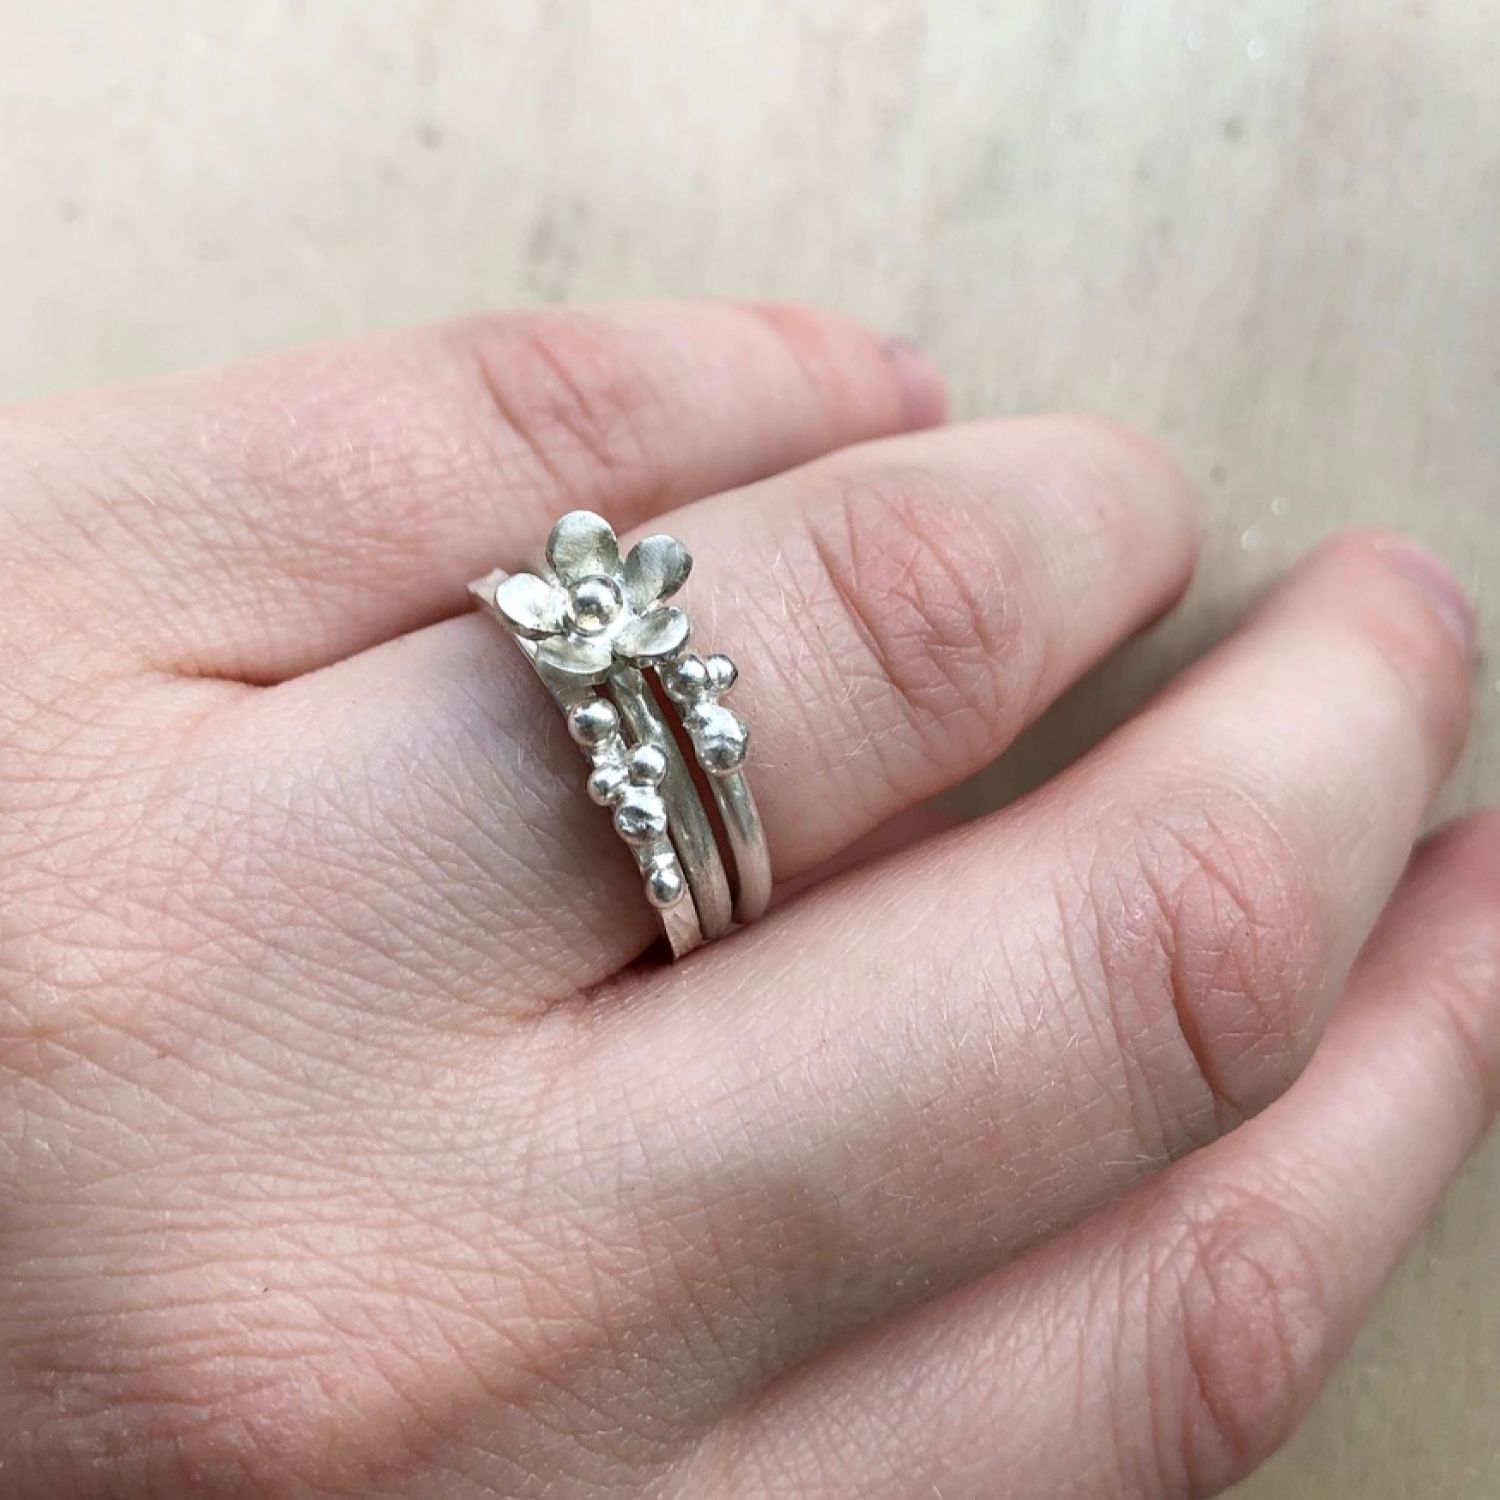
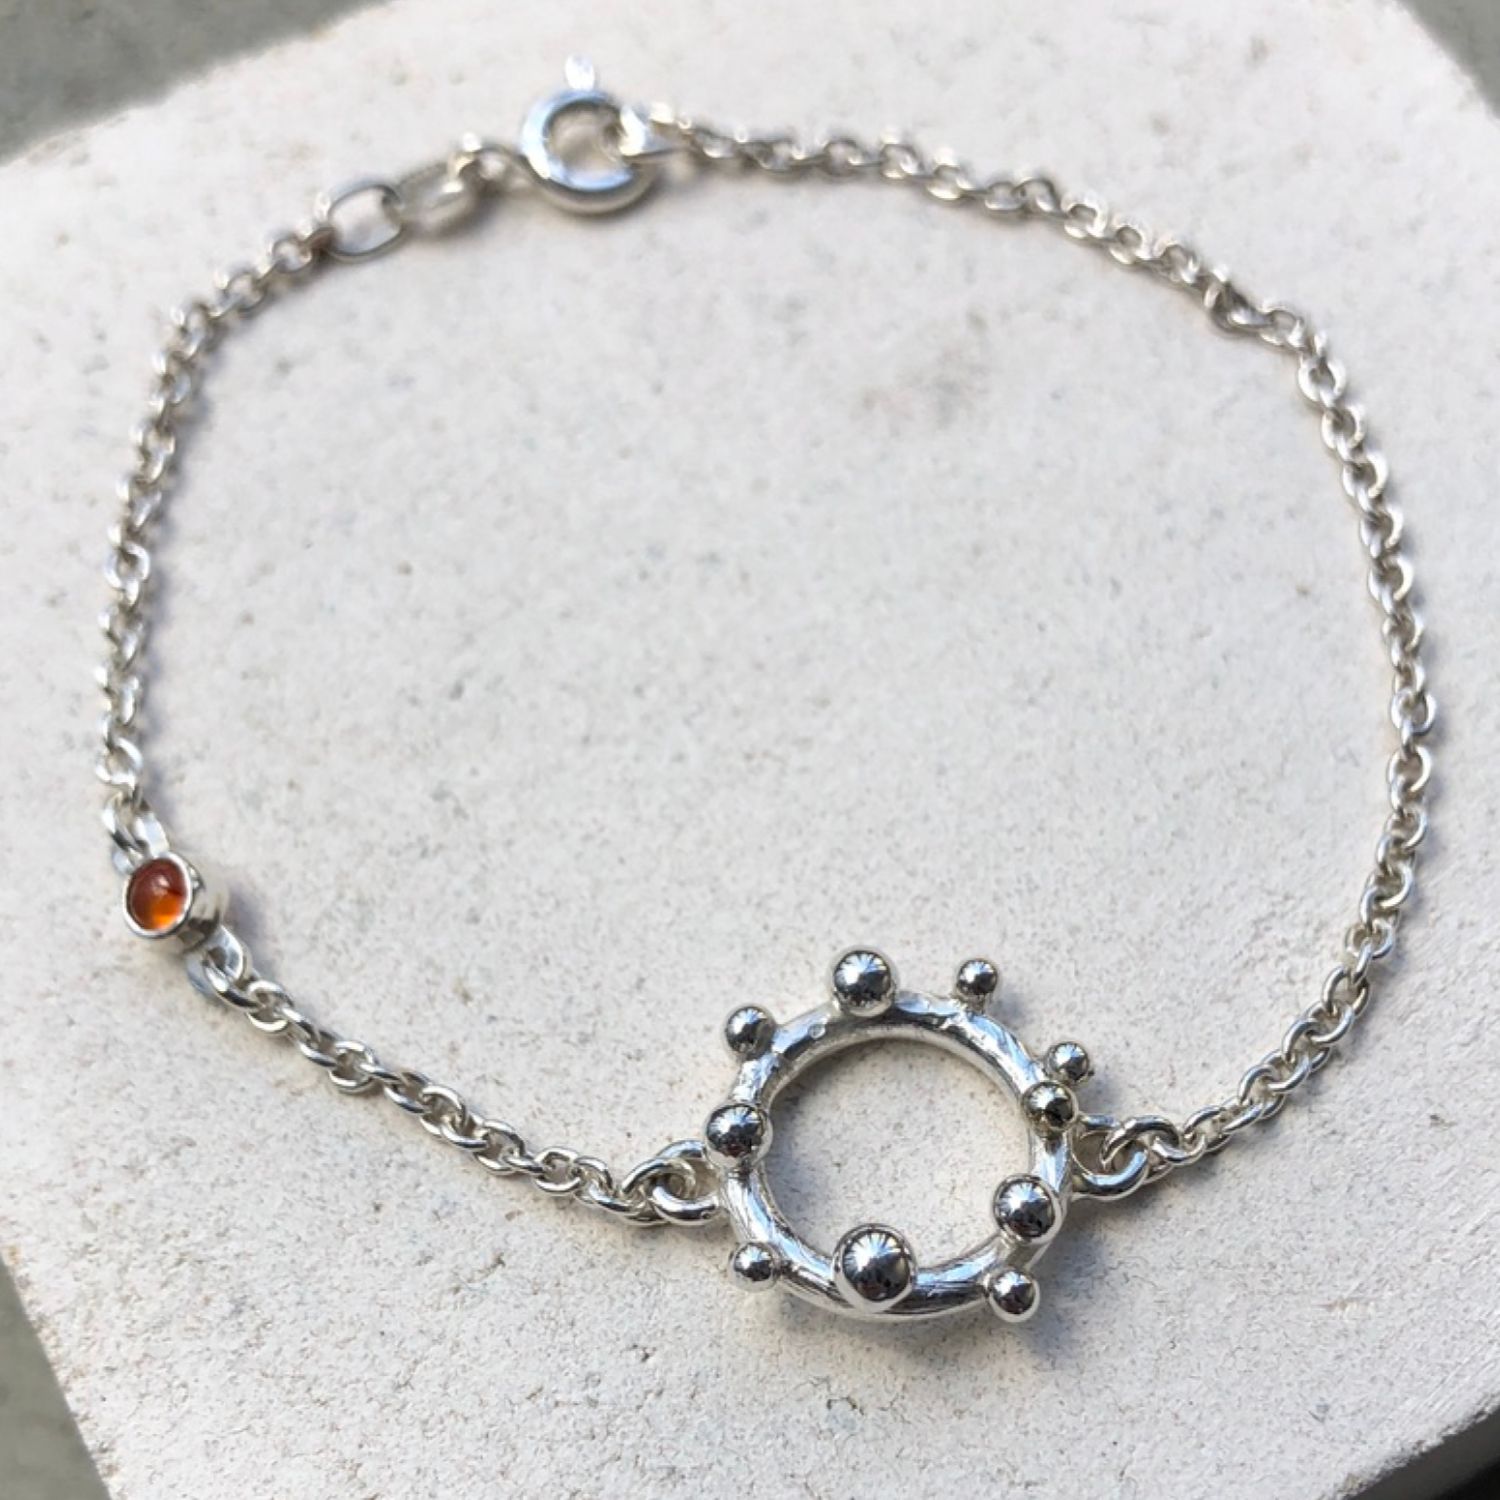
Other ways I like to use granulation...
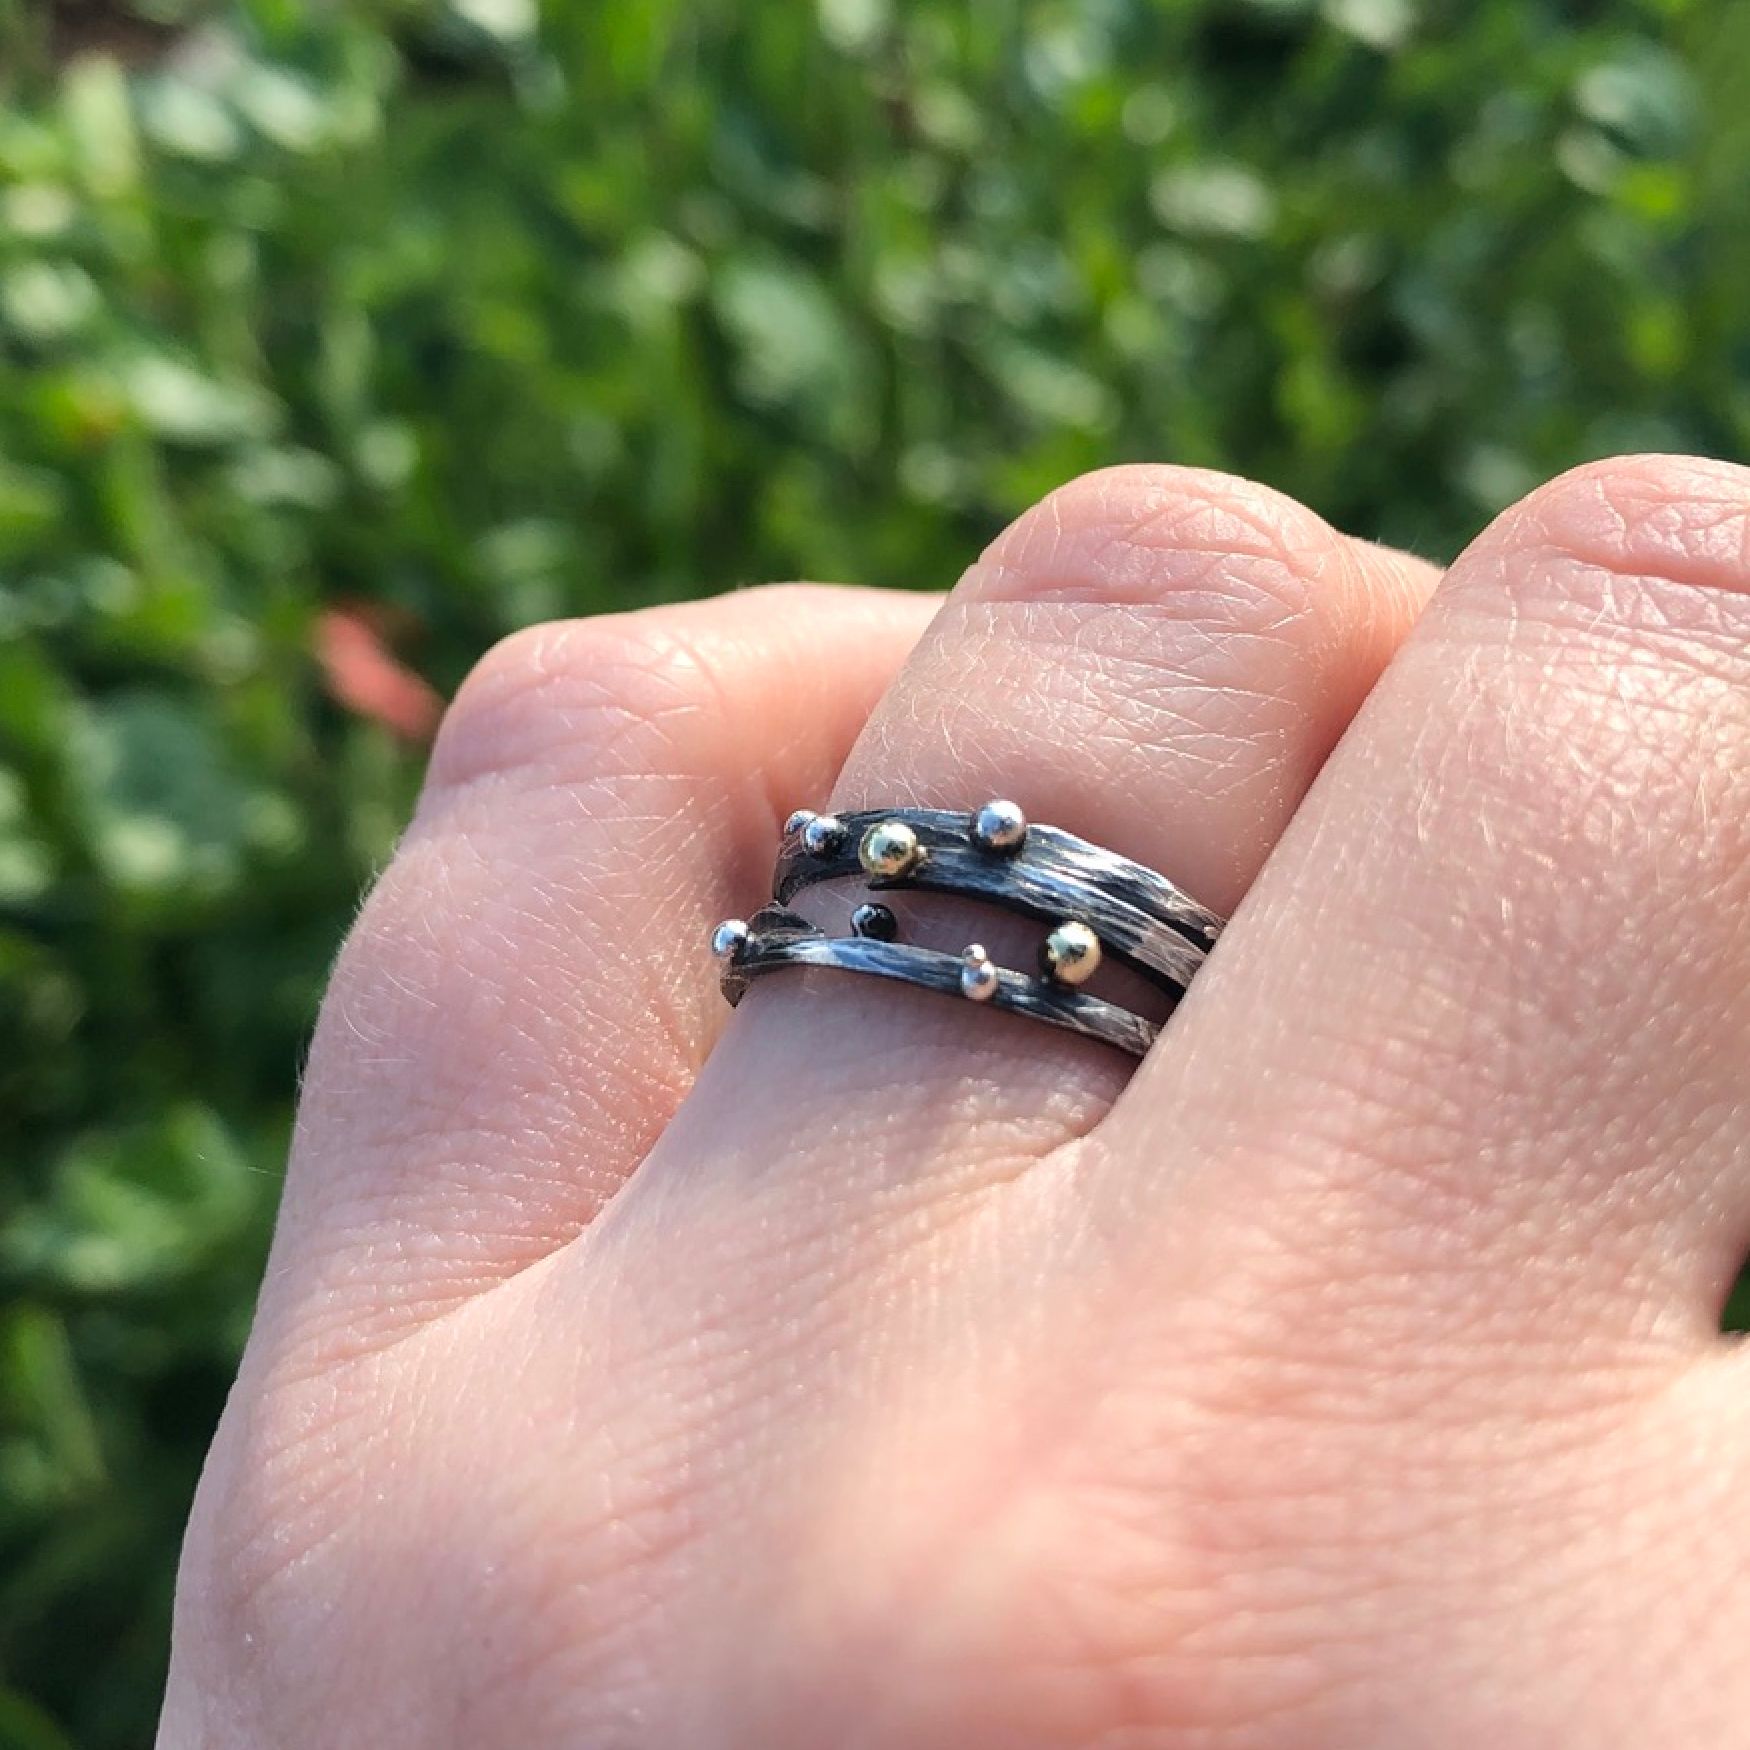
On rings and bracelets. Play around with mixed metal (gold granules on oxidized silver makes a beautiful contrast)
Watch granulation in action

Meet your guest tutor, Hanne
"I'm Hanne, the face behind Jewellery by HISO. I'm a Norwegian goldsmith and I make all my jewellery in Lillestrøm, not very far from Oslo, Norway. I'm very passionate about handcrafting, and I really love that silver and gold are recyclable. I've always been captivated by jewellery and wanted to make it myself, but I only started my little brand in 2020 - after I got my diploma."