


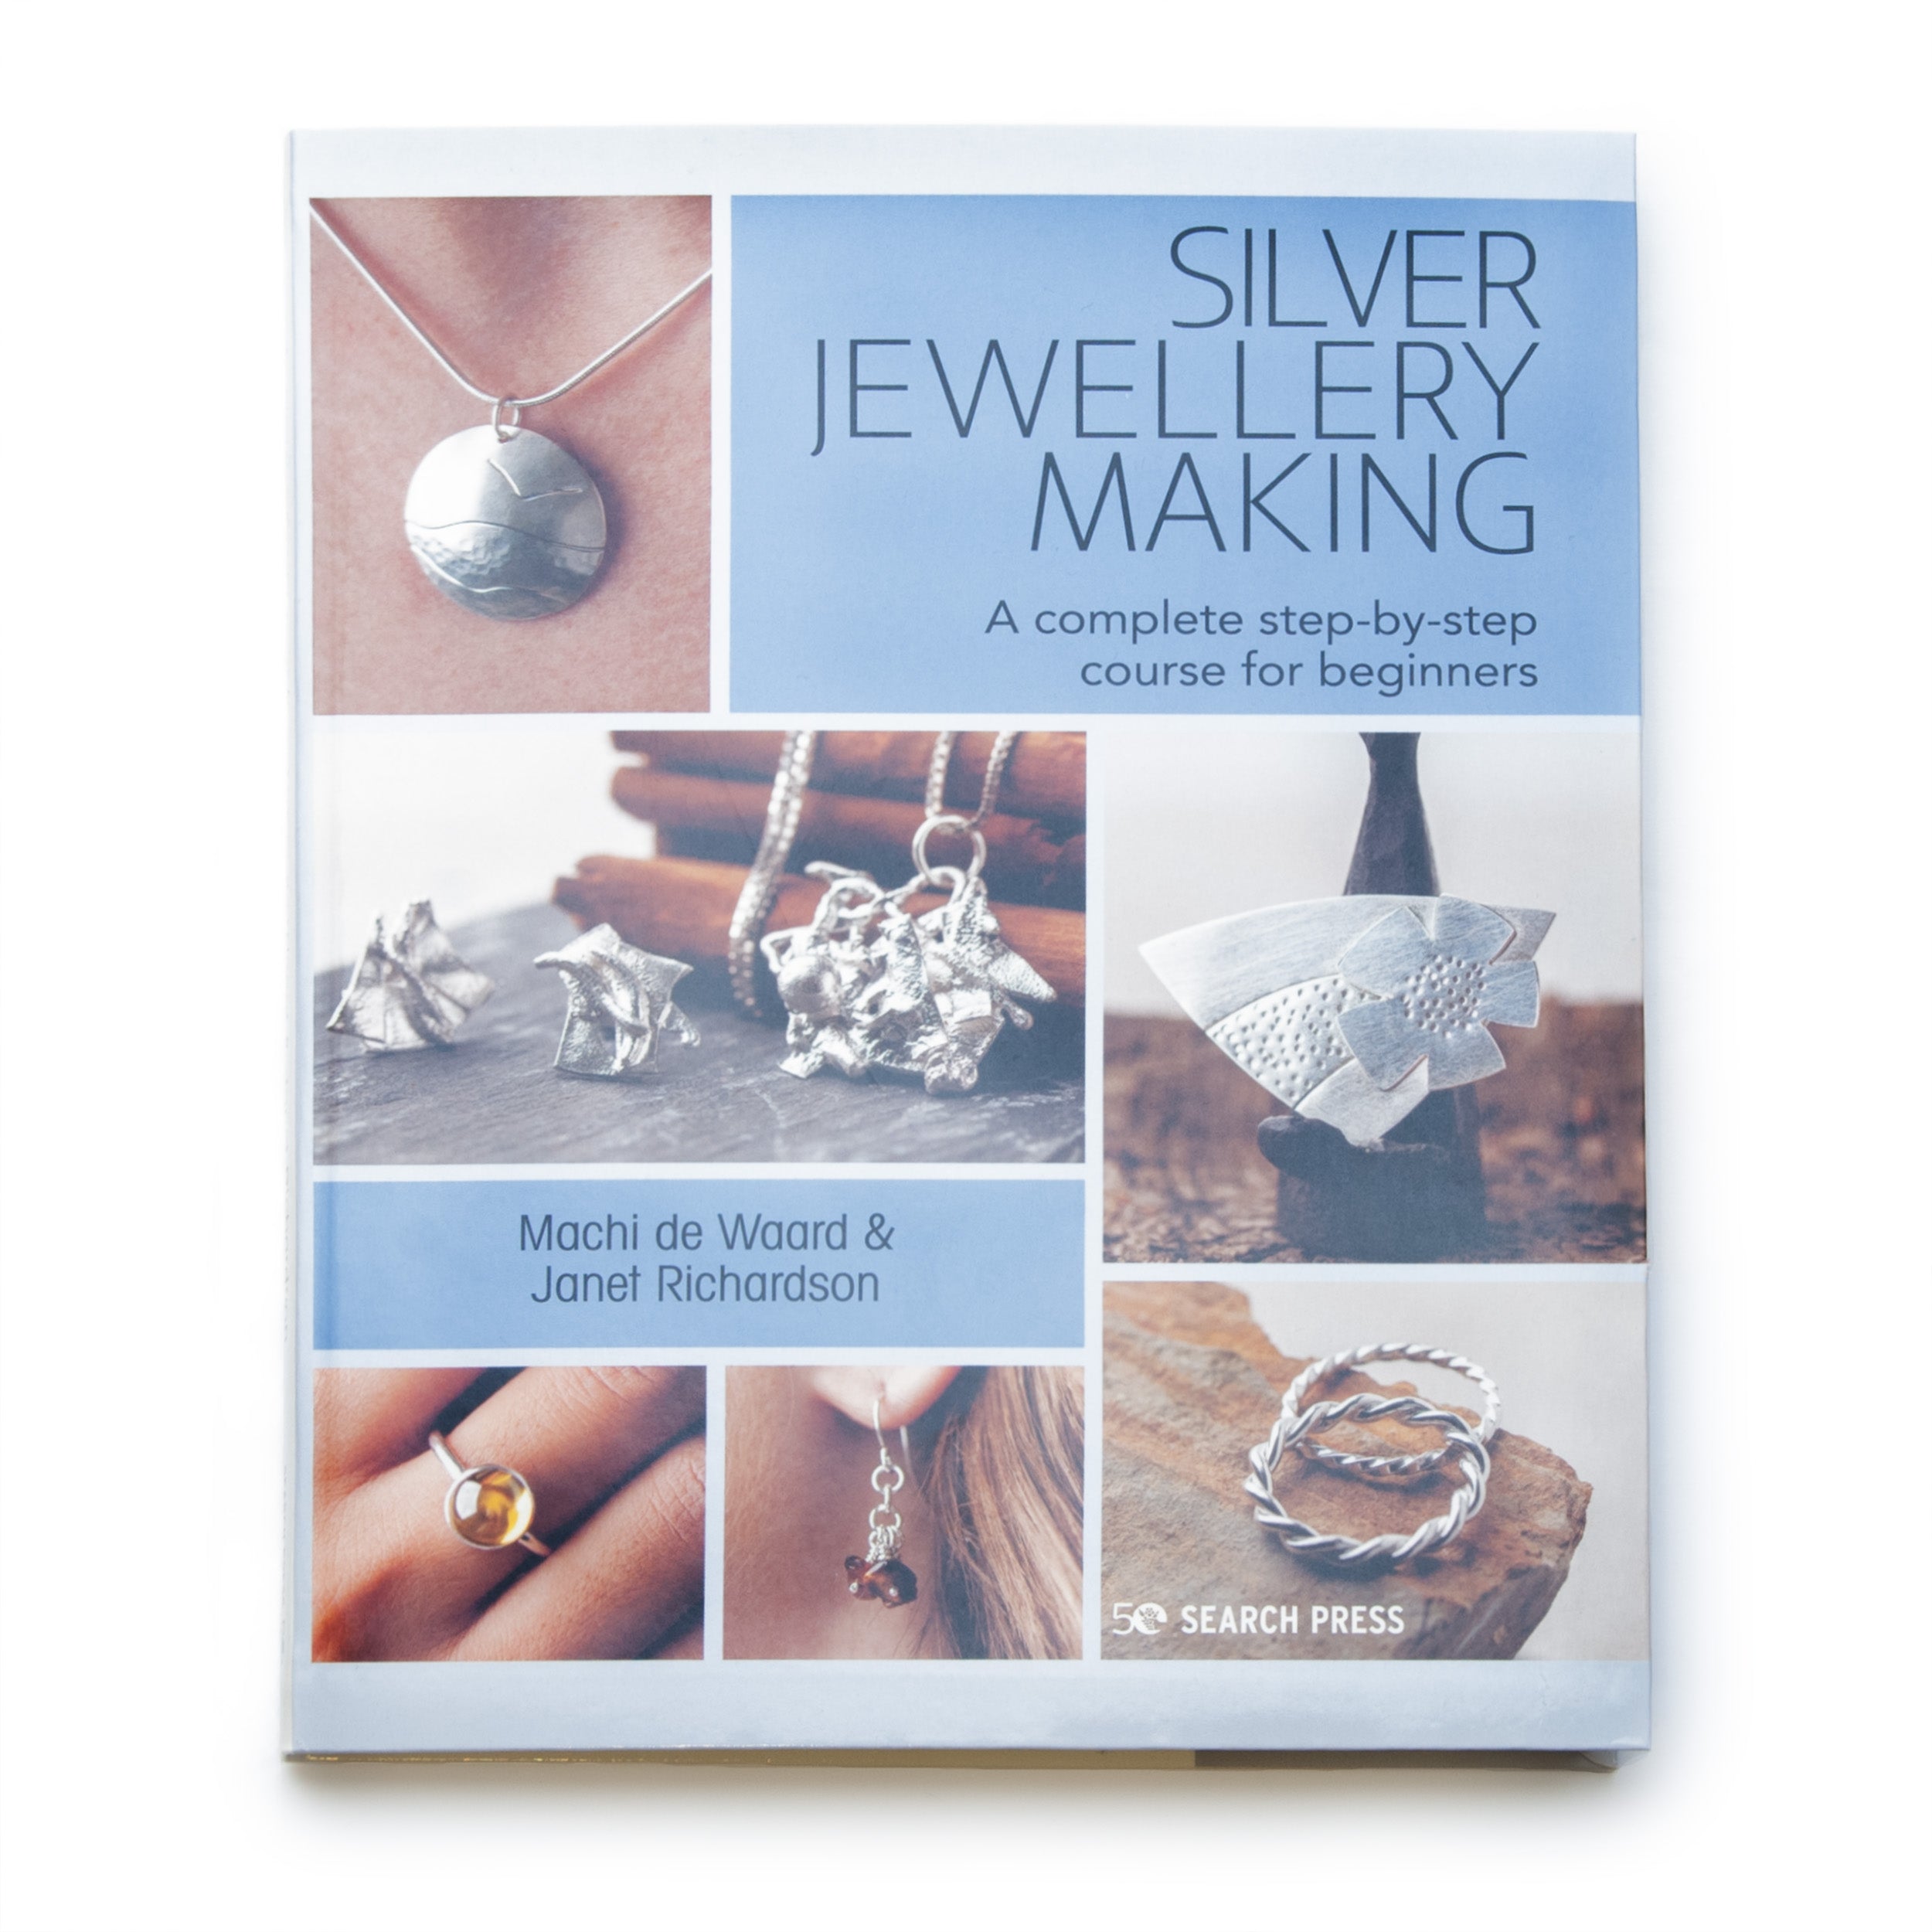
Silver Jewellery Making - A Complete Step-By-Step Course For Beginners - Machi De Waard & Janet Richardson
Unit of measure:
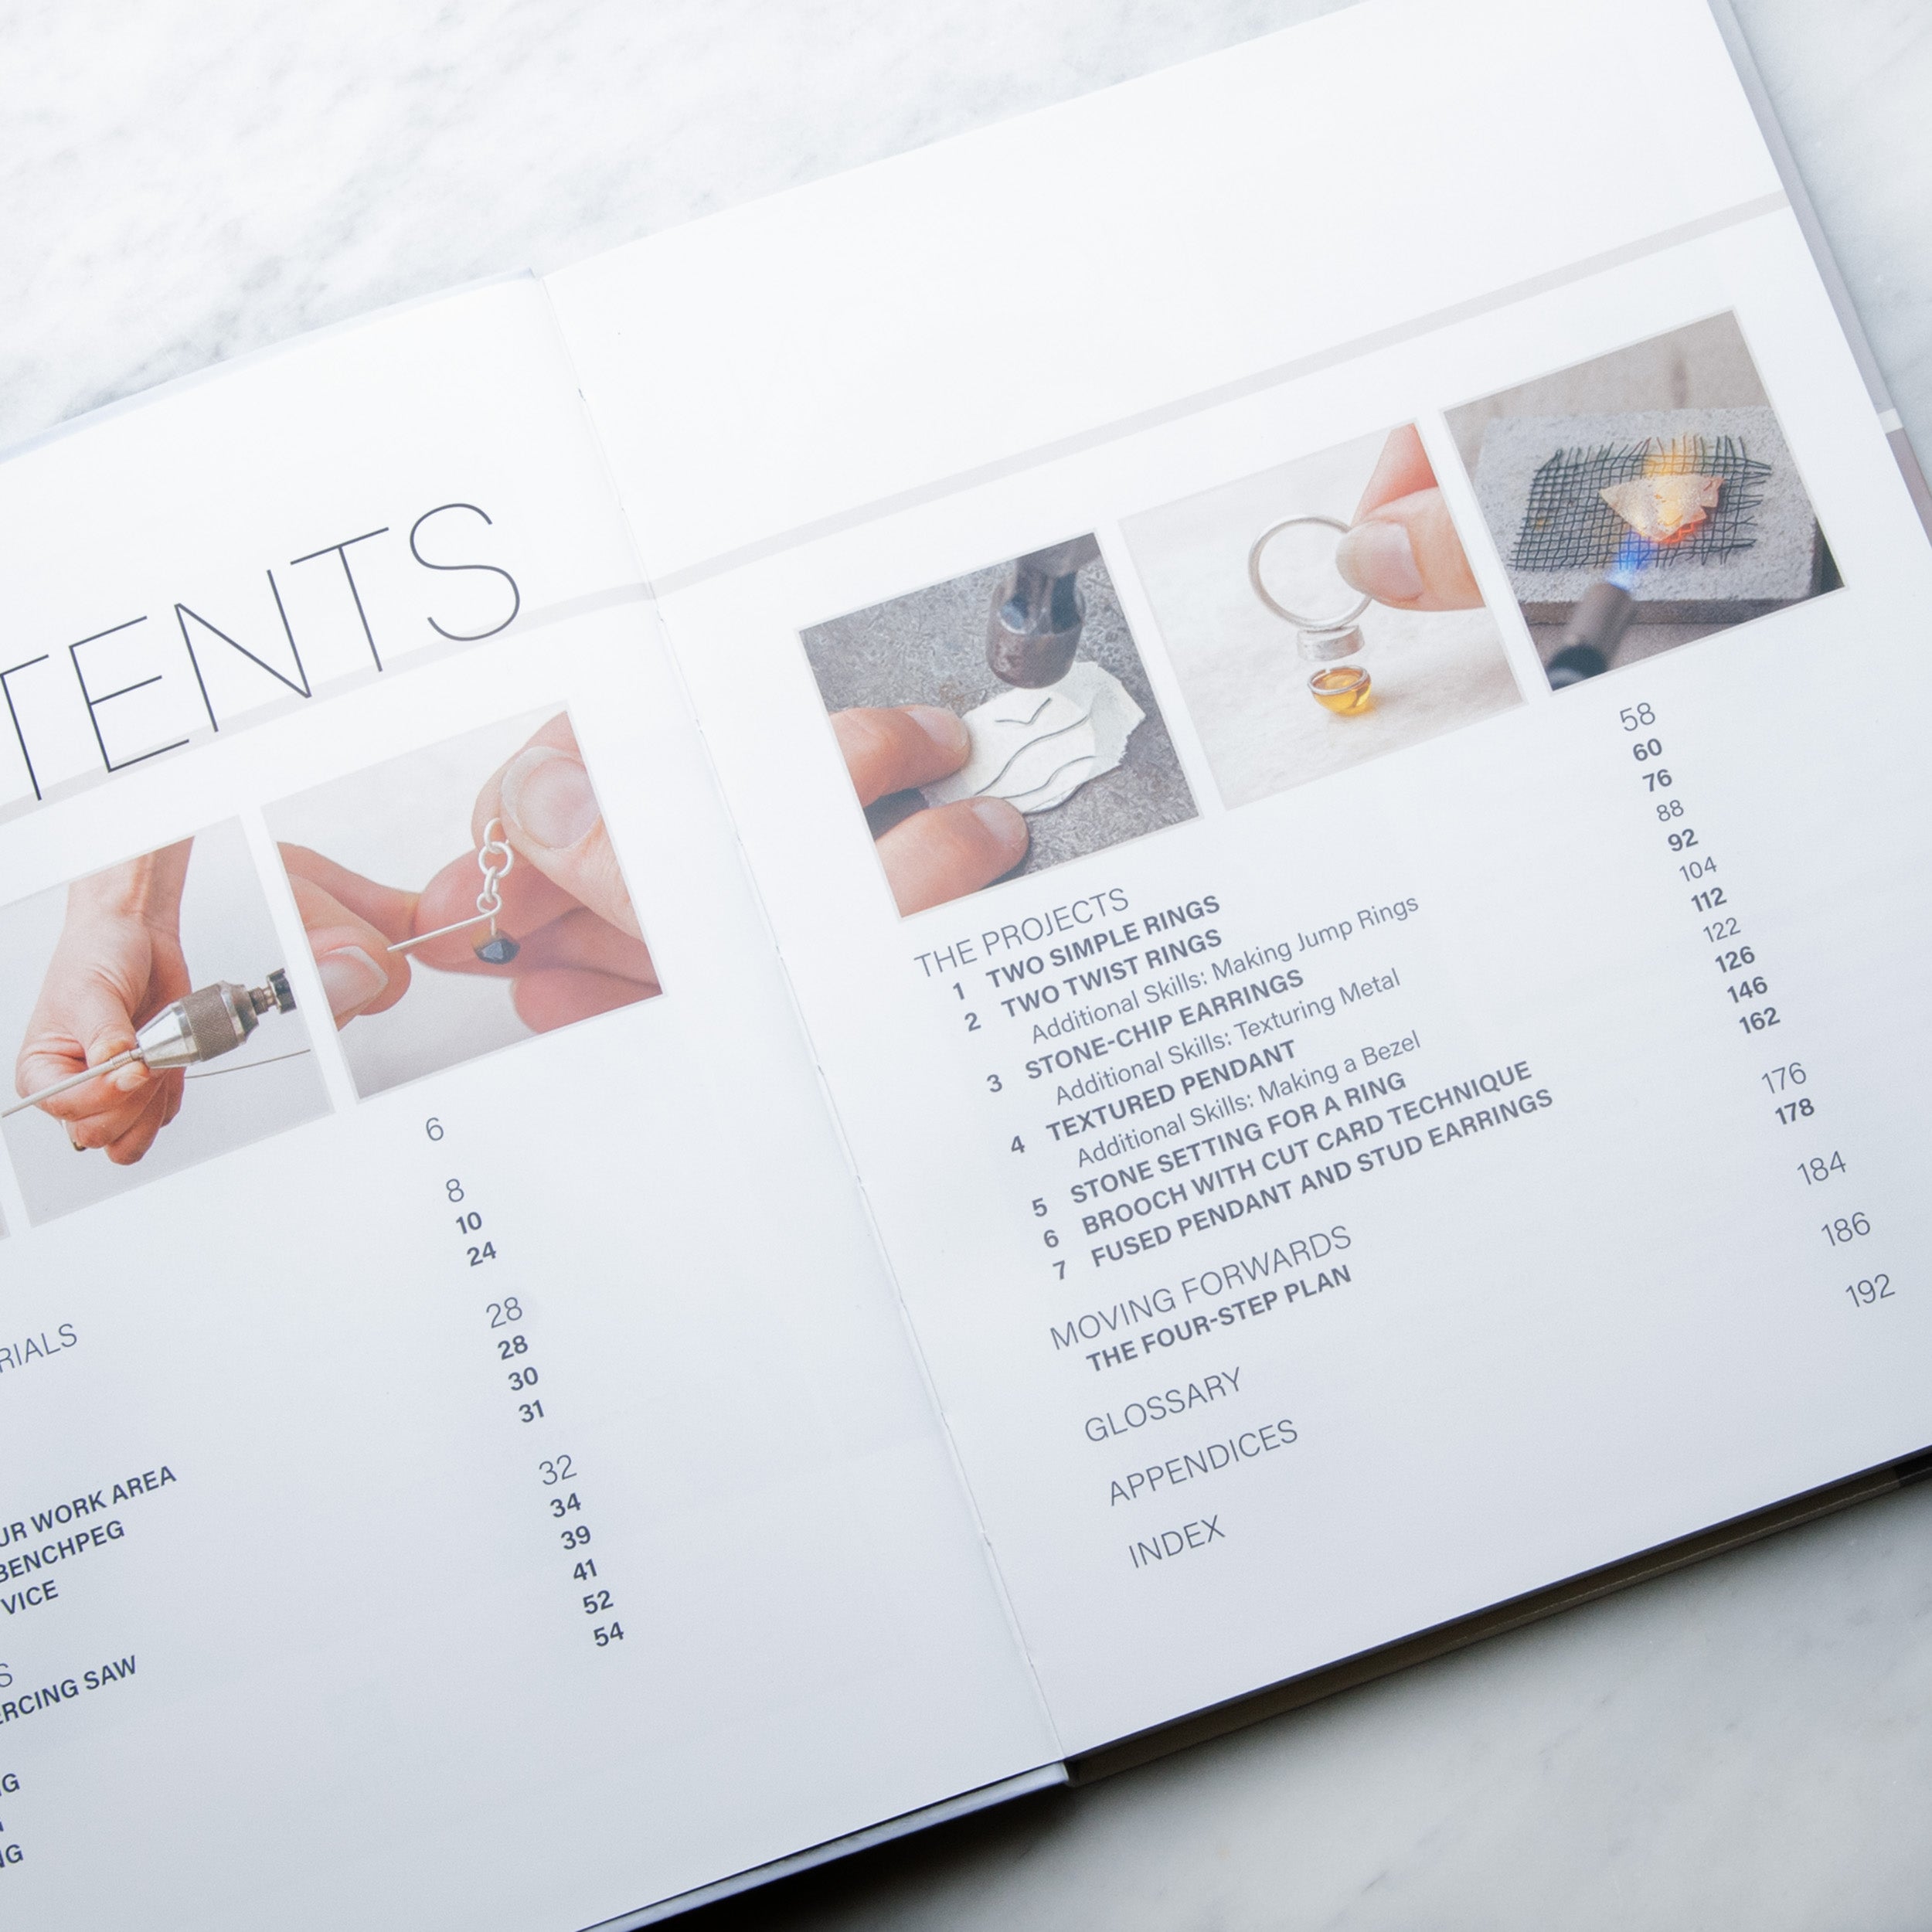
With this book, you will be able to create beautiful, wearable jewellery pieces from the comfort of your own home or workshop. There are 7 step-by-step projects that introduce you to the skills you need to make simple jewellery and other unique pieces.
Key features:
- An introduction to tools and materials, covering essential bench, hand, and forming tools as well as soldering tools and equipment, and finishing and polishing tools
- Setting up your work area, bench peg, and vice
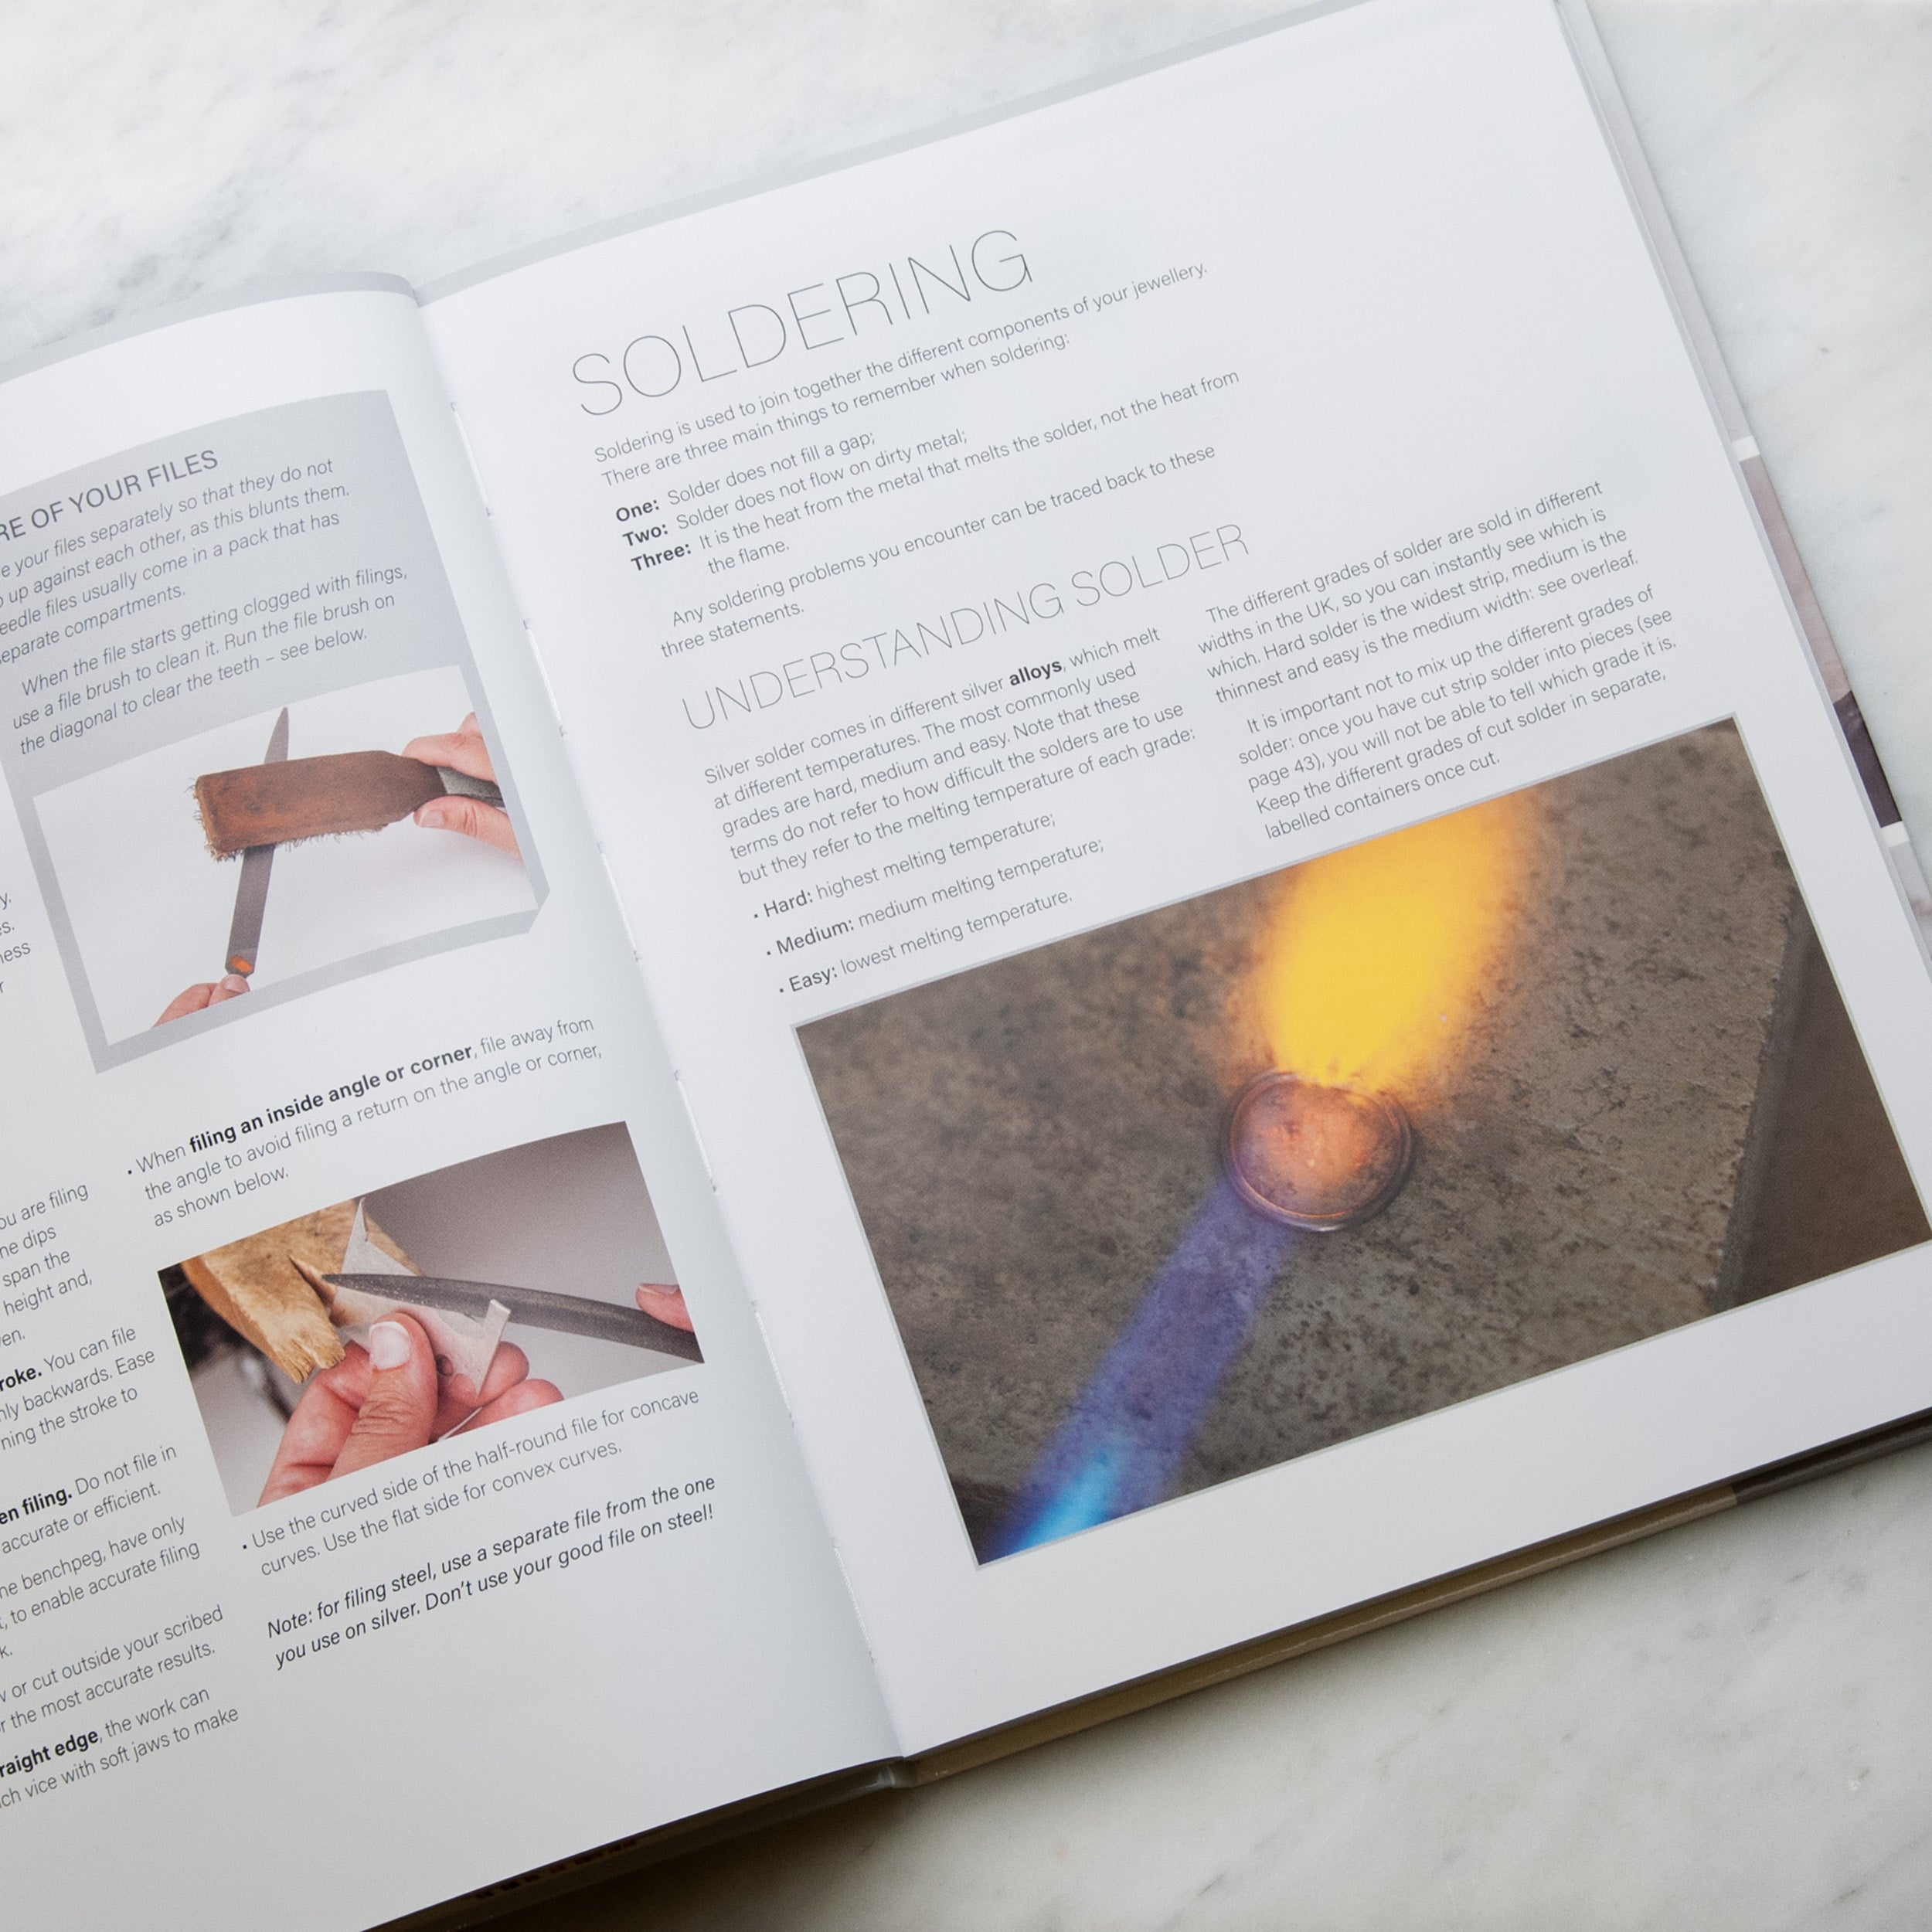
- Core skills - using a piercing saw, filing, soldering, pickling, and finishing
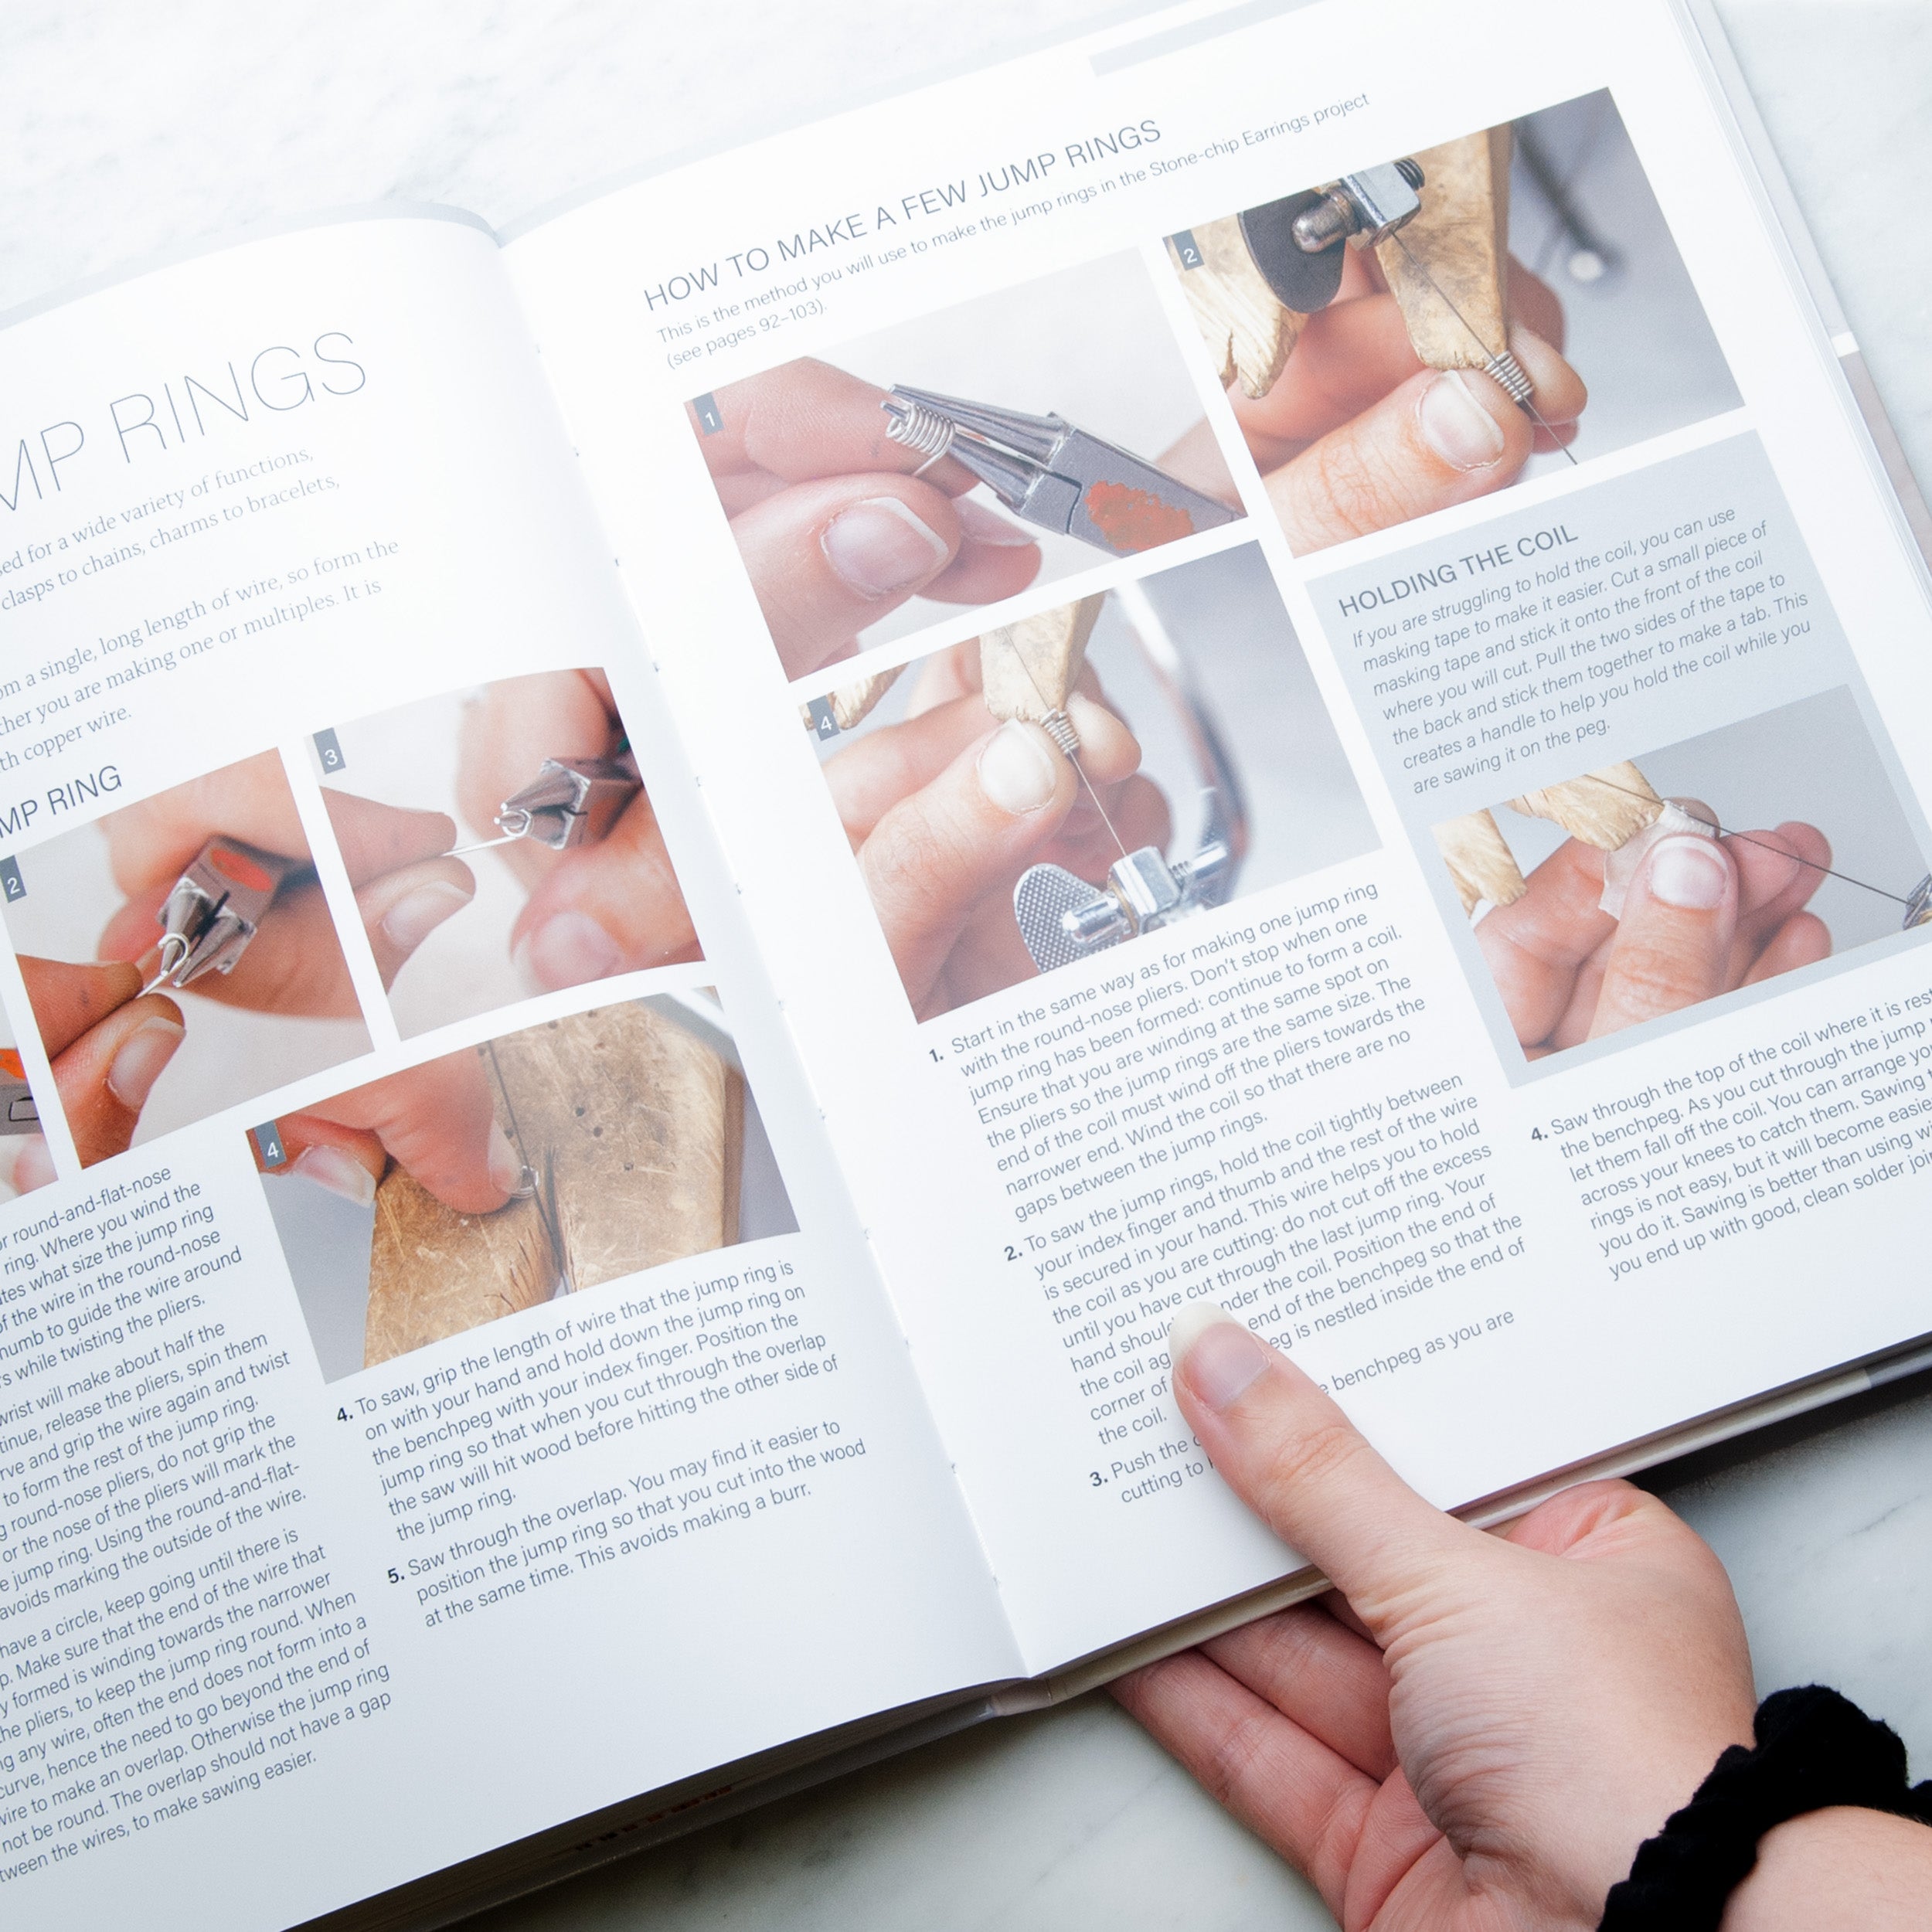
- 7 step-by-step projects including guides to make rings earrings and pendants, plus stone setting, making brooches, and fused pendants and earrings
Dispatch Information
Orders are dispatched Monday to Friday (excluding bank holidays).
Most orders are shipped the same day if placed before our cutoff. Dispatch may take longer during busy periods, sales events, or for complex/custom orders.
Special Delivery orders must be placed by 12 noon for same-day dispatch.
UK delivery options
- Free UK Delivery - Orders over £50.
- Standard Delivery - 3–5 working days with Royal Mail Tracked 48.
- Express Delivery - 1–2 working days with Royal Mail Tracked 24 - only £4.99.
- Special Delivery - Next working day with Royal Mail - from £7.99.
- Courier Delivery - Next working day with FedEx - from £14.99.
International Delivery
- Method: Sent via Royal Mail Tracked, handed over to your local postal service for final delivery.
- Estimated time: Usually 5–10 working days.
- Cost: Starts from £12.99 (varies by destination and order weight).
- Important note: Local import duties, taxes, or customs fees may apply and are payable by the recipient on arrival (not included in our shipping charge).
Track your order using the details sent in your confirmation email.
Questions? Contact us
- You can return unused items in their original packaging within 30 days of delivery.
- Earrings and earring parts cannot be returned for hygiene reasons.
- Return shipping is at your cost unless the item is faulty or damaged in transit.